How to Save Response Data in JMeter
Performance devs often come across instances where they need to save response data from a server to a file. We'll show you how to use JMeter to do it!
Join the DZone community and get the full member experience.
Join For FreePerformance test developers often encounter situations when it is necessary to save response data from a server to a file. This may be needed for various reasons. Let's consider some of them:
- Saving responses is the purpose of the test - Sometimes saving the response data is the purpose of the test. We can use this data for subsequent analysis, importing to a database, and more.
- Sharing response data - Sharing response results with teammates could be useful for various reasons. We may want to show artifacts in the responses from the server or ask for help with debugging.
- The response is too large - We will not be able to see a response in the View Results Tree if the size of the response is more than 200K. There are a couple of ways to solve this problem and one of them is saving the response to a file.
Performance and Site Reliability Virtual Roundtable. Friday Dec 9, 11:00 AM (EDT)
Sign Up For The Event

Of course, there could be additional reasons for saving responses from the server to a file. It all depends on your project needs. Let's discuss how to do it with Apache JMeter™ in this blog post.
We will need a simple JMeter script to demonstrate the various approaches to saving responses from the server. I chose the BlazeDemo website ( http://blazedemo.com/) to create our performance script and run the tests.
What are we waiting for? Let's get started!
Test plan -> Add -> Thread (Users) -> Thread Group
1. Add a Thread Group to the Test plan.
Thread Group -> Add -> Sampler -> HTTP Request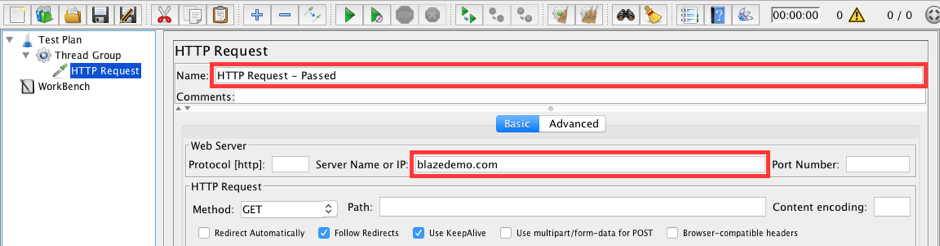
2. Add an HTTP Request which opens the landing page of the test web app.
Set the following values:
HTTP Request - Passed -> Add -> Assertions -> Response Assertion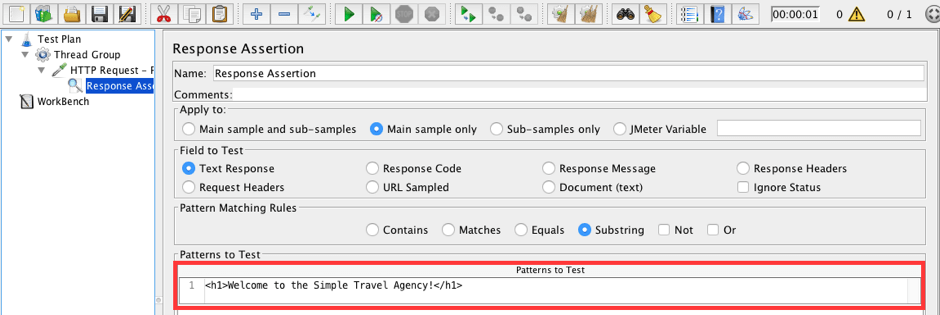
3. Add a Response Assertion to the HTTP Request - Passed. This assertion will check if the page is correct.
Add a row to the Patterns to the Test field: <h1>Welcome to the Simple Travel Agency!</h1>
This assertion is correct and the sample should pass every time since the text is presented on the page.
Thread Group -> Add -> Sampler -> HTTP Request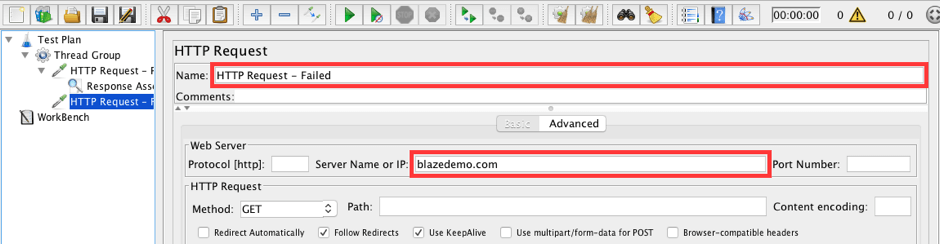
4. Add another HTTP Request.
Set the values:
HTTP Request - Failed -> Add -> Assertions -> Response Assertion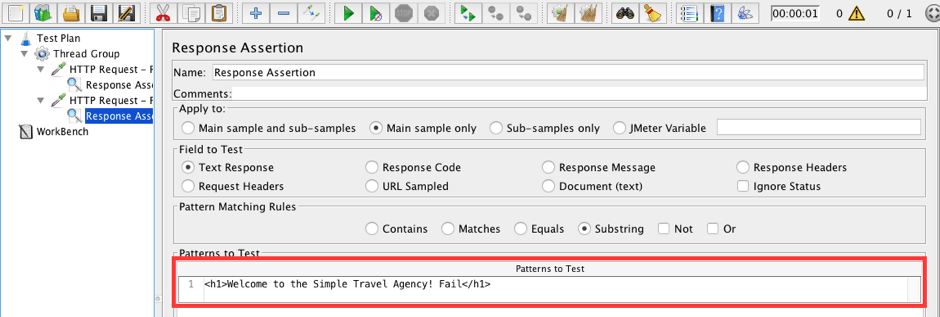
5. Add a Response Assertion to the HTTP Request - Failed. This assertion will also check if the page loaded correctly. But let's fill the 'Pattern to Test' field with an incorrect verification value. We will use it for demo purposes.
Add a row to the Patterns to Test field: <h1>Welcome to the Simple Travel Agency! Fail</h1>
This assertion is incorrect and the sample should fail each time because the text isn't presented on the page.
Thread Group -> Add -> Listener -> View Results Tree
6. We are just about done! Add a listener to see the test results.
7. Run the script.
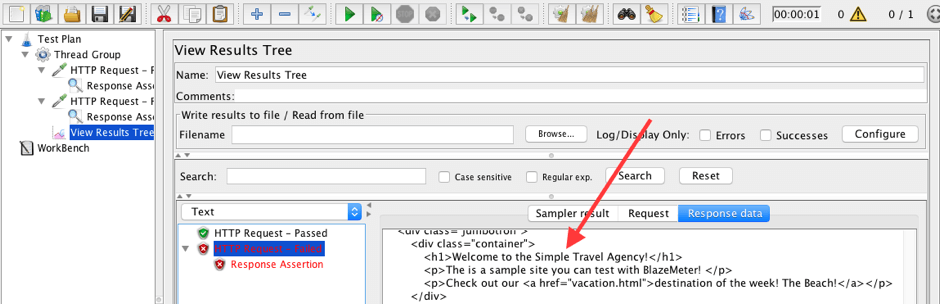
As we can see, each request has a response in the View Results Tree. This is very comfortable for debugging. We can see the actual page and understand what is wrong. Now let's see how we can save these results to a file.
The first option for saving response data is listeners that have 'Write results to a file/Read from file' sections. Examples of such listeners are the View Results Tree, the Simple Data Writer, and the View Results in Table. There are more.
We will use a View Results Tree listener for this demonstration.

8. Update the 'Write results to a file/Read from file' section in the View Results Tree listener.
Set a filename to save the results to:
- Filename: test_results.csv
IMPORTANT: You may need to set an absolute location in the Filename field.
9. Run the script and upload the results to JMeter.
Run the script by pressing the run button. Script results will be saved to the test_results.csv file on the computer. Clean results and upload the file: test_results.csv, by using the Browse button in the 'Write results to a file/Read from file' section.
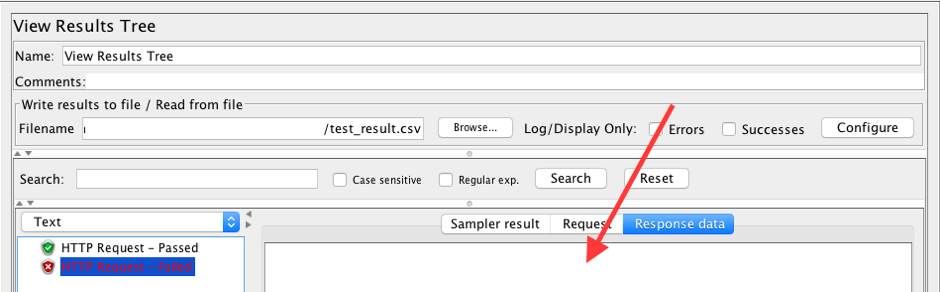
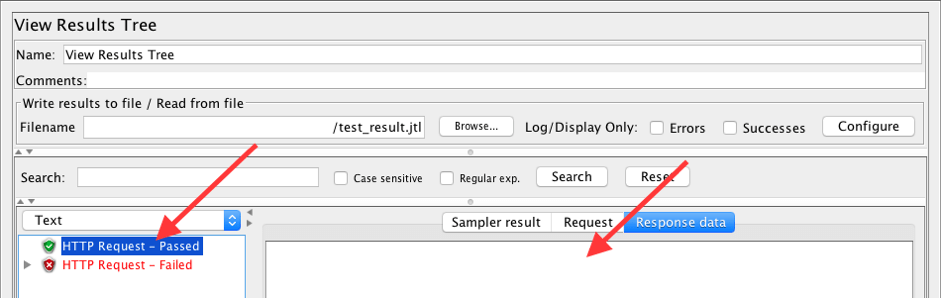
As we can see, the View Results Tree is showing all the requests that took place during the test run. We can see if a request passed or failed, but we can't see the actual responses, and respectively we can't understand the failure reason.
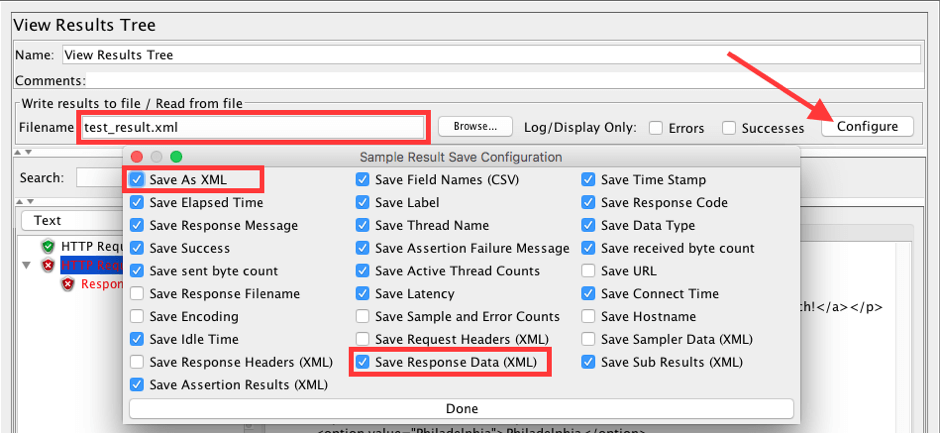
- Change the name of the file to test_result.xml.
- Click the Configure button.
- Check the Save As XML and Save Response Data (XML) checkboxes.
- Save those changes by clicking Done.
10. Let's play with the listener configuration to store the responses to files.
11. Run the script, clean the results, and upload the results from the file again.
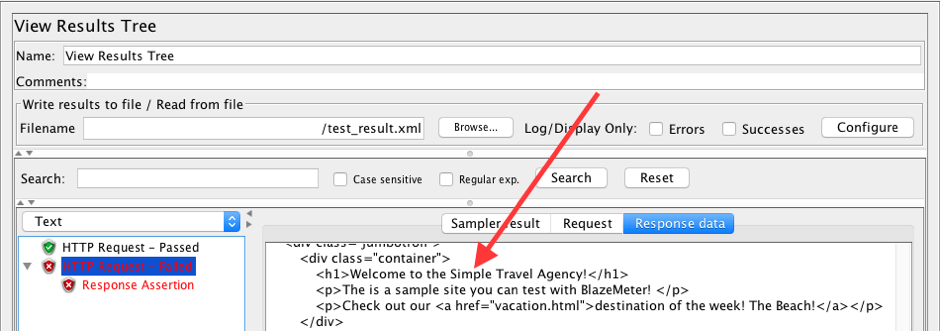
Now we can see not only a list of requests with their statuses in the View Results Tree but also responses from the server. Isn't that cool! Now we can easily understand why a request failed.
This approach has one significant downfall. In a real load testing scenario, storing all of these requests could be too much for your workstation. Let's fix this problem.
12. Let's save the request/response only for failed requests.
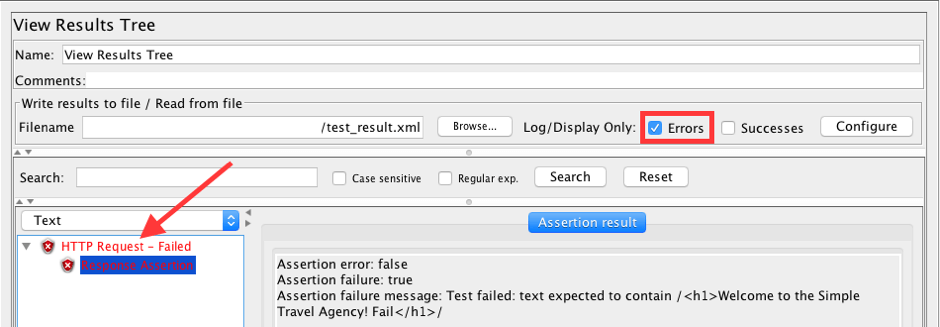
Check the Errors checkbox on the View Results Tree listener.
Run, clean, and upload results again.
Now the request list contains only a list of failed requests with saved response data. This is a better approach when we are running real performance tests.
There is another useful listener called the 'Save Responses to a File' listener. This listener is implemented especially for saving responses from a server to files. It generates a new file for each sample and saves the file with the response data.
Let's see how it works.
HTTP Request - Failed -> Add -> Listeners -> Save Responses to a file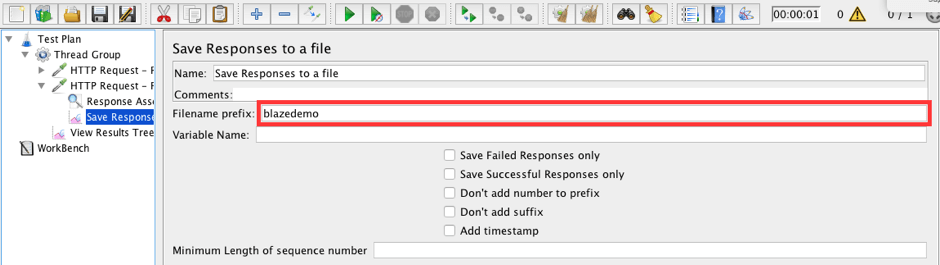
13. Add a Save Responses to a file listener to the HTTP Request - Failed.
Fill the Filename prefix field with blazedemo.
IMPORTANT: You may need to set an absolute location for the Filename prefix field.
14. Run the script. And open the folder where results should be saved.
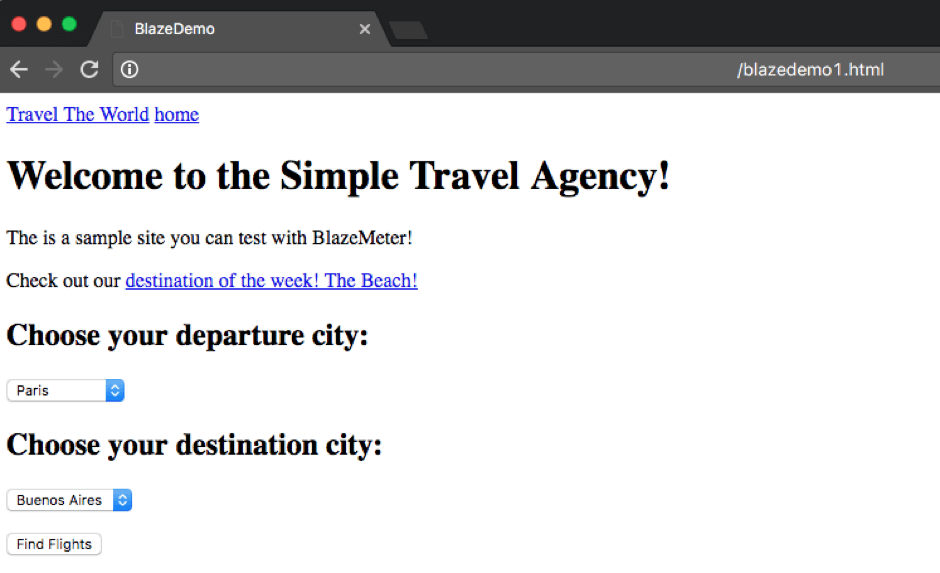
We should see the ' blazedemo1.html ' file in this folder. Open it with a browser.
The browser will open an HTML version of the response. This is a very visual approach to storing response data to a file.
Let's consider one more approach to storing response data to a file. This approach uses JMeter properties. It is a better fit for a Non-GUI mode of running performance tests.
Just to make it clear: previous approaches also work in Non-GUI mode.
- #jmeter.save.saveservice.output_format=csv
- #jmeter.save.saveservice.response_data=false
- #jmeter.save.saveservice.response_data.on_error=false
The Jmeter.properties file is located in the bin folder of JMeter. Open it with your preferred editor. There are plenty of useful properties there, but we are interested only in a couple of them.
By default, JMeter saves the test results in csv format without storing the response data.
15. Let's set JMeter properties to store the response data to a file and run the script.
- jmeter.save.saveservice.output_format=xml
- jmeter.save.saveservice.response_data=true
- #jmeter.save.saveservice.response_data.on_error=false
Set the properties with the following values and save the file.
jmeter -n -t test_script.jmx -l test_result.jtl
Run the script with the option -l. This option determines the location and name of the log file.
Upload this .jtl file with the View Results Tree listener Browse button. You can also view the results in a text editor, but the listener is more convenient.
The log contains a list of requests with their statuses, just like the responses from the server. This is better, but still not perfect, since storing responses for all requests could take a lot of disk space, as we discussed.
16. Let's change the JMeter setting and run the script again.
- jmeter.save.saveservice.output_format=xml
- #jmeter.save.saveservice.response_data=false
- jmeter.save.saveservice.response_data.on_error=true
Update the jmeter.properties file with the following values.
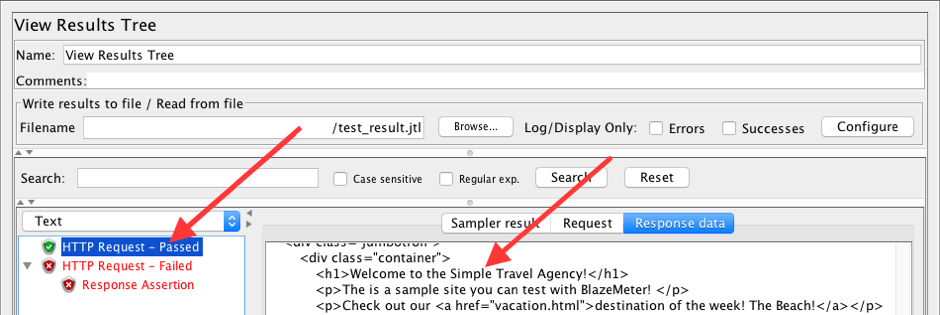
Run the script, clean the listener, and upload the results again.
That's it. The passed requests have no response data, and the failed requests do. That was our goal!
I hope this blog post was useful for you. I will be glad to answer any questions you might have in the comments section.
To learn more JMeter, check out our free JMeter academy with advanced and basic courses.
Published at DZone with permission of George Maksimenko. See the original article here.
Opinions expressed by DZone contributors are their own.
Comments