How to Send JMeter Requests from Different IPs
In this post we take a look at how to send requests to JMeter from different IPs to simulate multiple, separate clients. Read on for the details.
Join the DZone community and get the full member experience.
Join For FreeWhen performance testing your website or app, you might need to simulate requests that are coming from a batch of different IP addresses. For example, when your load balancer creates a unique session between the server and the client based on IP addresses, but your application has a limit on the number of sessions that can be supported. Having only one IP address for load simulation will not allow you to catch these kinds of limitations and will not protect you from downtime.
If you need to simulate requests from just a few IP addresses you can always run Apache JMeter™ in a distributed form on different machines. By nature, each of them has a unique IP address. But what if you need to load test a batch of 5 or more IP addresses? Running the script from 5 different machines doesn’t sound wise. And actually, you don’t need to do it this way as because JMeter has a built-in feature that helps you manage this task.
Ever since JMeter 2.4, the HTTP sampler has an inbuilt feature for sending requests from specific IP addresses. In other words, it allows changing the IP destination source. In this article, we will give you a short overview on how to simulate HTTP requests from 5 different IP destinations, which might help you with different complicated scenarios when you need each user to have a unique IP address. Let’s get started.
Step 1: Adding IPs to Your Machine
JMeter relies on a list of real IP addresses that are allocated to the machine you are running the tests from. This means that you can not simulate a request from an IP that is not allocated to this machine at this moment. That’s why for our first step we need to allocate a list of different IP addresses for our local machine. I currently use Mac OS but I’ll share the link explaining how to proceed with the same steps on other operating systems.
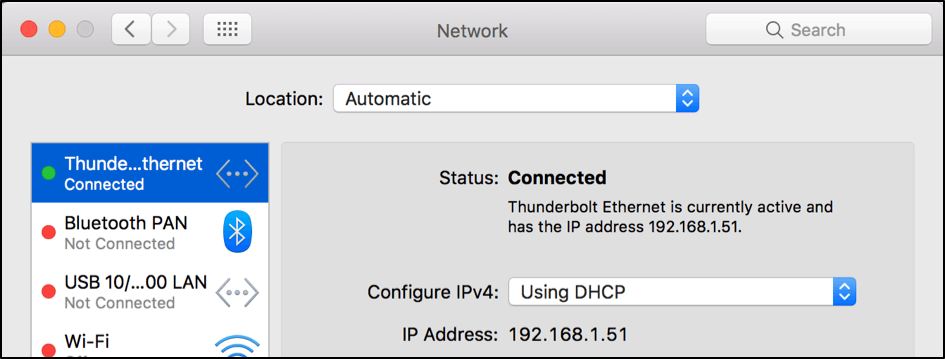
Adding additional IP addresses in macOS systems is very easy. You just need to go to System Preferences -> Network. There, you should see the network interface that is currently used for your internet connection (it should have a green dot on the left):

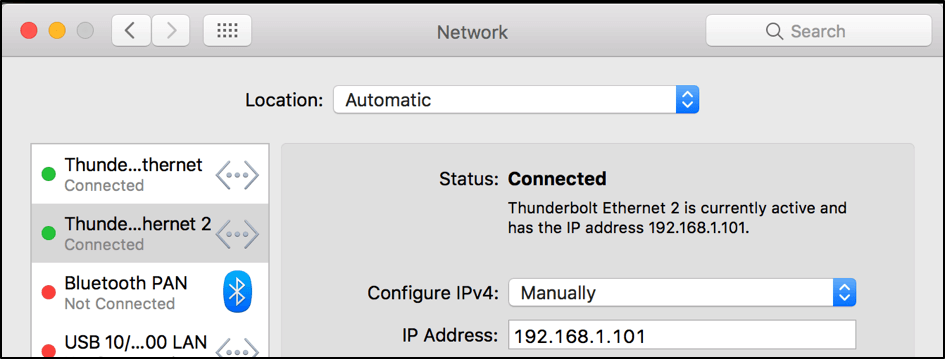
To add an additional IP address, you can just duplicate the existing entry and change the IPv4 configuration to “Manually”:
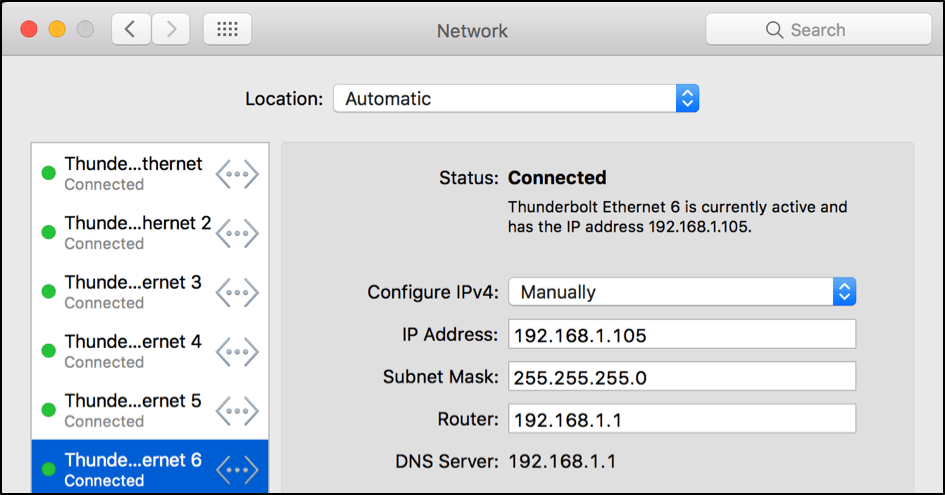
In the same way, you can add additional interfaces, assigning a unique IP address for each one. Keep in mind that the IP address should have a specific format and should be unique:
By default, each network interface has its own unique IP address, but also you can allocate multiple IPs for the one interface. This technique is called "IP aliasing", and in this case each new IP value is called an "alias."
After that, your machine should have multiple IP addresses assigned to the same network interfaces. This way works fine unless you need to simulate a huge amount of unique IPs. Let’s assume that you need to simulate the scenario for 100 users.
Of course, we don’t want to create 100 interfaces and make them manually. For such needs, there is another approach.
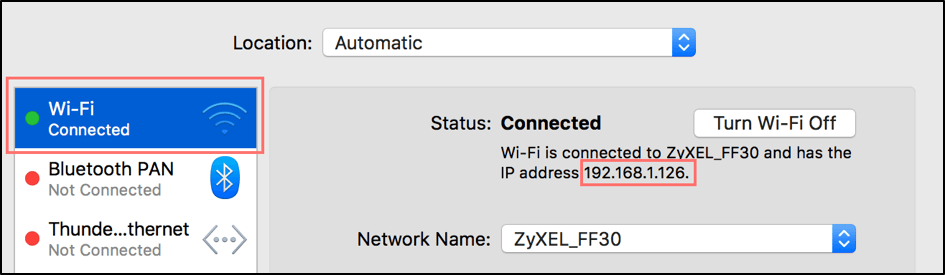
First of all, we need to know the ID of the interface that is used for our internet connection. For this, take the initial network configuration that we saw with the green dot inside the network config. On the right, you should see the IP assigned to this configuration by default:
After that, you need to open the console and run this command in the terminal:
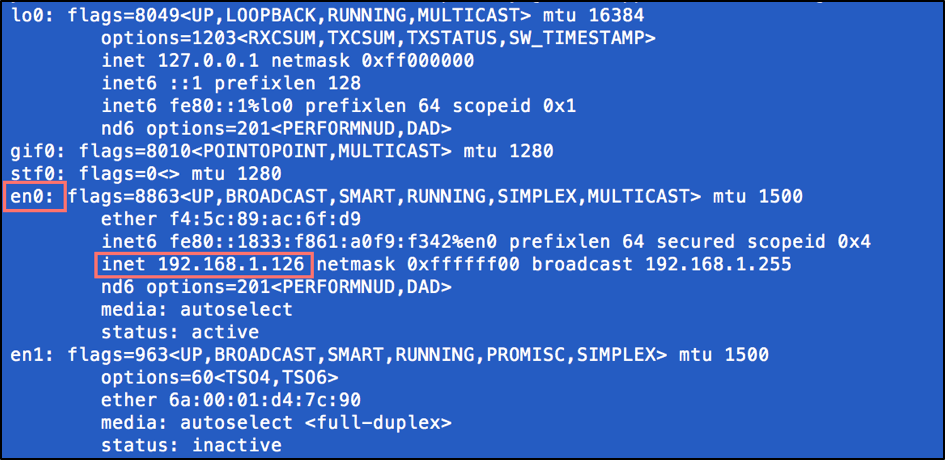
/sbin/ifconfigIn the output of this command you should find the ID of the network interface associated with the given IP address from the network configuration (‘192.168.1.126’ in our case). The ID here is en0.
Now, as soon as you know the ID of the active interface which is used for internet connection, you can assign additional IPs for this interface by this command:
sudo /sbin/ifconfig en0 alias 192.168.0.101 255.255.255.0
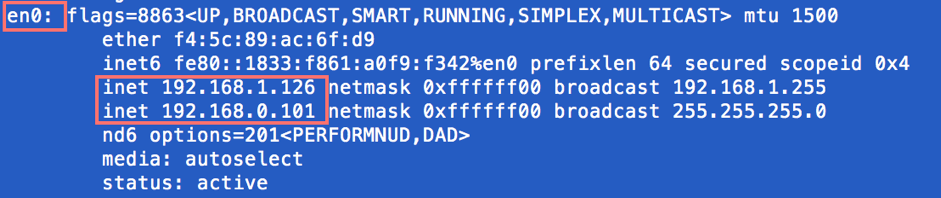
After this operation, your network interface will get the additional IP address ‘192.168.0.101’ which can be used in your tests. If you run the ‘/sbin/ifconfig’ command one more time, you should see the added IP address in the list:
As soon as you know how to add IP address in the terminal, you can easily implement some handy shell script which allows you to add as many IPs as you want in a one loop. Let’s create the shell script (we can name it ‘add_many_ips.sh’):
for i in {1..5}
do
  /sbin/ifconfig en0 alias 192.168.0.${i} 255.255.255.0
done
After that, you can run the script this way:
sudo sh add_many_ips.sh
Immediately after that, you should see that 5 IP addresses have been assigned to your network interface. Do you want 100 IP addresses? Just put ‘100’ instead of ‘5’ in the script loop.
Here are links explaining how you can assign multiple IP addresses for other OS systems:
As soon as you configured multiple addresses on your local machine, you can start the script implementation.
Step 2: Creating a JMeter Script
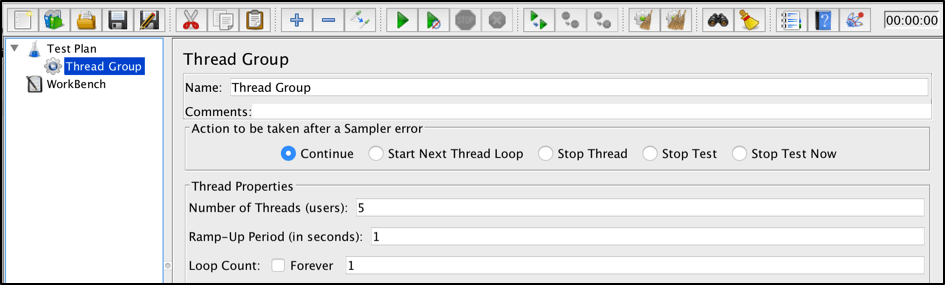
Let’s create a simple scenario simulating HTTP requests by a number of users, each of them having a unique IP address. First, you need to create a Thread Group to simulate the number of users. (Keep in mind that if you have a requirement for users to have unique IPs, then you need to make sure that you do not run more users than the amount of unique IPs on the system):
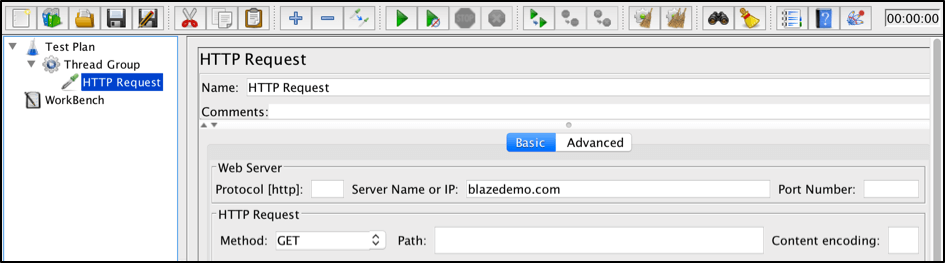
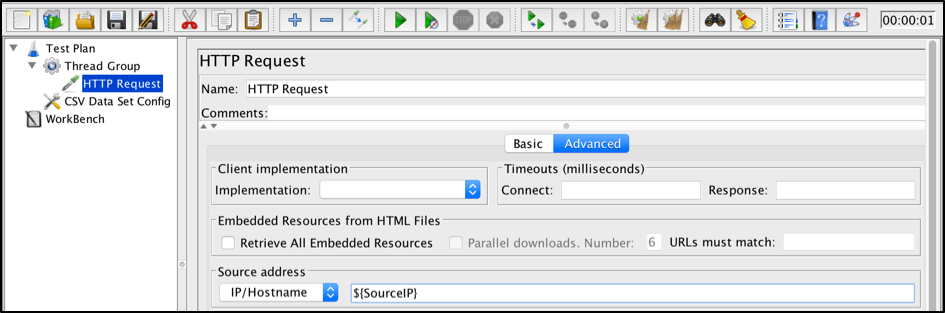
Next, you need to create the HTTP request. As an example, we can make a GET request to the http://blazedemo.com web application:
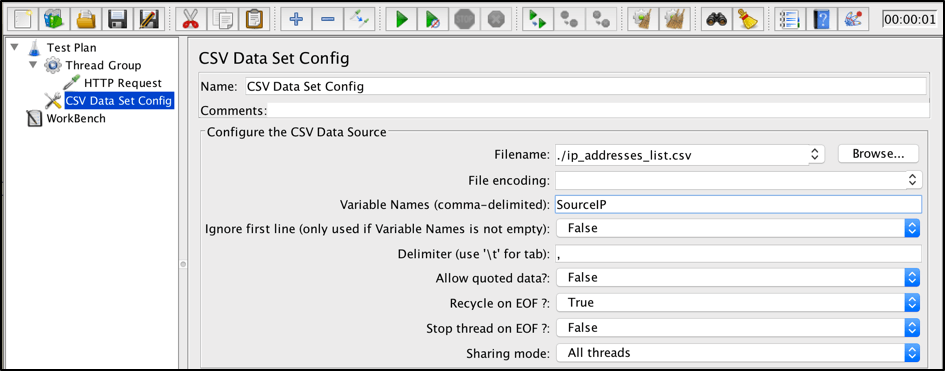
To assign a unique IP for each user, we are going to use the CSV Data Set Config element which is one of the most useful ways to assign unique values to each user. By the way, in this article you can find some details about advanced usage of CSV Data Set config and it’s different sharing modes.
To use this element, we need to create a CSV file that contains multiple lines. Each line should represent the values for particular user. Therefore, if we want to simulate 5 users, we need 5 lines inside the CSV file. The values in each line will be assigned accordingly to each user.
Let’s create such a CSV file in the same folder our JMeter script is. In the file we will put the list of IP addresses we assigned to our system in the previous step.
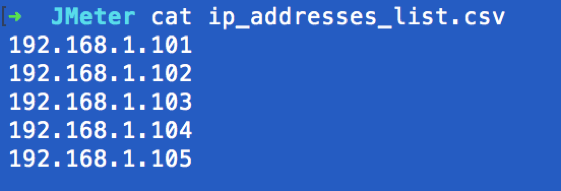
As you can see, in the mentioned CSV file we have multiple lines with a unique IP address in each line. After that, add the CSV Data Set Config element, specify the path to the CSV file and a variable name that can be used in other JMeter elements to get the unique IP:
As mentioned before, ever since version 2.4, the JMeter HTTP sampler has an inbuilt feature to send requests from a specific IP address. You can find the field to specify the IP address in the “Advanced” tab of the HTTP request sampler, under the ‘“Source address” field. In our case we can specify the ${SourceIP}variable in this field, which will take the unique IP address from the CSV file for each user accordingly:
Now we can run the script and add the “View Results Tree” element to check the outcoming requests. If you go to the “Request” tab in each request, you should find the “X-LocalAddress” header which represents the IP address of each request has been sent:
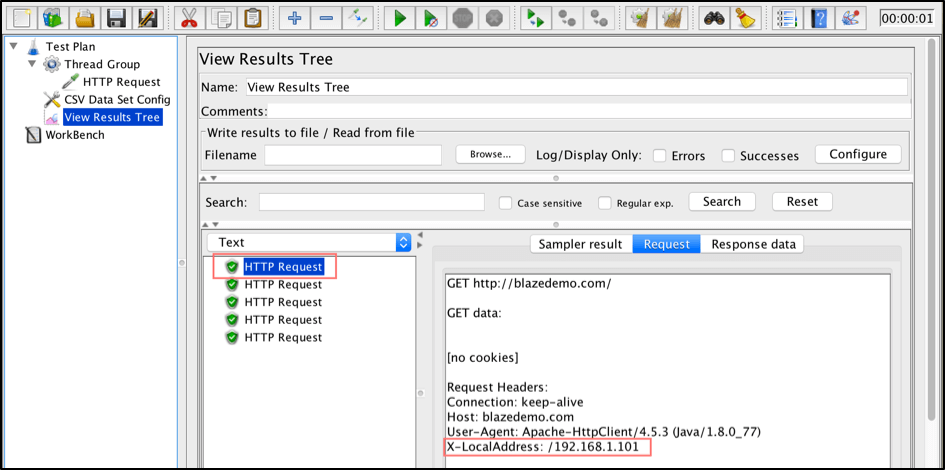
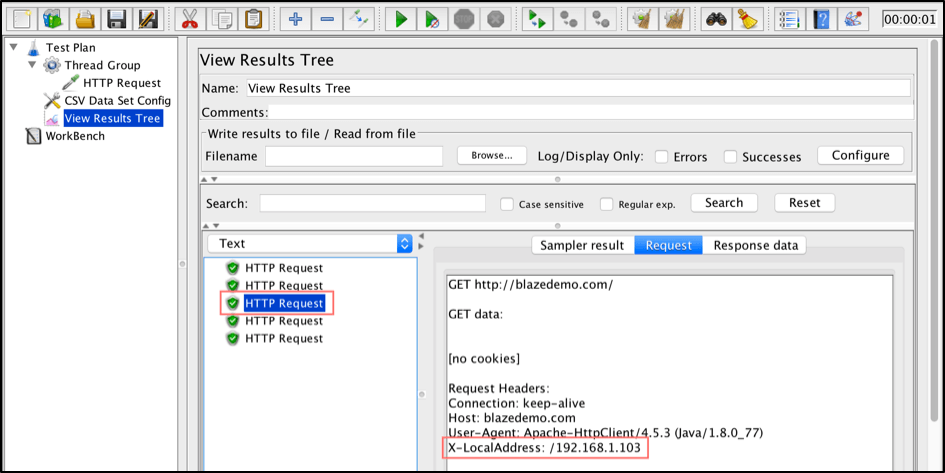
As you can see, each of the requests has been sent from a unique IP.
That’s it! As we showed, this is the way to mimic users making requests from different locations and machines. This can be very critical if your application caches sessions and behaves differently when you are sending the same number of requests from one or multiple IP addresses.
You can learn more about JMeter from our free JMeter academy.
Published at DZone with permission of Anastasia Golovkova. See the original article here.
Opinions expressed by DZone contributors are their own.
Comments