How To Set Up a Scalable and Highly-Available GraphQL API in Minutes
This article shows how to set up a GraphQL layer (with an underlying database) across multiple availability zones of a public cloud region in minutes.
Join the DZone community and get the full member experience.
Join For FreeA modern GraphQL API layer for cloud-native applications needs to possess two characteristics: horizontal scalability and high availability.
Horizontal scalability adds more machines to your API infrastructure, whereas vertical scalability adds more CPUs, RAM, and other resources to an existing machine that runs the API layer. While vertical scalability works to a certain extent, the horizontally scalable API layer can scale beyond the capacity of a single machine.
When it comes to high availability, the GraphQL layer needs to function continuously without failing (even in the event of outages that are not under our control). This system characteristic is best measured with the nines of availability.
This article shows how to set up a GraphQL layer (with an underlying database) across multiple availability zones of a public cloud region in minutes. The final solution will span multiple availability zones and can withstand zone-level outages as well as scale horizontally. AWS, Hasura Cloud, and Yugabyte Cloud are used as reference platforms for demo purposes.
Deploying YugabyteDB Across Multiple Availability Zones
Let’s begin with the database layer. We picked YugabyteDB, an open-source, distributed SQL database that is an ideal backbone for scalable and resilient APIs. YugabyteDB is also a PostgreSQL-compliant database. This means we don’t need to learn another SQL dialect or rewrite existing applications from scratch.
How much time does it take to deploy a resilient, multi-zone YugabyteDB cluster? It depends, but if you are as lazy as I am, or prefer using cloud-native services, then Yugabyte Cloud is the simplest way to accomplish this task:
For starters, create or sign in to your Yugabyte Cloud account.
Next, provision a multi-node YugabyteDB cluster that spans several availability zones:
![Provision a multi-node YugabyteDB cluster that spans several availability zones]()
a. Use a custom cluster name such as multi-zone-cluster, place the cluster in an AWS region closest to you (N.Virginia - us-east-1 for me), and make sure the Fault Tolerance parameter is set to Availability Zone Level.
b. Download credentials for future reference, then click Create Cluster.
How do we achieve high availability with YugabyteDB? The cluster has three nodes, deployed in one of three availability zones. The replication factor is also set to three. This means each node (and each region effectively) will keep a copy of a given data record. In my case, there is a node in us-east-1b, us-east-1c, and us-east-1a availability zones:

YugabyteDB is built on the Raft consensus protocol. Therefore, with the current three-node configuration, we can lose up to one node (or one availability zone as long as there is one node in each region) and remain operational. Why wouldn’t YugabyteDB keep serving requests with one node left? In terms of the CAP theorem, YugabyteDB is a consistent and partition-tolerant (CP) database. The following formula defines a dependency between the fault-tolerance of k nodes and replication factor (RF):RF=(2k + 1)
In our case, k is equal to one (the cluster can lose up to one node) and, as a result, RF calculates three copies of data.
How do we achieve horizontal scalability with YugabyteDB if the database needs to process 100x more queries or keep much more data? Just go to the Settings screen of the cluster and add more nodes to the infrastructure.

Provisioning a Scalable and Resilient Hasura GraphQL Layer
Hasura is an advanced GraphQL server that gives us instant, real-time GraphQL APIs over PostgreSQL-compliant databases such as YugabyteDB.
Hasura comes with a fully-managed cloud version. Create a Hasura project that provides horizontal scalability and high availability out of the box:
Create or sign in to your Hasura Cloud account.
Create a Standard Tier project:
![Create Project]()
- Select an AWS region similar to the one chosen for the YugabyteDB deployment - US East (N. Virginia) in my case.
- Click the Create Project button to proceed with the deployment.
As we see, Hasura doesn’t have any settings related to scalability and zone-level availability. How can we be sure that our API layer will remain operational during potential zone outages or scale horizontally once necessary? In fact, as long as we selected the Standard Tier, these two characteristics are provided out of the box. This is what Hasura says in the documentation:
Horizontal scalability: Hasura Cloud lets you scale your applications automatically without having to think about the number of instances, cores, memory, and thresholds. You can keep increasing your number of concurrent users and the number of API calls, and Hasura Cloud will figure out the optimizations automagically.
High availability: Multiple instances of Hasura can be run with the open-source graphql-engine. In Hasura Cloud, the process of automatically scaling and the infrastructure required to run this is taken care of without any requirement of manual intervention.
Connecting Hasura to YugabyteDB
Up to now, we’ve already deployed a Hasura GraphQL layer and YugabyteDB cluster that can scale horizontally and withstand zone-level outages. What’s left is the interconnection of these two components to get a final solution for our applications.
Adding Hasura to the YugabateDB White List
The YugabyteDB cluster instance requires us to specify the IP addresses of applications accessing the database. This is not an exception for our Hasura instance.
Add Hasura Cloud IP to the Allow IP List on Yugabyte Cloud’s end:
Copy the Hasura Cloud IP from your Hasura’s project screen.
Navigate to YugabyteDB Cloud and add the IP to the IP Allow List.
Establishing Connection
After granting Hasura access to the YugabyteDB instance, we need to establish a connection between the two services. It involves two steps:
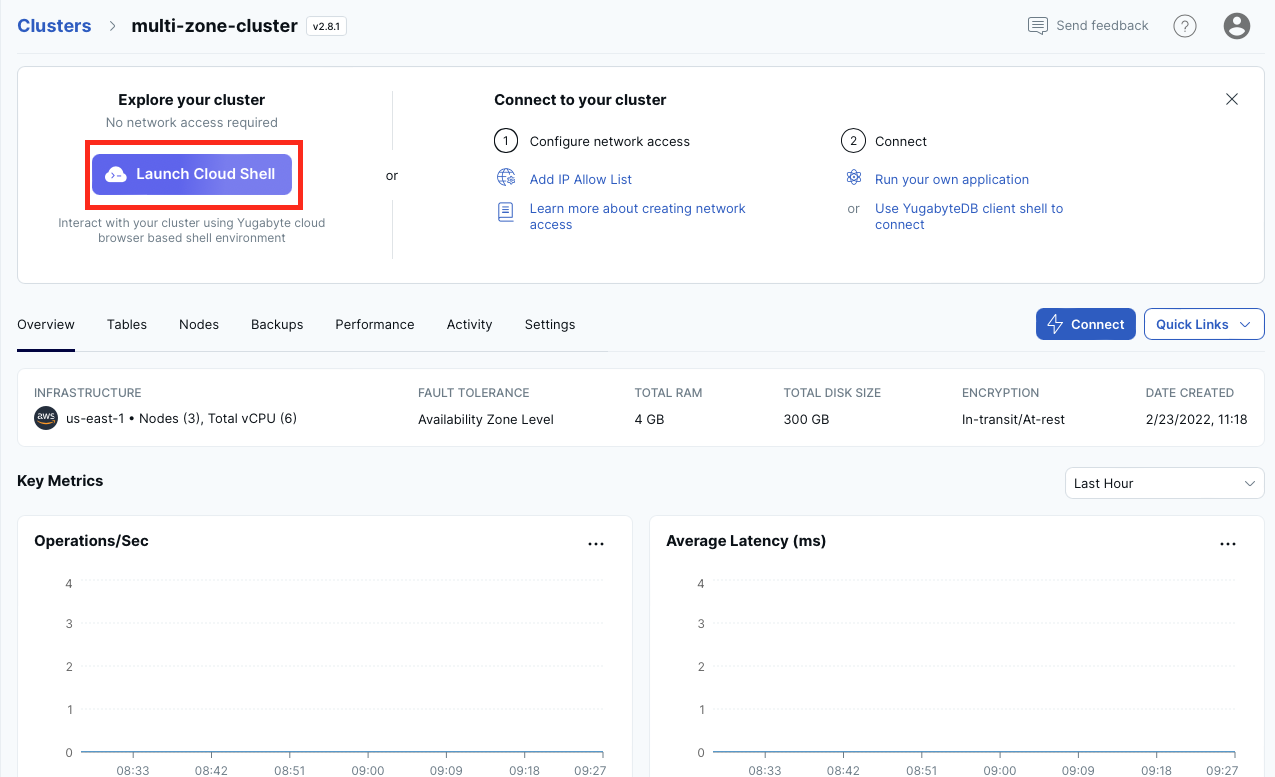
- Open Yugabyte Cloud and copy a connection URL:
![Open Yugabyte Cloud and copy a connection URL]()
Click the Connect button and select the Connect to your Application option.
Check the Optimize for Hasura property.
Copy your unique connection URL for YSQL (Yugabyte SQL).
Make sure to replace DB USER and DB PASSWORD with the credentials that you downloaded during the YugabyteDB cluster deployment step.
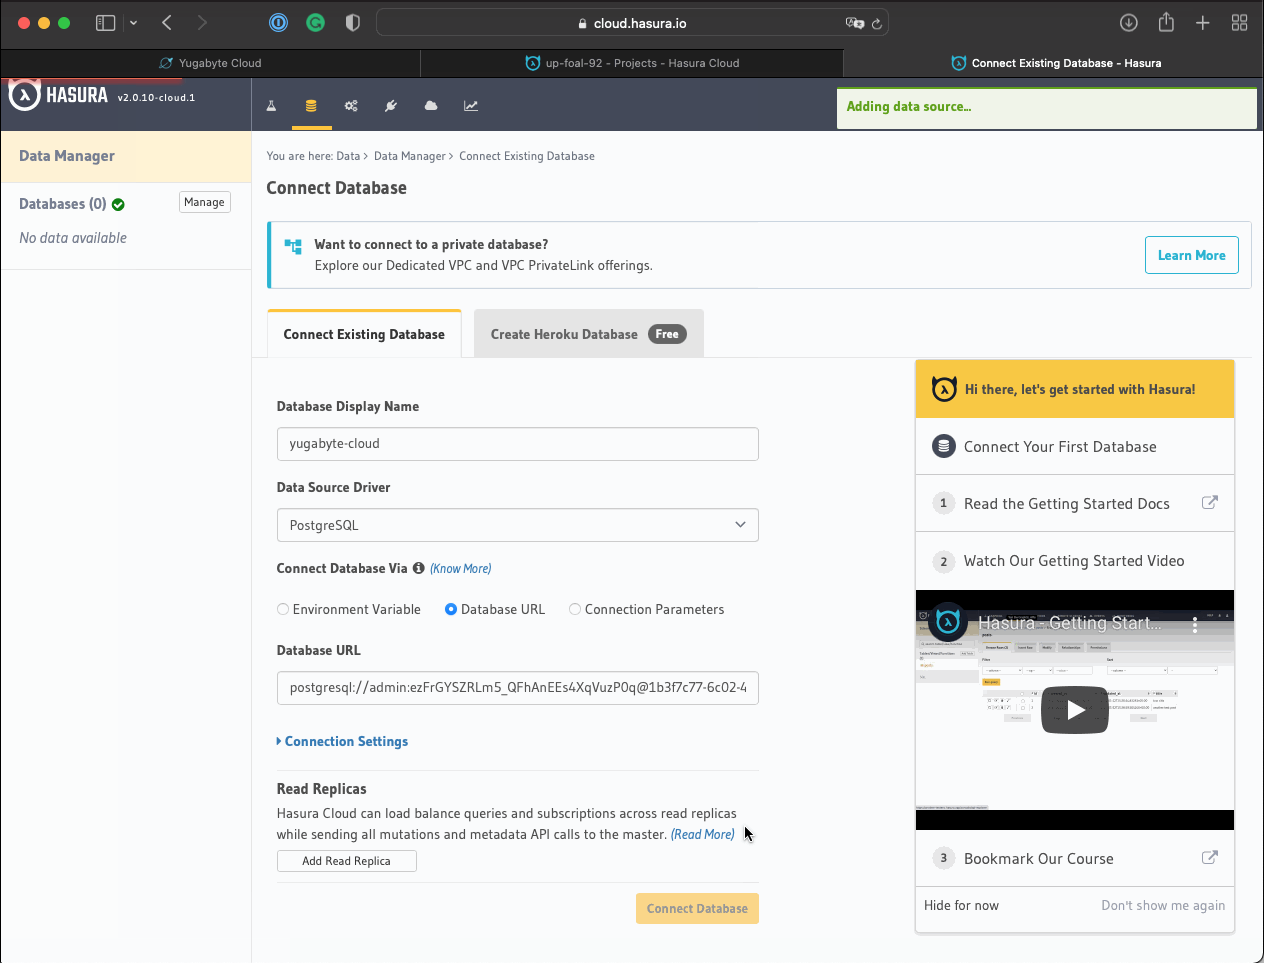
Navigate to Hasura Cloud and establish a connection with YugabyteDB:
![Navigate to Hasura Cloud and establish a connection with YugabyteDB]()
Click the Launch Console button and go to the Data & Schema Management screen.
Provide YugabyteDB connection parameters and establish a connection.
Click the Connect Database button to establish the connection.
We’ve just set up a GraphQL API layer that can withstand zone-level outages and scale horizontally. Now, let’s do a sanity test of the APIs by playing with sample data and requests.
Creating a Sample Database
Follow the steps below to create the Users and Messages tables in YugabyteDB:
- Launch the Cloud Shell on the YugabyteDB Cloud end:
![Launch the Cloud Shell on the YugabyteDB Cloud end]()
- Create Users and Messagestable:
SQL
CREATE SEQUENCE users_pk_seq CACHE 100;
CREATE SEQUENCE messages_pk_seq CACHE 100;

CREATE TABLE Users (
id int NOT NULL DEFAULT nextval('users_pk_seq'),
name text,
age int,
city text,
PRIMARY KEY(id));

CREATE TABLE Messages (
id int NOT NULL DEFAULT nextval('messages_pk_seq'),
sender_id int REFERENCES Users(id),
recipient_id int REFERENCES Users(id),
payload text,
PRIMARY KEY (id)
);
3. Finally, initialize the Users table with two records:
INSERT INTO USERS (name, age, city) VALUES
('John', 35, 'Austin'),
('Mark', 36, 'Seattle');
Querying Data With GraphQL
After loading the sample database to YugabyteDB, we can benefit from the GraphQL API layer provided by Hasura.
Exposing Tables to GraphQL Layer
Even though Hasura automatically detects structural changes on the database side, we still need to specify explicitly what tables can be queried with GraphQL APIs:
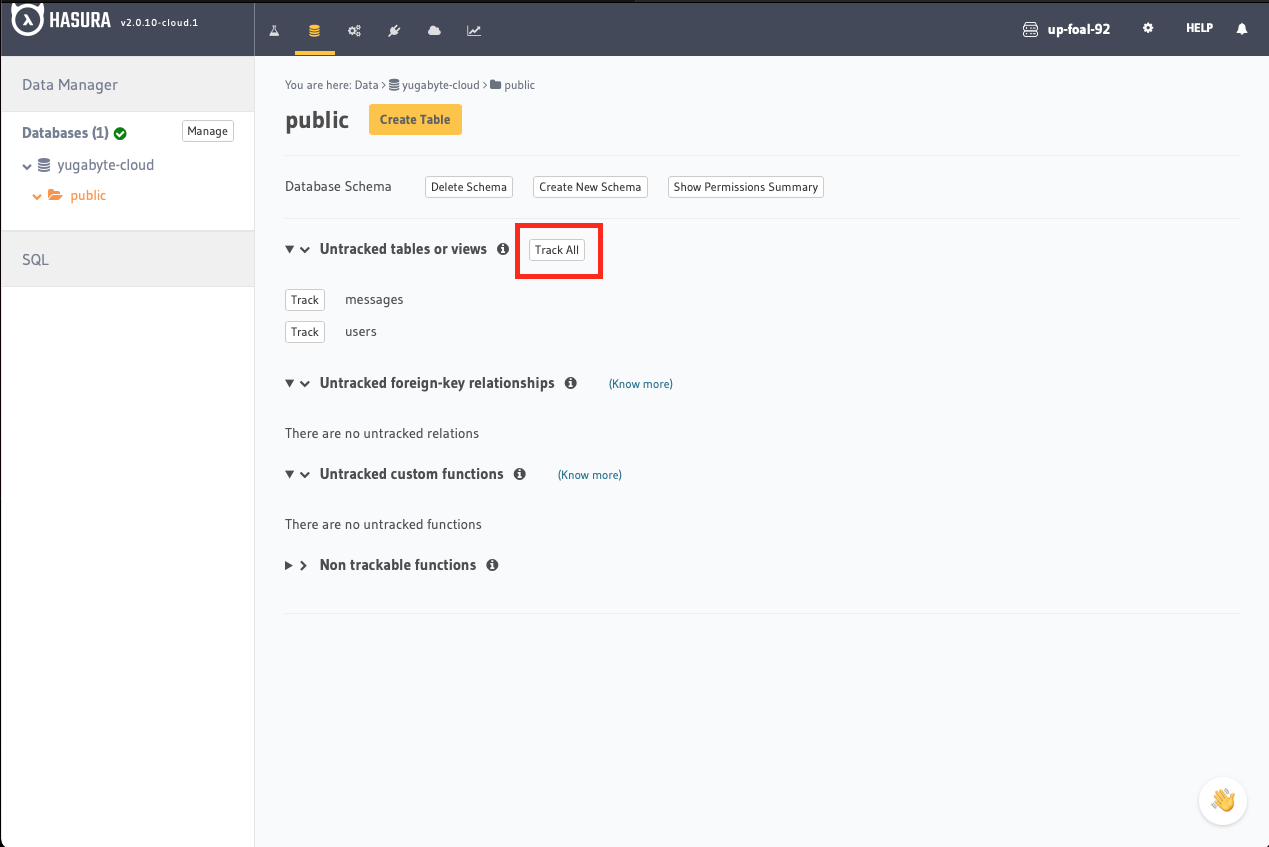
Open the Data & Schema Management tab of the Hasura Console.
Click the Track All button to expose both tables via the GraphQL APIs:
![Click the Track All button to expose both tables via the GraphQL APIs]()
Finally, click the Track buttons for the messages->users foreign key relationships:
![Click the Track buttons for the messages->users foreign key relationships]()

Querying Data
Next, let’s read records of the Users table with GraphQL:
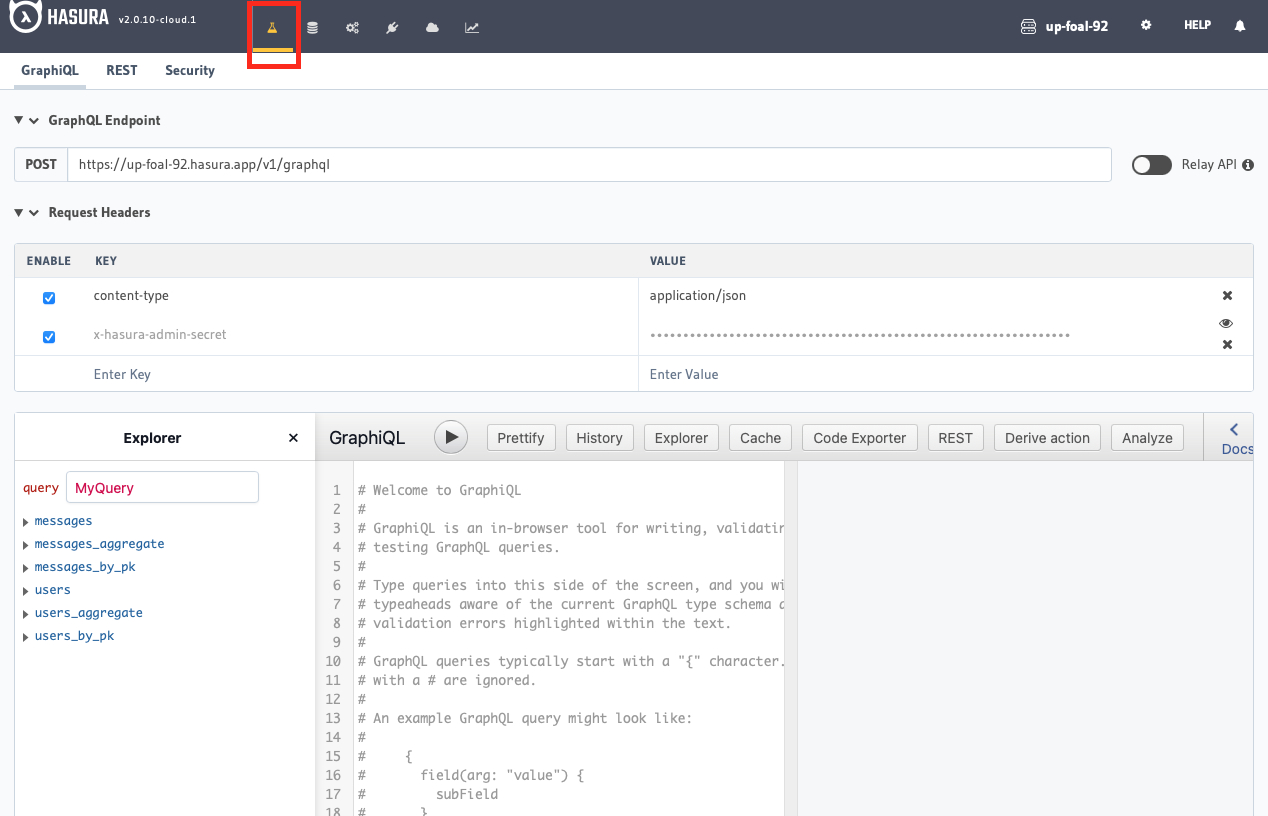
- Open the Api Explorer tab of the Hasura Console:
![Open the Api Explorer tab of the Hasura Console]()
- Get all the Users:
query {
  users {
    id
    name
    age
    city
  }
}
3. Lastly, confirm the output is as follows:
{
  "data": {
    "users": [
      {
        "id": 1,
        "name": "John",
        "age": 35,
        "city": "Austin"
      },
      {
        "id": 2,
        "name": "Mark",
        "age": 36,
        "city": "Seattle"
      }
    ]
  }
}
Updating Data
Finally, let’s make sure that our GraphQL APIs can handle writes without issues.
- Add a Messageto the database with the following GraphQL mutation:
mutation {
  insert_messages_one(object: {recipient_id: 2, sender_id: 1, payload: "Hi, Mark! How are you doing?"}) {
    id
  }
}
2. Read the Message back from YugabyteDB:
query {
  messages {
    payload
    userBySenderId {
      name
      city
    }
    user {
      name
      city
    }
  }
}
3. Confirm the output is as follows:
{
  "data": {
    "messages": [
      {
        "payload": "Hi, Mark! How are you doing?",
        "userBySenderId": {
          "name": "John",
          "city": "Austin"
        },
        "user": {
          "name": "Mark",
          "city": "Seattle"
        }
      }
    ]
  }
}
Conclusion
As we’ve seen in this article, the right combination of modern cloud-native services makes it easy to set up a horizontally scalable and highly available GraphQL API layer. Within a matter of minutes, we’ve got the API layer that can handle an increase in requests, expand its capacity from 10GB to 100GB and even bigger volumes, and, most importantly, keep serving application requests, even in the event of a zone-level outage.
Finally, if your GraphQL API layer needs to work across several cloud regions and tolerate region-level outages, then you still can use Hasura and YugabyteDB. Presently, this capability is available for self-managed installation options (see YugabyteDB multi-region deployments). However, I believe this should make its way to the fully-managed versions of the technologies in the near future.
Opinions expressed by DZone contributors are their own.
Comments