Getting Started With the YugabyteDB Managed REST API
In this article, learn how to generate an API key, list existing clusters, create a new cluster, and stream market orders into the cluster.
Join the DZone community and get the full member experience.
Join For FreeREST API is so widespread that you can even use it to manage distributed SQL databases. In this blog post, I will show you how to manage and work with YugabyteDB Managed clusters via REST. You'll learn how to generate an API key, retrieve a list of existing clusters, create a new cluster, and finally, start a sample application that streams market orders into the cluster. Let's get started!
Generating a YugabyteDB Managed API Key
First, you'll need an API key to interact with the YugabyteDB Managed REST API.
To generate a new key, follow these steps:
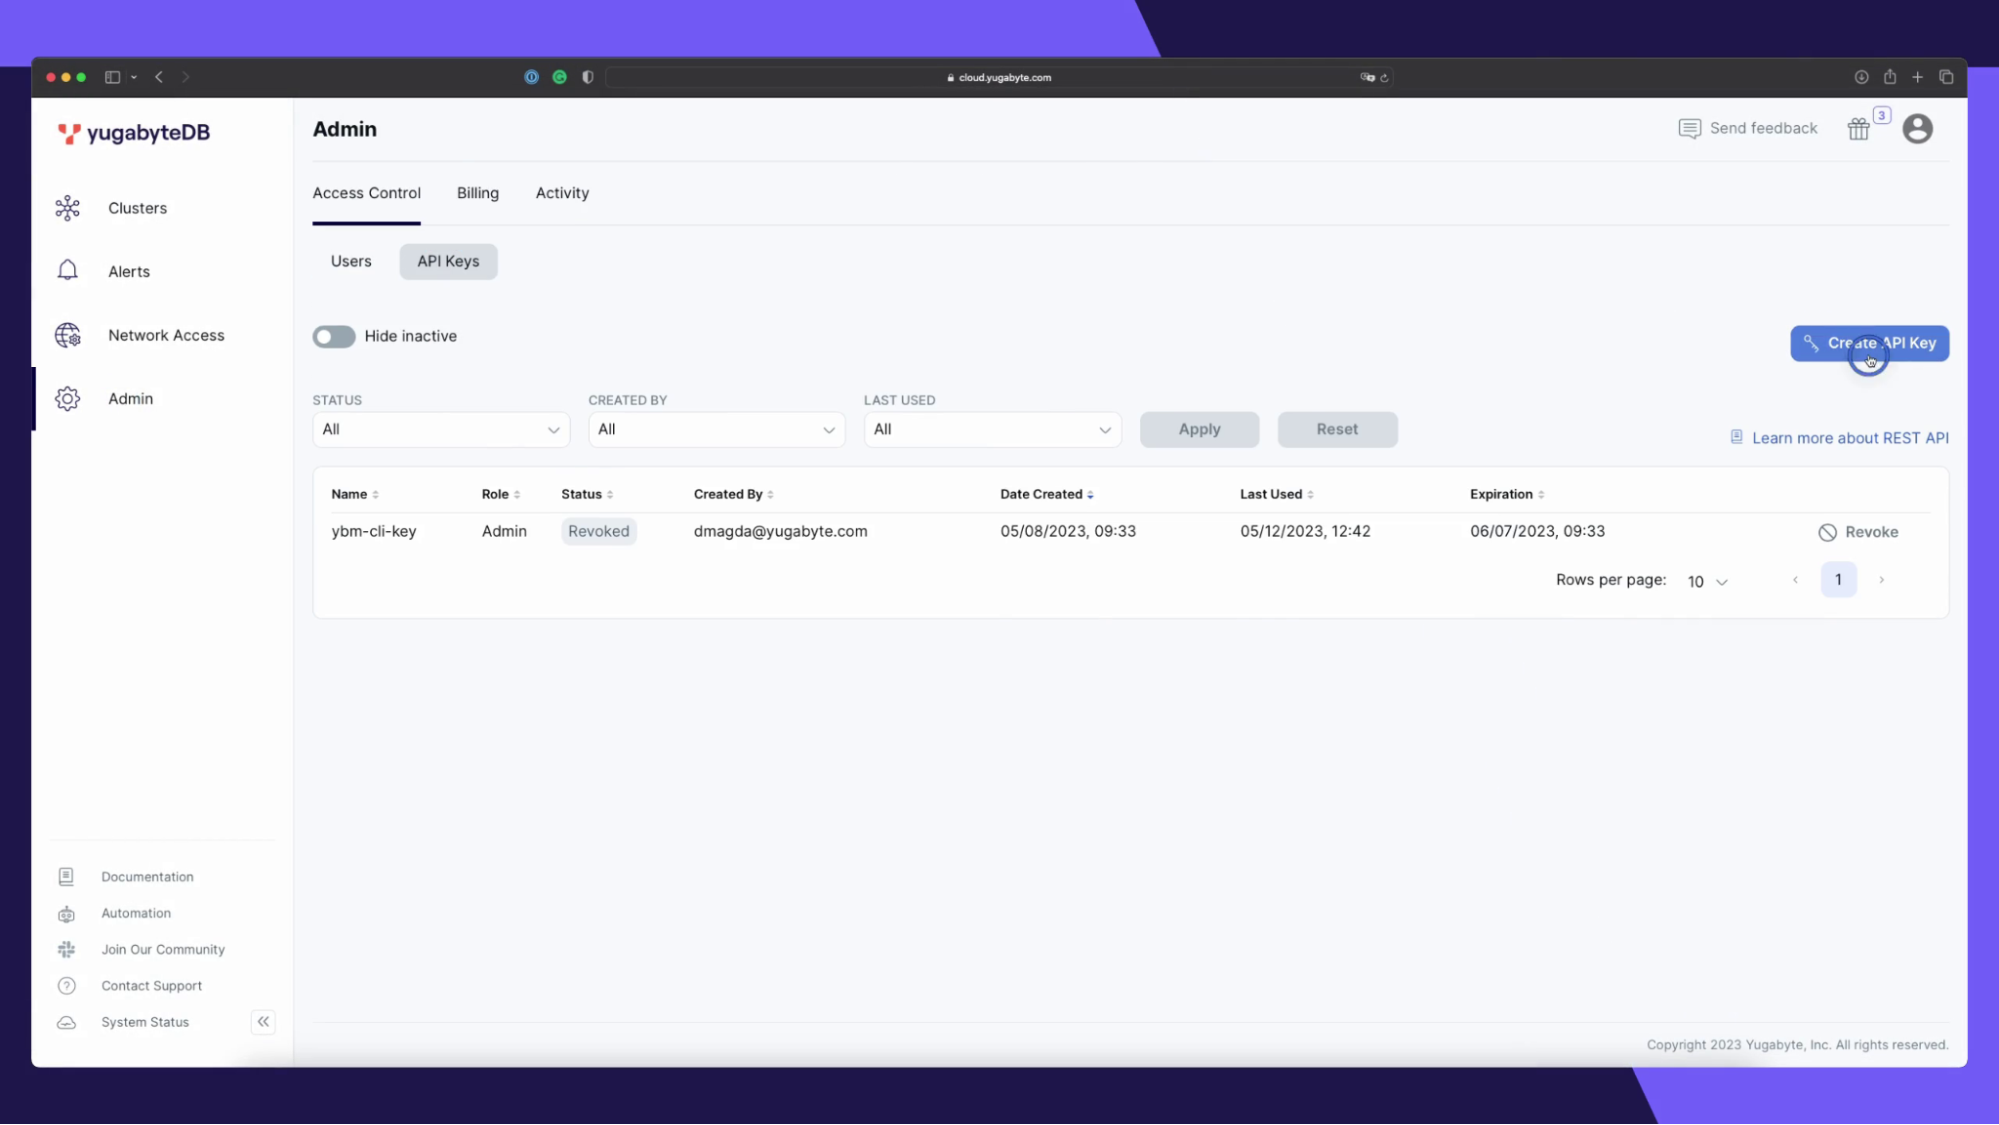
Follow along with the sister video—YugabyteDB Managed REST API
- Head over to the YugabyteDB Managed UI.
- Navigate to the API Keys section.
- Click on the Create API Key button.
- Give the key a name, select a role (e.g., 'Developer' or 'Admin'), and define an expiration time.
- Click on the Generate API Key button.
Once the key is generated, copy it somewhere safe, since you will not be able to see it again.
You need to use this API key in the Authorization:Bearer header for all your requests to YugabyteDB Managed. If you use httpie, then your first REST request can be as simple as this:
http GET https://cloud.yugabyte.com/api/public/v1/accounts \
	-A bearer -a {YOUR_API_KEY}
Retrieve a List of Existing YugabyteDB Clusters
Next, let’s run more sophisticated requests via REST. How about getting a list of YugabyteDB Managed clusters?
To fetch that list, you need to make an API call to the clusters endpoint:
http GET https://cloud.yugabyte.com/api/public/v1/accounts/{YOUR_ACCOUNT_ID}/projects/{YOUR_PROJECT_ID}/clusters \
	-A bearer -a {YOUR_API_KEY}
For this and many other API endpoints, you'll need to provide the accountID and the projectID. You can find these values in the URL of your YugabyteDB Managed UI.

After making this API call to the clusters endpoint, you'll get a JSON response containing the list of database clusters. If the data field is empty, it means there are no database clusters yet.
{
  "_metadata": {
    "continuation_token": null,
    "links": {
      "next": null,
      "self": "/api/public/v1/accounts/{YOUR_ACCOUNT_ID}/projects/{YOUR_PROJECT_ID}/clusters"
    }
  },
  "data": []
}
Create a YugabyteDB Managed Cluster
To create a new YugabyteDB Managed cluster, you'll need to make a POST HTTP request to the clusters endpoint and provide the necessary cluster configuration details.
Here's an example request for provisioning a new distributed YugabyteDB cluster:
http POST https://cloud.yugabyte.com/api/public/v1/accounts/{YOUR_ACCOUNT_ID}/projects/{YOUR_PROJECT_ID}/clusters \
	-A bearer -a {YOUR_API_KEY} < cluster_config.json
The clusters_config.json file includes a required cluster configuration in JSON format. The configuration below requests to start a 3-node cluster in the us-east1 region of the Google Cloud Platform:
{
"cluster_spec": {
  "name": "sample-cluster",
  "cluster_info": {
    "cluster_tier": "PAID",
    "cluster_type": "SYNCHRONOUS",
    "num_nodes": 3,
    "fault_tolerance": "ZONE",
    "node_info": {
      "num_cores": 2,
      "memory_mb": 8192,
      "disk_size_gb": 50
    },
    "is_production": false,
    "version": null
  },
"software_info": {
  "track_id": "d9618d5e-9591-445b-a280-705770f5fb30"
    },
"cluster_region_info": [
  {
    "placement_info": {
      "cloud_info": {
        "code": "GCP",
        "region": "us-east1"
      },
      "num_nodes": 3,
      "multi_zone": true
    },
    "is_default": true,
    "is_affinitized": true,
    "accessibility_types": [
      "PUBLIC"
    ]
  }
]
},
"db_credentials": {
  "ycql": {
    "username": "admin",
    "password": "SuperStrongPassword"
  },
  "ysql": {
    "username": "admin",
    "password": "SuperStrongPassword"
  }
}
}
Once you've sent this POST request, your new cluster will start to provision.
"cluster_endpoints": [{
    "accessibility_type": "PUBLIC",
    "host": null,
    "id": "5e24c4d3-3329-47e1-ba95-5f1fa36a86f0",
    "pse_id": null,
    "region": "us-east1",
    "state": "CREATING",
    "state_v1": "CREATING"
 }]
You can continue checking the cluster status using the REST API, or you can wait while the deployment is finished with the YugabyteDB Managed UI.

Start a Sample Application and Monitoring Cluster Metrics
Now that you have your YugabyteDB Managed cluster up and running, let's start a sample application that streams market orders into the cluster.
Once you start the application, make sure it is connected to the cluster, and streams market orders into the database as expected:
============= Trade Stats ============

Trades Count: 1040

Stock           Total Proceeds
Linen Cloth     2815.790039
Google          2201.330078
Bespin Gas      2132.620117
Apple           1536.520020
Elerium         1189.439941
======================================
Next, let's use YugabyteDB Managed REST API to confirm the incoming requests using the cluster-metrics API endpoint:
http GET https://cloud.yugabyte.com/api/public/v1/accounts/{YOUR_ACCOUNT_ID}/projects/{YOUR_PROJECT_ID}/cluster-metrics?cluster_ids={YOUR_CLUSTER_ID} \
-A bearer -a {YOUR_API_KEY}cluster_idsparameter: You can find your cluster’s ID by sending the GET request to theclustersAPI endpoint (see the retrieving the clusters list section above) or by locating through the YugabyteDB Managed UI.
If everything is working as expected, you'll see your cluster's metrics data, including the number of active read and write requests.
{
  "data": [
    {
      "cluster_id": "bf7e8c4e-3540-4afb-a382-1b87d31cc0d8",
      "metrics": {
        "read_ops_per_second": 5.0,
        "write_ops_per_second": 10.0
      }
    }
  ]
}
Congratulations!
Congratulations! You now know how to use the YugabyteDB Managed REST API to generate an API key, retrieve a list of existing clusters, create a new cluster, and monitor the cluster metrics while streaming market orders from a sample application.
You can now take full advantage of YugabyteDB Managed and its REST API to manage your database clusters more efficiently and programmatically.
Opinions expressed by DZone contributors are their own.
Comments