How To Set Up and Run Cypress Test Cases in CI/CD TeamCity
In this article, readers will use a tutorial to learn how to set up and run Cypress test cases in CI/CD TeamCity, including code blocks and screenshots.
Join the DZone community and get the full member experience.
Join For FreeThis article will cover how to set up and run Cypress test cases in CI/CD TeamCity. Cypress is a JavaScript-based end-to-end testing framework that can be used to test web applications. To execute Cypress test cases in a CI/CD pipeline using TeamCity, you can use the Cypress Test Runner as a build step in your pipeline. This can be configured to run the tests in a headless browser and generate test reports that can be used to track test results over time. Additionally, you can use TeamCity’s built-in features, such as notifications and analytics, to track the status of your tests and to be alerted when tests fail.
Prerequisites
- User already logged into TeamCity.
- Code is already pushed to GitHub.
- For the demo, use the latest version (12.3.0) of Cypress.
What Is TeamCity?
TeamCity is a continuous integration and continuous delivery (CI/CD) server developed by JetBrains. It is used to automate the building, testing, and deployment of software projects. TeamCity provides a web-based interface for configuring and managing builds, as well as for viewing build results and statistics.
TeamCity supports a wide variety of build technologies, including Java, .NET, C++, and many others. It can integrate with a variety of version control systems, issue-tracking systems, and testing frameworks. It also has built-in support for running tests and deploying code to various environments.
Basic CI Workflow in TeamCity
To understand the data flow between the server and agents, what is passed to the agents, and how and when TeamCity gets the results, let’s take a look at a simple build lifecycle.
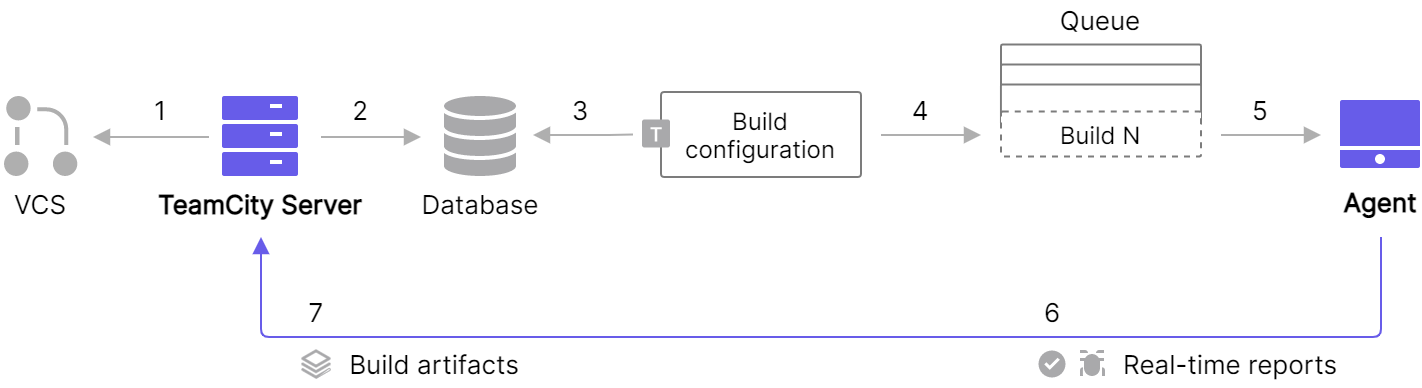
Source: JetBrains
Workflow Guide
- The TeamCity server detects a change in your VCS root (repository).
- The server stores this change in the database.
- The trigger, attached to the build configuration, detects the relevant change in the database and initiates the build.
- The triggered build gets to the build queue.
- The build is assigned to a free and compatible build agent.
- The agent executes the build steps, described in the build configuration. While executing the steps, the agent reports the build progress to the TeamCity server. It is sending all the log messages, test reports, and code coverage results on the fly so you can monitor the build process in real time.
- After finishing the build, the agent sends build artifacts to the server.
In addition, TeamCity can be integrated with other tools, such as GitHub, JIRA, and Slack, to streamline the CI process and provide a comprehensive view of the project status.
Before integration, we have to install and set up Cypress with the some.spec file to run CI/CD TeamCity.
Set Up Cypress
To set up Cypress, you must have Node.js and npm (Node Package Manager) installed on your computer. Once you have those, you can follow these steps:
- Open a terminal, or command prompt, and navigate to the root directory of your project.
- Run the command
npm initto initialize a new npm package in your project. (You can skip this step if your project already has apackage.jsonfile). - Run the command
npm install cypress --save-devto install Cypress as a development dependency in your project. - Once the installation is complete, run the command
npx cypress opento open the Cypress Test Runner. - In the Cypress Test Runner, you can write and run tests for your application.
- You can also configure Cypress by editing the
cypress.jsonfile located in the root of your project.
Install Cypress using the below command:
npm install cypress --save-devOnce Cypress is installed you can see the folder structure below:
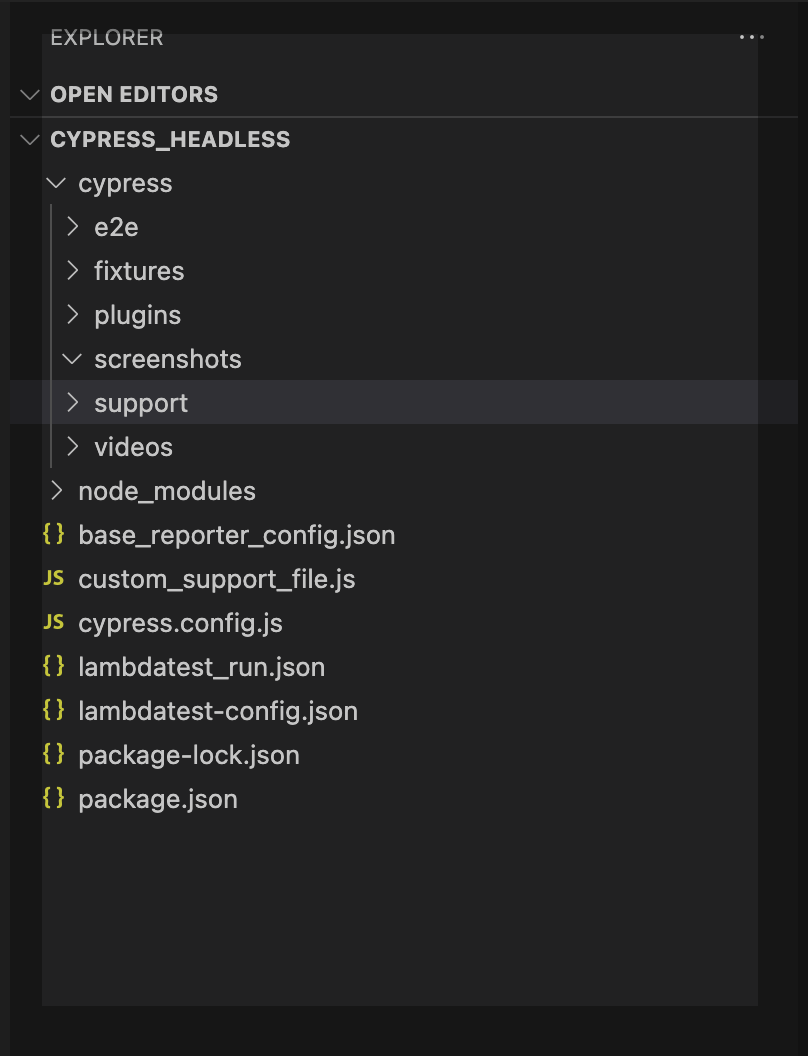
An explanation of the folder structure of Cypress is as follows:
cypress/: This is the main directory for your Cypress tests.e2e/: This directory contains all of your test files. It is recommended to organize test files based on the feature or page they are testing.fixtures/: This directory contains data that is used to test your application, such as JSON or CSV files.plugins/: This directory contains JavaScript files that extend the functionality of Cypress.support/: This directory contains files that are used to configure Cypress and set up your tests.
Demo Example
For demo purpose, I am taking the example of this site.
UI Example
/// <reference types="cypress" />

describe("QAAutomationLabs.com", { testIsolation: false }, () => {
  it("Open URL", () => {
    cy.visit("https://qaautomationlabs.com/");
  });
  it("Click on Read More ", () => {
    cy.get(".staticslider-button").click();
  });
  it("Verify Particular Blog ", () => {
    cy.contains(
      "Running End-to-End Cypress Test cases In Google Cloud Build Pipeline"
    );
  });
  it("Click on Blogs", () => {
    cy.contains("Blog").scrollIntoView().click({ force: true });
  });
  it("Search the datas", () => {
    cy.get('[id="wp-block-search__input-2"]').scrollIntoView();
    cy.get('[id="wp-block-search__input-2"]')
      .click({ force: true })
      .type("cypress");
    cy.get('[id="search-icon"]').click({ force: true });
    cy.contains("Search Results for: cypress");
  });
});
API Example
For the API, take the example of this site:
it("GET API testing Using Cypress API Plugin", () => {
  cy.request("GET", "https://reqres.in/api/users?page=2").should((response) => {
    expect(response.status).to.eq(200);
  });
});

it("POST API testing Using Cypress API Plugin", () => {
  cy.request("POST", "https://reqres.in/api/users", {
    name: "morpheus",
    job: "leader",
  }).should((response) => {
    expect(response.status).to.eq(201);
  });
});

it("PUT API testing Using Flip Plugin", () => {
  cy.request("PUT", "https://reqres.in/api/users/2", {
    name: "morpheus",
    job: "zion resident",
  }).should((response) => {
    expect(response.status).to.eq(200);
  });
});

it("DELETE API testing Using Cypress API Plugin", () => {
  cy.request("DELETE", "https://reqres.in/api/users/2").should((response) => {
    expect(response.status).to.eq(204);
  });
});
Package.json File
{
  "name": "cypress_headless",
  "version": "1.0.0",
  "description": "",
  "main": "index.js",
  "scripts": {
    "test": "yarn cypress run"
  },
  "author": "Kailash Pathak",
  "license": "ISC",
  "dependencies": {
    "cypress": "^12.3.0"
  },
}
Integrate TeamCity With Cypress
Integrating Cypress with TeamCity allows you to run your Cypress end-to-end tests as part of your continuous integration (CI) workflow.
To integrate Cypress with TeamCity, you will need to create a build configuration that runs Cypress tests as part of the build process. This can be done by configuring a build step to run the Cypress test command, such as “npx cypress run” or “yarn cypress run,” depending on your project’s setup. Additionally, you’ll need to configure the build to report test results to TeamCity, so the results can be analyzed and displayed in the TeamCity web interface
Below are some steps for the Cypress integration with TeamCity:
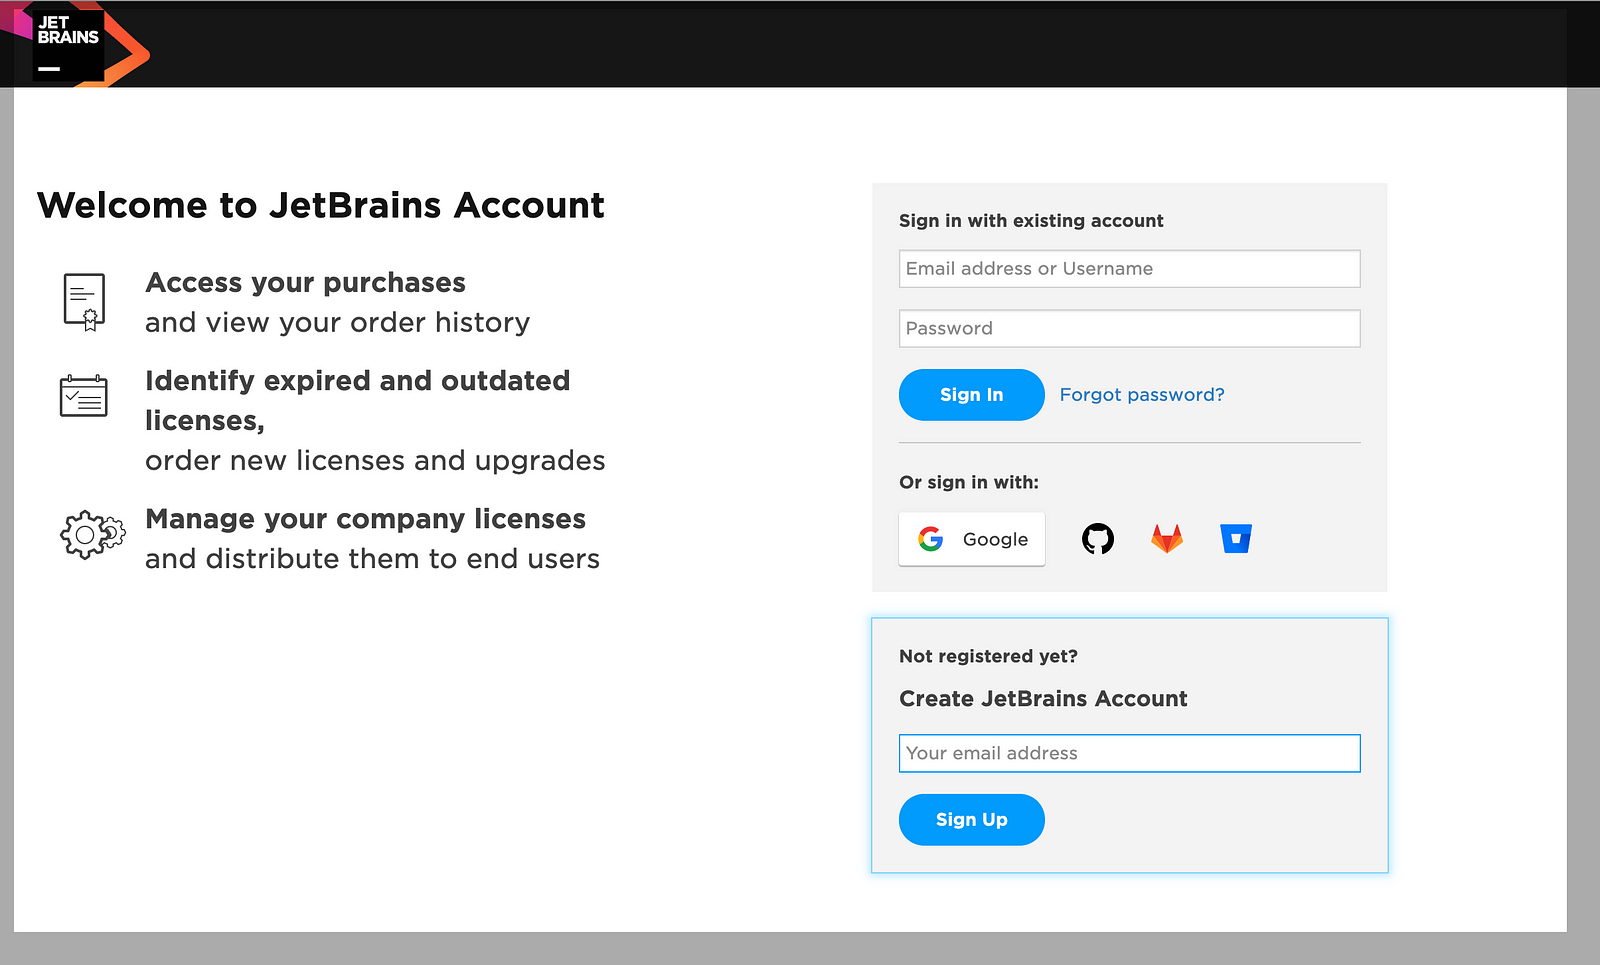
Step 1
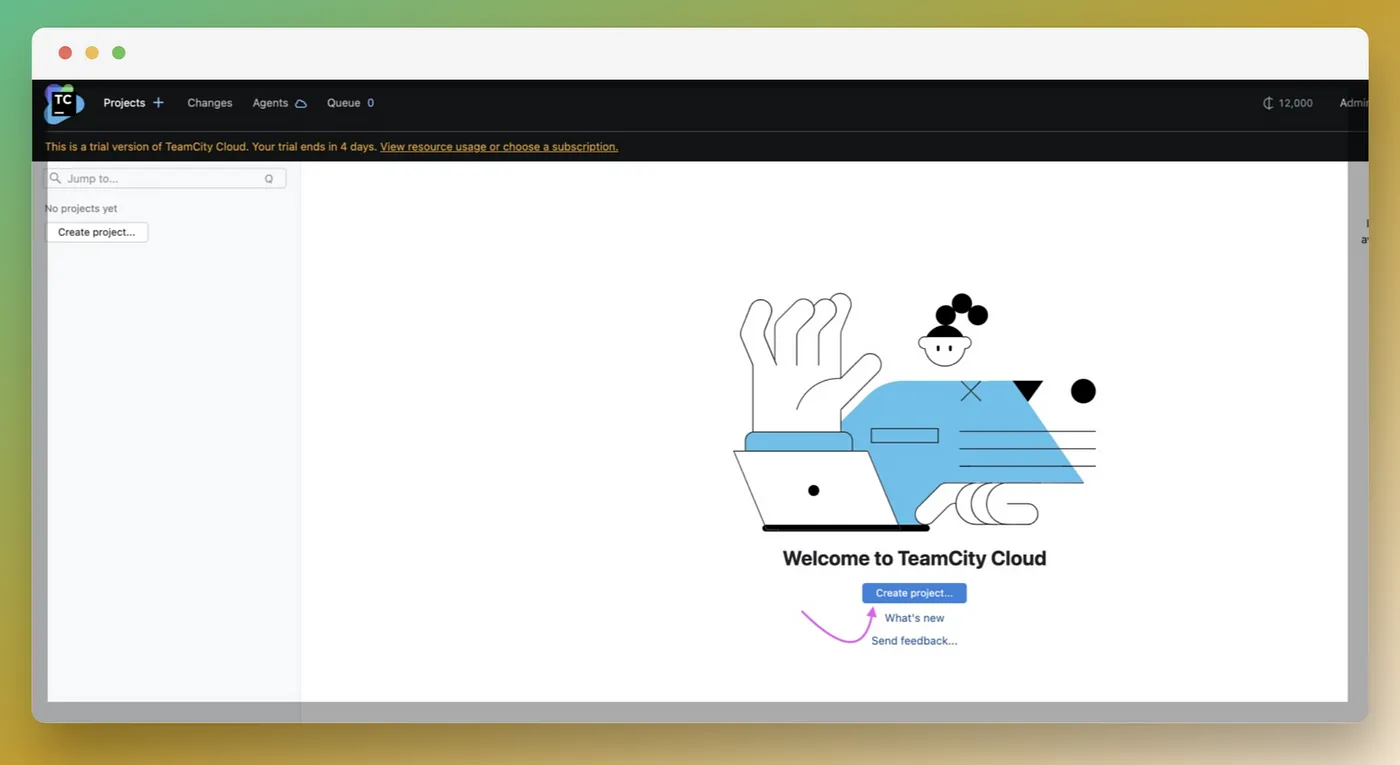
Sign up with an existing Google account:
After logging in, you will see the below screen:
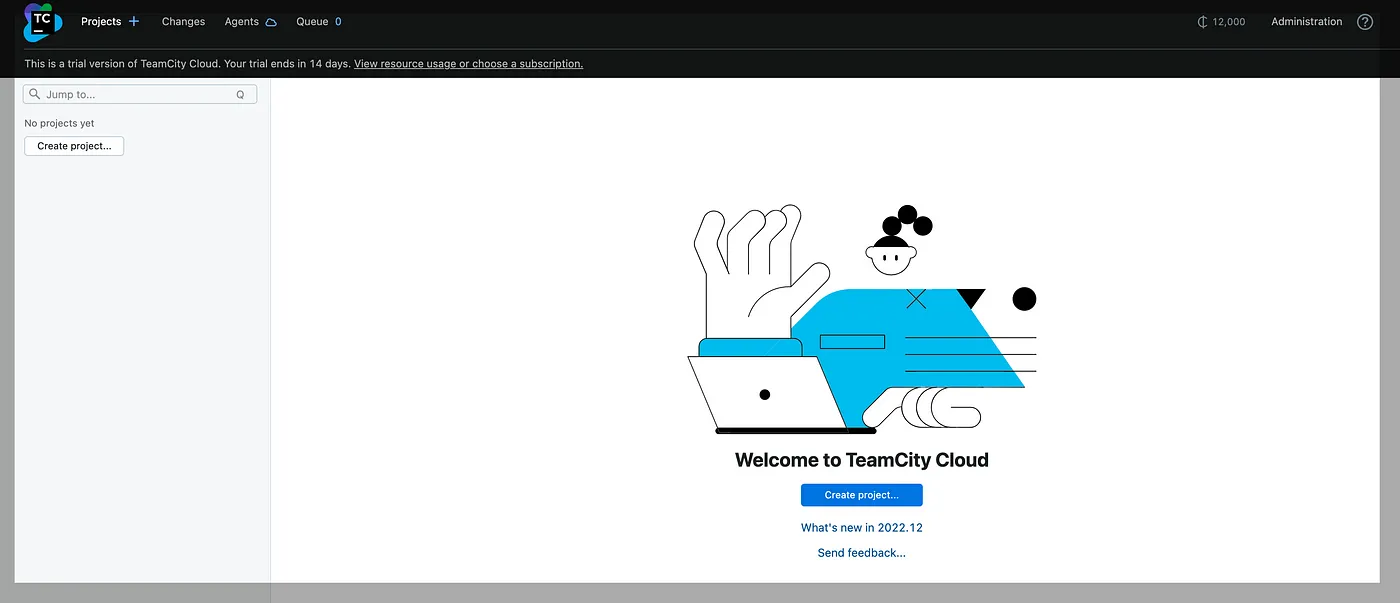
Step 2
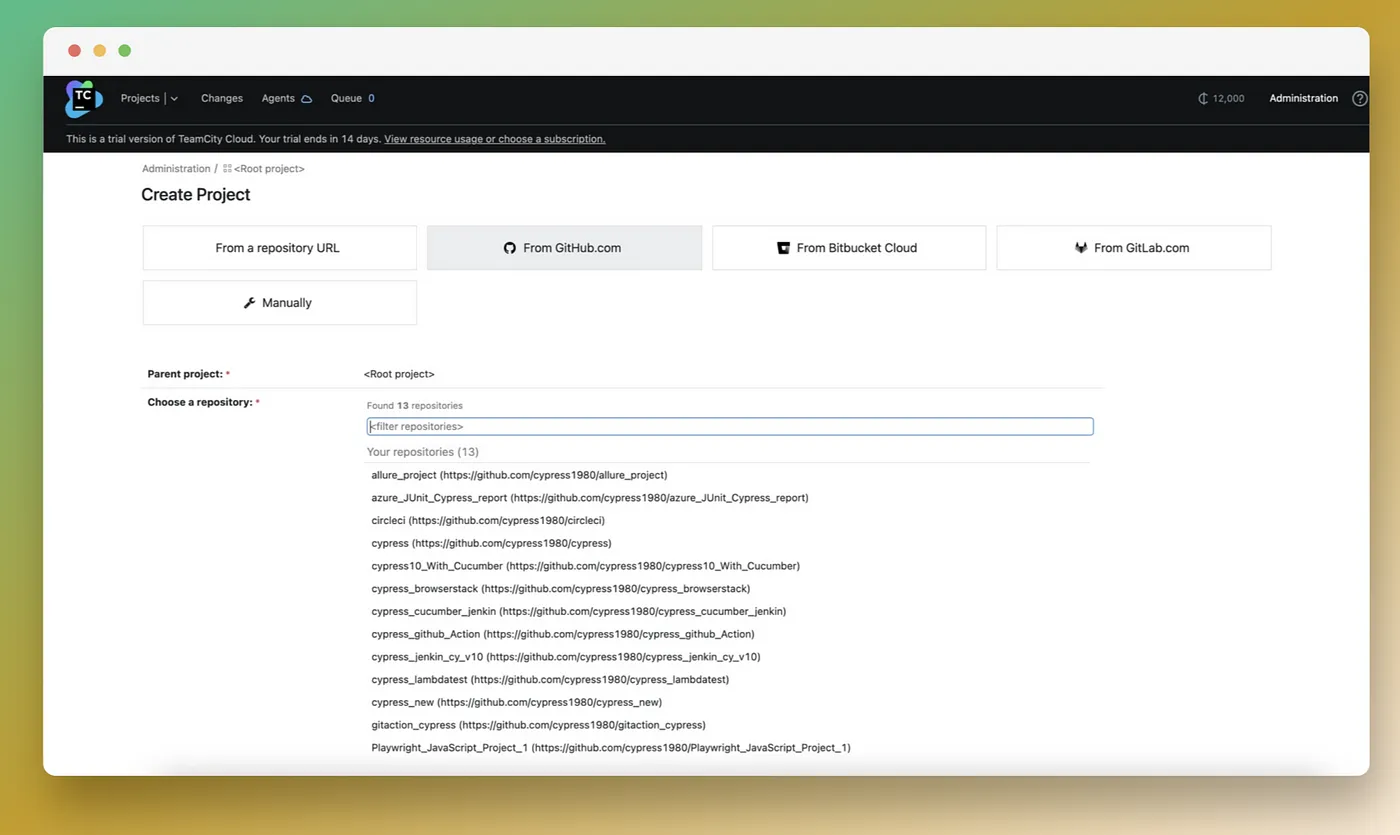
Click on “Create Project” and create a new project:
Step 3
After clicking on “Create Project” the below screen will open. In the below screen, we can see all the repositories are displaying:
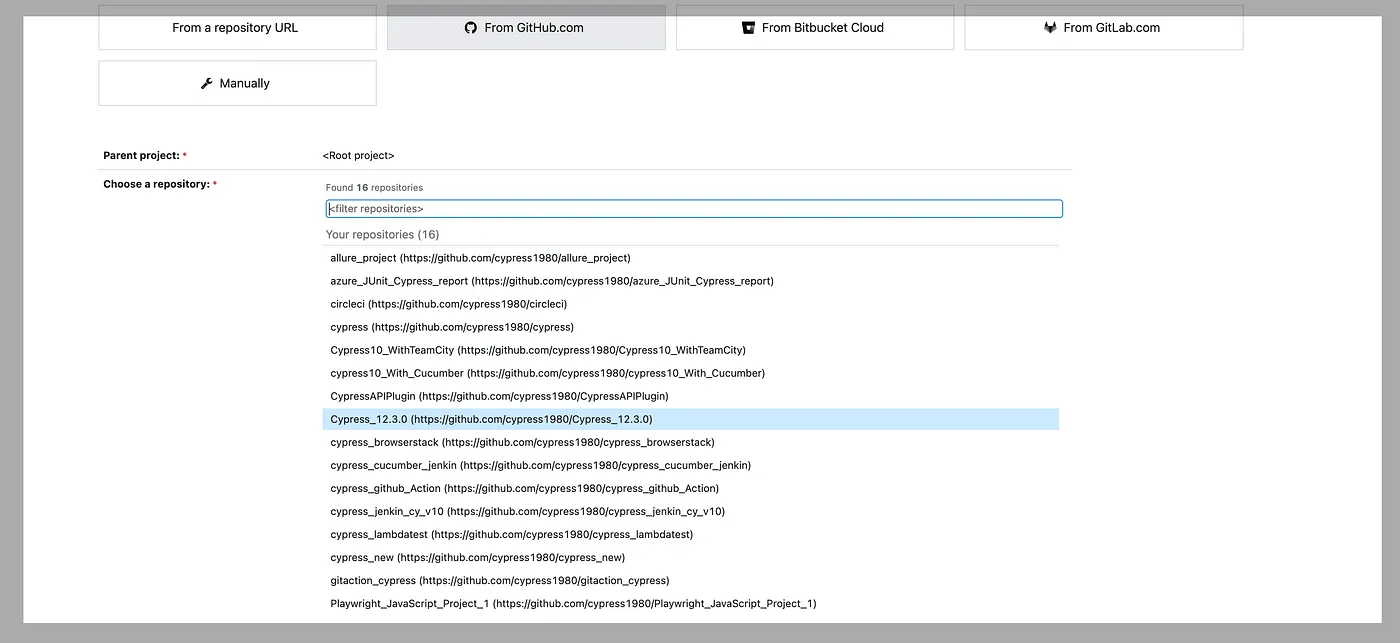
Step 4
Select the project. In my case, I will select “Cypress_12.3.0 (https://github.com/cypress1980/Cypress_12.3.0):”
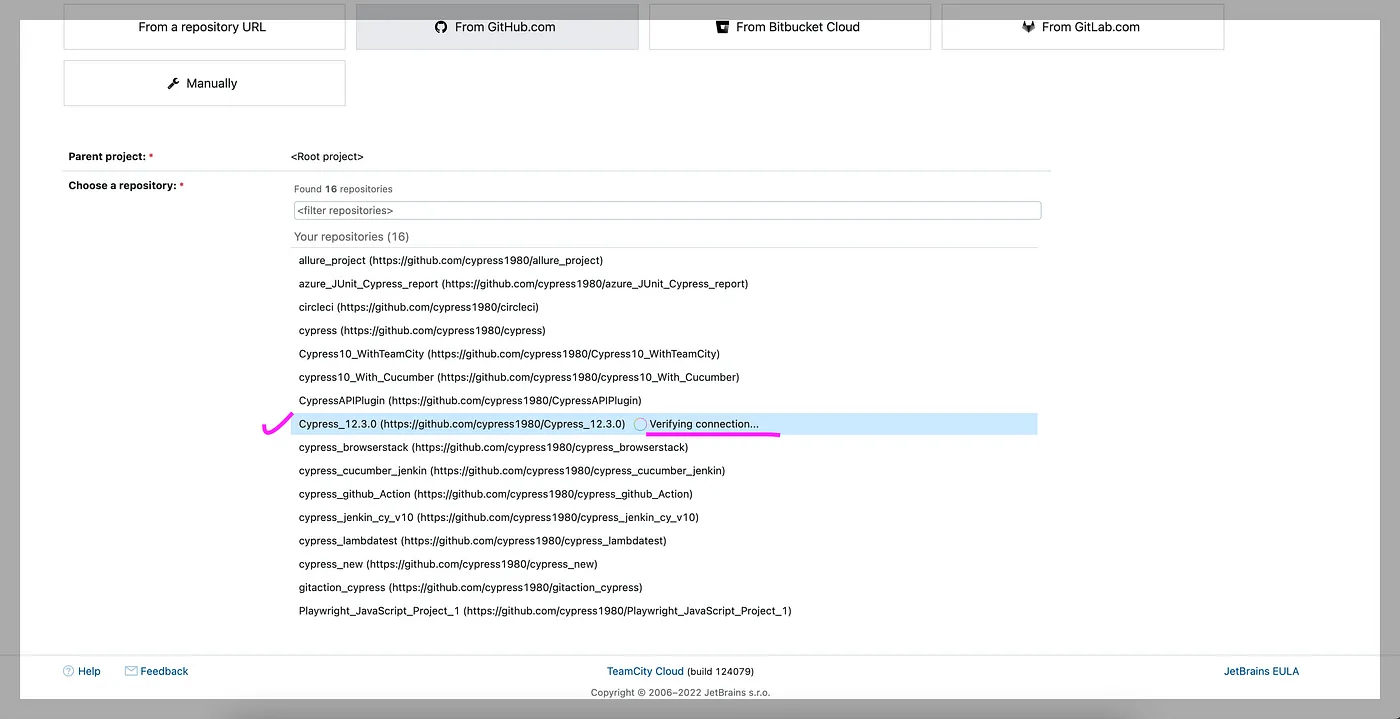
Step 5
As the user selects the project, the below screen will open. The connection to the VCS repository has been verified and the repository is linked:
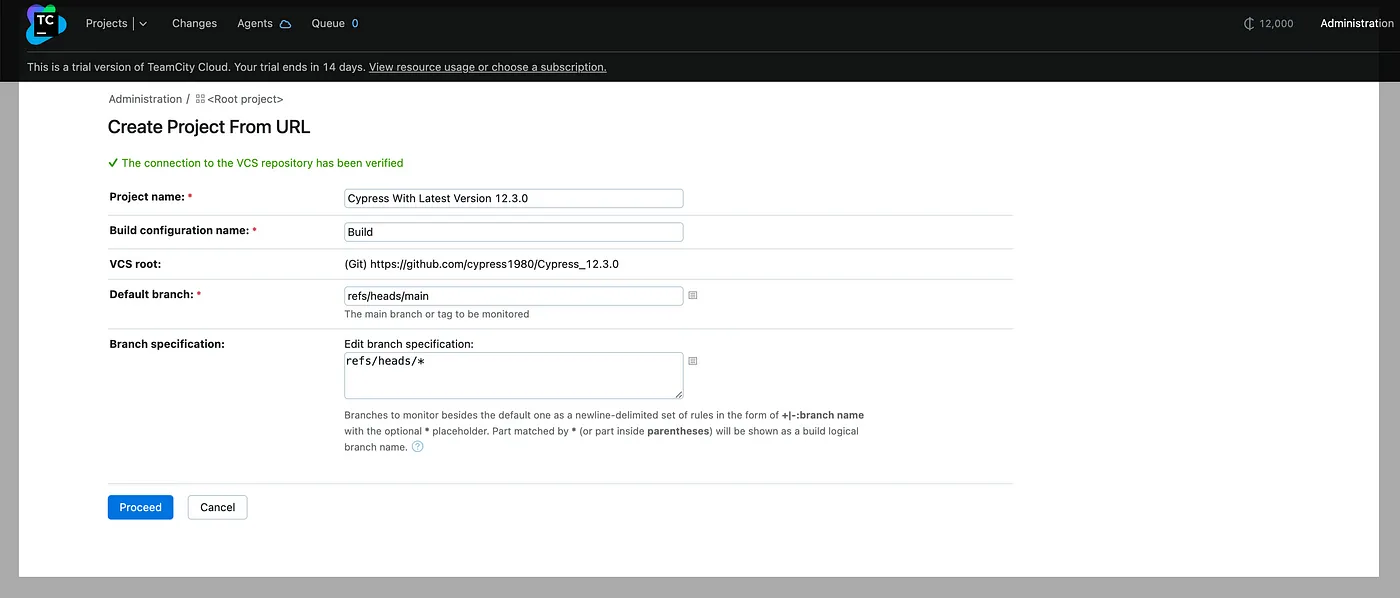
Step 6
Click on the “Proceed” button in the above screen. As the user clicks on the “Proceed” button this shows: Build steps and their settings are detected automatically by scanning the VCS repository:
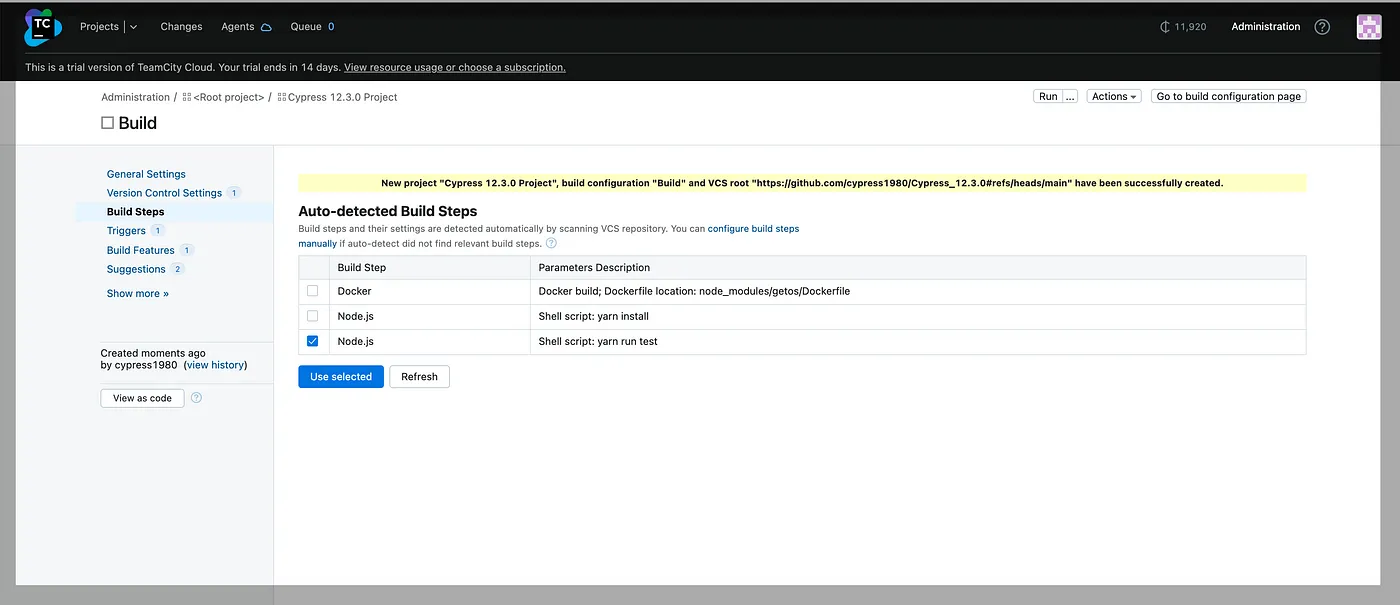
Step 7
Select “Node.js (Shell Script :npm run test)” from the below screen:
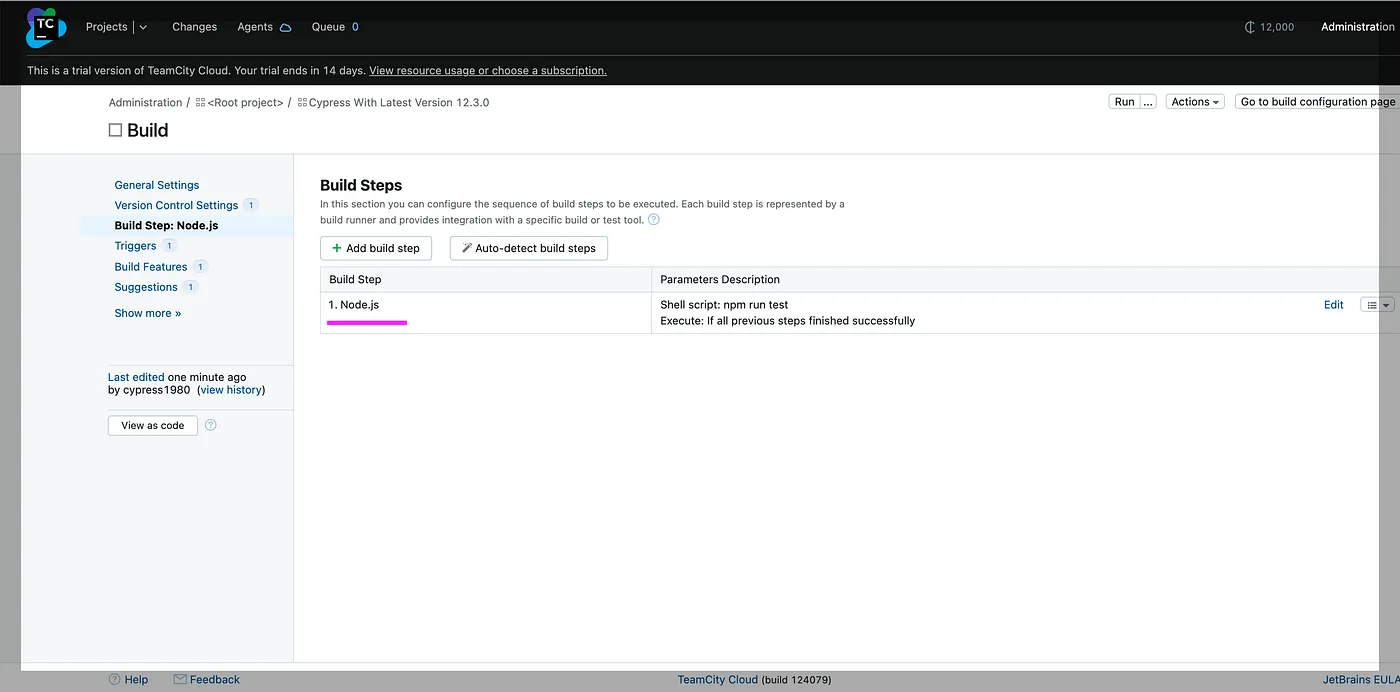
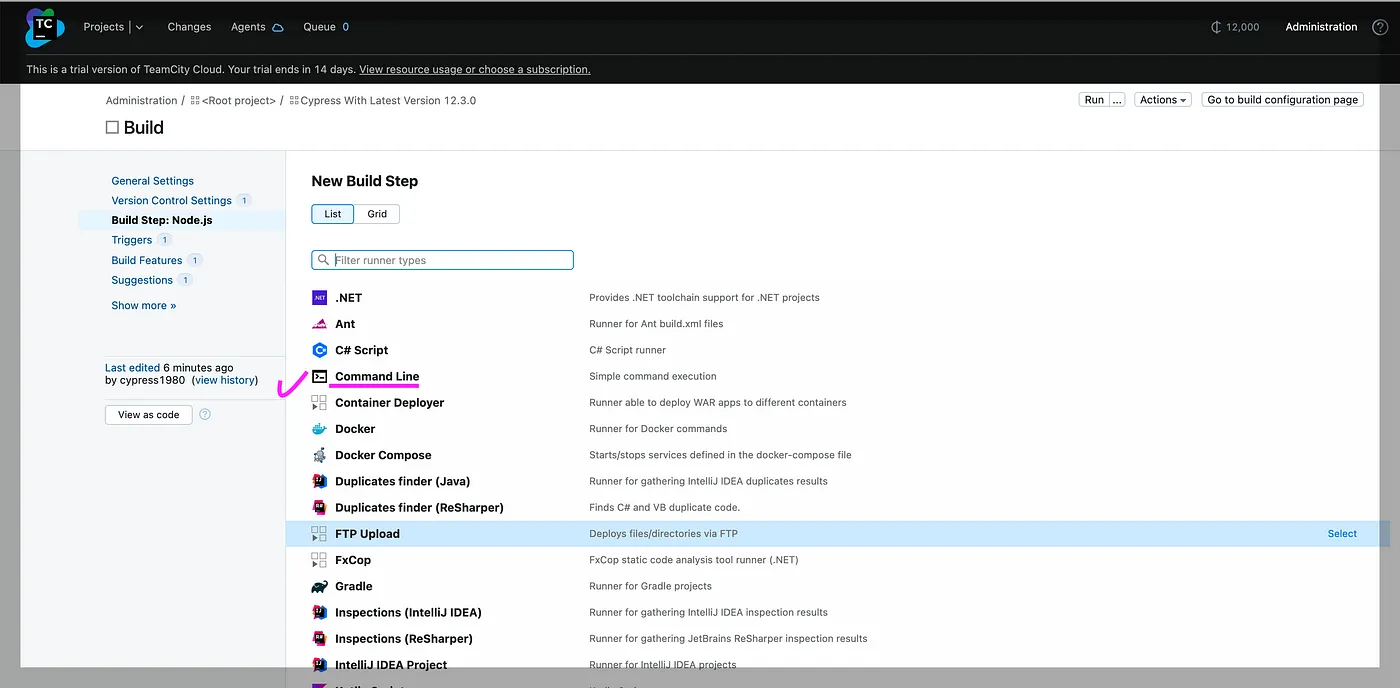
Step 8
Click on “Add build steps” from the above screen. Select “Command Line” as your build step:
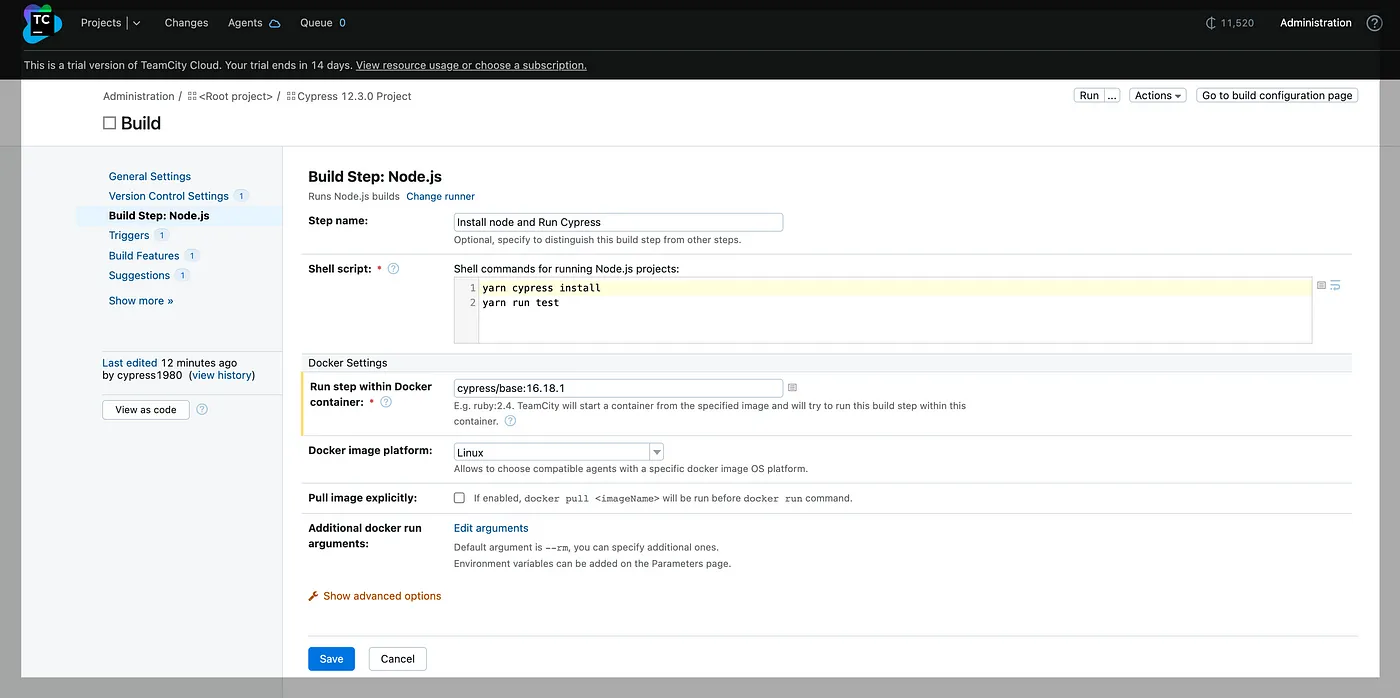
Step 9
Enter the below information in “Shell Script:”
yarn cypress install
yarn run test
Select the Docket Container “cypress/base:16.18.1,” and click the “Save” button:
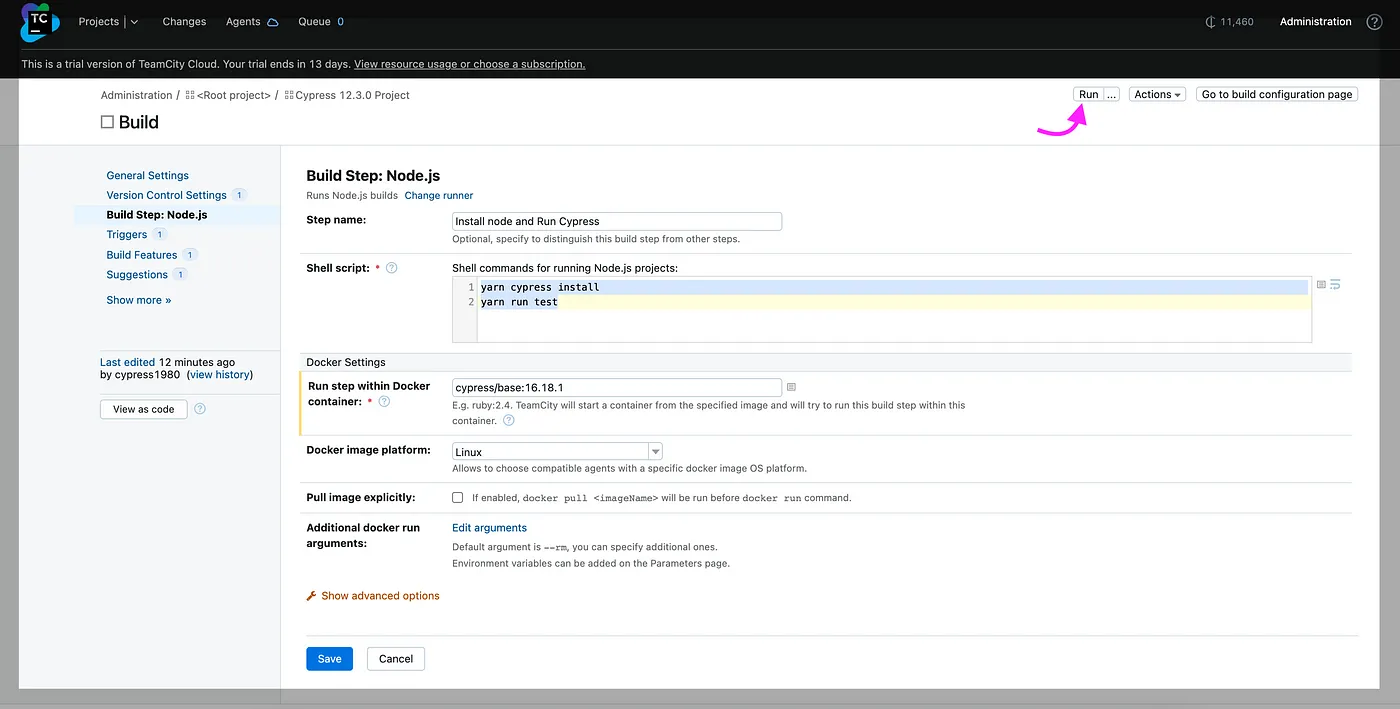
Step 10
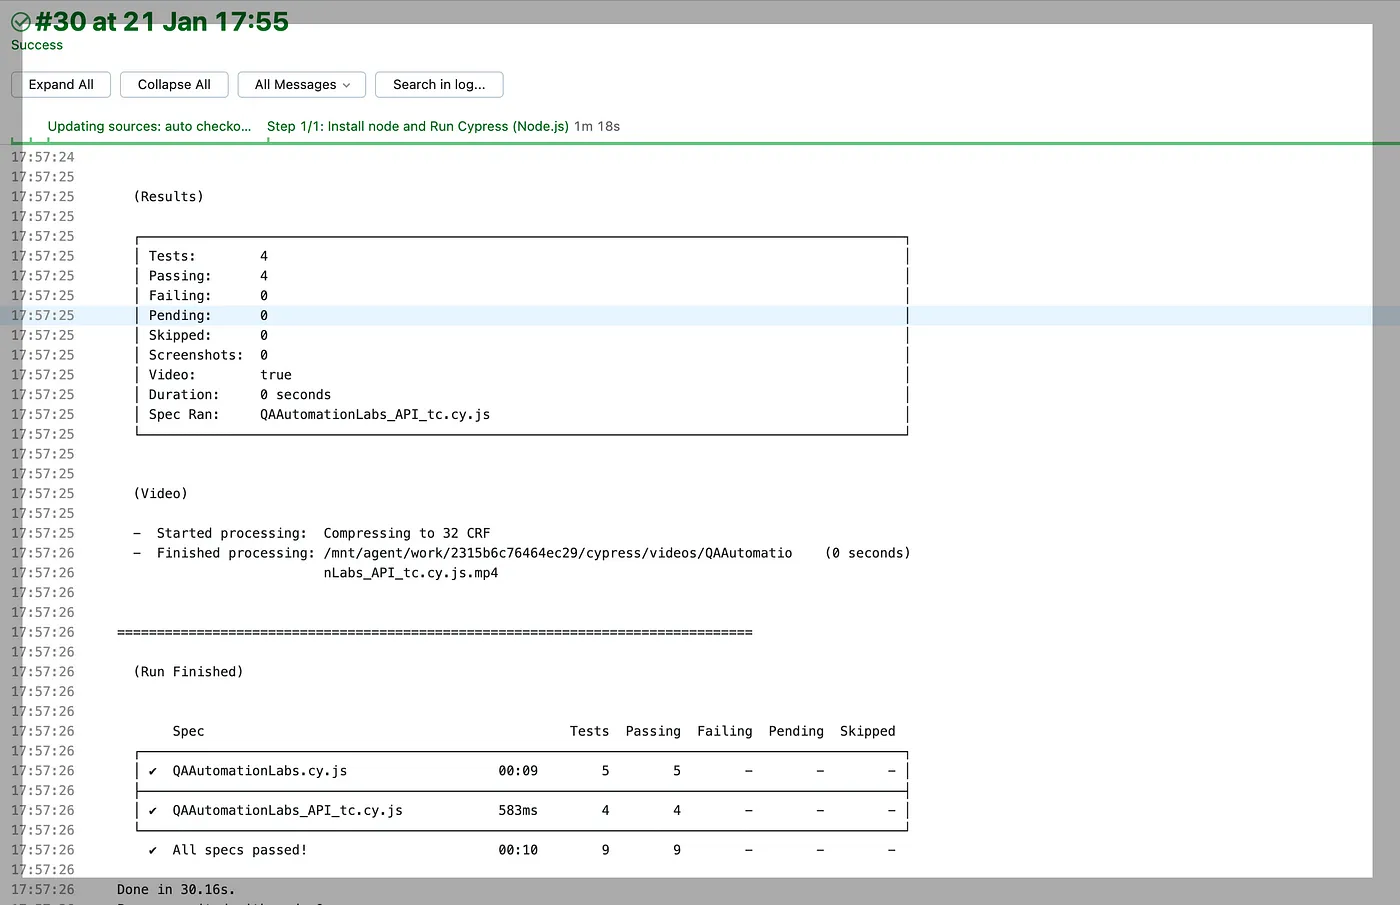
Now, “Run” the build by clicking on the “Run” button:
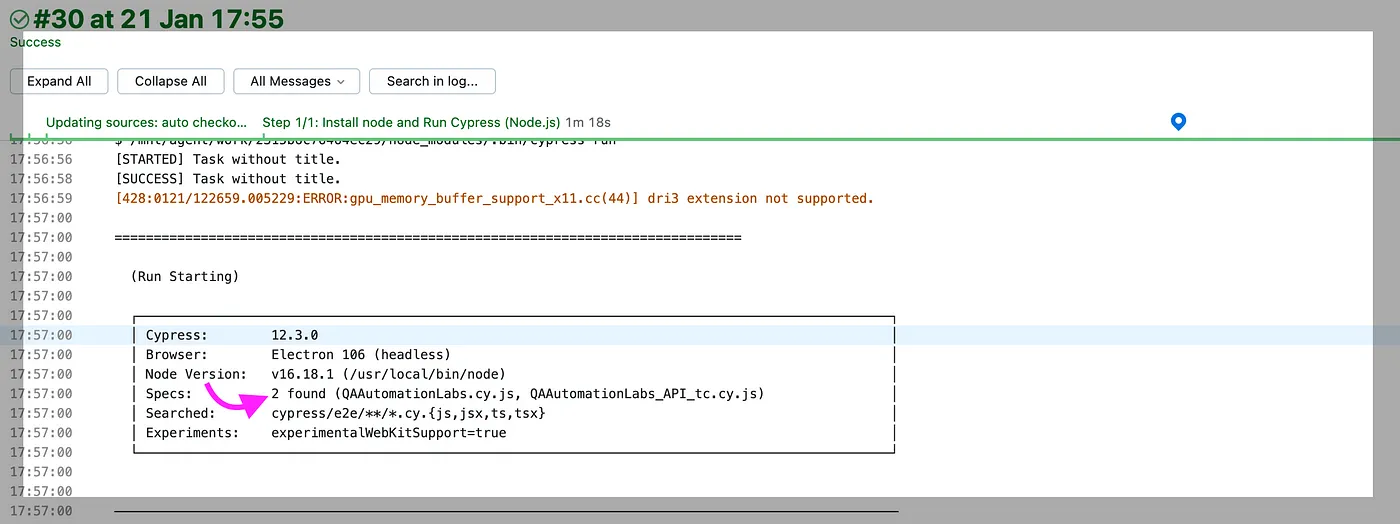
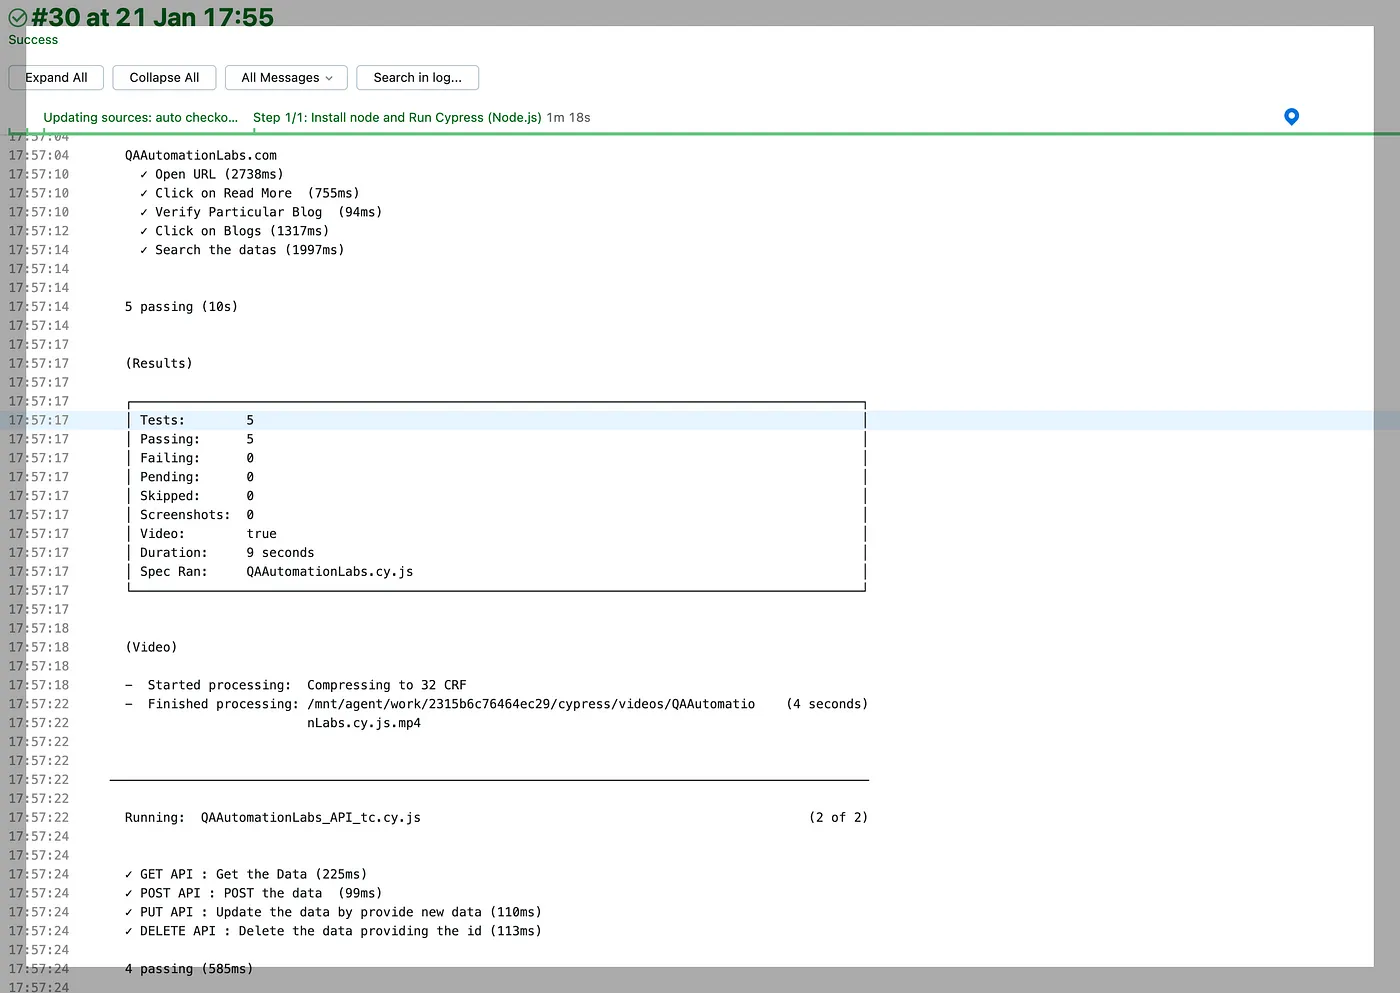
Report
Published at DZone with permission of Kailash Pathak. See the original article here.
Opinions expressed by DZone contributors are their own.
Comments