How to Use Apache Shiro and OAuth 2.0 to Build a Secure Application
This article demonstrates how to use Apache Shiro and OAuth 2.0 to create a secure Maven-based account with Okta.
Join the DZone community and get the full member experience.
Join For FreeFor those unfamiliar, Apache Shiro—a Java Security framework—performs authorization, authentication, and session management (along with many other functions) to help build more secure applications.
This post will show you how to use JAX-RS to build a simple Java REST application. JAX-RS is a set of interfaces so you’ll need to pick your implementation. In this post, we’ll be using Jersey—but you can use whatever implementation you prefer and none of these APIs are Jersey specific.
In OAuth 2.0, REST services are usually resource servers. In simple terms, they authenticate using an access token sent in the Authorization HTTP header, formatted as Authorization: Bearer <access-token>.
For this tutorial you will need:
- Java 8+
- Apache Maven
- A free Okta Account
Create a New JAX-RS project
There are a few ways to create a new Maven-based project. I usually use my IDE, but you can also generate one on the command line. Whichever way you decide, start with a pom.xml file that looks like this:
<project xmlns="http://maven.apache.org/POM/4.0.0"
xmlns:xsi="http://www.w3.org/2001/XMLSchema-instance"
xsi:schemaLocation="http://maven.apache.org/POM/4.0.0 http://maven.apache.org/xsd/maven-4.0.0.xsd">
<modelVersion>4.0.0</modelVersion>
<groupId>com.okta.example</groupId>
<artifactId>okta-shiro-jaxrs-example</artifactId>
<version>1.0-SNAPSHOT</version>
<packaging>war</packaging>
<properties>
<maven.compiler.source>1.8</maven.compiler.source>
<maven.compiler.target>1.8</maven.compiler.target>
<project.build.sourceEncoding>UTF-8</project.build.sourceEncoding>
<project.reporting.outputEncoding>UTF-8</project.reporting.outputEncoding>
</properties>
</project>
Next, add the dependencies:
xxxxxxxxxx
<dependencies>
<dependency>
<groupId>com.okta.shiro</groupId>
<artifactId>okta-shiro-plugin</artifactId>
<version>0.1.0</version>
</dependency>
<dependency>
<groupId>javax.ws.rs</groupId>
<artifactId>javax.ws.rs-api</artifactId>
<version>2.1.1</version>
</dependency>
<dependency>
<groupId>org.apache.shiro</groupId>
<artifactId>shiro-jaxrs</artifactId>
<version>1.5.3</version>
</dependency>
<dependency>
<groupId>org.apache.shiro</groupId>
<artifactId>shiro-servlet-plugin</artifactId>
<version>1.5.3</version>
<scope>runtime</scope>
</dependency>
<!-- logging -->
<dependency>
<groupId>org.slf4j</groupId>
<artifactId>jcl-over-slf4j</artifactId>
<version>1.7.30</version>
<scope>runtime</scope>
</dependency>
<dependency>
<groupId>ch.qos.logback</groupId>
<artifactId>logback-classic</artifactId>
<version>1.2.3</version>
<scope>runtime</scope>
</dependency>
<!-- JAX-RS, runtime only dependencies -->
<dependency>
<groupId>org.glassfish.jersey.containers</groupId>
<artifactId>jersey-container-servlet</artifactId>
<version>2.30.1</version>
<scope>runtime</scope>
</dependency>
<dependency>
<groupId>org.glassfish.jersey.core</groupId>
<artifactId>jersey-server</artifactId>
<version>2.30.1</version>
<scope>runtime</scope>
</dependency>
<dependency>
<groupId>org.glassfish.jersey.inject</groupId>
<artifactId>jersey-hk2</artifactId>
<version>2.30.1</version>
<scope>runtime</scope>
</dependency>
</dependencies>
To make running the WAR file easy, we can add the Jetty Maven Plugin to the pom file:
xxxxxxxxxx
<build>
<plugins>
<plugin>
<groupId>org.eclipse.jetty</groupId>
<artifactId>jetty-maven-plugin</artifactId>
<version>9.4.27.v20200227</version>
<configuration>
<httpConnector>
<port>8000</port>
</httpConnector>
</configuration>
</plugin>
</plugins>
</build>
Create a JAX-RS Endpoint
A JAX-RS application contains at least two parts: the REST resources/endpoints, to serve the requests, and the Application class to hold them all together. The resources are simply Java objects that have annotations mapping an HTTP request to a method.
Create a simple resource that displays the current user’s email address in src/main/java/com/okta/example/shiro/SecureEndpoint.java
xxxxxxxxxx
package com.okta.example.shiro;
import org.apache.shiro.authz.annotation.RequiresAuthentication;
import javax.ws.rs.GET;
import javax.ws.rs.Path;
import javax.ws.rs.Produces;
import javax.ws.rs.core.Context;
import javax.ws.rs.core.SecurityContext;
("/")
({"plain/text"})
public class SecureResource {
public String showUser( SecurityContext securityContext) {
return "Current User: " + securityContext.getUserPrincipal().getName();
}
}
- The base path for all methods in this class
- Keep things simple in this post and just return plain text
- This method will handle HTTP
GETrequestsRequire Authentication! - Inject the current user’s security context
- Get the name from the Java Principal
If you need to get other information out of the access token, cast the user principal to an OktaJwtPrincipal and use the getClaim() method:
xxxxxxxxxx
OktaJwtPrincipal jwtPrincipal = (OktaJwtPrincipal) securityContext;
jwtPrincipal.getClaim("your-claim-key");
Create a JAX-RS Application
A JAX-RS Application class defines the metadata and components associated with an application. Most JAX-RS implementations provide helper classes that scan your resources automatically but, because this example works with any implementation, you’ll configure them directly.
Create a class that extends from Application in src/main/java/com/okta/example/shiro/RestApplication.java:
xxxxxxxxxx
package com.okta.example.shiro;
import org.apache.shiro.web.jaxrs.ShiroFeature;
import javax.ws.rs.ApplicationPath;
import javax.ws.rs.core.Application;
import java.util.HashSet;
import java.util.Set;
("/")
public class RestApplication extends Application {
public Set<Class<?>> getClasses() {
Set<Class<?>> classes = new HashSet<>();
classes.add(ShiroFeature.class);
classes.add(SecureResource.class);
return classes;
}
}
- This application is mounted to /, all resource paths are relative to this one
- Register Apache Shiro's JAX-RS feature
- Add the SecureResource we created in the previous step
Configure Apache Shiro to Use OAuth 2.0
Apache Shiro can be configured in a few different ways: programmatically, using dependency injection with Spring and Guice, or using an "ini" file. To keep things focused, I’ll use a simple shiro.ini file located in src/main/resources:
xxxxxxxxxx
[main]
# Define the Okta realm
oktaJwtRealm = com.okta.shiro.realm.OktaResourceServerRealm
# Configure your issuer
oktaJwtRealm.issuer = https://{yourOktaDomain}/oauth2/default
[urls]
# use the `authcBearer` filter to process Bearer tokens
/** = authcBearer
If you have resources that require anonymous access, use authcBearer[permissive]—just make sure all of your endpoints are annotated correctly!
Add a web.xml
You might be asking yourself, "really, a web.xml file?" Technically you don’t need one—you could instead configure the Maven War Plugin to not require a web.xml.
Or, just add an empty web.xml to src/main/webapp:
xxxxxxxxxx
<web-app xmlns="http://xmlns.jcp.org/xml/ns/javaee"
xmlns:xsi="http://www.w3.org/2001/XMLSchema-instance"
xsi:schemaLocation="http://xmlns.jcp.org/xml/ns/javaee https://xmlns.jcp.org/xml/ns/javaee/web-app_3_1.xsd"
version="3.1">
</web-app>
Run the Secure REST Application
You could build the project with ./mvnw package. Simply grab the war file from the target directory, copy it to your favorite container, and start it up. Instead, we’re going to use the Jetty Maven Plugin. From the project directory, run:
xxxxxxxxxx
./mvnw jetty:run
This command starts a server running on port 8000. Make a request using curl:
xxxxxxxxxx
curl localhost:8000/ -v
xxxxxxxxxx
< HTTP/1.1 401 Unauthorized
< Date: Thu, 09 Apr 2020 17:50:49 GMT
< WWW-Authenticate: Bearer realm="application"
< Content-Length: 0
< Server: Jetty(9.4.27.v20200227)
The server returned a 401 status code because we did not provide an access token. There are a few ways to get an access token; which option is right for you depends on where and how you access your REST application. Usually, the application that is invoking your REST API already has an access token. For example, a SPA mobile app, or another web app likely already has an authenticated user. For testing purposes, we will set up the OIDC Debugger.
Create an OAuth 2.0 Application
Login in to your Okta admin console. If you just created a new Okta account and have not logged in yet, follow the activation link in your inbox.
Make a note of the Org URL on the top right; I’ll refer to this as {yourOktaDomain} in the next section.
Once you are logged in, select Applications → Add Application from the top menu. Then, select Web → Next.
Give your application a name, something clever like: "Shiro JAX-RS Example."
Set the Login redirect URIs to https://oidcdebugger.com/debug
Check Implicit (Hybrid)
Click Done
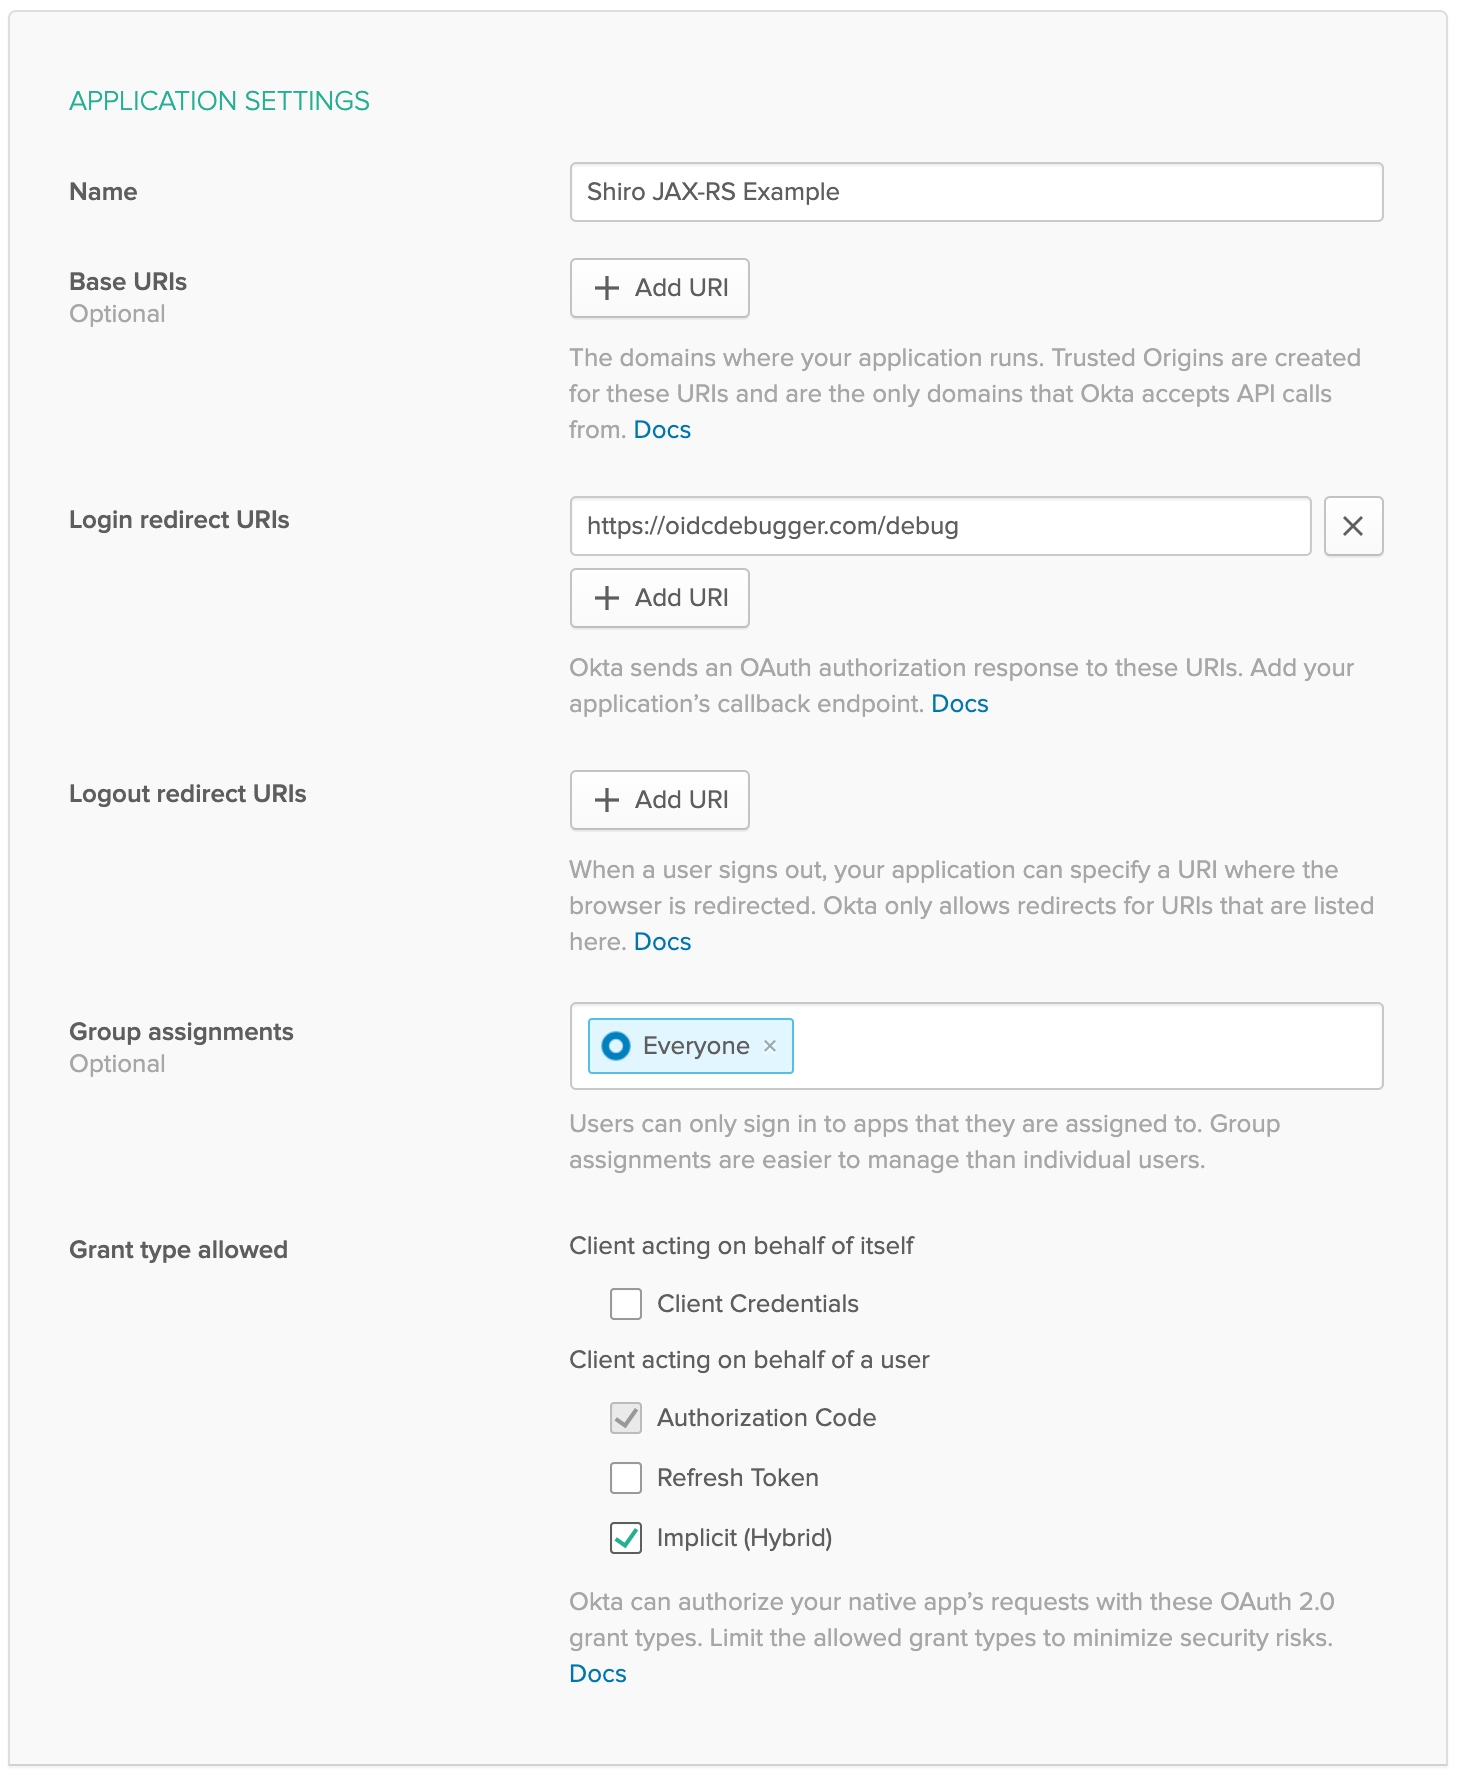 Make note of the Client ID, you will need this for the next step.
Get a Token with the OIDC Debugger
Head over to https://oidcdebugger.com/ and populate the form with the following values:
Authorize URI -
{yourOktaDomain}/oauth2/default/v1/authorizeClient ID -
{yourClientID}from the previous stepState -
this is a test(this can be any value)Response type - select token
Use defaults for all other fields
Press the Send Request button.
If you are using an incognito/private browser, this may prompt you to login again. Once the Success page loads, copy the Access token and create an environment variable:
xxxxxxxxxx
export TOKEN=" <your-access-token-here>"
Now that you have a token, you can make another request to your JAX-RS server:
xxxxxxxxxx
curl localhost:8000/ -H "Authorization: Bearer $TOKEN"
Current User: <your-email-address>
And just like that, you have made an authenticated request to your JAX-RS application!
Learn More About Secure Applications
In this tutorial, I’ve shown you how to secure a simple JAX-RS application with Apache Shiro and Okta. This same resource server technique can be used with other servlet based web applications too.
Check out these related blog posts to learn more about building secure web applications.
If you like this blog post and want to see more like it, follow @oktadev on Twitter, subscribe to our YouTube channel, or follow us on LinkedIn. As always, please leave a comment below if you have any questions.
Published at DZone with permission of Brian Demers. See the original article here.
Opinions expressed by DZone contributors are their own.
Comments