

How to Write ETL Operations in Python
Clean and transform raw data into an ingestible format using Python.
 ·
·
Join the DZone community and get the full member experience.
Join For FreeIn this article, you’ll learn how to work with Excel/CSV files in a Python environment to clean and transform raw data into a more ingestible format. This is typically useful for data integration.
This example will touch on many common ETL operations such as filter, reduce, explode, and flatten.
Notes
The code for these examples is available publicly on GitHub here, along with descriptions that mirror the information I'll walk you through.
These samples rely on two open source Python packages:
- pandas: a widely used open-source data analysis and manipulation tool. More info on their site and PyPi.
- gluestick: a small open source Python package containing util functions for ETL maintained by the hotglue team. More info on PyPi and GitHub.
Without further ado, let's dive in!
Introduction
This example leverages sample Quickbooks data from the Quickbooks Sandbox environment, and was initially created in a hotglue environment — a light-weight data integration tool for startups.
Feel free to follow along with the Jupyter Notebook on GitHub!
Step 1: Read the Data
Let's start by reading the data.
This example is built on a hotglue environment with data coming from Quickbooks. In hotglue, the data is placed in the local sync-output folder in a CSV format. We will use the gluestick package to read the raw data in the input folder into a dictionary of pandas dataframes using the read_csv_folder function.
By specifying index_cols={'Invoice': 'DocNumber'} the Invoices dataframe will use the DocNumber column as an index. By specifying converters, we can use ast to parse the JSON data in the Line and CustomField columns.
x
import ast
import gluestick as gs
import pandas as pd
# standard directory for hotglue
ROOT_DIR = "./sync-output"
# Read input data
input_data = gs.read_csv_folder(ROOT_DIR,
index_cols={'Invoice': 'DocNumber'},
converters={
'Invoice': {
'Line': ast.literal_eval,
'CustomField': ast.literal_eval,
'Categories': ast.literal_eval
}
}
)
Take a Peek
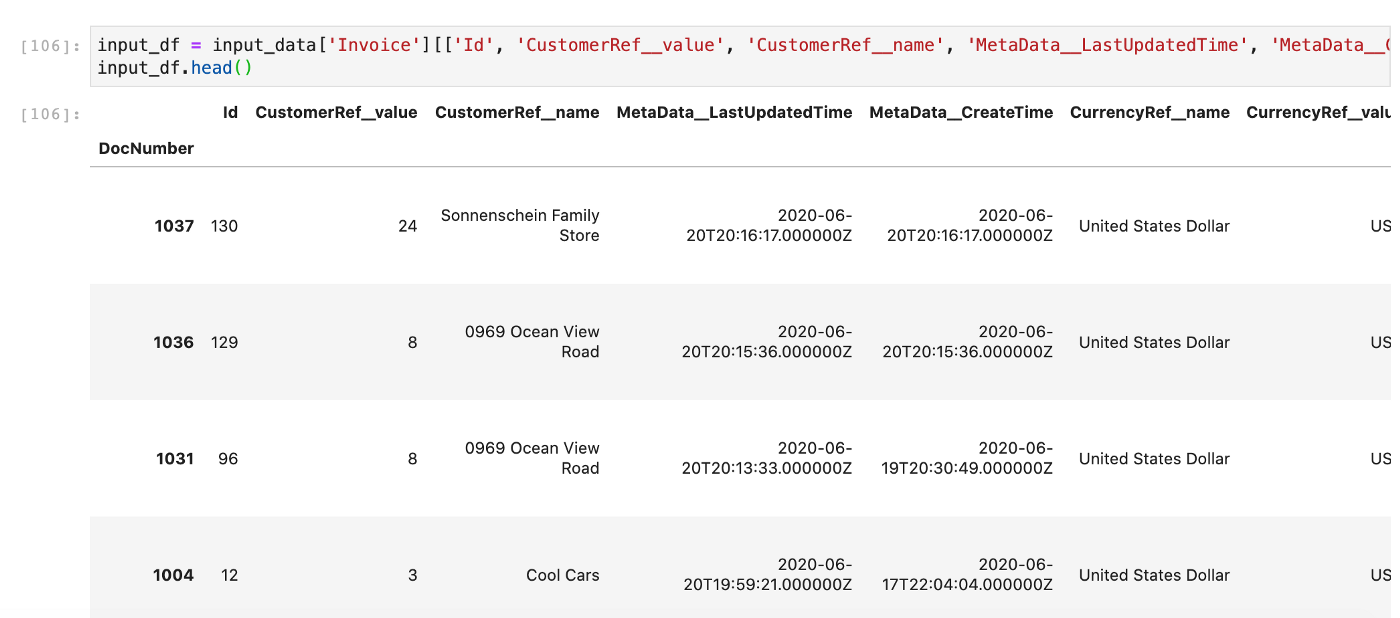
Let's take a look at what data we're working with. For simplicity, I've selected the columns I'd like to work with and saved it to input_df. Typically, in hotglue, you can configure this using a field map, but I've done it manually here.
xxxxxxxxxx
input_df = input_data['Invoice'][['Id', 'CustomerRef__value', 'CustomerRef__name', 'MetaData__LastUpdatedTime', 'MetaData__CreateTime', 'CurrencyRef__name', 'CurrencyRef__value', 'Line', 'CustomField']]
Step 2: Rename Columns
Let's clean up the data by renaming the columns to more readable names.
CustomerRef__value -> CustomerId
CustomerRef__name -> Customer
MetaData_LastUpdatedTime -> LastUpdated
MetaData_CreateTime -> CreatedOn
CurrencyRef__name -> Currency
CurrencyRef__value -> CurrencyCode
xxxxxxxxxx
# Let's clean up the names of these columns
invoices = input_df.pipe(lambda x: x.rename(columns={'CustomerRef__value': 'CustomerId', 'CustomerRef__name': 'Customer',
'MetaData__LastUpdatedTime': 'LastUpdated',
'MetaData__CreateTime': 'CreatedOn', 'CurrencyRef__name': 'Currency',
'CurrencyRef__value': 'CurrencyCode'}))
invoices.head()

Step 3: Extract Information
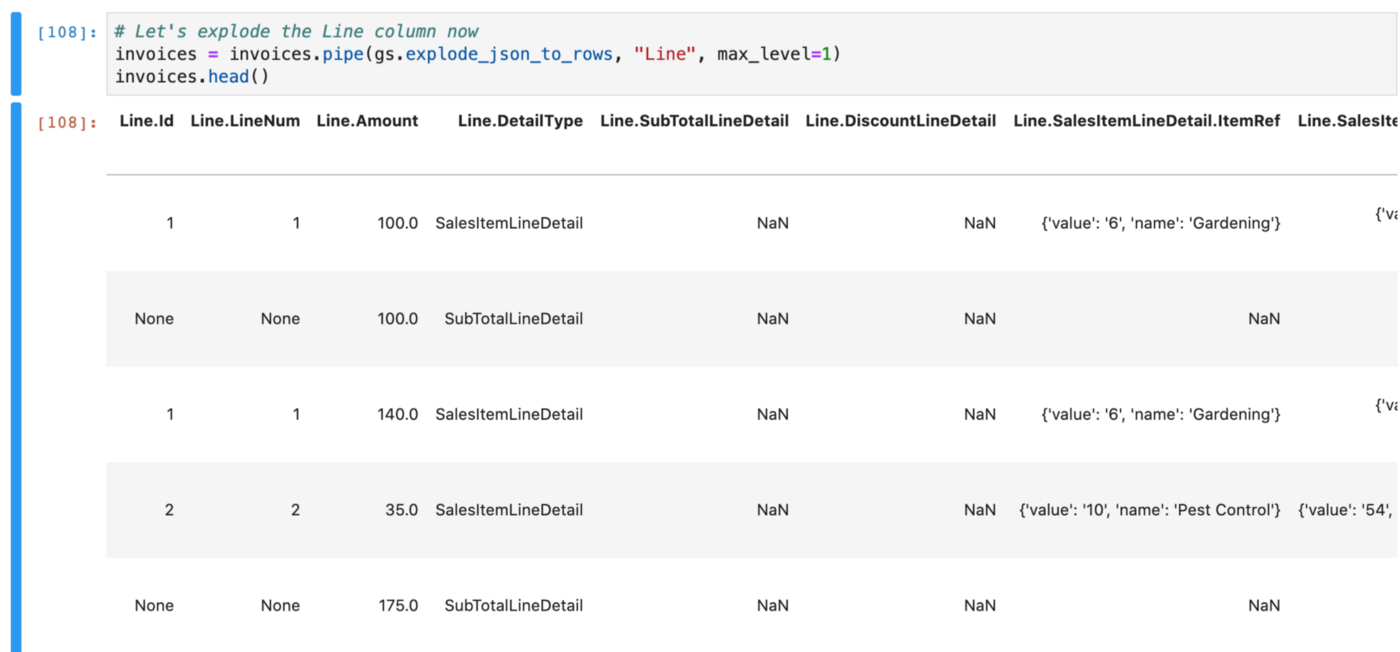
The Line column is actually a serialized JSON object provided by Quickbooks with several useful elements in it. We'll need to start by flattening the JSON and then exploding into unique columns so we can work with the data.
Again, we'll use the gluestick package to accomplish this. The explode_json_to_rows function handles the flattening and exploding in one step. To avoid exploding too many levels of this object, we'll specify max_level=1.
Here is a snippet from one to give you an idea.
xxxxxxxxxx
[{
'Id': '1',
'LineNum': '1',
'Amount': 275.0,
'DetailType': 'SalesItemLineDetail',
'SalesItemLineDetail': {
'ItemRef': {
'value': '5',
'name': 'Rock Fountain'
},
'ItemAccountRef': {
'value': '79',
'name': 'Sales of Product Income'
},
'TaxCodeRef': {
'value': 'TAX',
'name': None
}
},
'SubTotalLineDetail': None,
'DiscountLineDetail': None
}]
x
# Let's explode the Line column now
invoices = invoices.pipe(gs.explode_json_to_rows, "Line", max_level=1)
invoices.head()
Step 4: Filter Rows
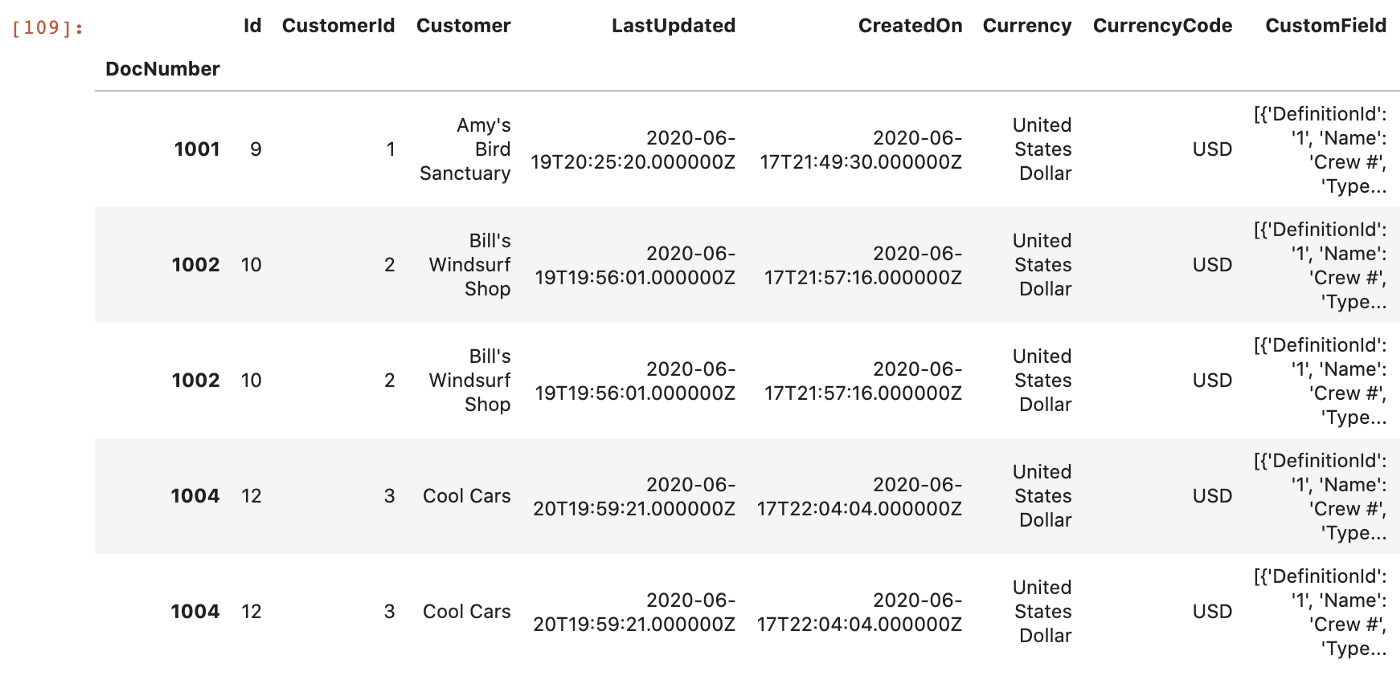
For our purposes, we only want to work with rows with a Line.DetailType of SalesItemLineDetail (we dont need sub-total lines). This is a common ETL operation known as filtering and is accomplished easily with pandas:
x
# We filter for only SalesItemLineDetail
invoices = invoices.pipe(lambda x: x[x['Line.DetailType'] == 'SalesItemLineDetail'])
invoices.head()
Step 5: More Exploding
Look at some of the entries from the Line column we exploded. You'll notice they are name value pairs in JSON.
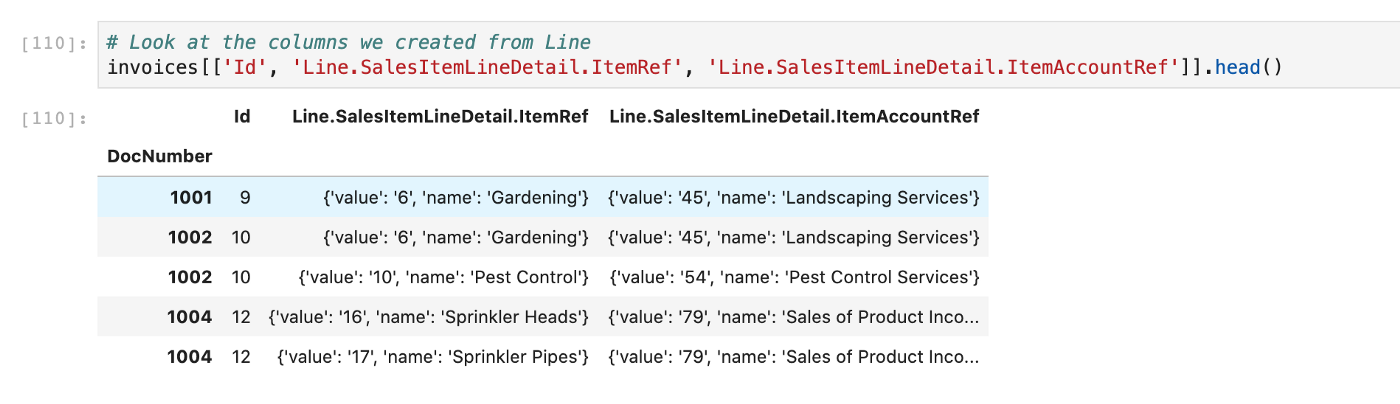
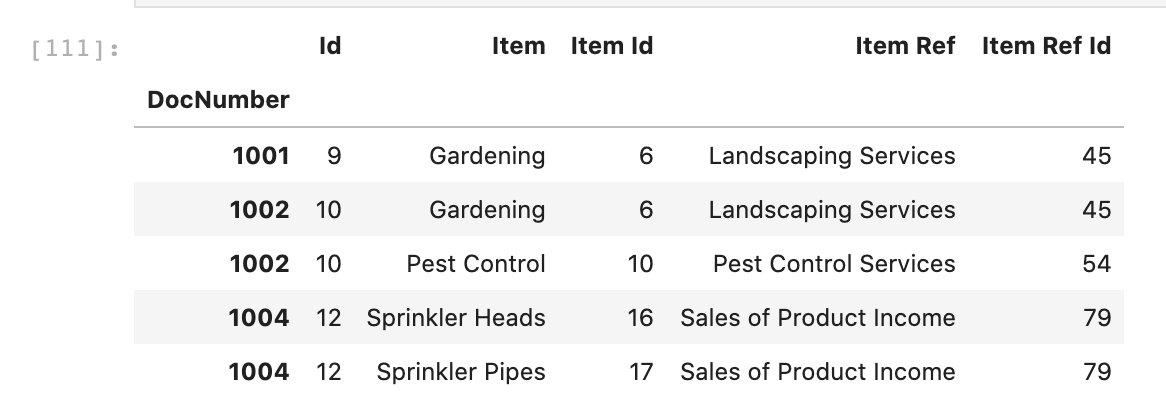
Let's use gluestick again to explode these into new columns via the json_tuple_to_cols function. We'll need to specify lookup_keys — in our case, the key_prop=name and value_prop=value.
x
# Specify lookup keys
qb_lookup_keys = {'key_prop': 'name', 'value_prop': 'value'}
# Explode these into new columns
invoices = (invoices.pipe(gs.json_tuple_to_cols, 'Line.SalesItemLineDetail.ItemRef',
col_config={'cols': {'key_prop': 'Item', 'value_prop': 'Item Id'},
'look_up': qb_lookup_keys})
.pipe(gs.json_tuple_to_cols, 'Line.SalesItemLineDetail.ItemAccountRef',
col_config={'cols': {'key_prop': 'Item Ref', 'value_prop': 'Item Ref Id'},
'look_up': qb_lookup_keys}))
invoices[['Id', 'Item', 'Item Id', 'Item Ref', 'Item Ref Id']].head()
Step 6: Some More Exploding
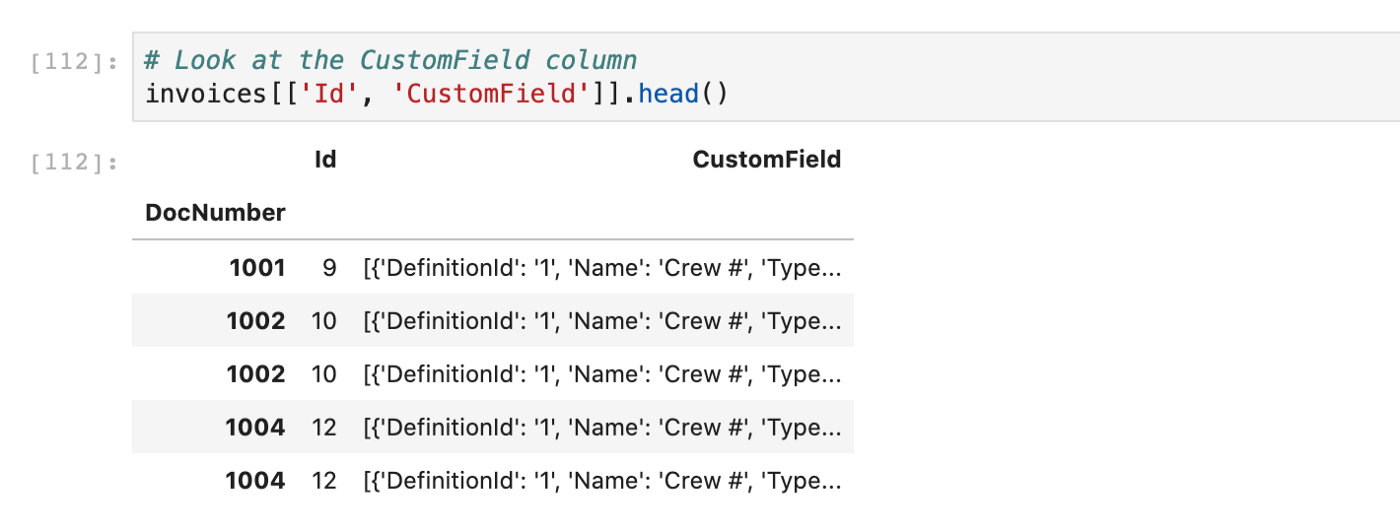
Take a look at the CustomField column. Below is an example of an entry:
xxxxxxxxxx
[{'DefinitionId': '1', 'Name': 'Crew #', 'Type': 'StringType', 'StringValue': '102'}]
You can see this is JSON encoded data, specifying one custom field: Crew # with value 102
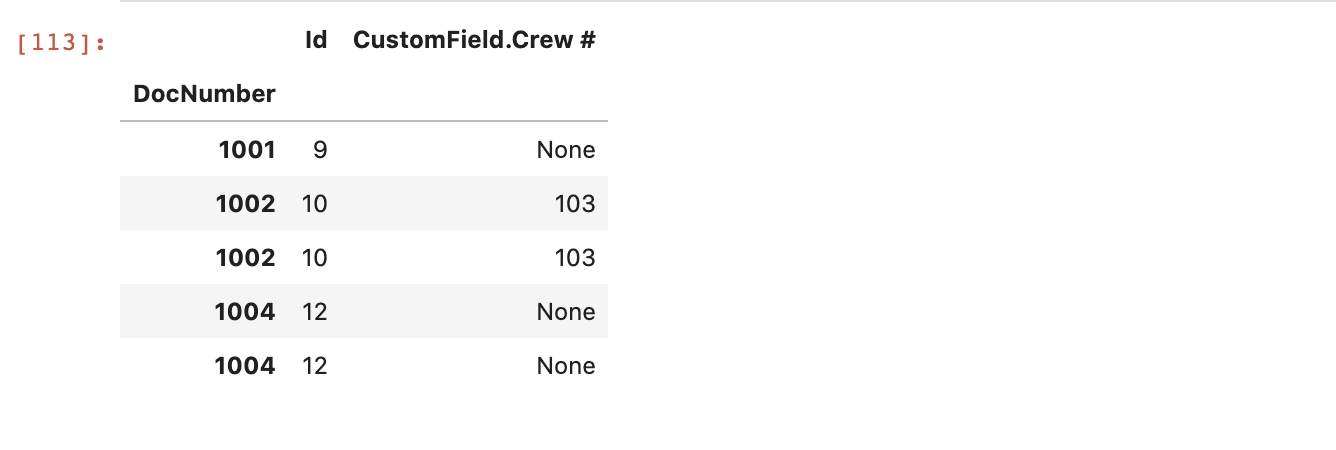
To explode this, we'll need to reduce this as we only care about the Name and StringValue. We can use gluestick's explode_json_to_cols function with an array_to_dict_reducer to accomplish this.
xxxxxxxxxx
# Grab the string value of entries
invoices = invoices.pipe(gs.explode_json_to_cols, 'CustomField', reducer=gs.array_to_dict_reducer('Name', 'StringValue'))
invoices[['Id', 'CustomField.Crew #']].head()
Conclusion
Our final data looks something like below. In this sample, we went through several basic ETL operations using a real-world example all with basic Python tools.

Feel free to check out the open source hotglue recipes for more samples in the future. Thanks for reading!
Published at DZone with permission of Hassan Syyid. See the original article here.
Opinions expressed by DZone contributors are their own.
Comments