How Use and Deploy Vite With React
Simple Tutorial about project with Vite with React and deploy this project
Join the DZone community and get the full member experience.
Join For FreeIn this article, we will look at how to make a simple project using Vite and React. As a bonus, I will show you how to deploy our project.
First, let's create a folder for our project and start creating a project using Vite and its templates.
mkdir ViteProject
cd ViteProject
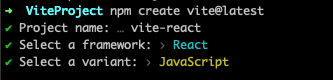
npm create vite@latestVite will prompt us to choose the name of our project, the template under which it will make it, and the compiler with which it will work. For our example, I chose the following options:
That's all, our project is created!
Let's study the structure of the created project:

- node_modules - respectively modules used in our project
- public - directory with media files we use
- src - directory with the project code, where we will add our code and components
- .gitignore - file to describe ignored files for git
- index.html - HTML file where our React application is mounted
- package-lock.json - a file for describing installed dependencies
- package.json - a file for describing the project and dependencies, script commands and other things
vite.config.json- default vite config file
Let's run our project and see what we have now.
Run the command in the terminal
npm run dev
In the terminal, we will see
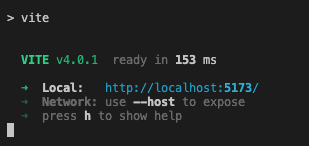
In this image, we are told how much Vite has collected for our project and at what address we can open it.
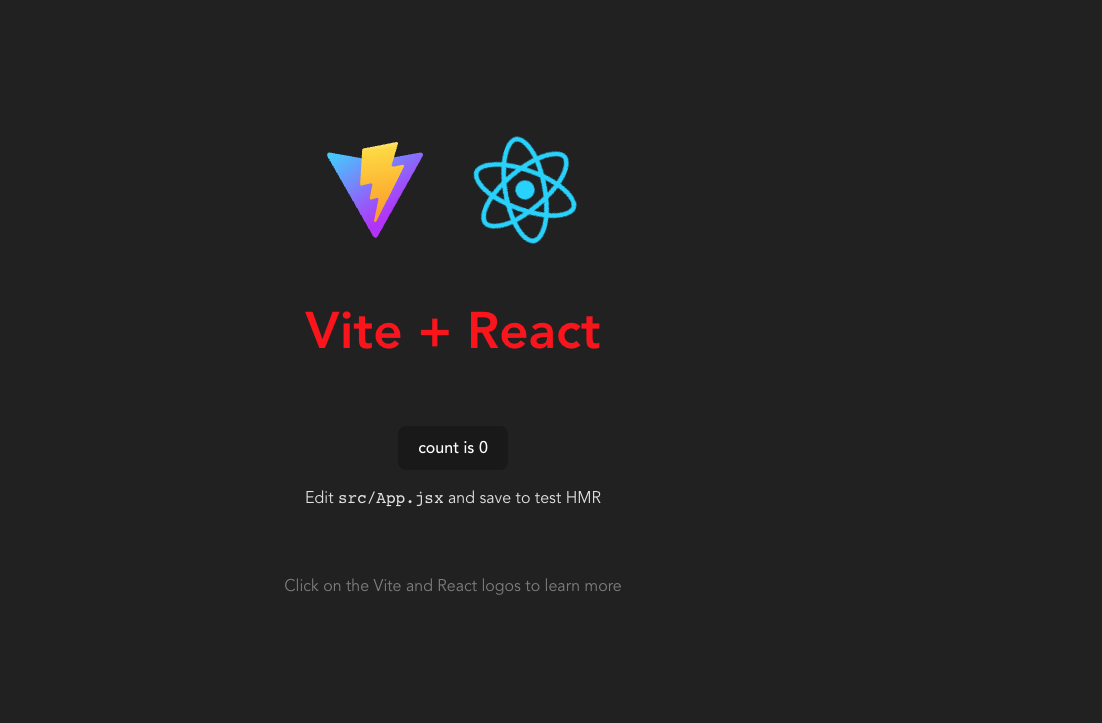
After opening the address http://localhost:5173/ we will see the standard Vite template for React, namely:

Yeah! our project is created and launched and we can further develop it!
Let's take a look at the Vite configuration and see how it's done.
import { defineConfig } from 'vite'
import react from '@vitejs/plugin-react'

// https://vitejs.dev/config/
export default defineConfig({
  plugins: [react()],
})
We see that it is quite simple, and does not look like a similar webpack configuration. In this case, the Vite plugin for React is used, which uses esbuild and babel. You can read more detailed information about this plugin on the page of this plugin.
Support for Sass and Tailwind
With Vite, we can easily use Sass and Tailwind as they are supported out of the box!
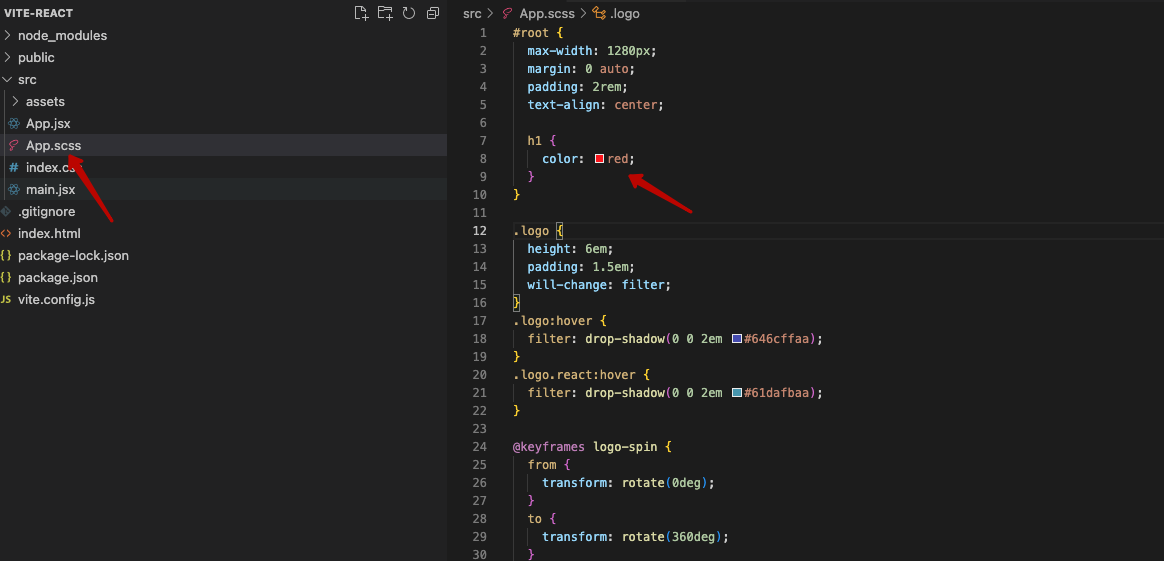
I renamed the App.css file to App.scss and added an inline style for the h1.
But so far, after rebooting, we get this error
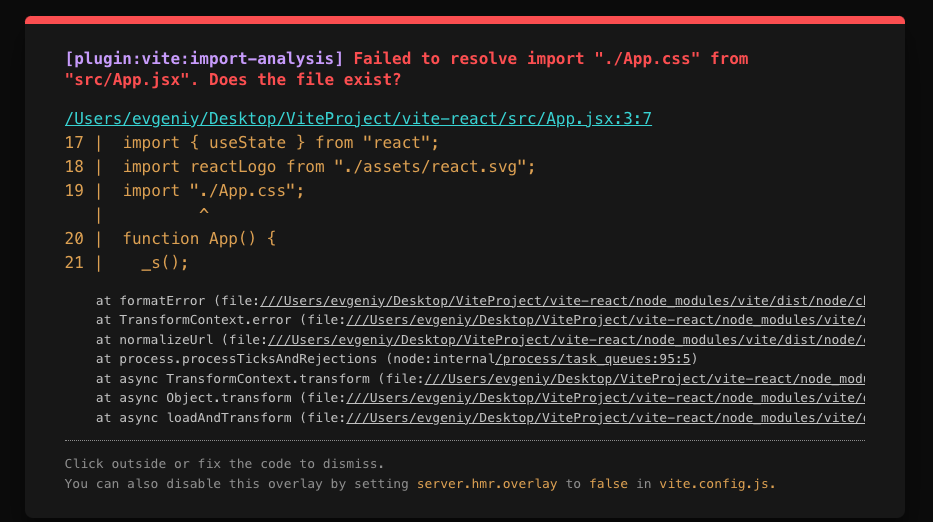
This is because we didn't install sass in our dependencies.
We need to execute this command
npm install sass --save-dev
And after that, we see that the style has been applied to our h1 tag!
As for Tailwind, we also need to go through only the installation of Tailwind itself, namely:
- instal tailwind css -
npm install -D tailwindcss postcss autoprefixernpxtailwindcss init -p - Configure your template paths - in file
tailwind.config.cjs
/** @type {import('tailwindcss').Config} */
module.exports = {
  content: [
    "./index.html",
    "./src/**/*.{js,ts,jsx,tsx}",
  ],
  theme: {
    extend: {},
  },
  plugins: [],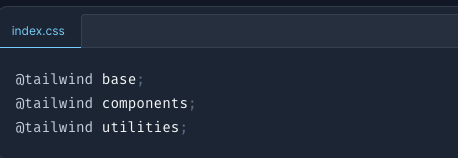
}- Add in index.css tailwind directives
![tailwind directives]()
That's all you need to use Tailwind!
Deploy
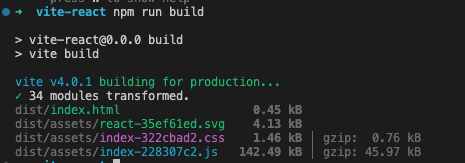
In order to deploy our site, you first need to build it.
This is done with the command
npm run build
The result of the Vite build is added to the dist directory
For subsequent testing of the built site, we can use the command
npm run preview
For deployment, we need to install Vercel CLI
npm i -g vercel
and run command
vercel
You will be asked to log in and asked a series of questions about your project and that's it!
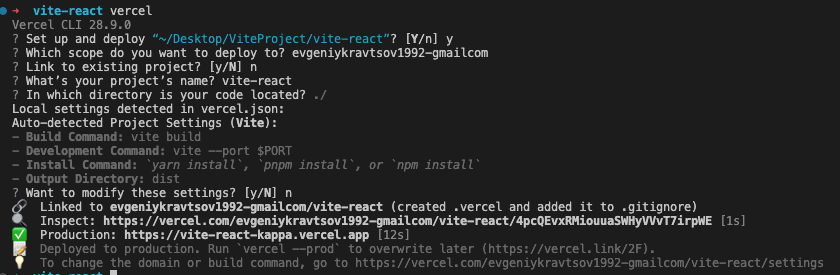
Our project - Vite React Vercel App
Conclusion
In conclusion, I would like to say that in this article we have analyzed a simple way to create a project, its configuration and deployment. This is just an overview article on the topic. Hope it helps you and teaches you something!
Opinions expressed by DZone contributors are their own.
Comments