How To Write a NetBeans Plugin
Join the DZone community and get the full member experience.
Join For FreeWant to add a feature or automate something in your NetBeans IDE? Follow along as we write your first plugin for NetBeans.
Let's go beyond the simple Toolbar Example and create a plugin which can auto-update itself. This code is based on the WakaTime plugin for NetBeans. Our example plugin will simply print a Hello World statement and update to new versions if available... just enough to get you started.
Create a New Plugin Project
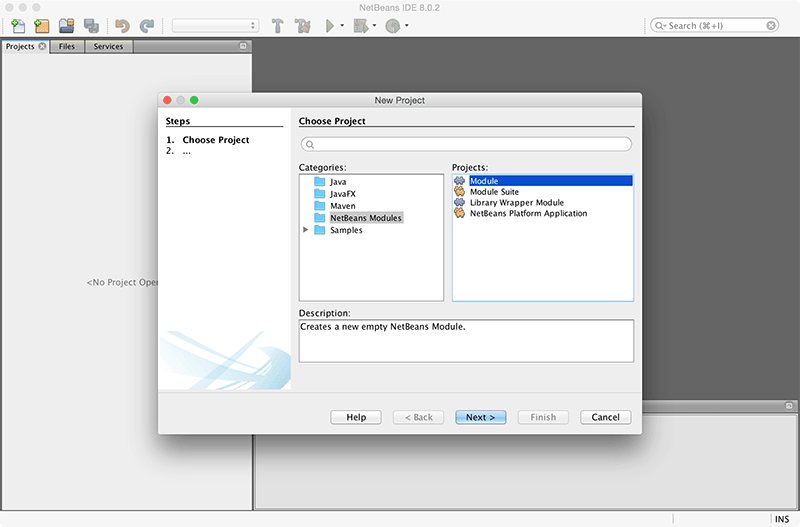
Choose File -> New Project then NetBeans Modules -> Module as the project type.
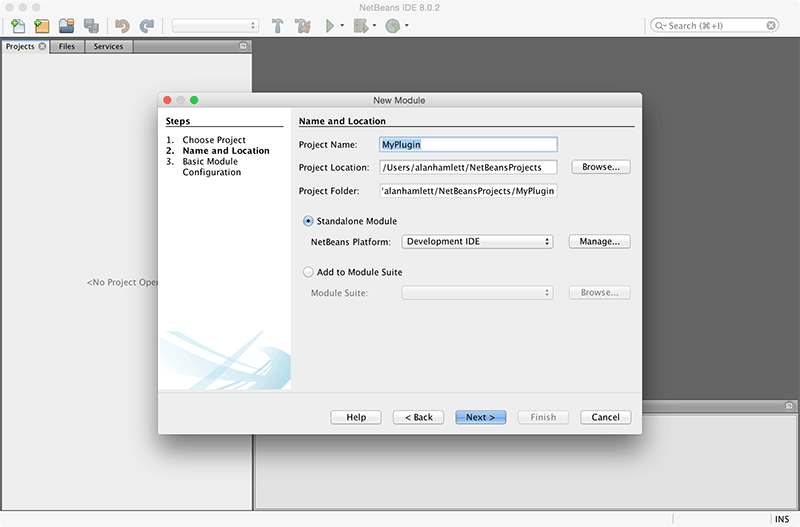
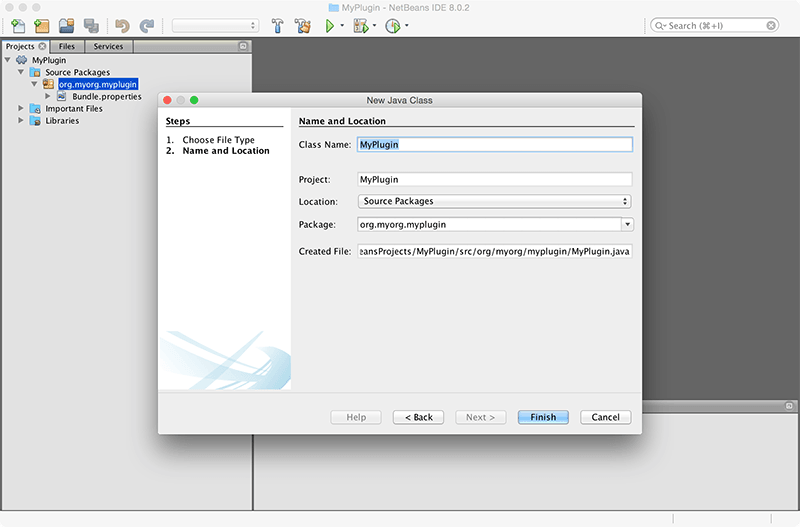
Name your project
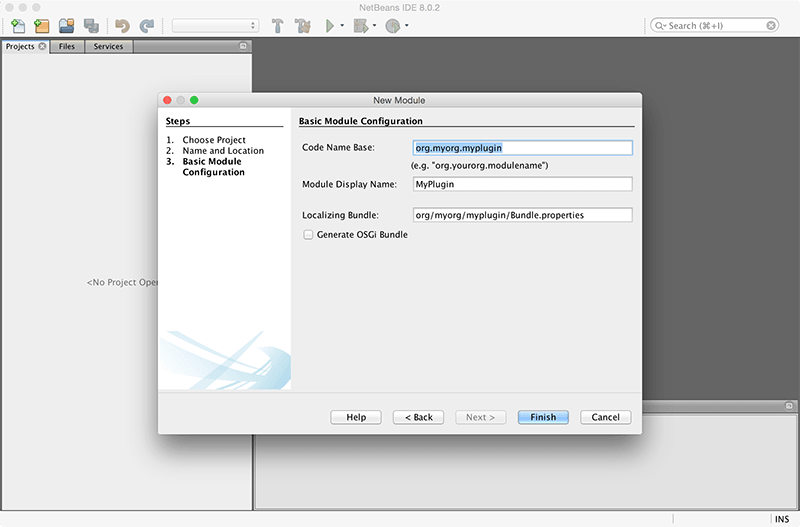
Choose a namespace or code name for your plugin
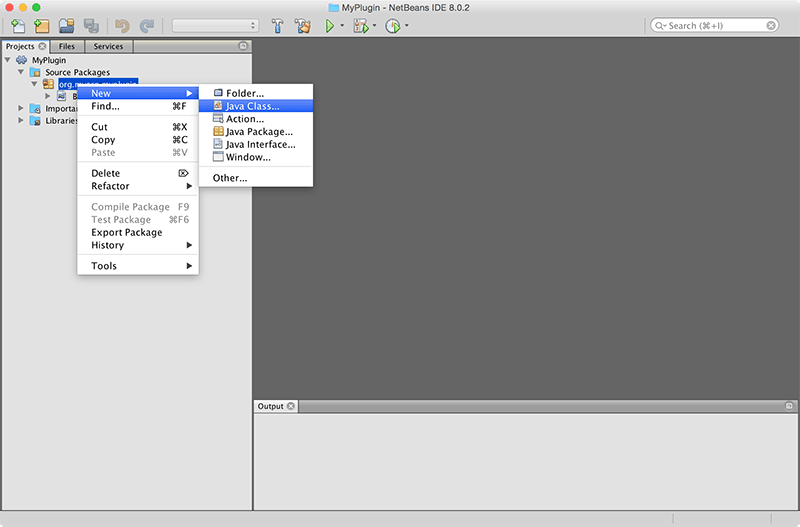
Add a Java File
Plugin Starting Point
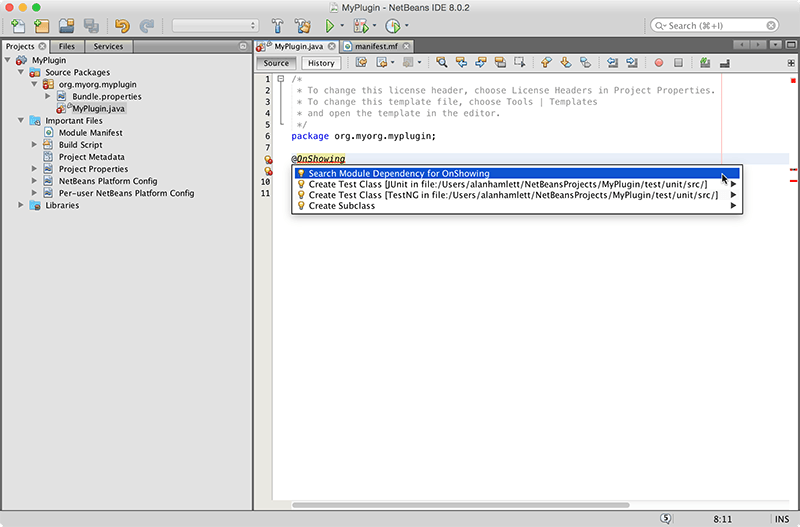
After creating the new Java Class file, make it extend ModuleInstall and wrap it with @OnShowing so it only runs after the GUI has loaded.
@OnShowing
public class MyPlugin extends ModuleInstall implements Runnable {
}
Press ALT + ENTER with your cursor over OnShowing then select Search Module Dependency for OnShowing to import the Window System API into the project. This will add a new dependency to your project as well as add the necessary import statements to the top of your file. Also do this for ModuleInstall.
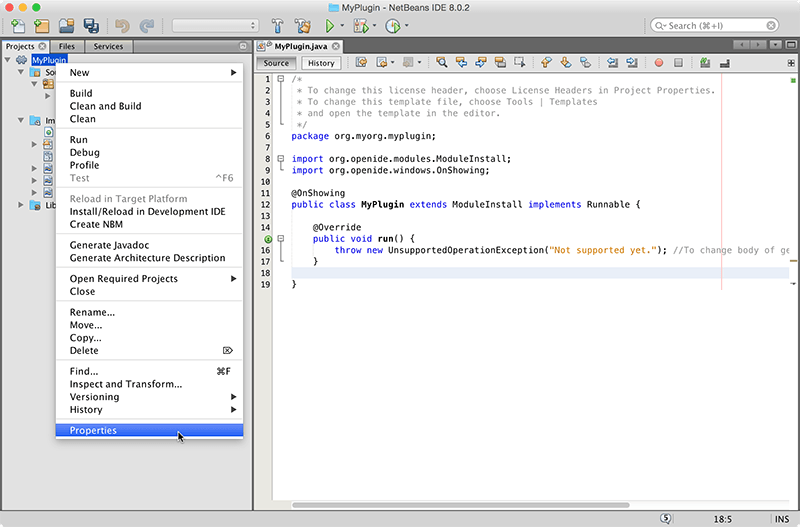
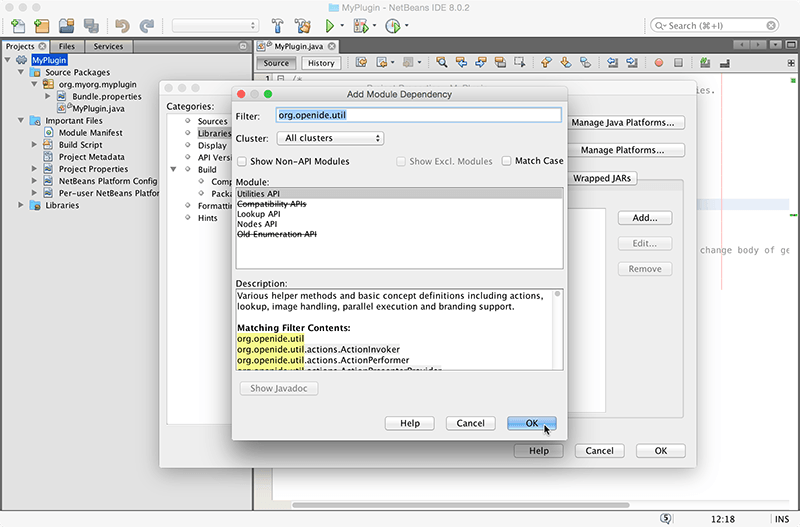
Sometimes NetBeans misses the org.openide.util dependency, so you might have to add that one manually. To do that, right click on MyPlugin then select Properties.
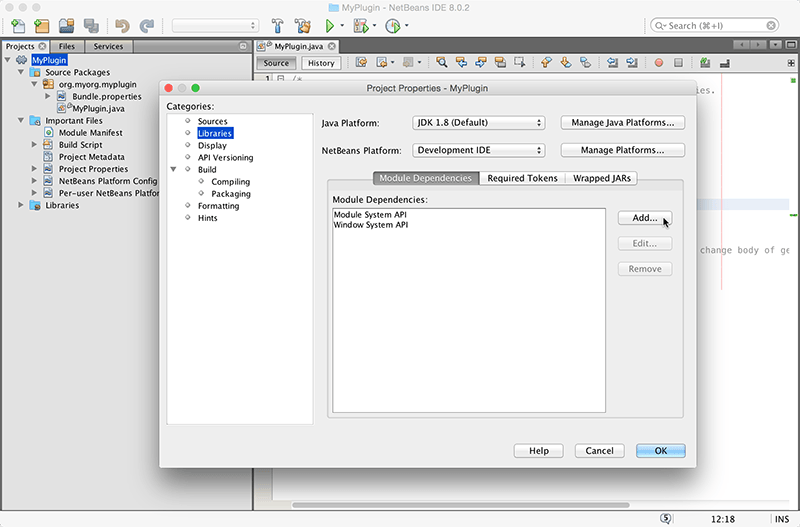
Choose category Libraries then click Add.... Type org.openide.util then click OK. This will add the dependency to your project.xml file.
Press ALT + ENTER on your MyPlugin class, then choose Implement all abstract methods.
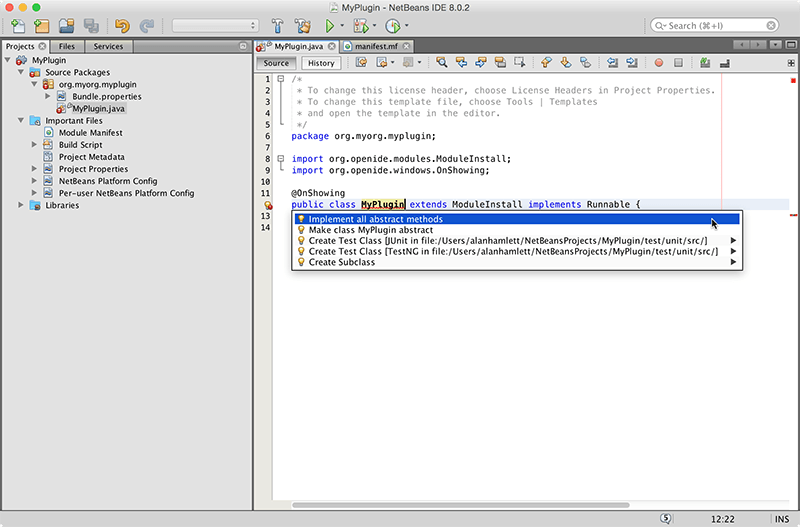
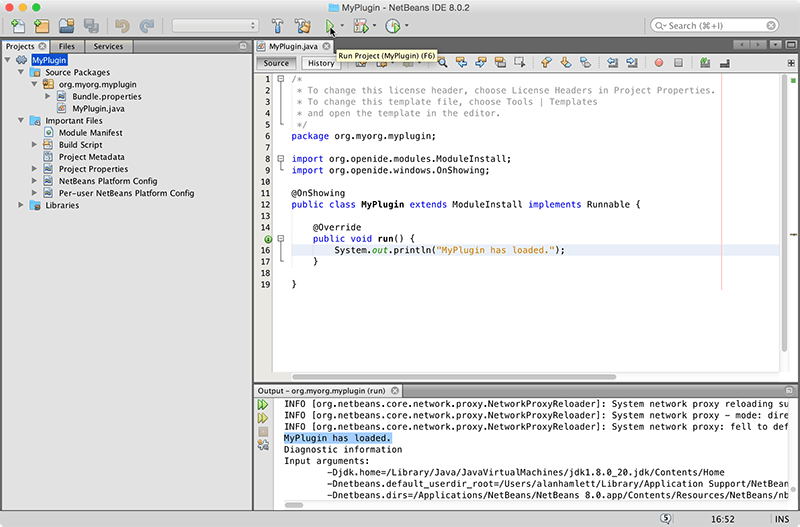
Now the run() method will execute after your plugin has loaded.
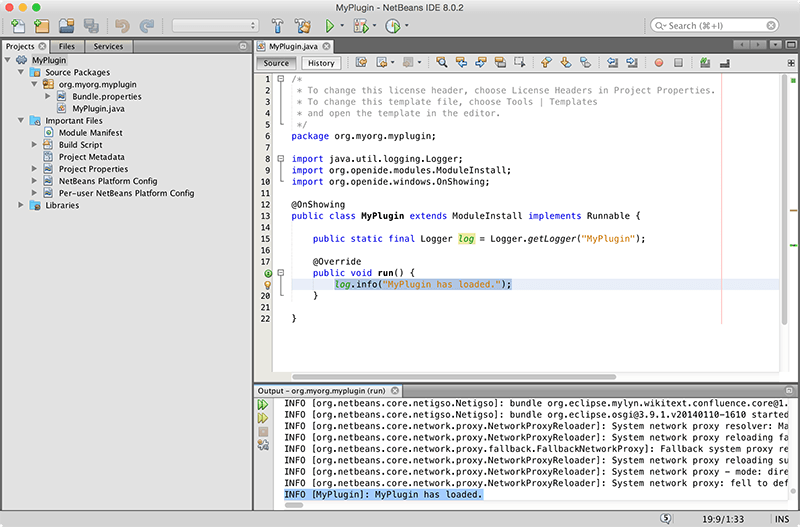
Logging
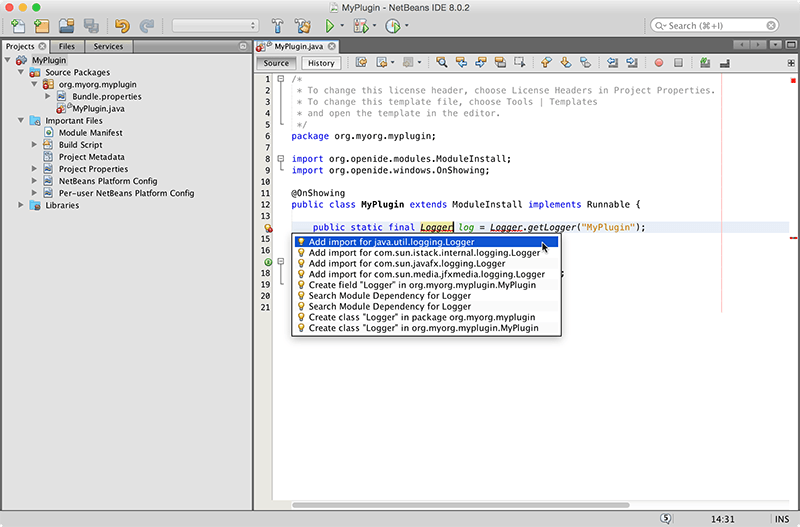
Let's make that println output to the NetBeans IDE log. First, setup the logger as an attribute of yourMyPlugin class.
public static final Logger log = Logger.getLogger("MyPlugin");
Press ALT + ENTER to import java.util.logging.Logger.
Replace println with log.info("MyPlugin has loaded.");.
Updating Your Plugin Automatically
Create a new Java file UpdateHandler.java inside your MyPlugin package.
Replace the contents of this file with UpdateHandler.java. Search the module dependency and add any missing dependencies by pressing ALT + ENTER over each import statement.
Add these lines to your manifest.mf file.
OpenIDE-Module-Layer: org/myorg/myplugin/layer.xml
OpenIDE-Module-Implementation-Version: 201501010101
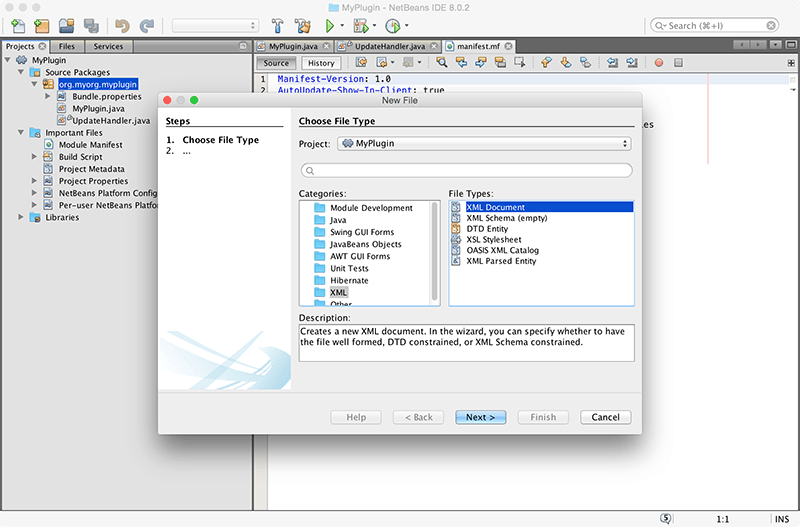
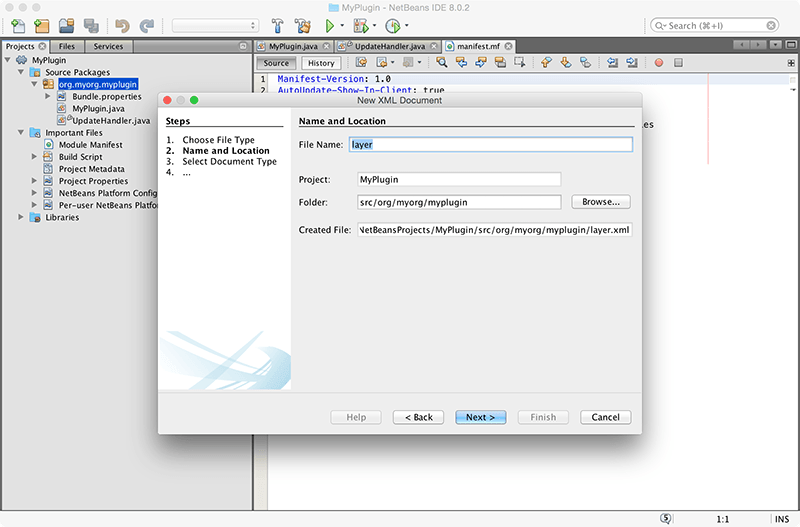
Create a new XML document in your MyPlugin package.
<?xml version="1.0" encoding="UTF-8"?>
<!DOCTYPE filesystem PUBLIC "-//NetBeans//DTD Filesystem 1.2//EN" "http://www.netbeans.org/dtds/filesystem-1_2.dtd">
<filesystem>
    <folder name="Services">
        <folder name="AutoupdateType">
            <file name="org_myorg_myplugin_update_center.instance">
                <attr name="displayName" bundlevalue="org.myorg.myplugin.Bundle#Services/AutoupdateType/org_myorg_myplugin_update_center.instance"/>
                <attr name="enabled" boolvalue="true"/>
                <attr name="instanceCreate" methodvalue="org.netbeans.modules.autoupdate.updateprovider.AutoupdateCatalogFactory.createUpdateProvider"/>
                <attr name="instanceOf" stringvalue="org.netbeans.spi.autoupdate.UpdateProvider"/>
                <attr name="url" bundlevalue="org.myorg.myplugin.Bundle#org_myorg_myplugin_update_center"/>
            </file>
        </folder>
    </folder>
</filesystem>
Add this code to your MyPlugin class inside the run() method.
WindowManager.getDefault().invokeWhenUIReady(new Runnable () {
    @Override
    public void run() {
      UpdateHandler.checkAndHandleUpdates();
    }
});
Add these lines to your Bundle.properties file:
Services/AutoupdateType/org_myorg_myplugin_update_center.instance=MyPlugin
UpdateHandler.NewModules=false
org_myorg_myplugin_update_center=https\://example.com/updates.xml
Now every time NetBeans restarts and launches your plugin, it will check for updates by downloading updates.xml from example.com.
Your updates.xml file tells NetBeans where to get the new NBM of your plugin. To create an NBM for publishing your plugin, right click on your MyPlugin project and select Create NBM. The NBM file is what you will publish to the NetBeans Plugin Portal.
For an example of hosting updates.xml on GitHub, look at update.xml and corrospondingBundle.properties from the WakaTime NetBeans plugin.
Opinions expressed by DZone contributors are their own.
Comments