Hunting Treasure with Kubernetes ConfigMaps and Secrets
Check out this tutorial that shows you how to build and deploy a simple treasure hunting game using Kubernetes, Docker, and Helm.
Join the DZone community and get the full member experience.
Join For FreeThe Kubernetes documentation illustrates ConfigMapsusing configuration properties for a game like ‘enemies=aliens’, ‘lives=3’ and secret codes that grant extra lives. So let’s explore this by building a mini-game for ourselves, Dockerizing it and deploying it to Minikube. This will give us a deeper understanding of how we can create ConfigMaps and Secrets and use them in our applications.
Treasure Hunt Game Concept
The idea is that there is treasure hidden at certain x and y coordinates and the player tries to work out where they are by making guesses through a URL with parameters like ‘ /treasure?x=4&y=6 ’. We could support guesses with a web page that has inputTexts and a button, but instead we’ll keep things simple with just a URL. The player has a maximum number of attempts and each request uses up an attempt. When the player uses up all their attempts they are told they have died. We’ll make a reset available to be able to start again.
We’ll first build this and then capture the hidden location of the treasure using Kubernetes Secrets and the number of attempts in Kubernetes ConfigMaps.
Building the Game
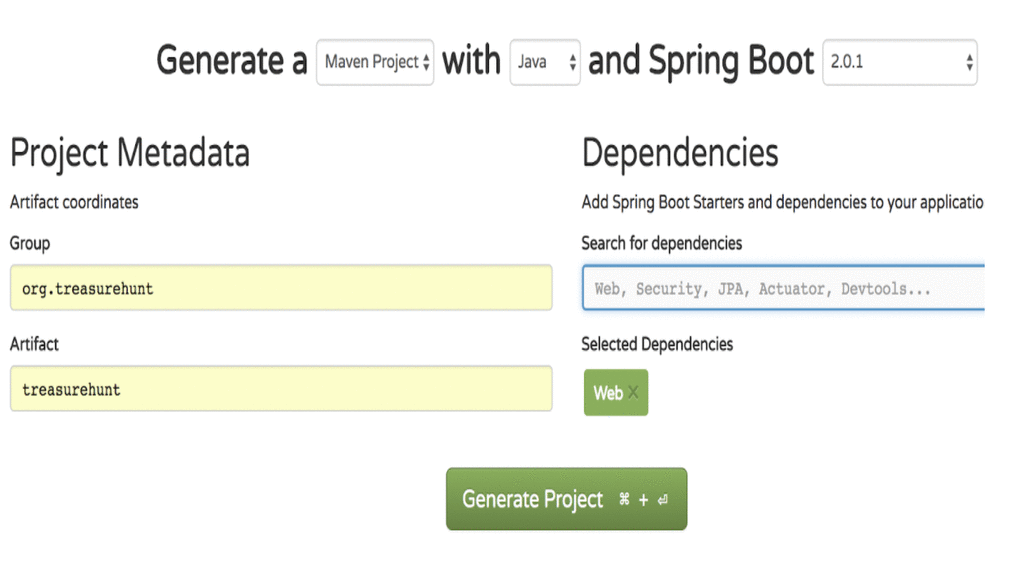
We start at the Spring Initializr to generate a Spring Boot app with the Web dependency:
The key to our app is going to be the treasure location. So let’s add a Spring Component for it:
@Component
public class Treasure {

   @Value("${treasure.location.x:1}")
   private Integer x;

   @Value("${treasure.location.y:0}")
   private Integer y;

   // if we wanted boot to randomize if not supplied then we could do
   // ${treasure.location.y:${random.int(5)}} for y and would be random.int(4) for x

   public Integer getX() {
       return x;
   }

   public Integer getY() {
       return y;
   }
}
Here the x and y coordinates of the treasure are set using Spring Boot properties that each default if not set. So we can expect these to later be set through environment variables of TREASURE_LOCATION_X and TREASURE_LOCATION_Y . (We could use Boot to randomize the treasure location but we’re not doing that.)
Now we can Autowire this Treasure component into the main Controller that will do the job of handling web requests for the game. We’ll assume we’ve only got one user at a time as we’ve not got any authentication. So we can get started with a Controller:
@RestController
public class TreasurehuntController {

   @Value("${treasurehunt.max.attempts:3}")
   private Integer maxAttempts;

   // use concurrent package to avoid cheating by simultaneous requests
   private AtomicInteger attemptsMade = new AtomicInteger(0);

   @Autowired
   private Treasure treasure;

   @GetMapping
   public String treasure(@RequestParam(required=true) Integer x, @RequestParam(required=true) Integer y){

       //hit treasure and not already dead
       if(x == treasure.getX() && y == treasure.getY() && attemptsMade.intValue() < maxAttempts ){

           return Graphics.treasure;
       }

       int attemptsLeft = maxAttempts - attemptsMade.incrementAndGet();

       if (attemptsLeft > 0) {
           return String.format(Graphics.missed, attemptsLeft) ;
       } else {
           return Graphics.died;
       }
   }
}
The user is limited to a maximum number of attempts through a configurable property that defaults to three. They won’t get away with making two attempts at once as we’re counting attempts with an AtomicInteger. Normally we’d store this counter per user but to do that we’d have to add a way to identify the user and we’re not concerned with that in this example.
We handle requests like /treasure?x=1&y=1 with the @GetMapping . If the user hasn’t hit the maximum number of lives and their parameters match the treasure location, then they see the treasure. This is represented by a String from Graphics.java. Otherwise, we record an attempt and check how many are left. If they’re not dead yet, then we show a "missed" graphic, into which we inject the number of attempts left so we can tell the user. Otherwise, we show the user that they’re dead.
The Graphics.java class just has a set of Strings to represent "screens." These could be as simple as “You found the treasure” and “You died,” but we can make it feel more like an old-school game with ASCII art. This will make more sense if we walk through the screens.
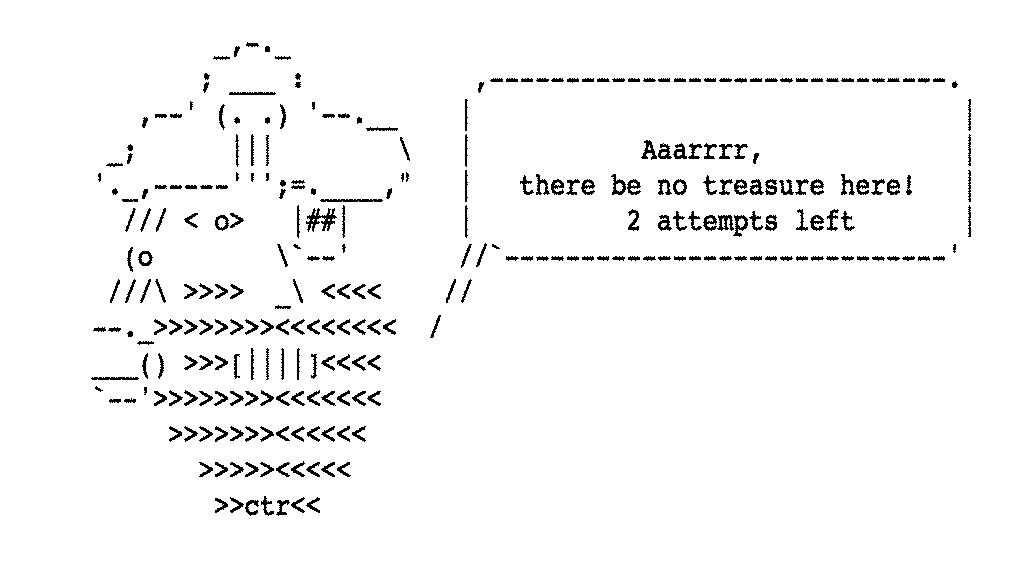
If we start the game with ‘ mvn spring-boot:run ’ and make an unsuccessful attempt like ‘ localhost:8080/treasure?x=5&y=6 ’ then we see:
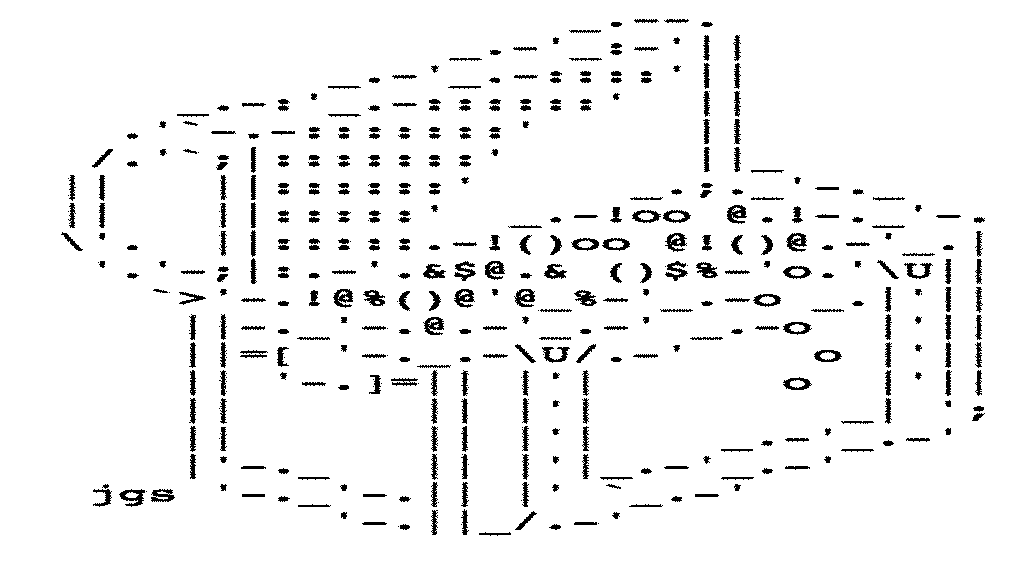
If we hit the treasure we see:
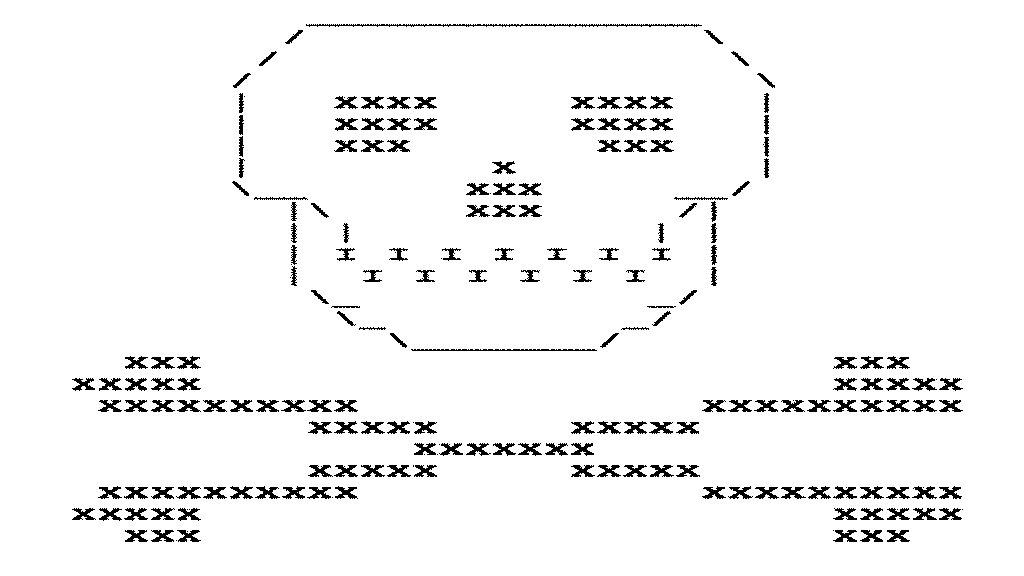
And if we run out of attempts we see:
But how do we then play again? And shouldn’t we have a "landing page" screen to introduce the game? To allow for this we add a bit more to the Controller:
 @GetMapping(value = "")
public String home(){
   return Graphics.map+"<br/><br/><br/>Play by going to e.g. /treasure?x=1&y=1 ";
}

@GetMapping(value="reset")
public String reset(){
   attemptsMade.set(0);
   return home();
}
Now ‘ /reset ’ will let us start afresh and it returns the same "screen" as the introductory screen which shows the map from the Graphics:
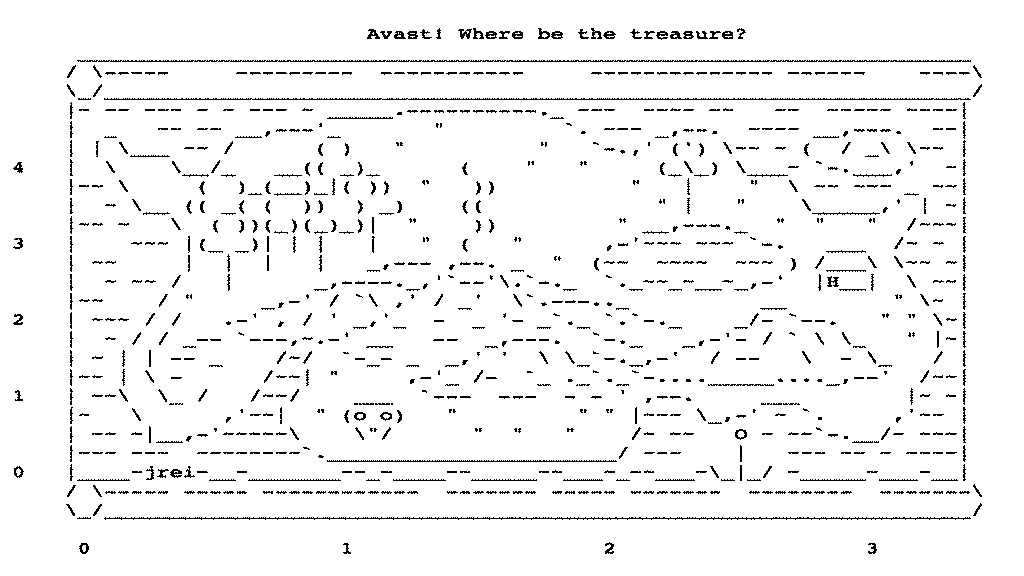
At this point, the game is playable, but there are quite a lot of locations one could guess at on this map so the player doesn't have much chance. In the next section, we'll improve the playability by showing a clue. This doesn't have anything to do with how we'll configure the game to run in Kubernetes so feel free to skip to the following section on deploying to Minikube if you're not worried about the game's dynamics.
Improving Playability
We’ll display a clue to narrow the player’s options down to within a 2 by 2 grid. The grid needs to include the treasure location but we can’t simply start that grid at the treasure location as that would give the location away (the player would realize that the treasure was always at the bottom-left of the clue grid). So we need to randomize it. We can find a start position for the grid as within range of the treasure with:
int leftX = Math.max(treasureX - ThreadLocalRandom.current().nextInt(0, 2),0);
int bottomY = Math.max(treasureY - ThreadLocalRandom.current().nextInt(0, 2),0);
This randomly decides whether to go a spot left or below the treasure (or at the treasure), provided it doesn’t take us off the map (in which case we fall back on zero). We also don’t want to be off map in the other direction so we compensate for that too:
leftX = Math.min(leftX, Graphics.xMax - 1);
bottomY = Math.min(bottomY, Graphics.yMax - 1);
We could simply output this range as starting from leftX,bottomY and going to leftX+1,bottomY+1 (i.e. the bottom-left and top-right of the box). That would provide a clue but it would be nice to make it visual. So we can create a ClueGenerator class that contains a List called ‘ mapRows ’ that represents the map as Strings:
//the map without scales shown
mapRows.add(" |~ ~~ ~~~ ~ ~ ~~~ ~ _____.----------._ ~~~  ~~~~ ~~   ~~  ~~~~~ ~~~~|");
mapRows.add(" |  _   ~~ ~~ __,---'_       \"         `. ~~~ _,--.  ~~~~ __,---.  ~~|");
mapRows.add(" | | \\___ ~~ /      ( )   \"          \"   `-.,' (') \\~~ ~ (  / _\\ \\~~ |");
mapRows.add(" |  \\    \\__/_   __(( _)_      (    \"   \"     (_\\_) \\___~ `-.___,'  ~|");
mapRows.add(" |~~ \\     (  )_(__)_|( ))  \"   ))          \"   |    \"  \\ ~~ ~~~ _ ~~|");
mapRows.add(" |  ~ \\__ (( _( (  ))  ) _)    ((             \" |   \"    \\_____,' | ~|");
mapRows.add(" |~~ ~   \\  ( ))(_)(_)_)|  \"    ))         \" __,---._  \"  \"   \"  /~~~|");
mapRows.add(" |    ~~~ |(_ _)| | |   |   \"  (   \"      ,-'~~~ ~~~ `-.   ___  /~ ~ |");
mapRows.add(" | ~~     |  |  |   |   _,--- ,--. _  \"  (~~  ~~~~  ~~~ ) /___\\ \\~~ ~|");
mapRows.add(" |  ~ ~~ /   |      _,----._,'`--'\\.`-._  `._~~_~__~_,-'  |H__|  \\ ~~|");
mapRows.add(" |~~    / \"     _,-' / `\\ ,' / _'  \\`.---.._          __        \" \\~ |");
mapRows.add(" | ~~~ / /   .-' , / ' _,'_  -  _ '- _`._ `.`-._    _/- `--.   \" \" \\~|");
mapRows.add(" |  ~ / / _-- `---,~.-' __   --  _,---.  `-._   _,-'- / ` \\ \\_   \" |~|");
mapRows.add(" | ~ | | -- _    /~/  `-_- _  _,' '  \\ \\_`-._,-'  / --   \\  - \\_   / |");
mapRows.add(" |~~ | \\ -      /~~| \"     ,-'_ /-  `_ ._`._`-...._____...._,--'  /~~|");
mapRows.add(" | ~~\\  \\_ /   /~~/    ___  `---  ---  - - ' ,--.     ___        |~ ~|");
mapRows.add(" |~   \\      ,'~~|  \" (o o)   \"         \" \" |~~~ \\_,-' ~ `.     ,'~~ |");
mapRows.add(" | ~~ ~|__,-'~~~~~\\    \\\"/      \"  \"   \"    /~ ~~   O ~ ~~`-.__/~ ~~~|");
mapRows.add(" |~~~ ~~~  ~~~~~~~~`.______________________/ ~~~    |   ~~~ ~~ ~ ~~~~|");
mapRows.add(" |____~jrei~__~_______~~_~____~~_____~~___~_~~___~\\_|_/ ~_____~___~__|");

//we added rows from top down so now want to invert so that index zero is bottom
Collections.reverse(mapRows);
We have to invert it as the bottom is zero and we’ll want to count upwards but we added the top first.
Now the trick to drawing a box is just to take subStrings from Strings in the mapRows List. We can use the list index to choose which rows. The index of the row can be mapped to the numbers on the map’s vertical scale and the positions for a subString can be mapped to the numbers on the map’s horizontal scale. All we need for that is to know how many characters apart each of the numbers on the scales are. We can record that in the Graphics class so our logic to show a clue box a clue can be:
//on each row take the subString from position leftX to (leftX+1) and factor for scale
//take rows starting bottomY*yScale
List<String> clueRows = new ArrayList<>();

for( int i = (bottomY * Graphics.yScale) ; i < ((bottomY + 1) * Graphics.yScale); i++){

    clueRows.add( mapRows.get(i).substring(leftX*Graphics.xScale, (leftX+1)*Graphics.xScale) );
}

//need to reverse back again so that we print top-down
Collections.reverse(clueRows);
StringBuilder clueBuilder = new StringBuilder();
clueBuilder.append("<pre>");
for(String row:clueRows){
    clueBuilder.append(row).append("<br/>");
}
clueBuilder.append("</pre>");
clueBuilder.append("which is "+leftX).append(",").append(bottomY).append(" to ").append(leftX+1).append(",").append(bottomY+1);
return clueBuilder.toString();
And we then use this in the home endpoint of our main Controller:
@GetMapping(value = "")
public String home(){
   String homePage = Graphics.map+"<br/>";

   homePage+="Your clue is:<br/><br/>"+clueGenerator.getClue(treasure.getX(),treasure.getY());

   homePage+="<br/><br/><br/>Play by going to e.g. /treasure?x=1&y=1 ";
   return homePage;
}
Which looks like:

Taking the Game to Minikube
Before we can deploy to Minikube we'll need to create a Docker image for our app. We want to build the executable jar inside the Docker image and then start the Java app when the container starts. We can do this using a multi-stage Docker build. The Dockerfile is:
FROM maven:3.5-jdk-8 as BUILDTREASUREHUNT

COPY src /usr/src/myapp/src
COPY pom.xml /usr/src/myapp
RUN mvn -f /usr/src/myapp/pom.xml clean package -DskipTests

FROM openjdk:alpine

COPY --from=BUILDTREASUREHUNT /usr/src/myapp/target/*.jar /maven/\
CMD java $JAVA_OPTS -jar maven/*.jar
Everything down to ‘ FROM openjdk:alpine ’ builds the JAR and then just the jar is copied over into a subsequent build stage based on the lightweight openjdk:alpine image. We start it with the JAVA_OPTS param exposed so that we’ve got the option to limit memory consumption (see this article about reducing memory consumption).
Then we can build an image using the command " docker build . -t treasurehunt "
And we can deploy it by creating a Kubernetes deployment. We’ll split the Kubernetes deployment into multiple files for the different Kubernetes objects that we need.
First, we create a ‘treasurehunt’ subdirectory and in there let’s create a ConfigMap in config.yaml:
---
apiVersion: v1
kind: ConfigMap
metadata:
 name: treasurehunt-config
 namespace: default
data:
 application.properties: |
   treasurehunt.max.attempts=5
This ConfigMap is called ‘ treasurehunt-config ’ and it contains an entry that represents an application.properties file. We create the contents of the application.properties file in-line in the definition of the ConfigMap. Because this config is a file, when we come to use this later in a Deployment we’ll mount the file as a volume, looking it up using the ConfigMap name and the key from the data section:
volumes:
- name: application-config
 configMap:
   name: treasurehunt-config
   items:
   - key: application.properties
     path: application.properties
We can then mount it using a volumeMount :
volumeMounts:
- name: application-config
 mountPath: "/config"
 readOnly: true
Simply putting the file in the “ /config ” directory is enough for the Spring Boot to read it and use it to override properties set from within the Jar’s internal properties file. We’ll know it has worked as this increases the number of attempts allowed to 5.
The secrets.yaml file takes a different approach and has content that at first looks a little strange:
---
apiVersion: v1
kind: Secret
metadata:
 name: treasurehunt-secrets
type: Opaque
data:
 treasure.location.x: Mw==
 treasure.location.y: Mw==
There are two data elements as we’re using environment variables instead of a file. The values look a bit strange as they were generated by doing:
echo -n "3" | base64So the value of “3” encoded in base64. (Note there are also websites that encode and decode.) This encoding is just required by Kubernetes for secrets. It’s not an encryption—it’s just an extra step.
When these get used in a Deployment it will look like:
- name: TREASURE_LOCATION_Y
 valueFrom:
   secretKeyRef:
     name: treasurehunt-secrets
     key: treasure.location.y
So the form is to specify the key (‘ treasure.location.y ’), which Secret it comes from (‘ treasurehunt-secrets ’) and what environment variable name to use for it (‘ TREASURE_LOCATION_Y ’). The environment variable name will be automatically mapped to the property treasure.location.y by Spring Boot.
We’ll need to create instances of Docker containers to service requests in the form of Pods. This will be done by our Deployment, created in deployment.yaml:
---
apiVersion: apps/v1beta1
kind: Deployment
metadata:
 name: treasurehunt
 labels:
   serviceType: treasurehunt
spec:
 replicas: 1
 template:
   metadata:
     name: treasurehunt
     labels:
       serviceType: treasurehunt
   spec:
     containers:
       - name: treasurehunt
         image: treasurehunt:latest
         imagePullPolicy: Never
         ports:
         - containerPort: 8080
         env:
         - name: JAVA_OPTS
           value: -Xmx64m -Xms64m
         - name: TREASURE_LOCATION_X
           valueFrom:
             secretKeyRef:
               name: treasurehunt-secrets
               key: treasure.location.x
         - name: TREASURE_LOCATION_Y
           valueFrom:
             secretKeyRef:
               name: treasurehunt-secrets
               key: treasure.location.y
         volumeMounts:
         - name: application-config
           mountPath: "/config"
           readOnly: true
     volumes:
     - name: application-config
       configMap:
         name: treasurehunt-config
         items:
         - key: application.properties
           path: application.properties
The bottom part of this specifies the volume mounting and environment variables for the ConfigMap and secrets. They are being injected into the pods that are created by the deployment—every container belonging to a pod created by this deployment will have a mounted volume and environment variables for the treasure location. The preceding sections say which image to use for the Docker container to go in the pod (‘ treasurehunt:latest ’), which port to use (‘ 8080 ’) and that we should limit Java memory. We also label all the pods with ‘ serviceType: treasurehunt ’. This is used by the service, defined in ‘ svc.yaml ’:
---
apiVersion: v1
kind: Service
metadata:
 name: treasurehunt-entrypoint
 namespace: default
spec:
 selector:
   serviceType: treasurehunt
 ports:
   - port: 8080
     targetPort: 8080
     nodePort: 30080
 type: NodePort
This says that we should expose port 30080 as available to route requests to Pods meeting the label specification ‘ serviceType: treasurehunt ’ and that they use port 8080.
So now we can link our terminal session to Minikube with:
eval $(minikube docker-env) Build the image with:
docker build . -t treasurehunt Deploy from the project's top-level directory with:
kubectl create -f ./treasurehunt And access by running:
minikube service treasurehunt-entrypoint We can tell that the treasurehunt.max.attempts from the ConfigMap is being applied as we get 5 attempts:
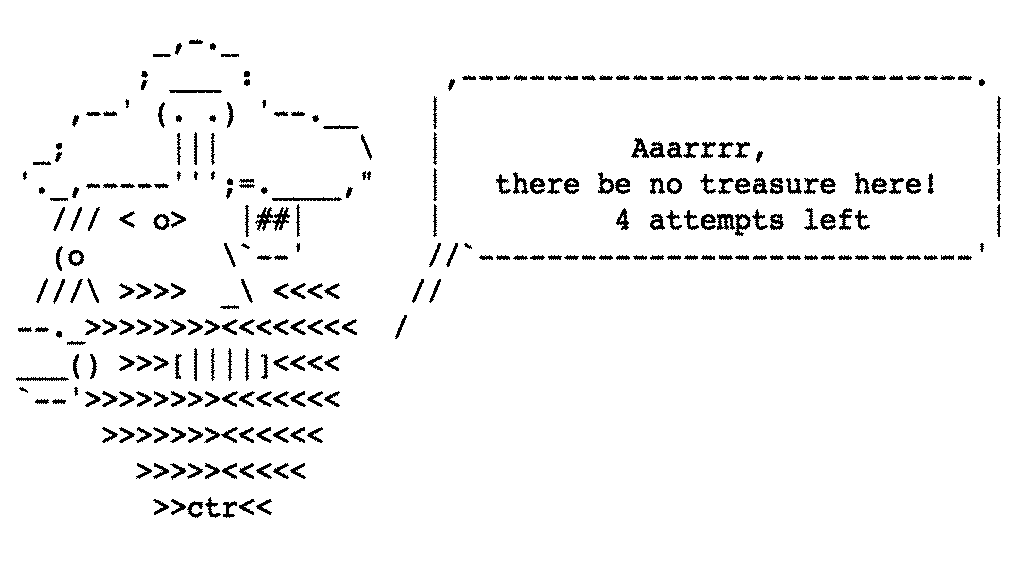
And that the treasure location from the secret is applied as we hit the treasure at ' treasure?x=3&y=3 ' (which also means we the app could leak the secret to the player if it chose to do so).
We can remove the game from Kubernetes if we want to with:
kubectl delete -f ./treasurehuntOptions with Kubernetes Secrets
ConfigMaps and Secrets are handled differently by Kubernetes—we can see this if we compare the result of two kubectl describe commands. First ‘ kubectl describe configmaps treasurehunt-config ’:
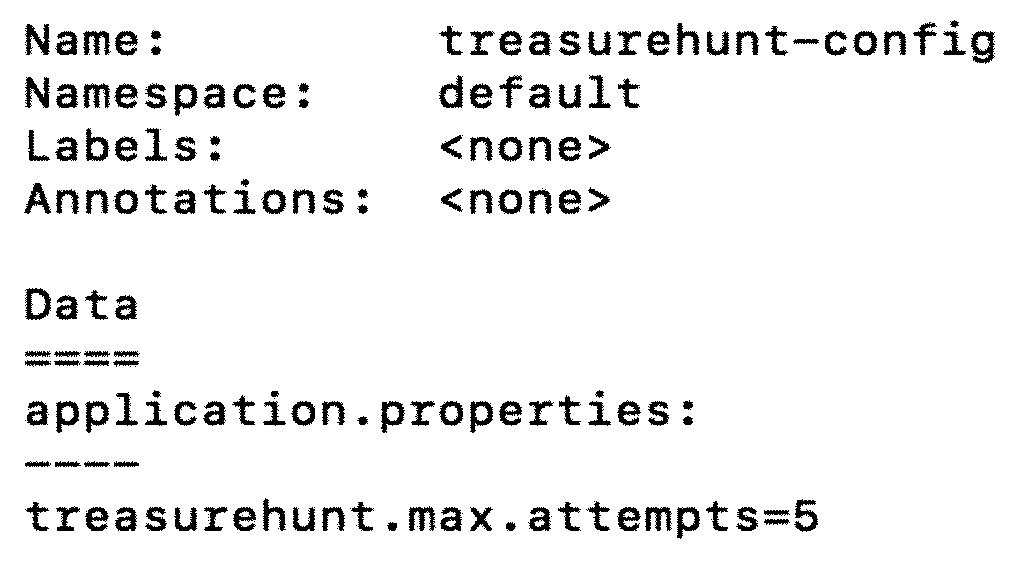
We see the contents of the ConfigMap. But we don’t see the contents of the secret when we do ‘ kubectl describe secret treasurehunt-secrets ’:
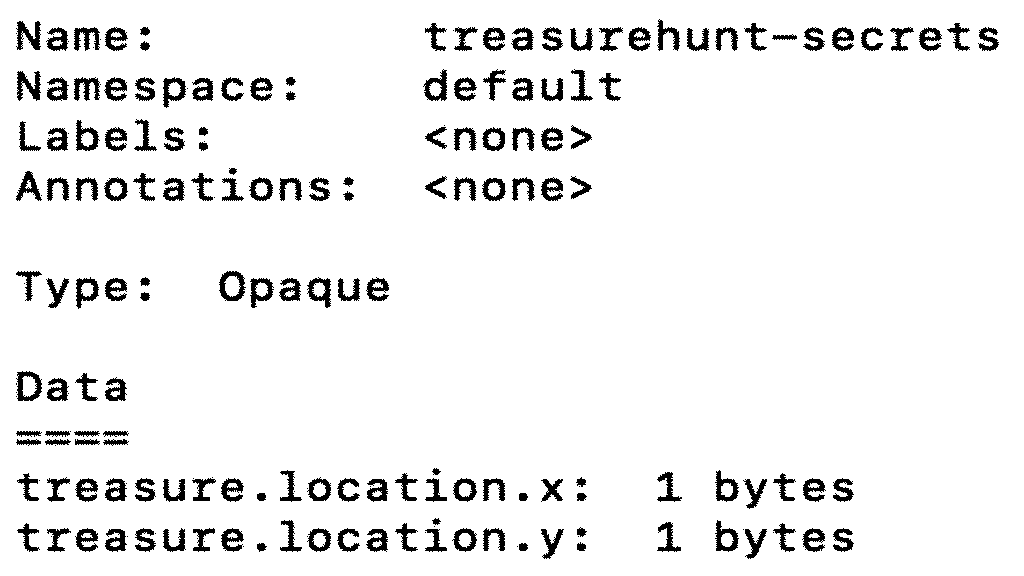
We just get shown the number of bytes. But we do see the encoded contents when we do ‘ kubectl get secret treasurehunt-secrets -o yaml ’ as that gives us the yaml description of the object.
If we do ‘ minikube dashboard ’ and go to the relevant pages under ‘Content and Storage’ then we see another difference as the ConfigMap data is shown immediately and the Secrets have a hide/show option:
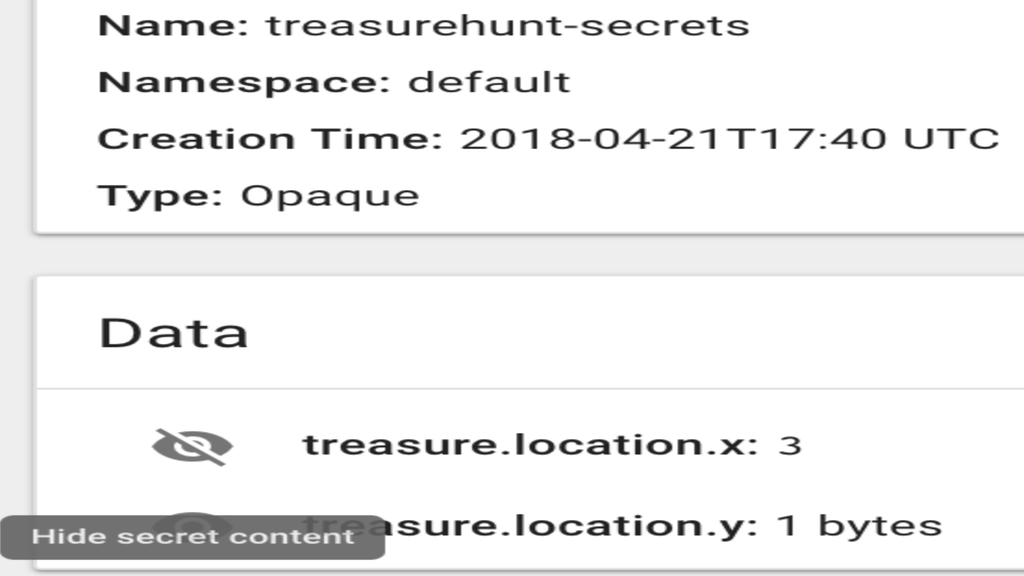
This may not look very secure but it’s not a real-world setup. To make things more secure we could enable role-based access control to restrict access to resources and we might choose to restrict who can access the Kubernetes dashboard.
With Secrets we may also want to avoid putting the values into source control. And for both Secrets and ConfigMaps we might want to have a way to use different values for different environments in a CI/CD pipeline. This is less of a concern with treasurehunt treasure locations than it would be with passwords for real systems. One way to achieve this might be to separate out the part of the deployment script that creates the Secret from the other deployment descriptors (perhaps by putting it in a different folder). Then the deployment script could look for the Secret and only create it if it doesn’t exist already. Or the script itself could create the Secret.
If the deployment script in our CI/CD is to create the Secret then it’ll need to do some pre-processing to modify the secrets.yaml file to contain the base64-encoded value for that environment or use a different version of the file for each environment. Alternatively, we could run a kubectl command to create a Secret from a file using the --from-file option. We’d then want to mount the Secret file much as we did with the ConfigMap. This would avoid the need for a CI to modify or use different versions of the Secret deployment yaml for different environments but at the expense of not using a yaml descriptor (since wed then be using ‘kubectl create secret’ instead).
There are various options in this space. There are ways to store encrypted secrets in SCM and have them decrypted at the Kubernetes leveland there are many factors to consider if one goes that road. One could also imagine encrypting all the secret values before creating them by having a master secret and using it to decrypt other secrets at the application level (e.g. using jasypt and spring profiles for different environments). We can’t look at all these options here.
What we will look at are options that open up if we choose to package the application with Helm. If we use a Helm chart we could input different parameter values at deploy time or supply a different file for just the data that changes per-environment rather than changing deployment descriptors (or needing to manage that variation at the application level). If you’re unfamiliar with Helm charts then think of them as parameterized templates for Kubernetes deployment descriptors (have a look at the examples in the Helm docs as a primer).
Hunting Treasure with Helm
First we need to create a Helm chart for the game, basing it upon our deployment descriptors. To do this we create and move to a new ‘charts’ directory in our project and run:
helm create treasurehuntThis creates an initial Chart called ‘treasurehunt’ following the default structure. We’ll now modify this Chart. The modification steps to get us started are:
- Change description and name in Chart.yml to say this is treasurehunt
- The values.yml specifies default values passed into a Chart in each deploy. Change the entries in values.yaml for image.repository and image.tag to point us by default to treasurehunt:latest
- Change the defaults in values.yml for serviceType to NodePort and port to 30080 as we’re using minikube (but note we could if we wanted still override these at deploy time with parameters).
- In deployment.yaml change containerPort to 8080 as our spring boot apps run on 8080
- Remove the liveness and readiness probes as we’re not using them in this example
- Copy the ‘env’ and ‘volumes’ sections over from the kubernetes deployment.yaml to the helm deployment.yaml
- Copy the config.yaml and secrets.yaml files over from the kubernetes deployment directory to /charts/treasurehunt/templates. In each put “{{ template "treasurehunt.fullname" . }}-” in front of the name in the metadata section. This will give them unique names if we deploy the game multiple times. Also prepend the same string to the points where these names are used in the /templates/deployment.yaml
At this point we have a working chart that will let us deploy with ‘ helm install --name=pet-parrot ./charts/treasurehunt/ ’. (Here ‘pet-parrot’ is the unique release name—it prefixes the Kubernetes objects so now if we wanted to launch the game it would be with ‘ minikube service pet-parrot-treasurehunt ’.) But the chart doesn’t yet do much that our deployment descriptors didn’t already do. So let’s first change the way we set the secrets to do something we couldn't do before.
Go to the chart's secrets.yaml file and change the data section to:
{{- if .Values.treasure.location.x }}
treasure.location.x: {{ .Values.treasure.location.x | toString | b64enc | quote }}
{{- else }}
treasure.location.x: {{ mod (randNumeric 1) 4 | toString | b64enc | quote }}
{{- end }}
{{- if .Values.treasure.location.y }}
treasure.location.y: {{ .Values.treasure.location.y | toString | b64enc | quote }}
{{- else }}
treasure.location.y: {{ mod (randNumeric 1) 5 | toString | b64enc | quote }}
{{- end }}
This will look for supplied parameters for the treasure x and y (which can provided on the ‘ helm install ’) and if none are found then it generates random integers (limited to the 0-3 and 0-4 ranges by the mod function) and encodes them in base64. (We're using randNumeric as these are numbers but many real helm charts create random passwords with randAlphaNum.) We also declare these entries in the values.yaml file:
treasure:
 location:
   ## Defaults to a random location if not set
   x: ""
   y: ""
So we’ll get a random location if we deploy with:
helm install --name=pet-parrot ./charts/treasurehunt/Or we can specify the location if we instead do:
helm install --name=pet-parrot --set treasure.location.x=3,treasure.location.y=2 ./charts/treasurehunt/So we could take this approach to specify secret values in a deployment from CI. (Though it does currently have shortcomings from a security perspective. There’s also a question-mark about whether or not you’d want to generate secrets afresh on an upgrade. Those interested in the security question might want to look at the helm-secrets project and its use in Jenkins X.)
We could parameterize the value used from the ConfigMap in the same way with a default that the user can override. But instead, we’ll handle it as a file referenced from our chart. To do this we create a ‘files’ directory under ‘charts/treasurehunt’ and put the application.properties file from ‘src/main/resources’ in there. We’ll change the number of lives there to 4 so that we know if the file is getting used.
Now in the config.yaml for the chart change the whole data section to:
{{ (.Files.Glob "files/application.properties").AsConfig | indent 2 }}And that’s enough for the file to be used by the ConfigMap when we install the app. There’s a very similar function available to do the same for secrets. If we were to take this approach then a CI job could could pull the source of the chart and would be able to replace the file that is being used (e.g. swapping out dev for prod). This is rather like the option the --from-file option for ‘ kubectl create ’ but here the file reference is actually part of the chart. It would be even nicer if the file location were a parameter that could be set when running ‘ helm install ’ —at the time of writing that’s not a helm feature but is under review.
So helm gives us more possibilities for configuring and setting ConfigMaps and Secrets. Which options are better for us will depend upon factors like how much data we want to make configurable, how we expect it to be changed and deployed, what security constraints we have and the capabilities of our CI. Because our helm chart prefixes the names of the Kubernetes objects, it also allows us to deploy multiple instances of our app into the same namespace. So we could run:
helm install --name=greedy-parrot --set treasure.location.x=1,treasure.location.y=2 ./charts/treasurehunt/
helm install --name=grumpy-parrot --set treasure.location.x=2,treasure.location.y=1 ./charts/treasurehunt/
And access both with:
minikube service greedy-parrot-treasurehunt
minikube service grumpy-parrot-treasurehuntOpinions expressed by DZone contributors are their own.

Comments