Leveraging IBM WatsonX Data With Milvus to Build an Intelligent Slack Bot for Knowledge Retrieval
This tutorial covers populating the database with IBM WatsonX Data or open-source Milvus and connecting the bot to Slack to answer queries in real-time.
Join the DZone community and get the full member experience.
Join For FreeIn today's fast-paced work environment, quick and easy access to information is crucial for maintaining productivity and efficiency. Whether it's finding specific instructions in a runbook or accessing key knowledge transfer (KT) documents, the ability to retrieve relevant information swiftly can make a significant difference.
This tutorial will guide you through building an intelligent Slack bot that leverages IBM WatsonX.data and Milvus for efficient knowledge retrieval. By integrating these tools, you'll create a bot that can search and provide answers to queries based on your organization's knowledge sources. We will use IBM WatsonX.data to populate and query relevant documents and IBM WatsonX.ai to answer questions from the fetched documents.
The tutorial is divided into two main parts: the first focuses on populating the database using either IBM WatsonX Data or open-source Milvus, and the second part shows how to run a Python program locally to connect the bot to Slack, leveraging WatsonX.ai for intelligent responses to user queries.
By the end of this tutorial, you'll have a fully functional Slack bot that enhances your team's ability to access and utilize important information, boosting overall productivity.
Prerequisites
Before you begin, ensure you have the following:
- IBM Cloud account: Access to IBM WatsonX.ai and WatsonX Data for knowledge retrieval and AI model integration
- Milvus vector database: Familiarity with Milvus for storing and querying vectorized data; you can use either the open-source Milvus or IBM’s managed Milvus service.
- Slack workspace: Administrator access to configure and deploy a Slack bot within your workspace
- Programming knowledge: Proficiency in Python, including experience with APIs, working with cloud services, and handling environment variables
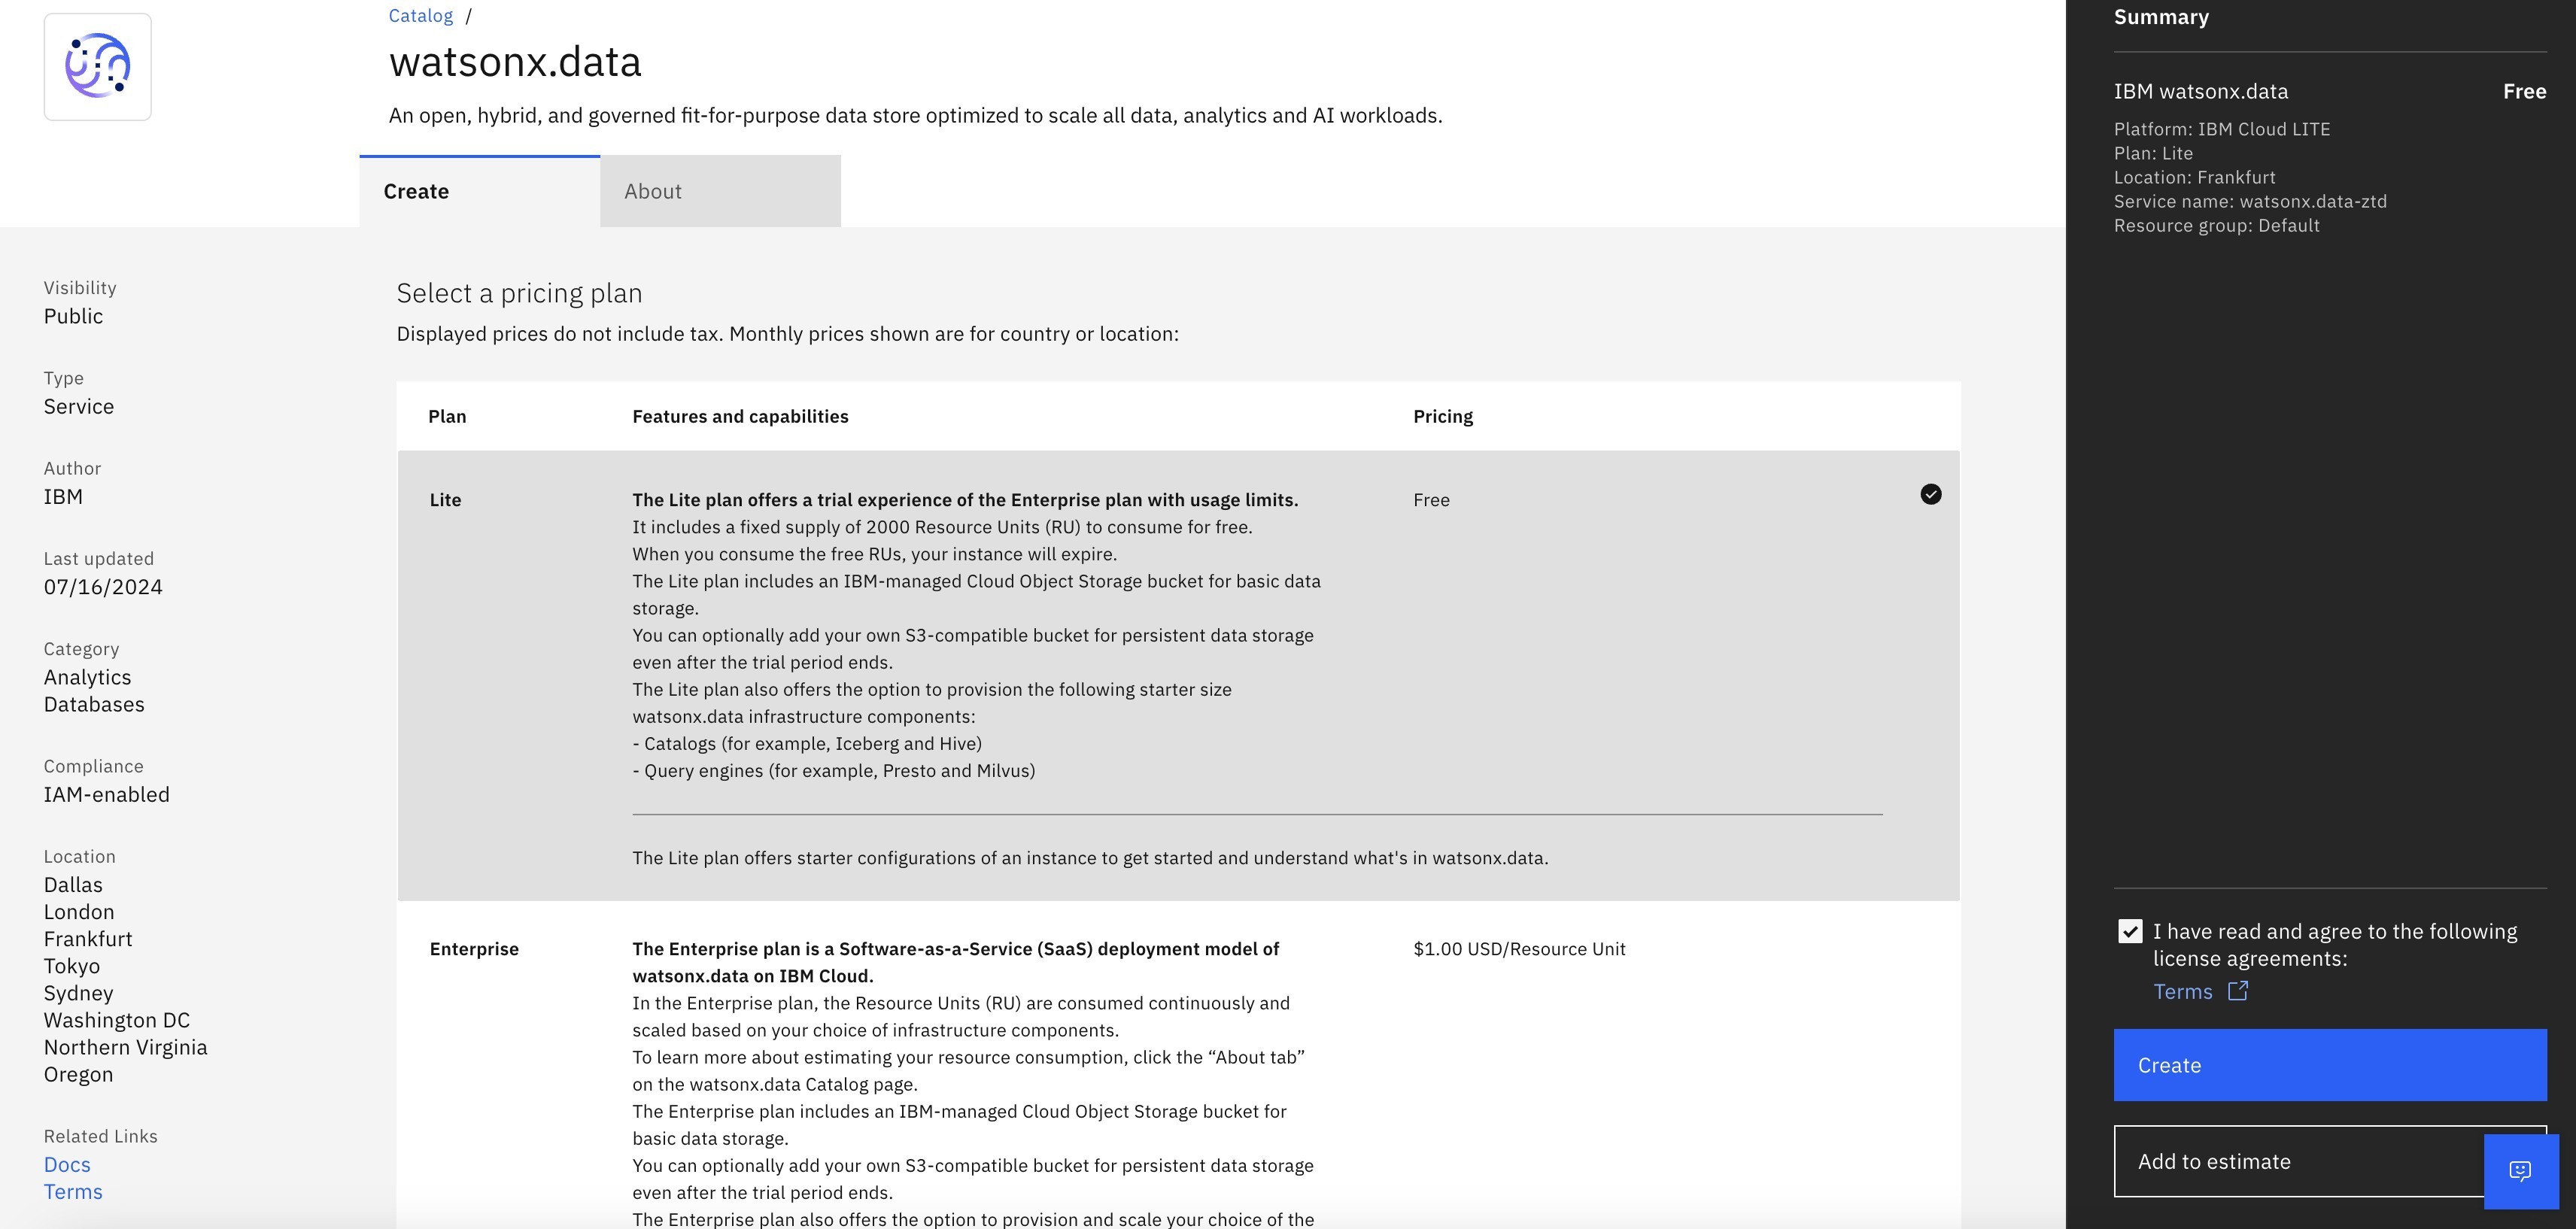
![WatsonX pricing plans]()
Step 1: Setting Up WatsonX.data and WatsonX Project
Set Up WatsonX.data
- Create an IBM Cloud account: Sign up at IBM Cloud if you don't already have an account.
- Create a WatsonX.data instance: In the IBM Cloud catalog, search for and create a WatsonX.data instance by picking up the plan and providing the necessary details.
Set Up WatsonX Project
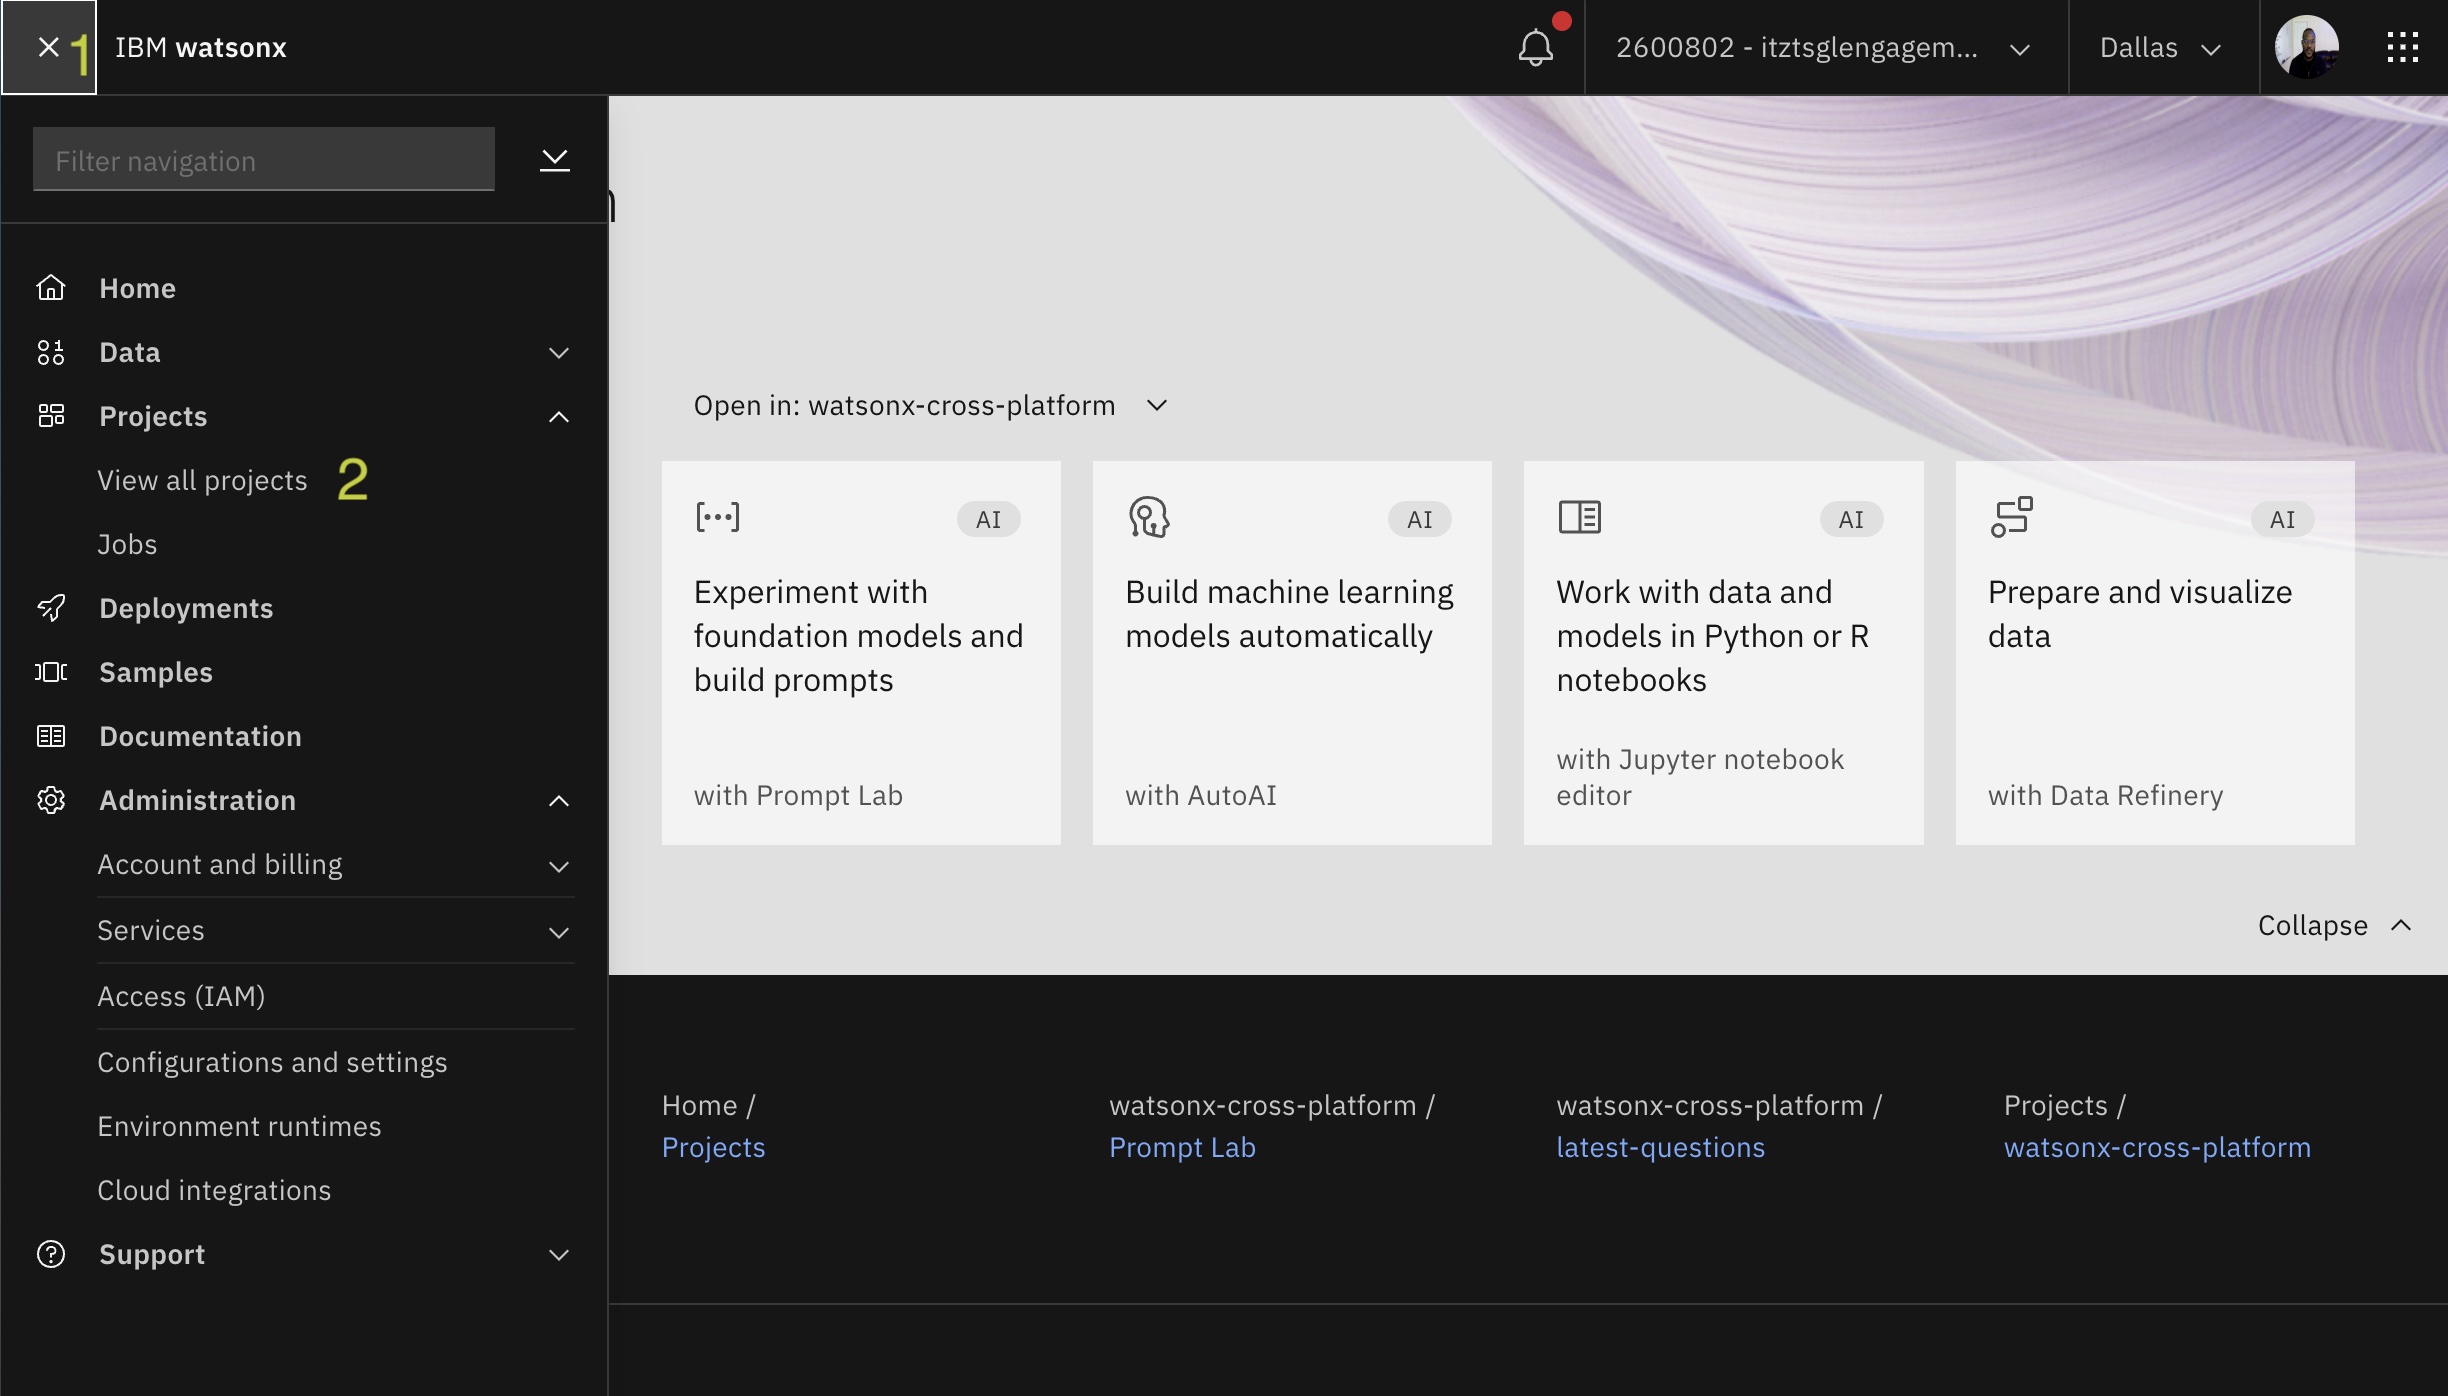
- Create a WatsonX Project: On the IBM Cloud Dashboard, navigate to the WatsonX home page and launch the watsonx.ai under capabilities. Create a sandbox project.
![Create a sandbox project]()
- Obtain Project ID and URL:
- Navigate to the Manage page of your WatsonX project to locate the Project ID.
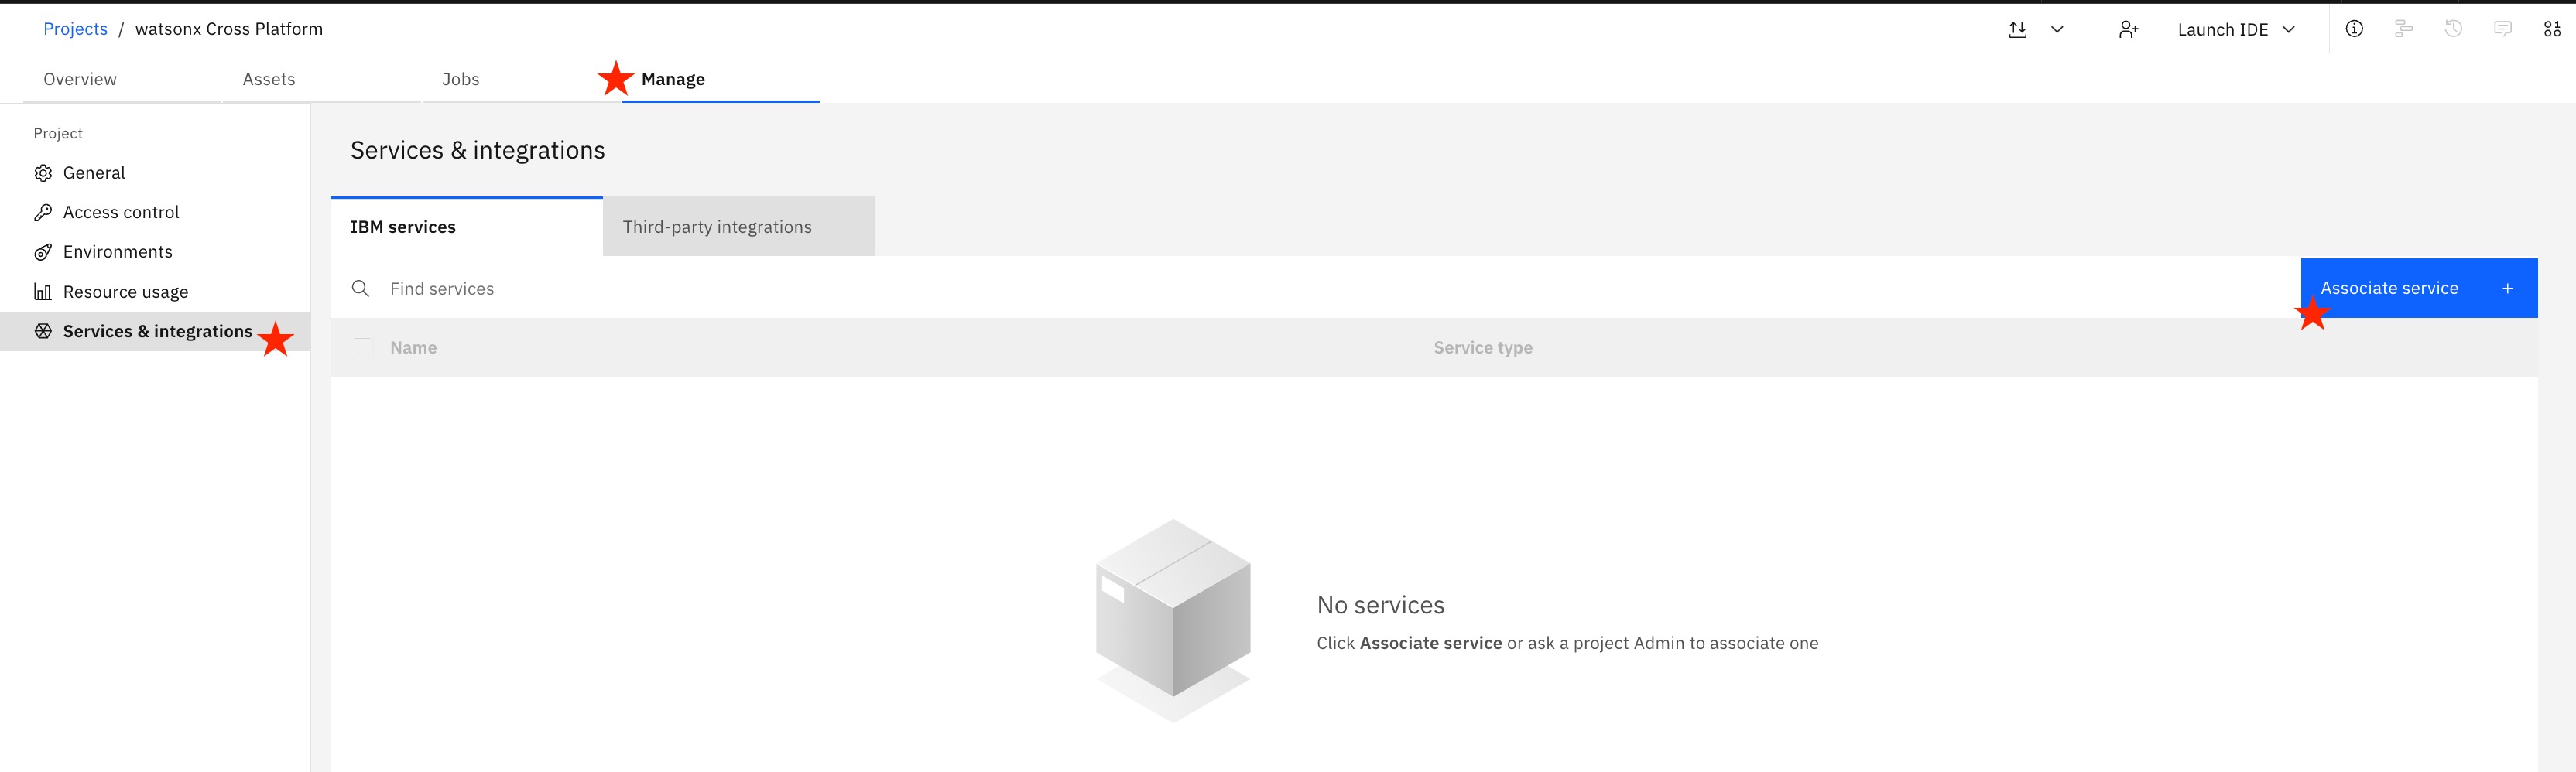
- Within your newly created project, under the "Manage" tab, select "Services & integrations" on the left menu.
- Select the blue "Associate service +" button. Choose the available "Watson Machine Learning" service name from the list.
![Choose the available "Watson Machine Learning" service name from the list]()
- Identify the URL of the Watson Machine Learning instance associated with your project. This URL varies based on the region where your ML instance is created and will be in the following format:
https://<region>.ml.cloud.ibm.com.- Dallas:
https://us-south.ml.cloud.ibm.com - London:
https://eu-gb.ml.cloud.ibm.com - Frankfurt:
https://eu-de.ml.cloud.ibm.com - Tokyo:
https://jp-tok.ml.cloud.ibm.com
- Dallas:
Step 2: Setting Up Milvus Server
You can set up the Milvus server in two ways: using IBM WatsonX.data or the open-source Milvus database.
Setting Up Milvus Using IBM WatsonX.data
- Log in to the WatsonX.data Console.
- Navigate to Infrastructure Manager.
- Add Milvus Service:
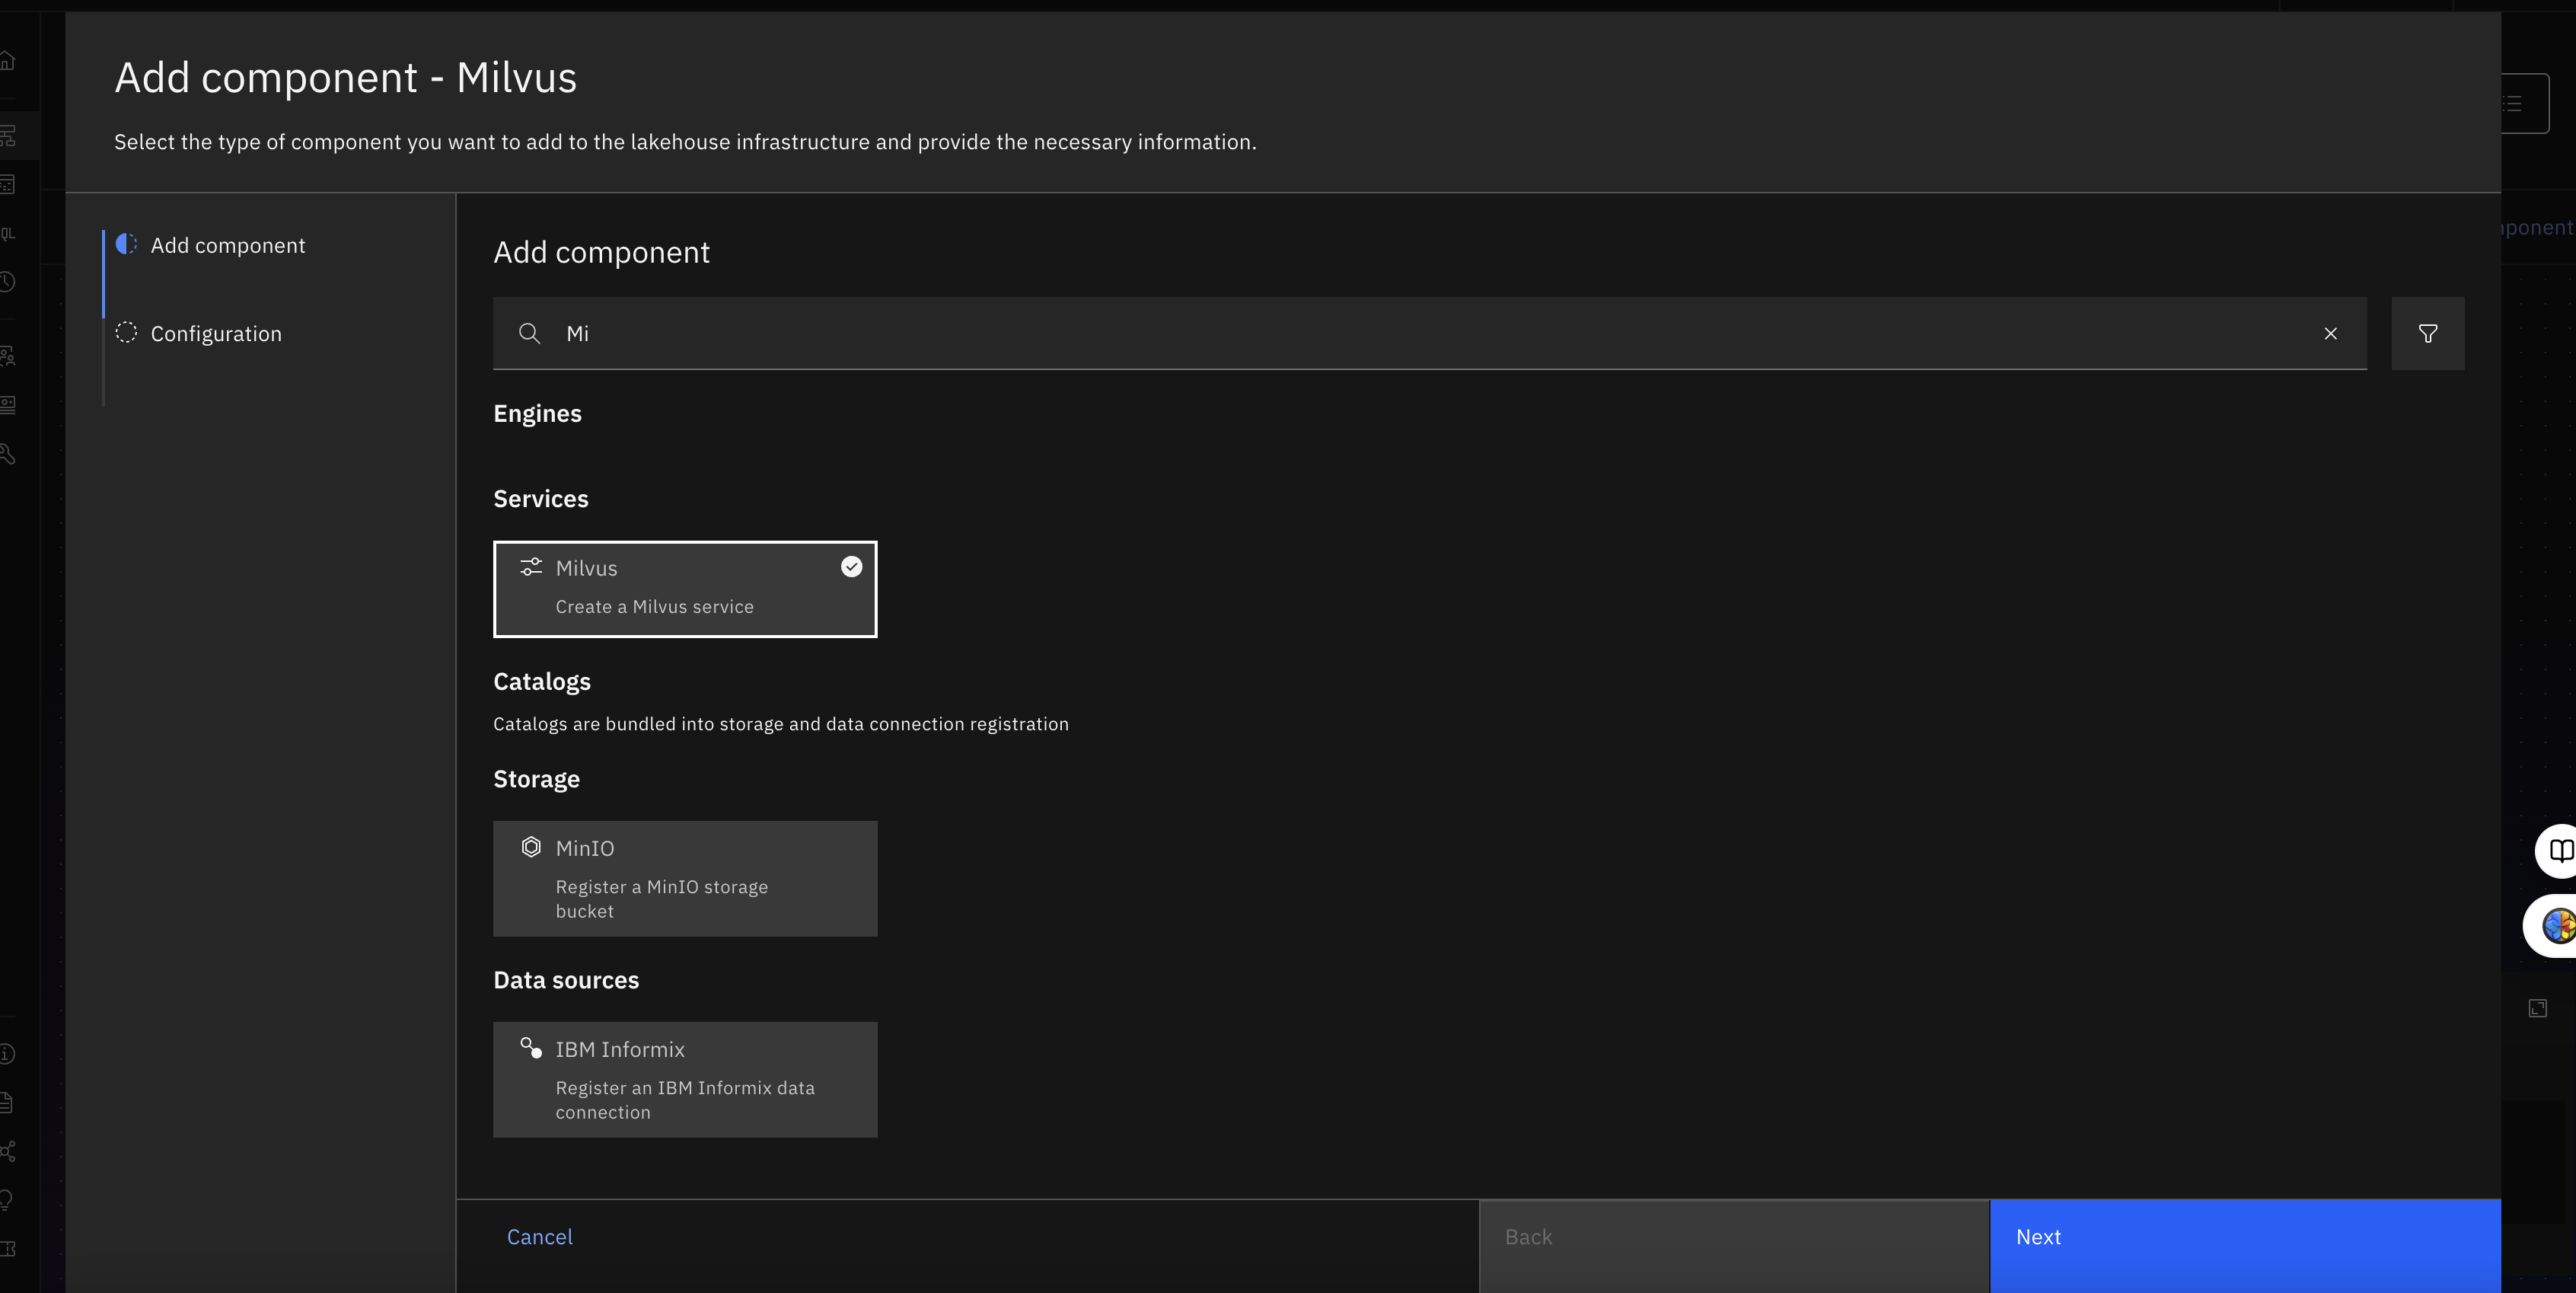
- Click Add component and select Add service.
- Select Milvus from the Type list.
![Choose the available "Watson Machine Learning" service name from the list]()
- Configure the Milvus Service:
- Display Name: Enter the Milvus service name.
- Add Storage Bucket: Associate an external bucket or select an IBM-managed bucket for the Starter size.
- Provision the Milvus Service: Click Provision.
Create Data Source Connection to Milvus
- In Your WatsonX.ai Project:
- Under the "Asset" tab, select New asset +.
- Connect to Data Source:
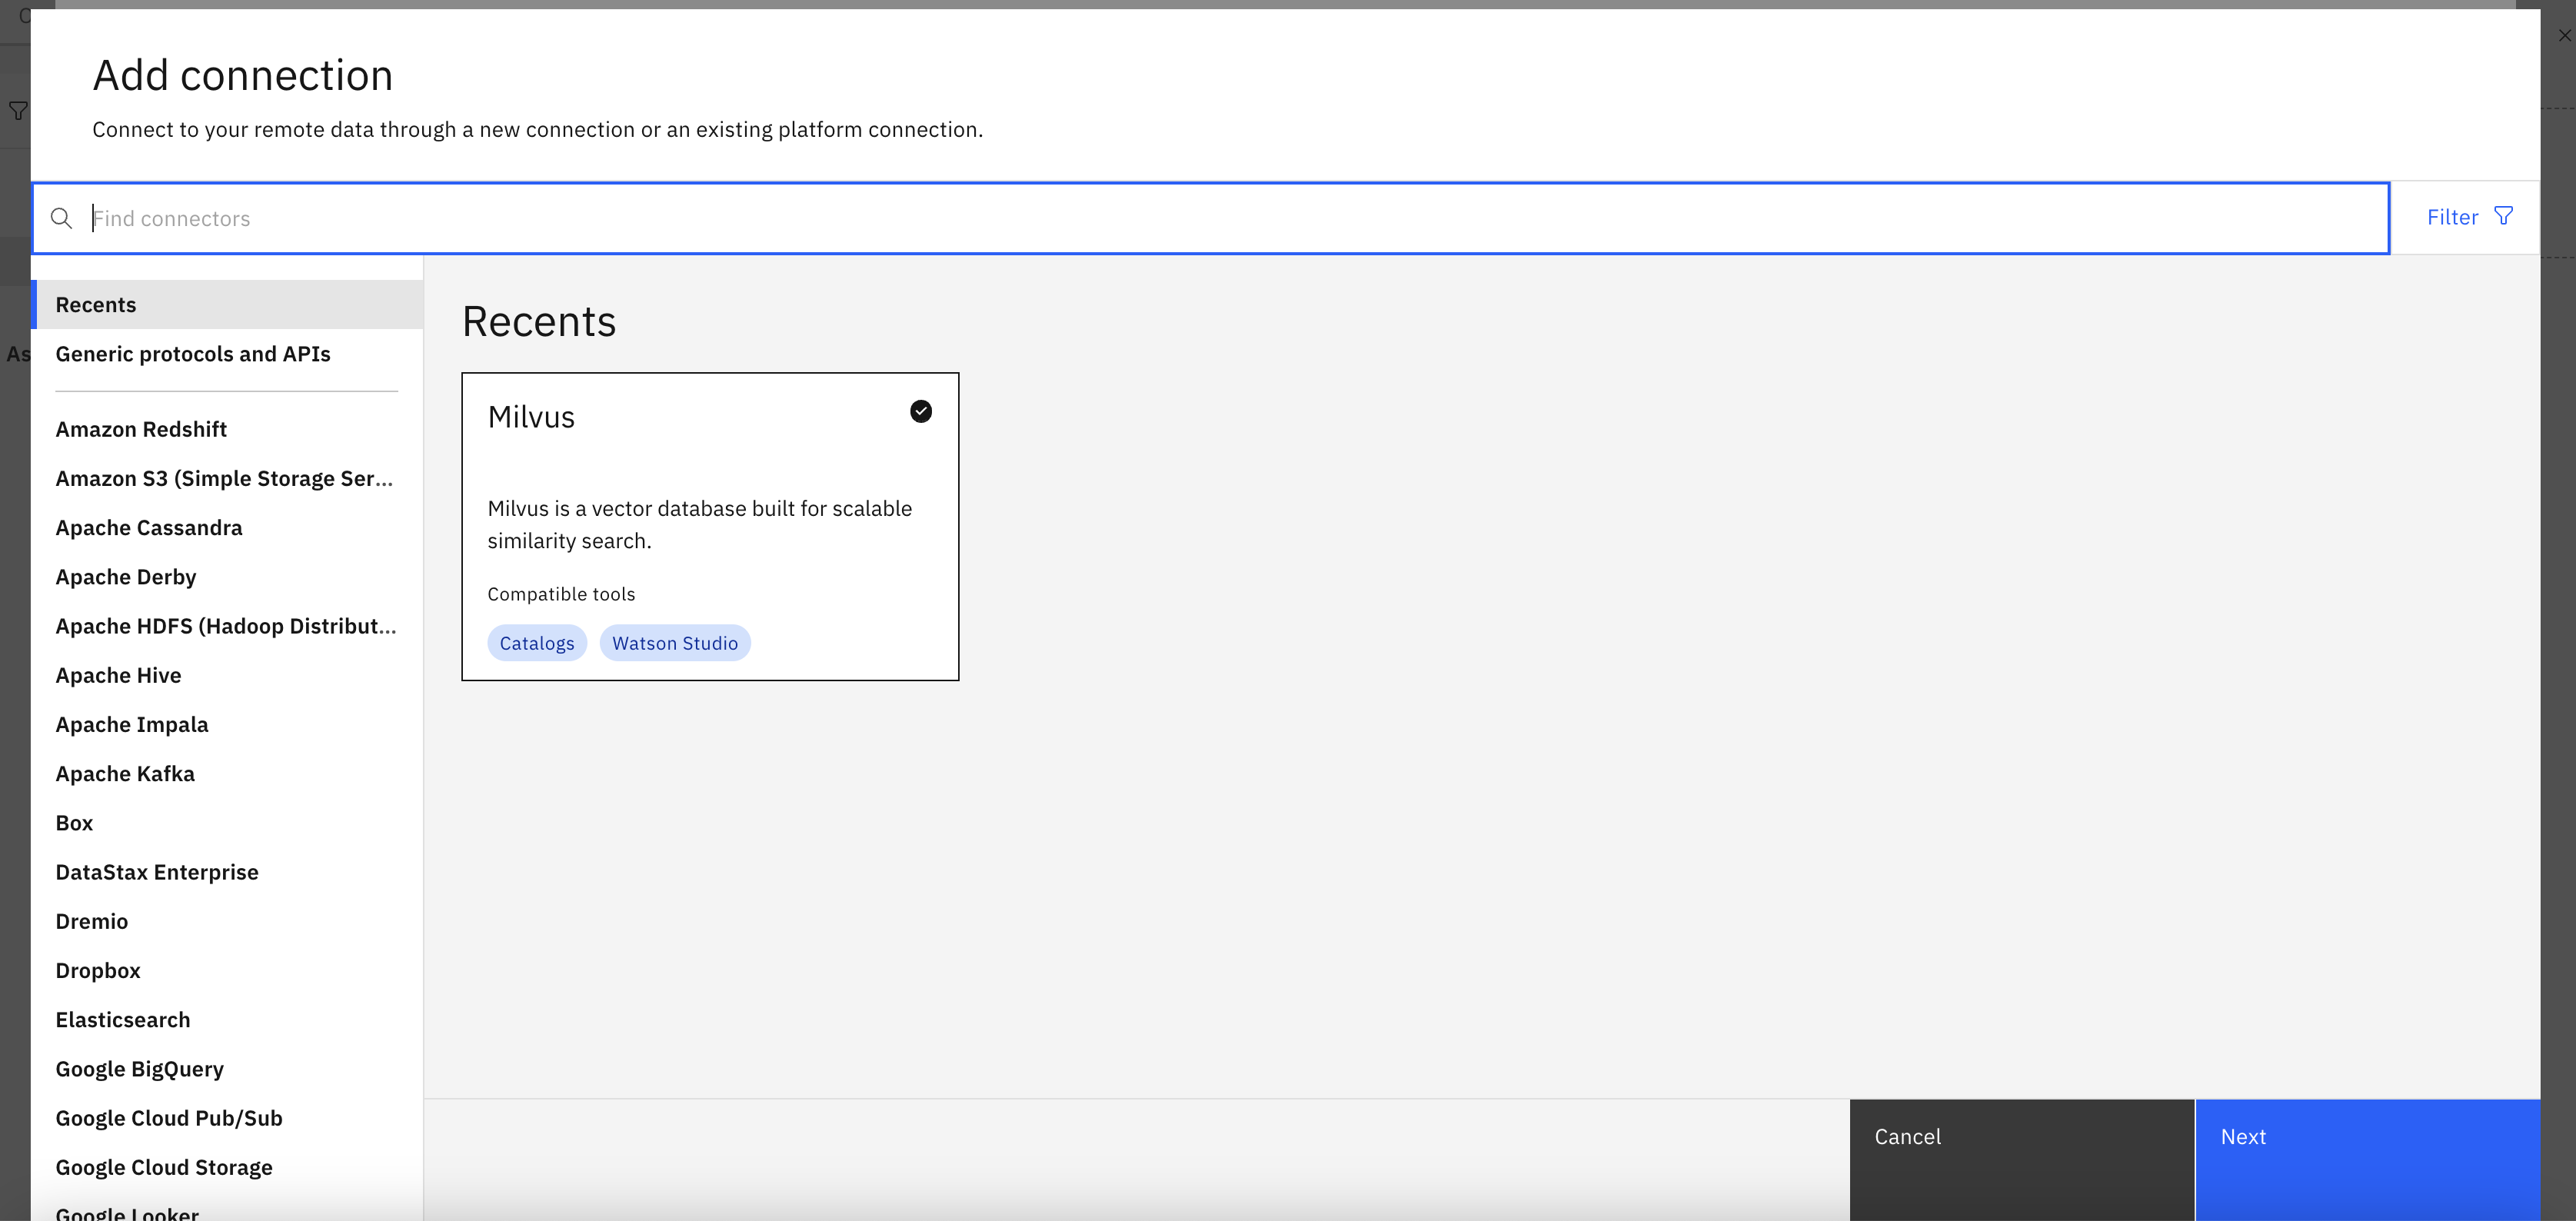
- Choose the tile Connect to a data source.
- Search for Milvus and click Select.
![Search for Milvus and click Select]()
- Provide Connection Details:
- Title: Enter a title for your connection (e.g., "Milvus connection").
- Milvus Hostname, Port, Database Name, Username, and Password:
- Get the Milvus host and port information from the Infrastructure Manager (click the Milvus service to open the Details page).
- Provide the database name and authorized user credentials to access the Milvus instance.
Setting Up Open-Source Milvus Server
1. Allocate Additional Memory to Docker
Increase Docker memory to at least 8GB through Docker desktop settings.
2. Download Docker Compose Configuration
Create a directory and download the Docker Compose file:
mkdir milvus_compose
cd milvus_compose
wget https://github.com/milvus-io/milvus/releases/download/v2.2.8/milvus-standalone-docker-compose.yml -O docker-compose.yml
3. Run Milvus Using Docker Compose
- Start Milvus:
docker compose up -d
- Verify containers are running:
docker ps -a
- Check the Milvus server logs:
docker logs milvus-standalone
Step 3: Creating a Slack Application
Creating a Slack Application
- Navigate to Slack API.
- Click on "Create App" -> "From Scratch".
- Provide an app name and select the workspace where you want to deploy your bot.
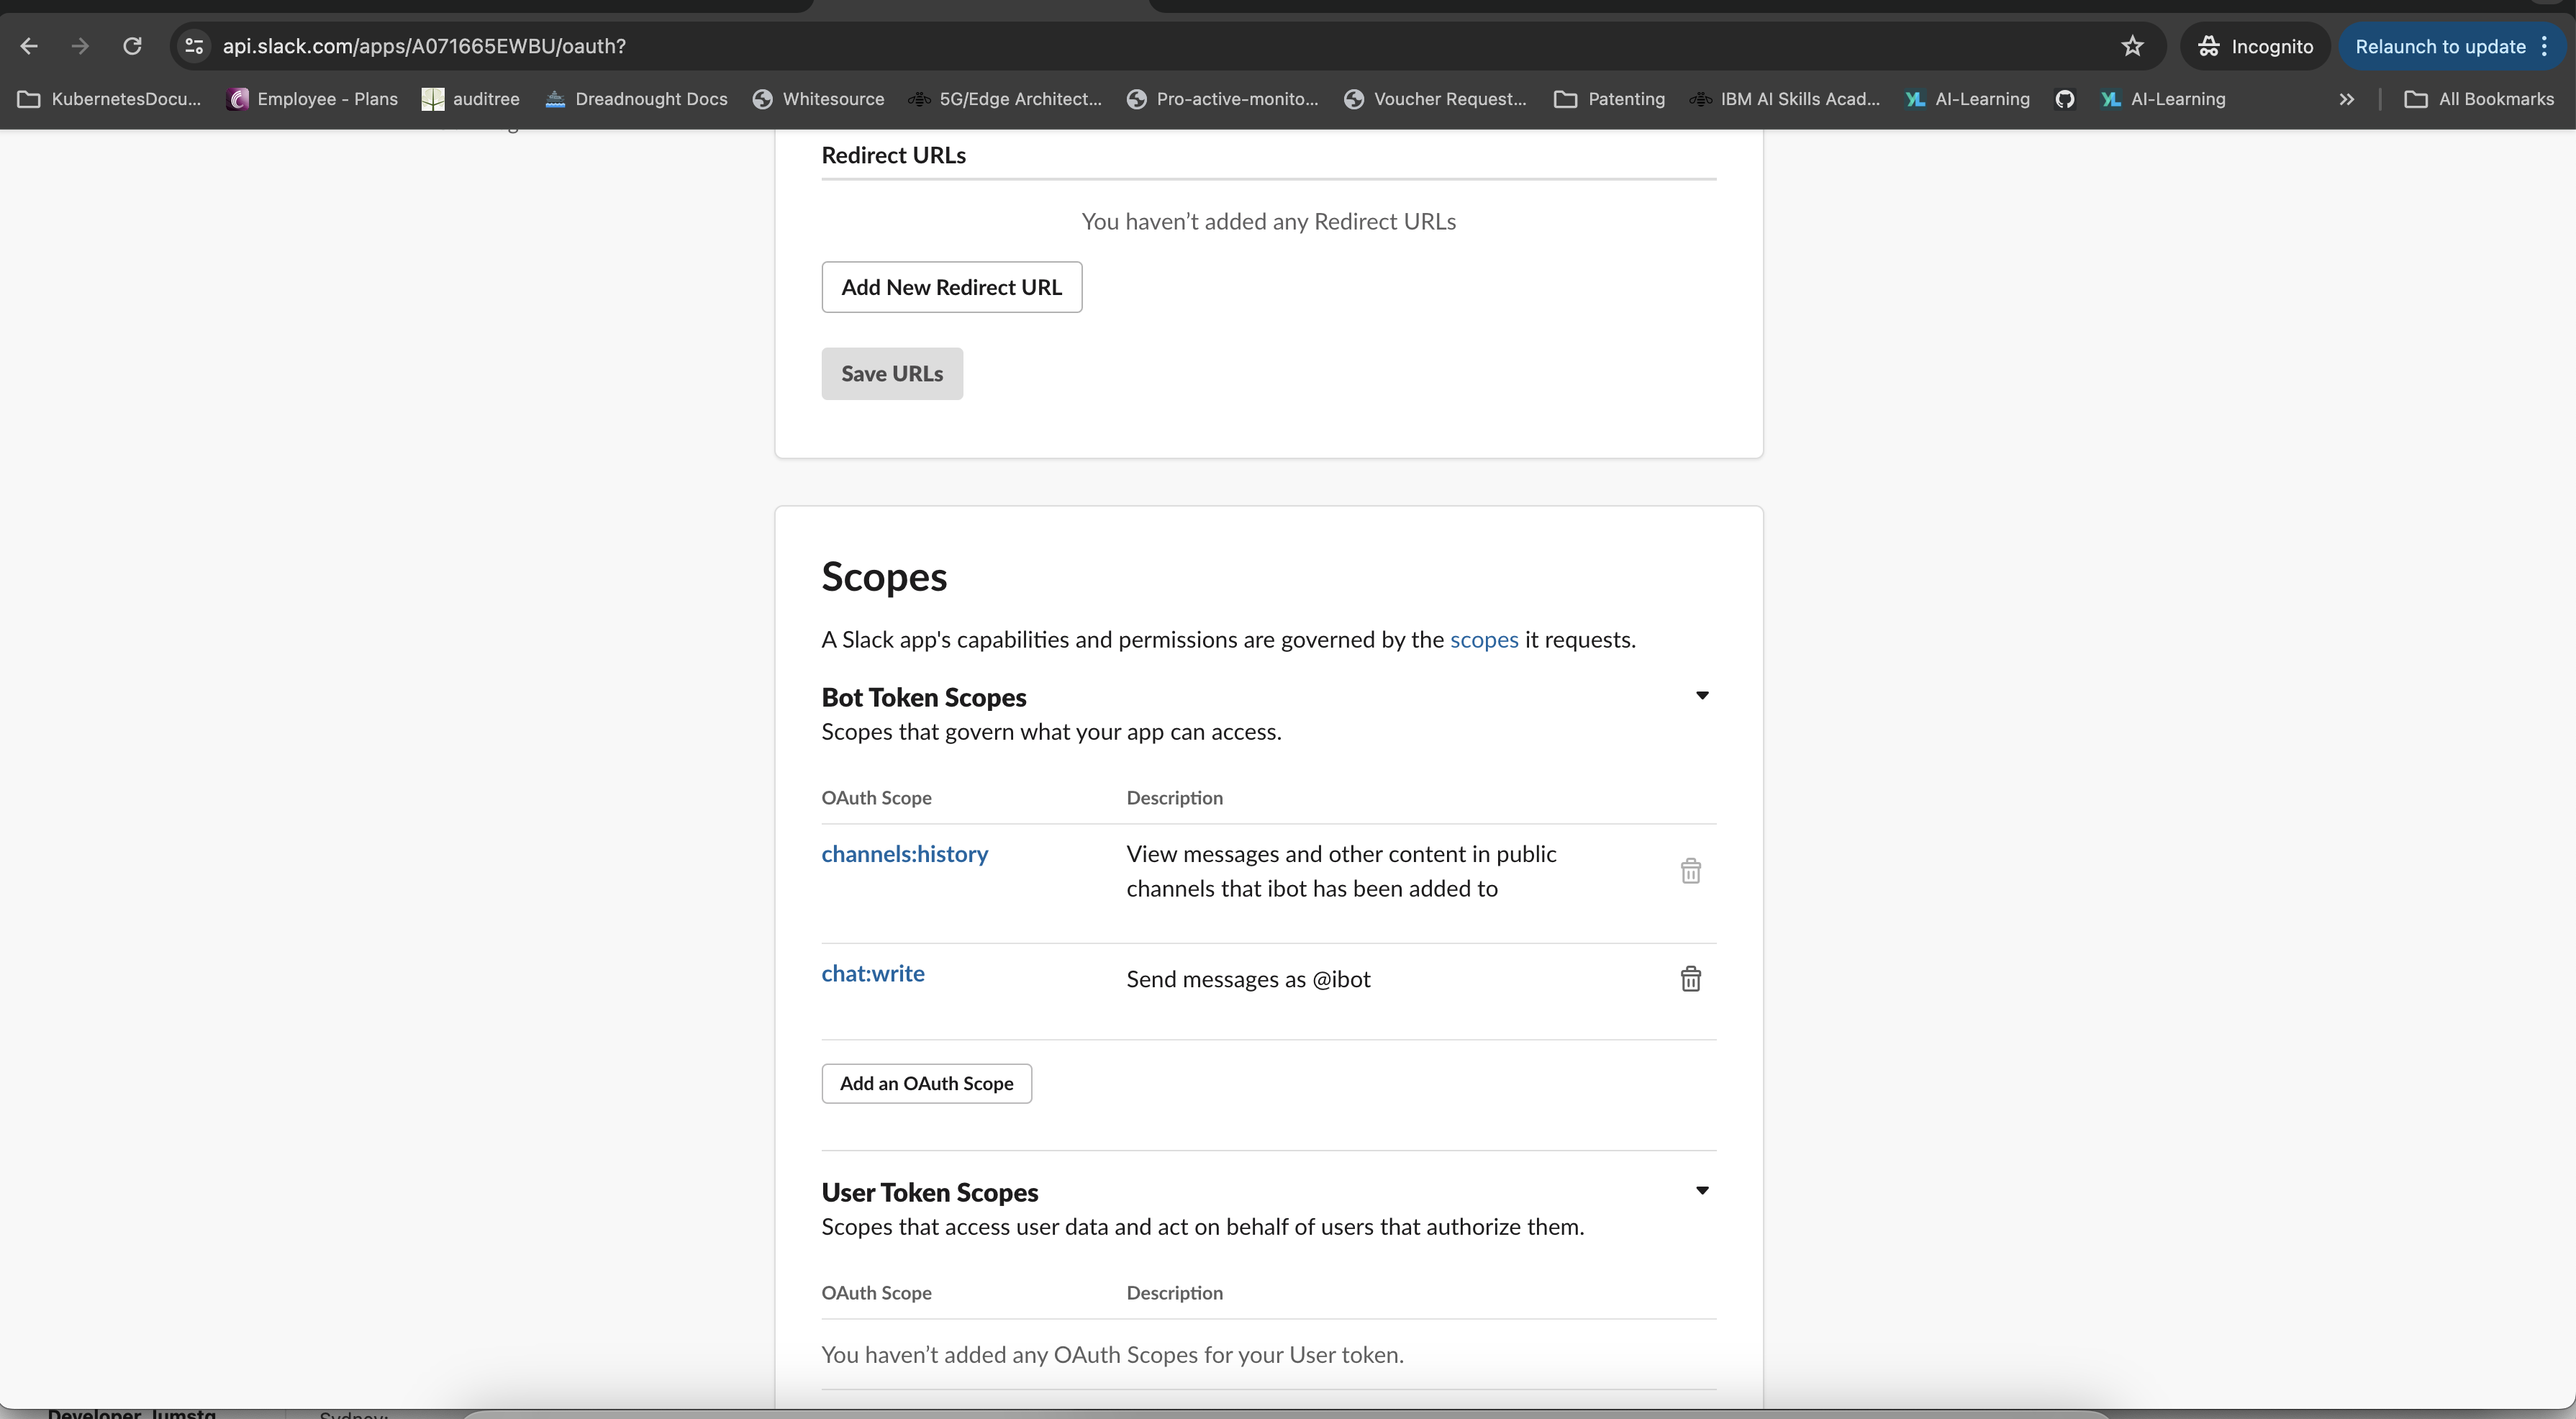
- Under your Slack application settings, navigate to "OAuth & Permissions."
- Click on "Add an OAuth Scope" and add "channels:history" and "chat:write" as bot token scopes.
![Click on "Add an OAuth Scope" and add "channels:history" and "chat:write" as bot token scopes]()
Obtain Tokens
- Get the
SLACK_TOKENfrom "OAuth & Permissions." - Get the
SIGNING_SECRETfrom "Basic Information."
Step 4: Setting Up the Project and Running the Application
Clone the Repository and Install Dependencies:
Clone the repository:
git clone https://github.com/PhaniDivi-613/doc-assistantNavigate to the project directory and install the required modules:
cd doc-assistant
pip install -r requirements.txt
Setup the Environment:
Create an .env file in the project directory and populate it with the following values collected in previous steps:
PROJECT_ID=<Project ID>
PROJECT_URL=<Project URL>
IC_API_KEY=<IBM Cloud API Token>
SLACK_TOKEN=<Slack API Token>
SIGNING_SECRET=<Signing Secret>
Populate the Database With Runbooks:
- Place all runbooks or knowledge transfer documents in the
knowledge_sourcefolder. - Populate the database by running the
populate_db.pyscript:
python populate_db.py --opensource-milvus  # Use this flag if using open-source Milvus
python populate_db.py  # Use this if using IBM watsonx.data
Run Your Python App and Create a Tunnel With Ngrok:
Start your Python Flask application:
python3 app.py --opensource-milvus # If using open-source Milvus
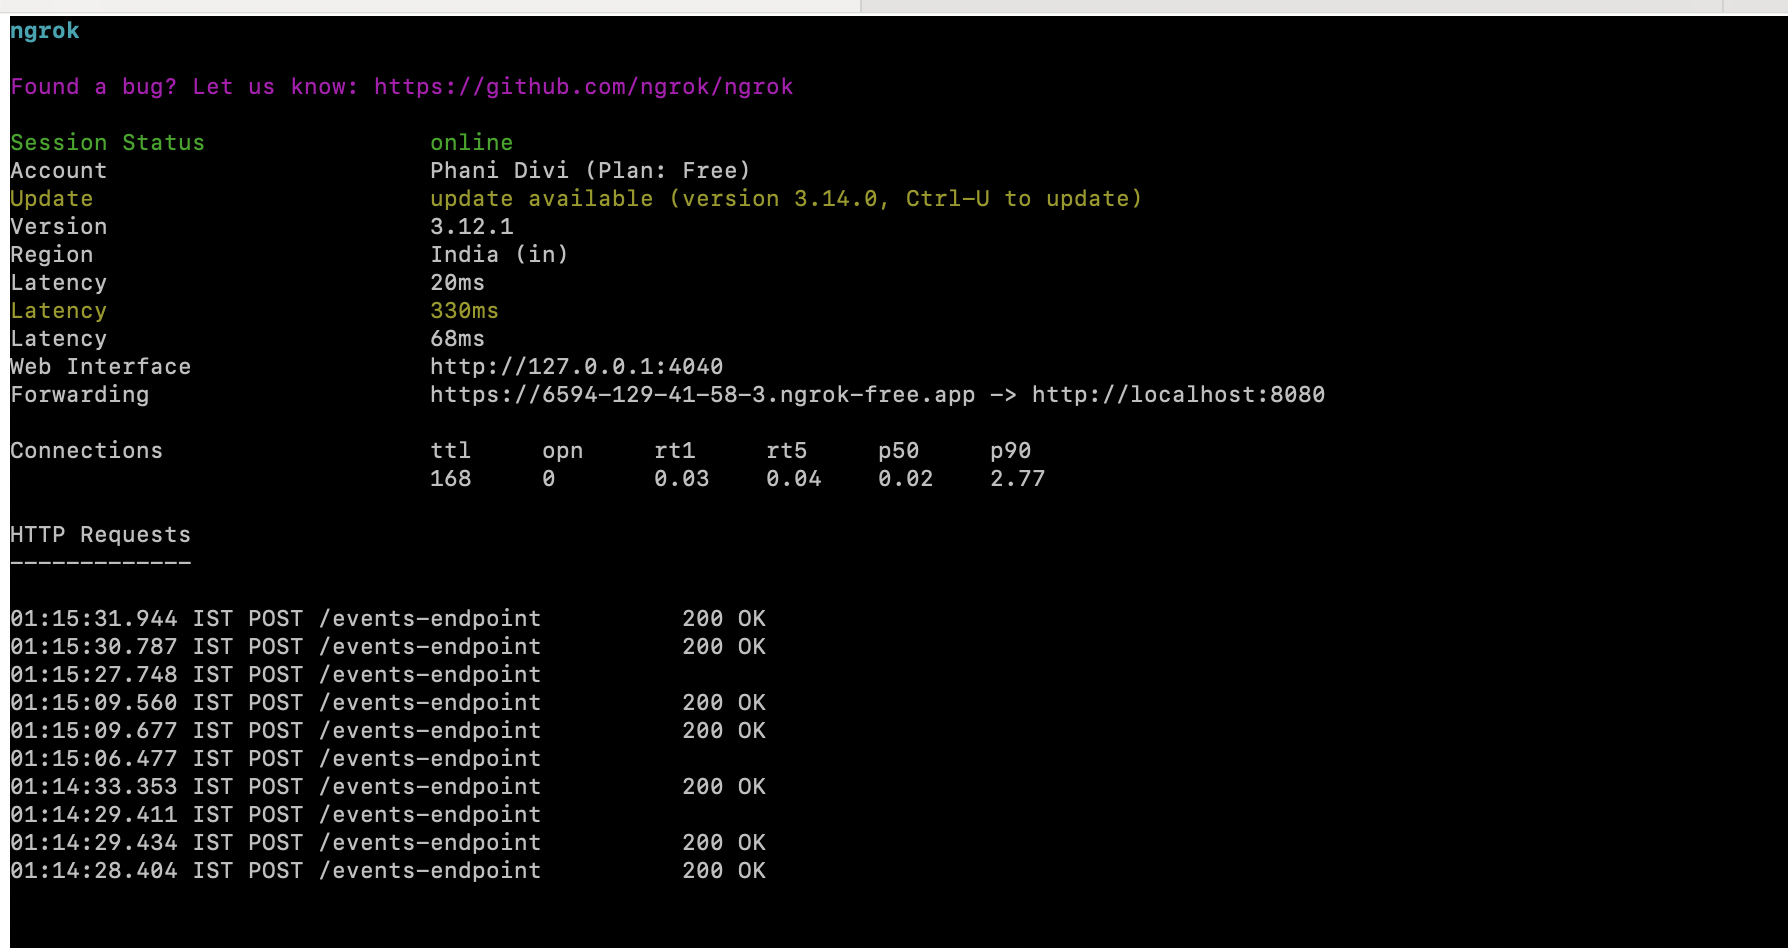
python3 app.py # If using IBM watsonx.dataIn a new terminal window, create a tunnel using ngrok:
ngrok http 8080Copy the forwarding URL from the ngrok terminal output.
![ngrok terminal output.]() Update Slack Configuration
Update Slack Configuration
 Update Slack Configuration
- In your Slack application settings, navigate to "Event Subscriptions."
- Update the "Request URLs" field with your
ngrokURL followed by/events-endpoint. - Add bot user events:
message.channelsmessage.channels
- Save the changes in your Slack application settings.
Interact With Your App
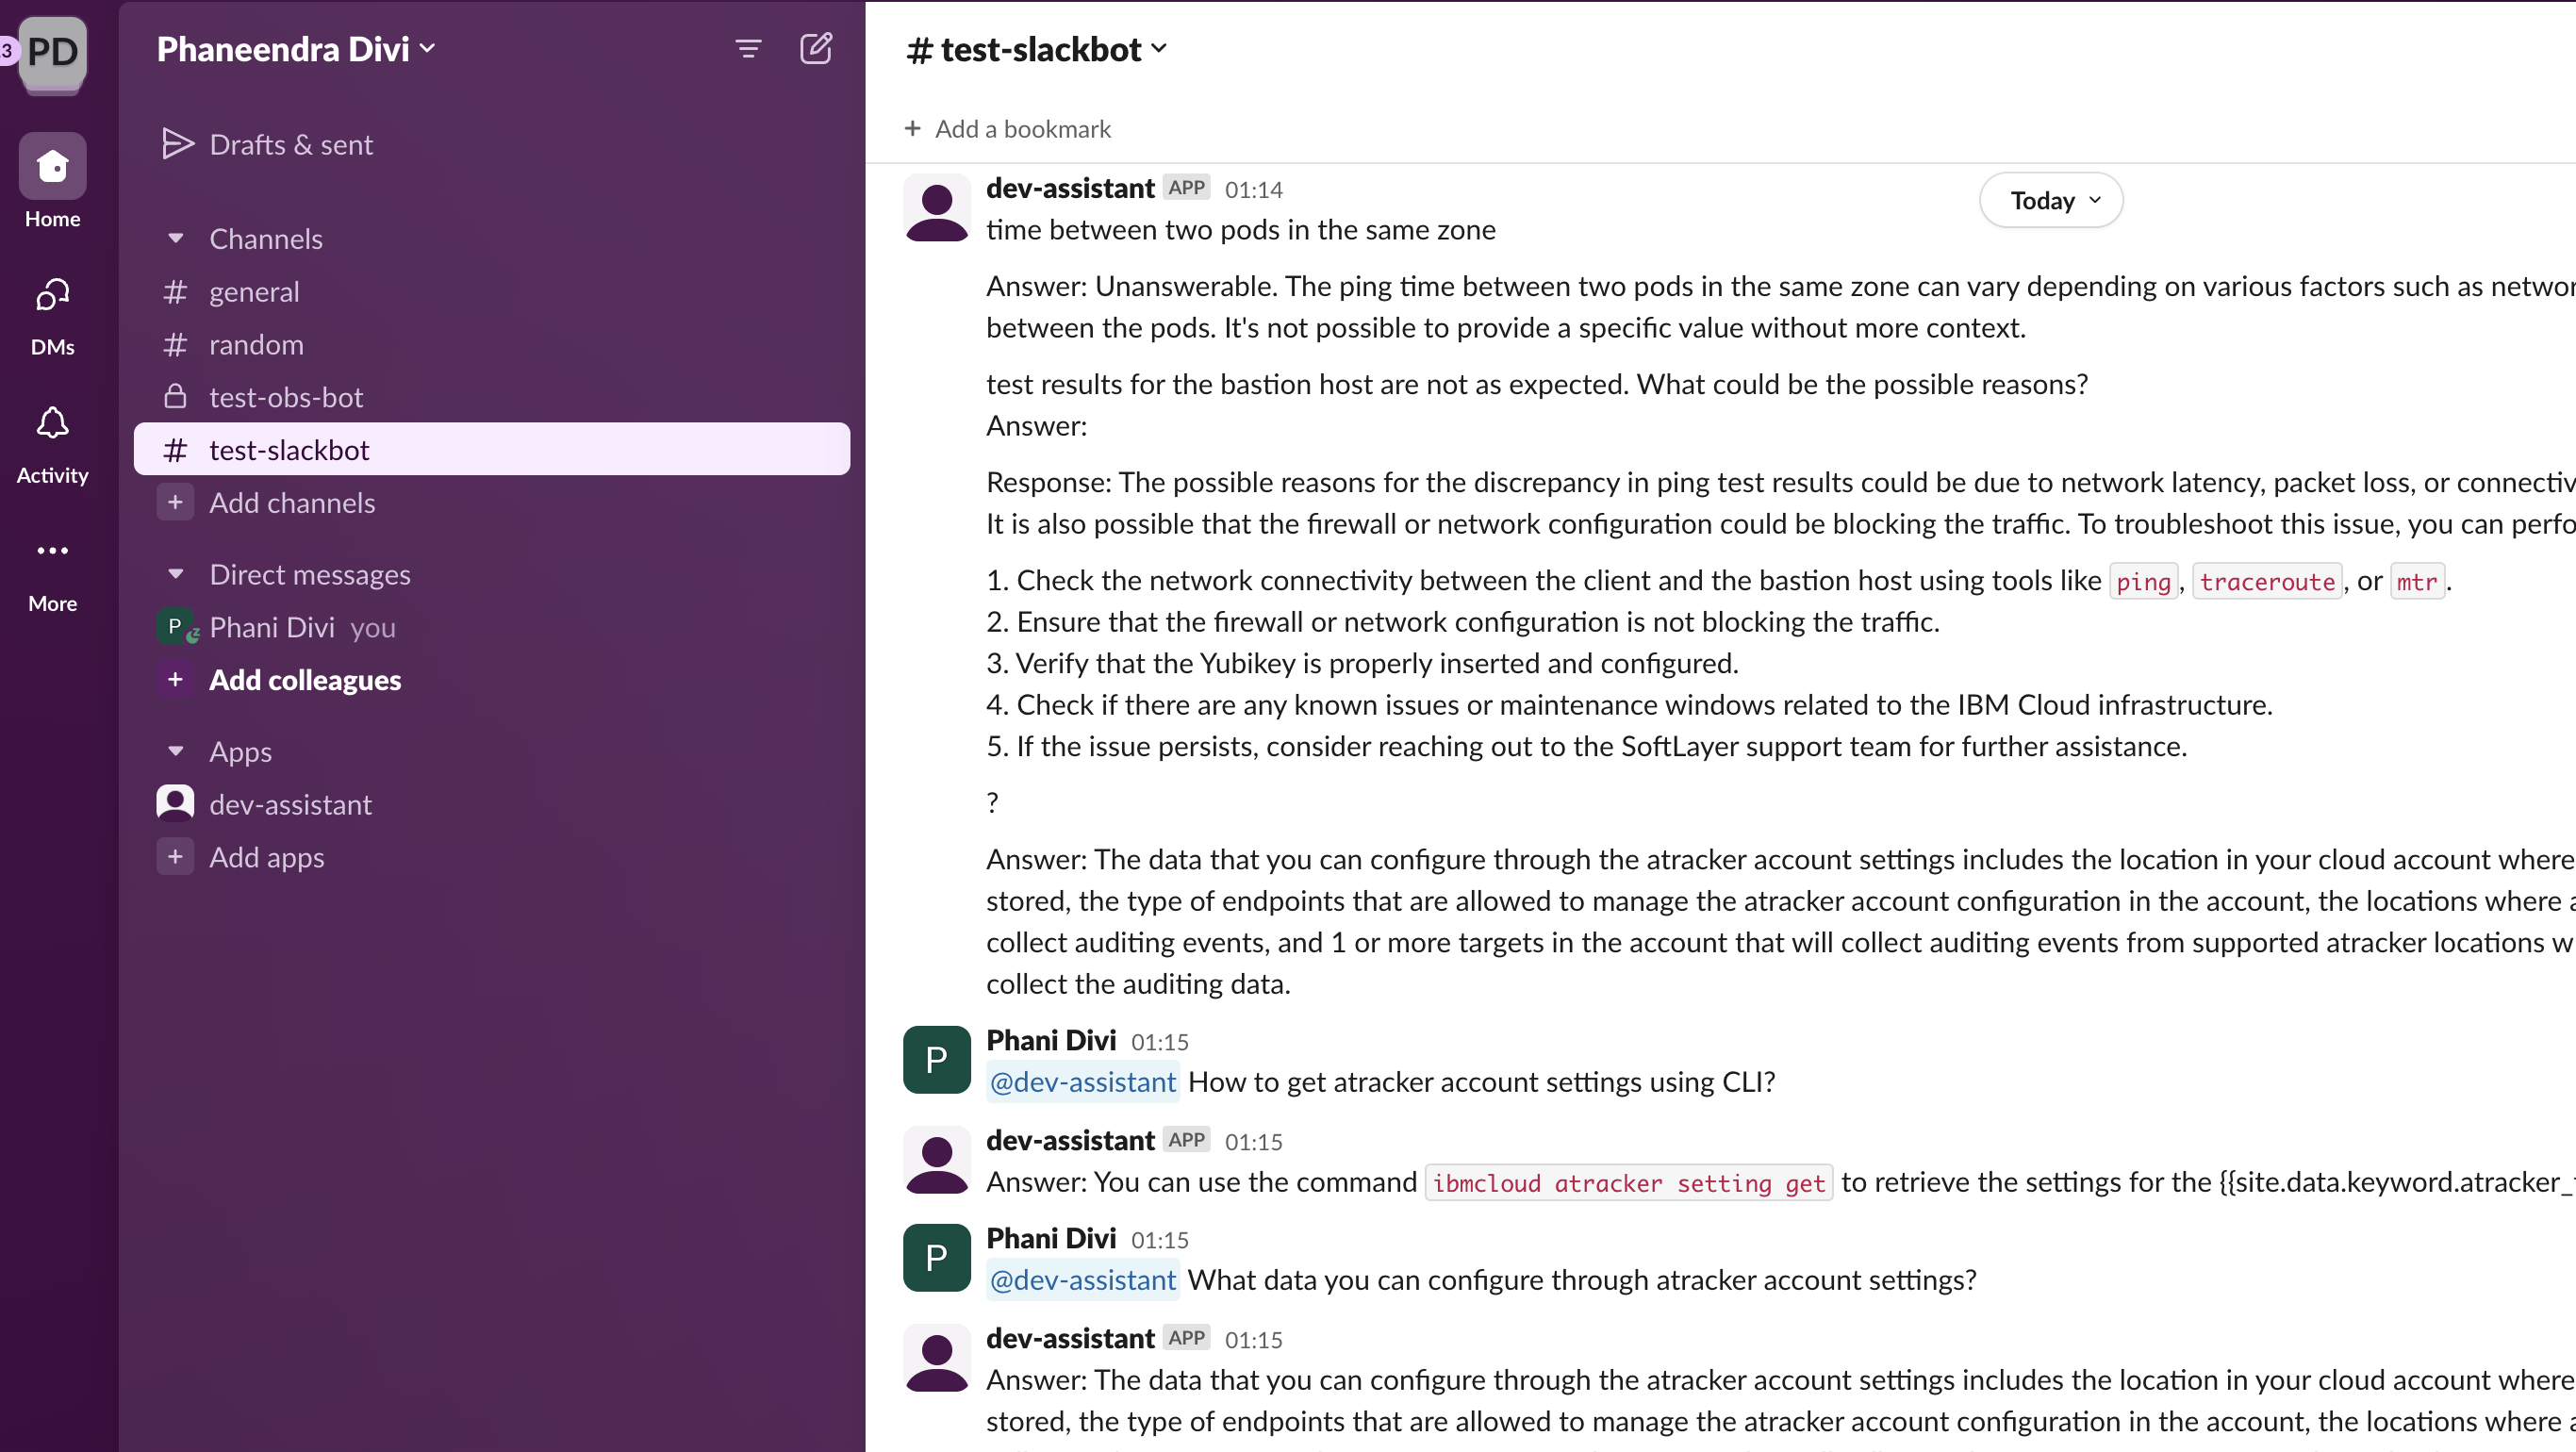
- Invite your bot to the Slack channel where you want it to operate.
- In the Slack channel, send a message to trigger the bot. For example:
@dev-assistant How to get atracker account settings using CLI? - Wait for the bot to process your request and generate a response.
![Slack bot response]()
Conclusion
By following these steps, you have successfully set up a Slack application integrated with a Milvus database for knowledge management. You can now interact with your bot in Slack, test its functionality, and experience its AI-powered capabilities. This setup allows for efficient query handling and intelligent responses based on the provided runbooks and knowledge sources.
Opinions expressed by DZone contributors are their own.
Comments