

Installation, Environment Setup, and Adding Proxy to npm and Node.js Packages
A quick tutorial on how to install npm packages and start working on a project using Node.js and npm.
Join the DZone community and get the full member experience.
Join For FreeNode.js is a server side platform, built on Google Chrome’s JavaScript runtime, which helps to build scalable network applications quickly and efficiently. As Node.js uses an event-driven, non-blocking I/O model, it is perfect for data-intensive real-time applications that run across distributed devices.
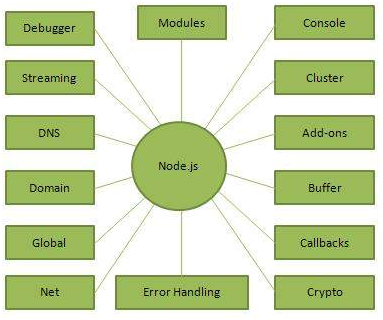
Image Reference: www.tutorialspoint.com
Node.js Installation and Environmental Variable Setup
- Download the latest Node.js Windows installer from here.
- Run the file by following prompts in the installer and complete the installation.
- Make sure the installation files are copied under C:\Program Files\nodejs or C:\Program Files (*86)\nodejs
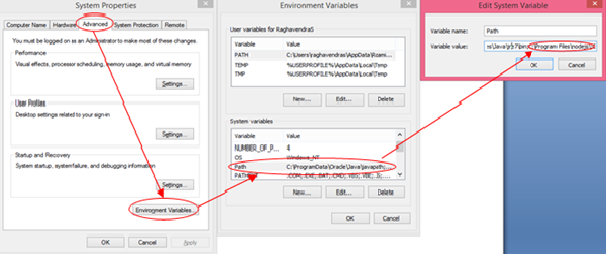
- Now open the system properties (enter sysdm.cpl in command prompt), and click Advanced tab.
- Click Environmental Variables. A pop-up window will open displaying Path under System Variables. Check whether the path is determined as C:\Program Files\nodejs (or) C:\Program Files (*86)\nodejs. If not, append the path manually by clicking Edit.
Verify Installation
- Open a text editor in any file location and save it as “main.js” file. The file should have the following content.
/* Hello, World! program in node.js */
console.log("Hello, World!")- Now open a command prompt and navigate to the folder that has main.js and execute the js file using node main.jscommand.
- If you have done the process correctly, the final result will be displayed as
Hello, World!- You can also check the node version using the command node -v
Installing Packages Using Node Package Manager (npm)
There is a simple syntax to install any Node.js module:
$ npm install <Package Name>For example, the following command installs a famous Node.js web framework module, called Gulp:
$ npm install gulpInstalling the npm Packages Globally
To download packages globally, simply use the command npm install -g <package name>
Note: Some of the npm package dependency files will be downloaded from git repositories. Hence, the Git Bash Installation is required. You can download and install the Git Bash from here.
Setup Node.Js and npm Behind a Corporate Web Proxy Server
- The Systems that are all present inside the corporate proxy requires npm proxy setup separately.
- npm uses a configuration file to apply the proxy setting, which can be modified through command prompt.
npm config - Run the commands in command prompt one by one.
Running a Sample Project Using npm
- Let’s assume that your project is located in your F: drive
- Open command prompt and navigate to F:\Sample project (project folder)
- Now verify the version of the node by using a command node -v in command prompt. If the version is outdated, it can be updated using the command npm install –g
- After updation of npm, the project requires bower package and its dependency files have to be installed (Bower can be installed using bower install -g)
- After the bower installation, you can run the project using gulp serve-dev for development mode and gulp serve-build for production mode.
- After running the command, web browser will be prompted automatically with http://localhost:3000
For more information please visit : http://vmokshagroup.com/blog/
Opinions expressed by DZone contributors are their own.
Comments