Jenkins Configure Master and Slave Nodes
Learn about the importance of the master and slave nodes and set up a sample freestyle project.
Join the DZone community and get the full member experience.
Join For Free
Jenkins Master and Slave Concept
A Jenkins master comes with the basic installation of Jenkins, and in this configuration, the master handles all the tasks for your build system.
You may also enjoy: Getting Started With Jenkins: The Ultimate Guide
If you are working on multiple projects you may run multiple jobs on each and every project. Some projects need to run on some particular nodes, and in this process, we need to configure slaves. Jenkins slaves connect to the Jenkins master using the Java Network Launch Protocol.
Jenkins Master and Slave Architecture

The Jenkins master acts to schedule the jobs and assign slaves and send builds to slaves to execute the jobs.
It will also monitor the slave state (offline or online) and getting back the build result responses from slaves and the display build results on the console output. The workload of building jobs is delegated to multiple slaves.
Steps to Configure Jenkins Master and Slave Nodes
- Click on Manage Jenkins in the left corner on the Jenkins dashboard.
- Click on Manage Nodes.
![Manage Nodes Manage Nodes]()
- Select New Node and enter the name of the node in the Node Name field.
- Select Permanent Agent and click the OK button. Initially, you will get only one option, "Permanent Agent." Once you have one or more slaves you will get the "Copy Existing Node" option.
![Node options Node options]()
Enter the required information.
Some required fields include:
Name: Name of the Slave. e.g: Test

Description: Description for this slave (optional). e.g: testing slave

# of Executors: Maximum number of Parallel builds Jenkins master perform on this slave. e.g: #2

Remote root directory: A slave needs to have a directory dedicated to Jenkins. Specify the path to this directory on the agent. e.g: /home/

Usage: Controls how Jenkins schedules builds on this node. e.g: Only build jobs with label expressions matching this node.

Launch method: Controls how Jenkins starts this agent. e.g: Launch agent agents via SSH
6. Enter the Hostname in the Host field.
7. Select the Add button to add credentials. and click Jenkins.
8. Enter Username, Password, ID, and Description.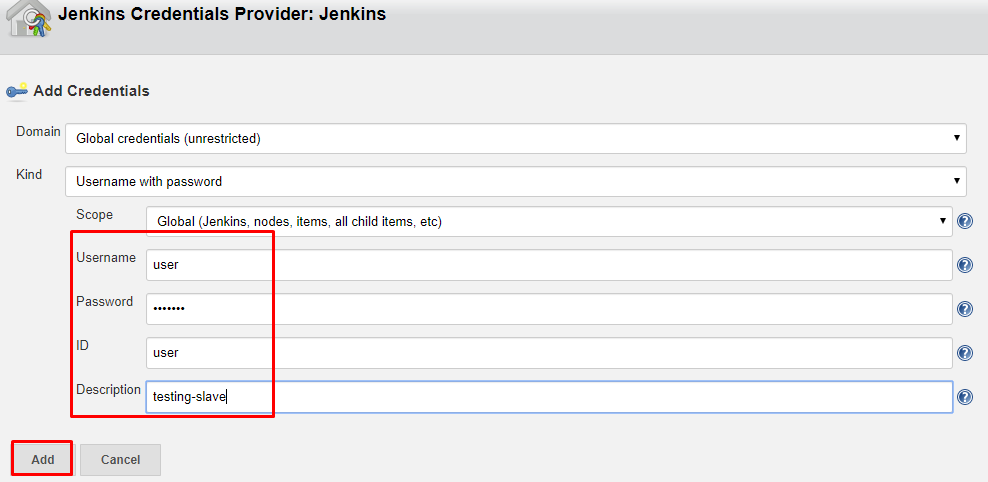
9. Select the dropdown menu to add credentials in the Credentials field.
10. Select the next dropdown to add the Host Key Verification Strategy under Non verifying Verification Strategy.
11. Select Keep this agent online as much as possible in the Availability field.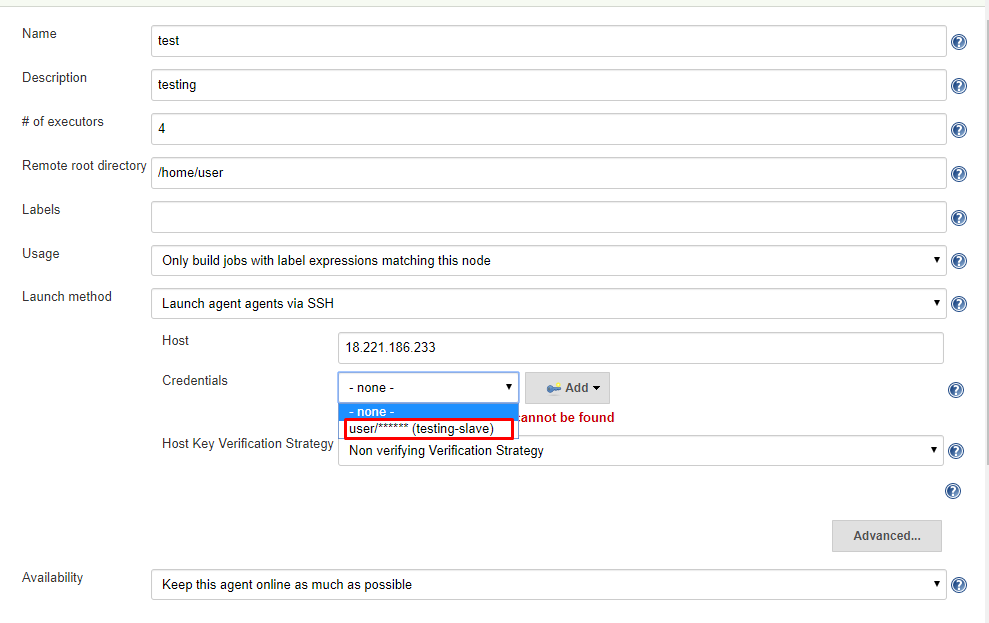
12. Click the Save button.

Creating a Freestyle Project and Running on The Slave Machine
- Click on Save and it will redirect to job's view page
- On the left pane, click the Build Now button to execute your Pipeline.
- We can verify the history of the executed build under the Build History by clicking the build number.
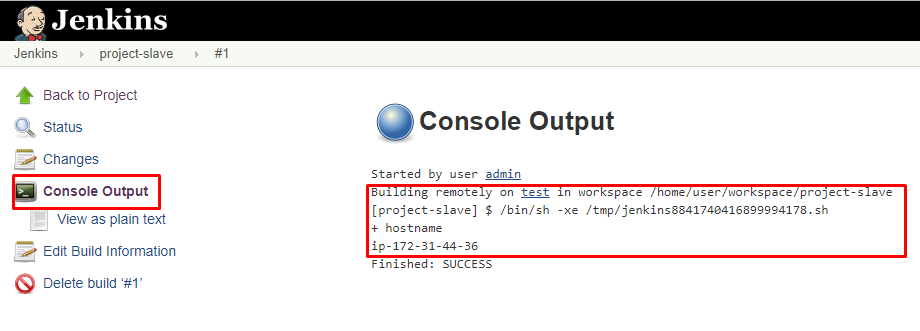
- Click on the build number and select Console Output. Here you can see the executed job in the remote host and output.
![Console output Console output]()
Creating a Pipeline and Running on The Slave Machine
- Click New Item in the top left corner on the dashboard.
- Enter the name of your project in the Enter an item name field, and select the Pipeline project, and click OK button.
- Enter Description (optional).
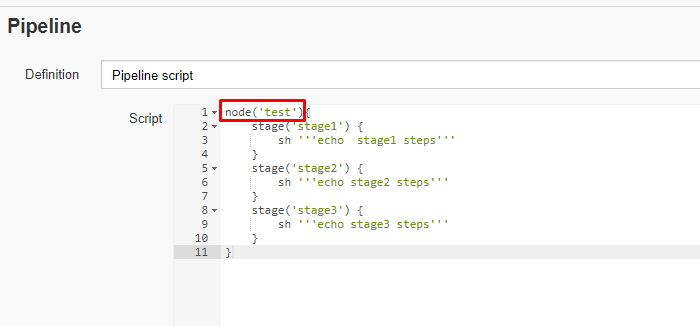
- Go to the Pipeline section, make sure the Definition field has the Pipeline script option selected.
- Copy and paste the following declarative Pipeline script into a script field.
node('test'){
stage('stage1') {
sh '''echo  stage1 steps'''
}
stage('stage2') {
sh '''echo stage2 steps'''
}
stage('stage3') {
sh '''echo stage3 steps'''
}
}
6. Click on Save, it will redirect to the Pipeline view page.
7. On the left pane, click the Build Now button to execute your Pipeline.
8. After Pipeline execution is completed, the Pipeline view will be as shown below.
9. We can verify the history of executed build under the Build History by clicking the build number.
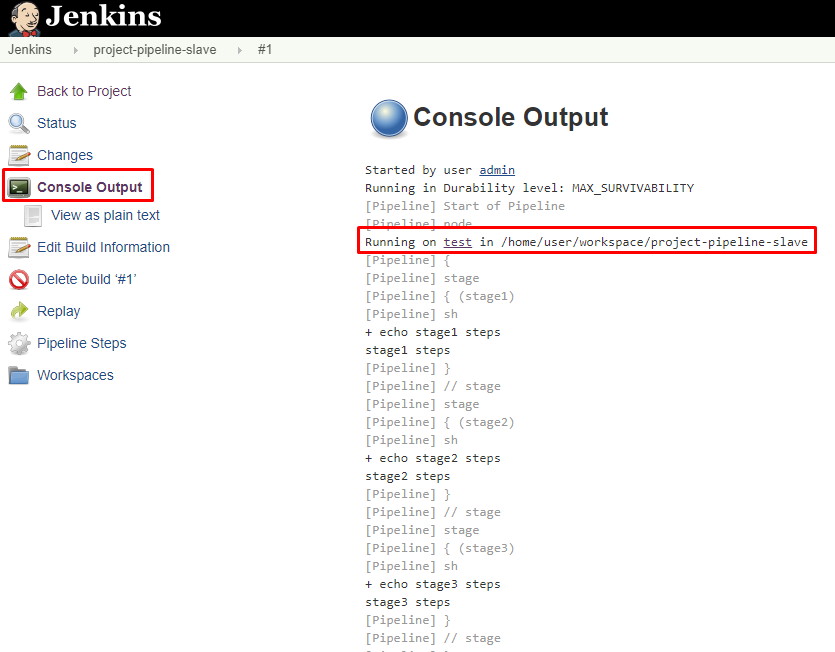
10. Click on build number and select Console Output. Here you can see that the pipeline ran on a slave machine.
Further Reading
Continuous Delivery With Jenkins Workflow
A Getting Started Guide to Setting up Jenkins
Opinions expressed by DZone contributors are their own.


Comments