Kotlin Microservices With Micronaut, Spring Cloud, and JPA
In this article, we'll learn how to create microservice applications written in Kotlin, using the Micronaut framework, Spring Cloud, and JPA for a little extra help.
Join the DZone community and get the full member experience.
Join For FreeThe Micronaut Framework provides support for Kotlin built upon the Kapt compiler plugin. It also implements the most popular cloud-native patterns, like distributed configuration, service discovery, and client-side load balancing. These features allow you to include an application that's been built on top of Micronaut into an existing microservices-based system. The most popular example of such an approach may be integration with the Spring Cloud ecosystem. If you have already used Spring Cloud, it is very likely you built your microservices-based architecture using the Eureka discovery server and Spring Cloud Config as a configuration server. Beginning with version 1.1, Micronaut supports both these popular tools as part of the Spring Cloud project. That's good news because, in version 1.0, the only supported distributed solution was Consul, and there was no way to use Eureka discovery together with Consul's property source (running them together ends with an exception).
In this article, you will learn how to:
- configure Micronaut Maven support for Kotlin using the Kapt compiler.
- implement microservices with Micronaut and Kotlin.
- integrate Micronaut with the Spring Cloud Eureka discovery server.
- integrate Micronaut with the Spring Cloud Config server.
- configure JPA/Hibernate support for an application built on top Micronaut.
- run a single instance of PostgreSQL shared between all sample microservices.
Our architecture is pretty similar to the architecture described in my previous article about Micronaut, A Quick Guide to Microservices with Micronaut Framework. We also have three microservices that communicate with each other. We use Spring Cloud Eureka and Spring Cloud Config for discovery and distributed configuration instead of Consul. Every service has a back-end store — PostgreSQL database. This architecture has been visualized in the following picture.

After that short introduction, we may proceed to the development. Let's begin from configuring Kotlin support for Micronaut.
1. Kotlin With Micronaut — Configuration
Support for Kotlin with the Kapt compiler plugin is described well on the Micronaut docs site. However, I decided to use Maven instead of Gradle, so our configuration will be slightly different than instructions for Gradle. We configure Kapt inside the Maven plugin for Kotlin, kotlin-maven-plugin. Thanks to that Kapt, we will create Java "stub" classes for each of our Kotlin classes, which can then be processed by Micronaut's Java annotation processor. The Micronaut annotation processors are declared inside the tag annotationProcessorPaths, in the configuration section. Here's the full Maven configuration to provide support for Kotlin. Beside the core library micronaut-inject-java, we also use annotations from tracing, OpenAPI, and JPA libraries.
<plugin>
    <groupId>org.jetbrains.kotlin</groupId>
    <artifactId>kotlin-maven-plugin</artifactId>
    <dependencies>
        <dependency>
            <groupId>org.jetbrains.kotlin</groupId>
            <artifactId>kotlin-maven-allopen</artifactId>
            <version>${kotlin.version}</version>
        </dependency>
    </dependencies>
    <configuration>
        <jvmTarget>1.8</jvmTarget>
    </configuration>
    <executions>
        <execution>
            <id>compile</id>
            <phase>compile</phase>
            <goals>
                <goal>compile</goal>
            </goals>
        </execution>
        <execution>
            <id>test-compile</id>
            <phase>test-compile</phase>
            <goals>
                <goal>test-compile</goal>
            </goals>
        </execution>
        <execution>
            <id>kapt</id>
            <goals>
                <goal>kapt</goal>
            </goals>
            <configuration>
                <sourceDirs>
                    <sourceDir>src/main/kotlin</sourceDir>
                </sourceDirs>
                <annotationProcessorPaths>
                    <annotationProcessorPath>
                        <groupId>io.micronaut</groupId>
                        <artifactId>micronaut-inject-java</artifactId>
                        <version>${micronaut.version}</version>
                    </annotationProcessorPath>
                    <annotationProcessorPath>
                        <groupId>io.micronaut.configuration</groupId>
                        <artifactId>micronaut-openapi</artifactId>
                        <version>${micronaut.version}</version>
                    </annotationProcessorPath>
                    <annotationProcessorPath>
                        <groupId>io.micronaut</groupId>
                        <artifactId>micronaut-tracing</artifactId>
                        <version>${micronaut.version}</version>
                    </annotationProcessorPath>
                    <annotationProcessorPath>
                        <groupId>javax.persistence</groupId>
                        <artifactId>javax.persistence-api</artifactId>
                        <version>2.2</version>
                    </annotationProcessorPath>
                    <annotationProcessorPath>
                        <groupId>io.micronaut.configuration</groupId>
                        <artifactId>micronaut-hibernate-jpa</artifactId>
                        <version>1.1.0.RC2</version>
                    </annotationProcessorPath>
                </annotationProcessorPaths>
            </configuration>
        </execution>
    </executions>
</plugin>
We also should not run maven-compiler-plugin during the compilation phase. The Kapt compiler generates Java classes, so we don't need to run any other compilators during the build.
<plugin>
    <groupId>org.apache.maven.plugins</groupId>
    <artifactId>maven-compiler-plugin</artifactId>
    <configuration>
        <proc>none</proc>
        <source>1.8</source>
        <target>1.8</target>
    </configuration>
    <executions>
        <execution>
            <id>default-compile</id>
            <phase>none</phase>
        </execution>
        <execution>
            <id>default-testCompile</id>
            <phase>none</phase>
        </execution>
        <execution>
            <id>java-compile</id>
            <phase>compile</phase>
            <goals>
                <goal>compile</goal>
            </goals>
        </execution>
        <execution>
            <id>java-test-compile</id>
            <phase>test-compile</phase>
            <goals>
                <goal>testCompile</goal>
            </goals>
        </execution>
    </executions>
</plugin>
Finally, we will add the Kotlin core library and Jackson module for JSON serialization.
<dependency>
    <groupId>com.fasterxml.jackson.module</groupId>
    <artifactId>jackson-module-kotlin</artifactId>
</dependency>
<dependency>
    <groupId>org.jetbrains.kotlin</groupId>
    <artifactId>kotlin-stdlib-jdk8</artifactId>
    <version>${kotlin.version}</version>
</dependency>
If you are running the application with IntelliJ, you should first enable annotation processing. To do that, go to Build, Execution, Deployment -> Compiler -> Annotation Processors as shown below.

2. Running Postgres
Before proceeding to the development phase, we have to start an instance of the PostgreSQL database. It will be started as a Docker container. For me, PostgreSQL is now available under the address,192.168.99.100:5432, because I'm using Docker Toolbox.
$ docker run -d --name postgres -e POSTGRES_USER=micronaut -e POSTGRES_PASSWORD=123456 -e POSTGRES_DB=micronaut -p 5432:5432 postgres3. Enabling Hibernate for Micronaut
Hibernate configuration is a little harder for Micronaut than for Spring Boot. We don't have any projects like Spring Data JPA, where almost everything is auto-configured. Beside specific JDBC drivers for integration with a database, we have to include the following dependencies. We may choose between three available libraries that provide data source implementation: Tomcat, Hikari, or DBCP.
<dependency>
    <groupId>org.postgresql</groupId>
    <artifactId>postgresql</artifactId>
    <version>42.2.5</version>
</dependency>
<dependency>
    <groupId>io.micronaut.configuration</groupId>
    <artifactId>micronaut-jdbc-hikari</artifactId>
</dependency>
<dependency>
    <groupId>io.micronaut.configuration</groupId>
    <artifactId>micronaut-hibernate-jpa</artifactId>
</dependency>
<dependency>
    <groupId>io.micronaut.configuration</groupId>
    <artifactId>micronaut-hibernate-validator</artifactId>
</dependency>
The next step is to provide some configuration settings. All the properties will be stored on the configuration server. We have to set the database connection settings and credentials. The JPA configuration settings are provided under the jpa.* key. We force Hibernate to update the database on application startup and print all the SQL logs (only for tests).
datasources:
  default:
    url: jdbc:postgresql://192.168.99.100:5432/micronaut?ssl=false
    username: micronaut
    password: 123456
    driverClassName: org.postgresql.Driver
jpa:
  default:
    packages-to-scan:
      - 'pl.piomin.services.department.model'
    properties:
      hibernate:
        hbm2ddl:
          auto: update
        show_sql: true
Here's our sample domain object.
@Entity
data class Department(@Id @GeneratedValue(strategy = GenerationType.SEQUENCE, generator = "department_id_seq") @SequenceGenerator(name = "department_id_seq", sequenceName = "department_id_seq") var id: Long,
                      var organizationId: Long, var name: String) {

    @Transient
    var employees: MutableList<Employee> = mutableListOf()

}
The repository bean needs to inject EntityManager using the @PersistentContext and @CurrentSession annotations. All functions need to be annotated with @Transactional, which does not require the methods to be final (open modifier in Kotlin).
@Singleton
open class DepartmentRepository(@param:CurrentSession @field:PersistenceContext val entityManager: EntityManager) {

    @Transactional
    open fun add(department: Department): Department {
        entityManager.persist(department)
        return department
    }

    @Transactional(readOnly = true)
    open fun findById(id: Long): Department = entityManager.find(Department::class.java, id)

    @Transactional(readOnly = true)
    open fun findAll(): List<Department> = entityManager.createQuery("SELECT d FROM Department d").resultList as List<Department>

    @Transactional(readOnly = true)
    open fun findByOrganization(organizationId: Long) = entityManager.createQuery("SELECT d FROM Department d WHERE d.organizationId = :orgId")
            .setParameter("orgId", organizationId)
            .resultList as List<Department>

}
4. Running Spring Cloud Config Server
Running the Spring Cloud Config server is very simple. I have already described that in some of my previous articles. All those were prepared for Java, while today we start it as Kotlin application. Here's our main class. It should be annotated with @EnableConfigServer.
@SpringBootApplication
@EnableConfigServer
class ConfigApplication

fun main(args: Array<String>) {
    runApplication<ConfigApplication>(*args)
}
Besides the Kotlin core dependency, we need to include the artifact, spring-cloud-config-server.
<dependency>
    <groupId>org.springframework.cloud</groupId>
    <artifactId>spring-cloud-config-server</artifactId>
</dependency>
<dependency>
    <groupId>org.jetbrains.kotlin</groupId>
    <artifactId>kotlin-stdlib-jdk8</artifactId>
    <version>${kotlin.version}</version>
</dependency>
By default, the config server tries to use Git as a properties source backend. We prefer using classpath resources, which is much simpler for our tests. To do that, we have to enable the native profile. We will also set the server port to 8888.
spring:
  application:
    name: config-service
  profiles:
    active: native
server:
  port: 8888
If you place all the configurations under the directory /src/main/resources/config, they will be loaded automatically after the app starts up.
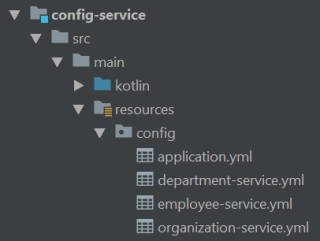
Here's the configuration file for department-service.
micronaut:
  server:
    port: -1
  router:
    static-resources:
      swagger:
        paths: classpath:META-INF/swagger
        mapping: /swagger/**
datasources:
  default:
    url: jdbc:postgresql://192.168.99.100:5432/micronaut?ssl=false
    username: micronaut
    password: 123456
    driverClassName: org.postgresql.Driver
jpa:
  default:
    packages-to-scan:
      - 'pl.piomin.services.department.model'
    properties:
      hibernate:
        hbm2ddl:
          auto: update
        show_sql: true
endpoints:
  info:
    enabled: true
    sensitive: false
eureka:
  client:
    registration:
      enabled: true
    defaultZone: "localhost:8761"
5. Running a Eureka Server
The Eureka server will also be run as a Spring Boot application written in Kotlin.
@SpringBootApplication
@EnableEurekaServer
class DiscoveryApplication

fun main(args: Array<String>) {
    runApplication<DiscoveryApplication>(*args)
}
We also need to include a single dependency, spring-cloud-starter-netflix-eureka-server, beside kotlin-stdlib-jdk8.
<dependency>
    <groupId>org.springframework.cloud</groupId>
    <artifactId>spring-cloud-starter-netflix-eureka-server</artifactId>
</dependency>
<dependency>
    <groupId>org.jetbrains.kotlin</groupId>
    <artifactId>kotlin-stdlib-jdk8</artifactId>
    <version>${kotlin.version}</version>
</dependency>
We run a standalone instance of Eureka on port 8761.
spring:
  application:
    name: discovery-service
server:
  port: 8761
eureka:
  instance:
    hostname: localhost
  client:
    registerWithEureka: false
    fetchRegistry: false
    serviceUrl:
      defaultZone: http://${eureka.instance.hostname}:${server.port}/eureka/
6. Integrating Micronaut With Spring Cloud
The implementation of a distributed configuration client is automatically included in Micronaut's core. We only need to include the module for service discovery.
<dependency>
<groupId>io.micronaut</groupId>
<artifactId>micronaut-discovery-client</artifactId>
</dependency>
We don't have to place anything in the source code. All the features can be enabled via configuration settings. First, we need to enable the config client by setting the micronaut.config-client.enabled property to true. The next step is to enable specific implementations of the config client — in our case, Spring Cloud Config — and then set the target URL.
micronaut:
  application:
    name: department-service
  config-client:
    enabled: true
spring:
  cloud:
    config:
      enabled: true
      uri: http://localhost:8888/
Each application fetches the properties frthe om configuration server. The part of the configuration responsible for enabling discovery based on the Eureka server is visible below.
eureka:
  client:
    registration:
      enabled: true
    defaultZone: "localhost:8761"
7. Running Applications
Kapt needs to be able to compile Kotlin code to Java succesfully. That's why we place a method inside the class declaration, and annotate it with @JvmStatic. The main class visible below is also annotated with @OpenAPIDefinition in order to generate a Swagger definition for API methods.
@OpenAPIDefinition(
        info = Info(
                title = "Departments Management",
                version = "1.0",
                description = "Department API",
                contact = Contact(url = "https://piotrminkowski.wordpress.com", name = "Piotr Mińkowski", email = "[email protected]")
        )
)
open class DepartmentApplication {

    companion object {
        @JvmStatic
        fun main(args: Array<String>) {
            Micronaut.run(DepartmentApplication::class.java)
        }
    }

}
Here's the controller class from department-service. It injects a repository bean for database integration and EmployeeClient for HTTP communication with employee-service.
@Controller("/departments")
open class DepartmentController(private val logger: Logger = LoggerFactory.getLogger(DepartmentController::class.java)) {

    @Inject
    lateinit var repository: DepartmentRepository
    @Inject
    lateinit var employeeClient: EmployeeClient

    @Post
    fun add(@Body department: Department): Department {
        logger.info("Department add: {}", department)
        return repository.add(department)
    }

    @Get("/{id}")
    fun findById(id: Long): Department? {
        logger.info("Department find: id={}", id)
        return repository.findById(id)
    }

    @Get
    fun findAll(): List<Department> {
        logger.info("Department find")
        return repository.findAll()
    }

    @Get("/organization/{organizationId}")
    @ContinueSpan
    open fun findByOrganization(@SpanTag("organizationId") organizationId: Long): List<Department> {
        logger.info("Department find: organizationId={}", organizationId)
        return repository.findByOrganization(organizationId)
    }

    @Get("/organization/{organizationId}/with-employees")
    @ContinueSpan
    open fun findByOrganizationWithEmployees(@SpanTag("organizationId") organizationId: Long): List<Department> {
        logger.info("Department find: organizationId={}", organizationId)
        val departments = repository.findByOrganization(organizationId)
        departments.forEach { it.employees = employeeClient.findByDepartment(it.id) }
        return departments
    }

}
It is worth taking a look at the HTTP client implementation. It has been discussed in the details in my last article about Micronaut, A Quick Guide to Microservices with the Micronaut Framework.
@Client(id = "employee-service", path = "/employees")
interface EmployeeClient {

@Get("/department/{departmentId}")
fun findByDepartment(departmentId: Long): MutableList<Employee>

}
You can run all the microservices using IntelliJ. You may also build the whole project with Maven using themvn clean install command, and then run them using the java -jar command. Thanks to maven-shade-plugin, our applications will be generated as uber jars. We then can run them in the following order: config-service, discovery-service, and microservices.
$ java -jar config-service/target/config-service-1.0-SNAPSHOT.jar
$ java -jar discovery-service/target/discovery-service-1.0-SNAPSHOT.jar
$ java -jar employee-service/target/employee-service-1.0-SNAPSHOT.jar
$ java -jar department-service/target/department-service-1.0-SNAPSHOT.jar
$ java -jar organization-service/target/organization-service-1.0-SNAPSHOT.jar
After this, you may take a look at the Eureka dashboard available under the address http://localhost:8761 in order to see a list of the running services. You may also perform some tests by running HTTP API methods.

Summary
The sample application's source code is available on GitHub in the repository sample-micronaut-microservices in the Kotlin branch. You can refer to that repository for more implementation details that have not been included in this article.
Published at DZone with permission of Piotr Mińkowski. See the original article here.
Opinions expressed by DZone contributors are their own.
Comments