Loading Pandas DataFrames Into QuestDB
In this article, readers will learn how to improve your time series analysis capability by using the QuestDB Python package to ingest Pandas DataFrames.
Join the DZone community and get the full member experience.
Join For FreeIn this article, learn how to improve your time series analysis capability by using the QuestDB Python package to ingest Pandas DataFrames.
Introduction
Pandas is an open-source data analysis and data manipulation library for Python that has become an essential tool for data scientists and analysts. It provides a simple and intuitive way to manipulate data, making it a popular choice for data analysis tasks.
However, while Pandas is excellent for small to medium-sized datasets, it can struggle with large datasets that exceed the available memory of the machine it is running on. This is where QuestDB excels, designed specifically for high-performance operations in such scenarios, making it the go-to solution for demanding data analysis tasks.
By loading Pandas DataFrames into QuestDB, we can leverage the powerful data processing capabilities of the database, allowing you to scale your analysis and data manipulation operations to large datasets. We will learn how to load large Pandas Dataframes into QuestDB. We use yellow and green taxi trip records published by NYC Taxi and Limousine Commission as our data source.
In this tutorial, we will learn how to load large Pandas Dataframes into QuestDB. We use yellow and green taxi trip records published by NYC Taxi and Limousine Commission as our data source.
Prerequisites
For this tutorial, it is recommended to have a basic understanding of Python and SQL. Also, you will need to have the following installed on your machine:
- Docker
Getting the Data To Ingest
Before we begin loading the data into QuestDB, we need to obtain the data we will be working with. As mentioned above, we will use the NYC TLC’s records of yellow and green taxi trips. Let’s download the data:
- Create a new directory called
pandas-to-questdband adatadirectory inside that. - Edit and execute the following command in your terminal to download the parquet files:
curl -L -o ./data/yellow_tripdata_2022-<MONTH>.parquet https://d37ci6vzurychx.cloudfront.net/trip-data/yellow_tripdata_2022-<MONTH>.parquetMake sure you replace <MONTH> with the zero-prefixed number of the month you wish to download (between 01 and 11, the 12th month is not available at the time of writing).
Now, we have the data to ingest. It is time to try loading it using Pandas.
Loading Records Into Memory
You may already have noticed that the downloaded files are in Parquet format. Parquet is a columnar storage format commonly used for big data processing. They are optimized for use with modern big data processing engines and provide efficient storage and retrieval of data compared to traditional row-based storage formats like CSV and JSON.
Before being able to load any data, we will set up a simulation production environment where we can easily test what happens if Pandas cannot load the Parquet files into memory. In production, we often meet situations where we have to deal with memory constraints, and this environment can reflect that.
Run the following command to create a new Docker container running with a 1GiB memory limit. If the container reaches that limit, Docker will kill it, or the OS will OOM kill the process we are running:
docker run -it -m 1g -v "$(pwd)":/tutorial -w /tutorial --net host python:3.11.1-slim-bullseye /bin/bashNow, we have an Ubuntu-based Python 3.11 Docker container. Let’s install our requirements. Create a requirements.txt file with the content below:
pandas>=1.5.3
psycopg[binary]>=3.1.8
pyarrow>=11.0.0
questdb>=1.1.0
Now, execute pip install -r requirements.txt within the container. Pip will install the Python requirements.
At this point, we have a test environment in which we can load the data. Create a new file called data_loader.py with the following content:
# data_loader.py
import pandas as pd

df = pd.read_parquet("./data/yellow_tripdata_2022-01.parquet")
print(df.head())
Now, execute it within the Docker container by running python data_loader.py. The program runs successfully, and we should see the following:
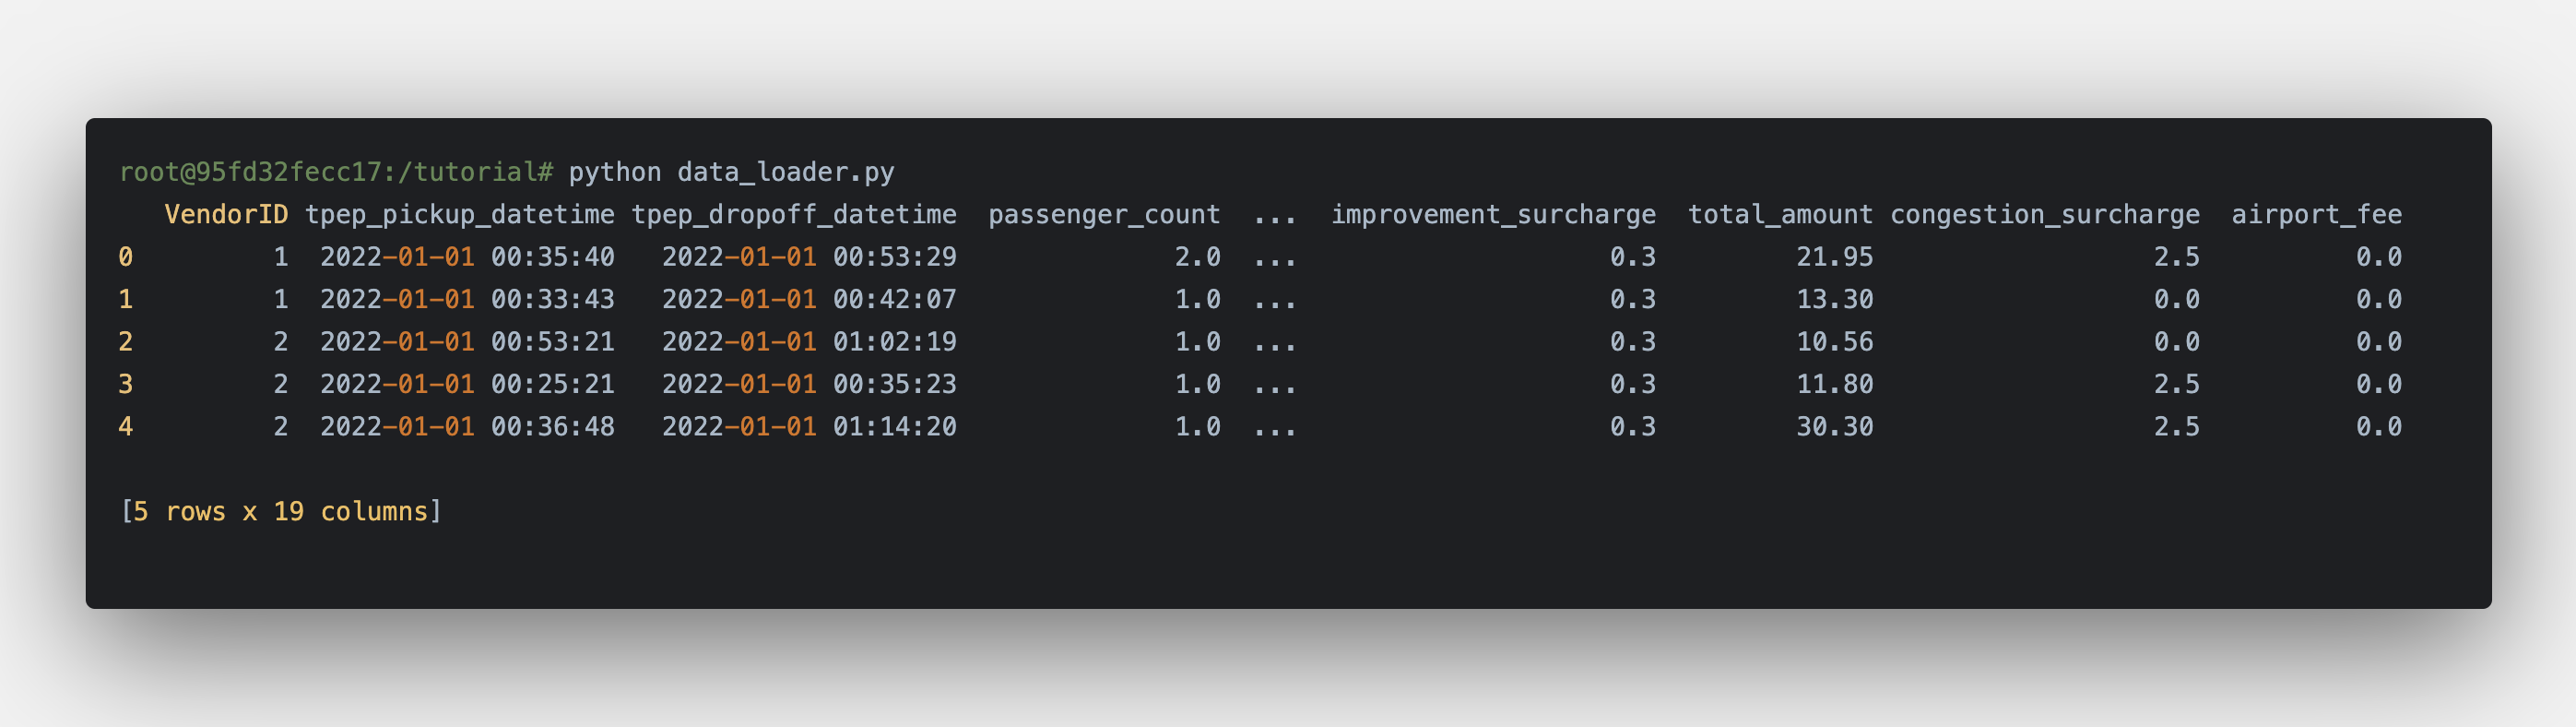
We just loaded the taxi trip records for 2022 January! Let’s try to load more data. Replace the content of data_loader.py with the code below to load all files from the data directory and execute the program again:
# data_loader.py

import os
import glob
import pandas as pd

records = glob.glob(os.path.join("data", "*.parquet"))

df = pd.concat((pd.read_parquet(r) for r in records), ignore_index=True)

print(df.head())
When executing the data_loader.py, you should get an error message: “Killed.” As you may assume, the OOM killer terminated the process. We were not able to load the dataset; therefore, we cannot work with that. We need a different approach.
Ingesting to QuestDB
In a new terminal window, start a QuestDB container by executing:
docker run --rm -it -p 8812:8812 -p 9009:9009 --net host --name questdb questdb/questdbThe database is now ready to receive the data. Update the data_loader.py to ingest data into QuestDB using the questdb package that uses the InfluxDB Line Protocol (ILP) over TCP for maximum throughput.
To handle large datasets, we will read files one by one and transfer their contents to QuestDB. Then, we will use QuestDB to query the data and load the results back into Pandas DataFrames. Refactor the data loader based on the above:
# data_loader.py

import os
import glob
import pandas as pd
from questdb.ingress import Sender

def main():
   files = glob.glob(os.path.join("data", "*.parquet"))

   with Sender("127.0.0.1", 9009) as sender:
       for file in files:
           df = pd.read_parquet(file)
           print(f"ingesting {len(df.index)} rows from {file}")
           sender.dataframe(df, table_name="trips", at="tpep_pickup_datetime")

if __name__ == "__main__":
   main()
Let’s start from the beginning. The first major change you’ll notice is that we need to specify the hostname and port number in the script to run it.
Then we iterate over the Parquet files and load them into memory using Pandas. After that, utilizing QuestDB’s Python client, we are ingesting to QuestDB directly from Pandas DataFrames.
In the Python container, run python data_loader.py. The script will ingest one parquet file at a time.
Working With Trip Data
So far, we have prepared the dataset and loaded it into QuestDB. It’s time to execute some queries and load the result into DataFrames. Using the whole dataset, we want to know what was the average total amount paid by passengers grouped by the passengers.
Create a new file, called query_amount.py with the following content:
# query_amount.py

import pandas as pd
import psycopg

QUERY = """
SELECT passenger_count, avg(total_amount)
   FROM 'trips'
   WHERE passenger_count > 0
   GROUP BY passenger_count
"""

if __name__ == "__main__":
   conn = psycopg.connect(
       dbname="questdb",
       host="127.0.0.1",
       user="admin",
       password="quest",
       port=8812,
   )

   df = pd.read_sql_query(QUERY, conn)

   print(df.head(10))
Similar to the data loader script, this script requires the host and port. In the script above, we are using the PostgreSQL Python client and connecting to QuestDB using that. In the Python container, execute Python query_amount.py:
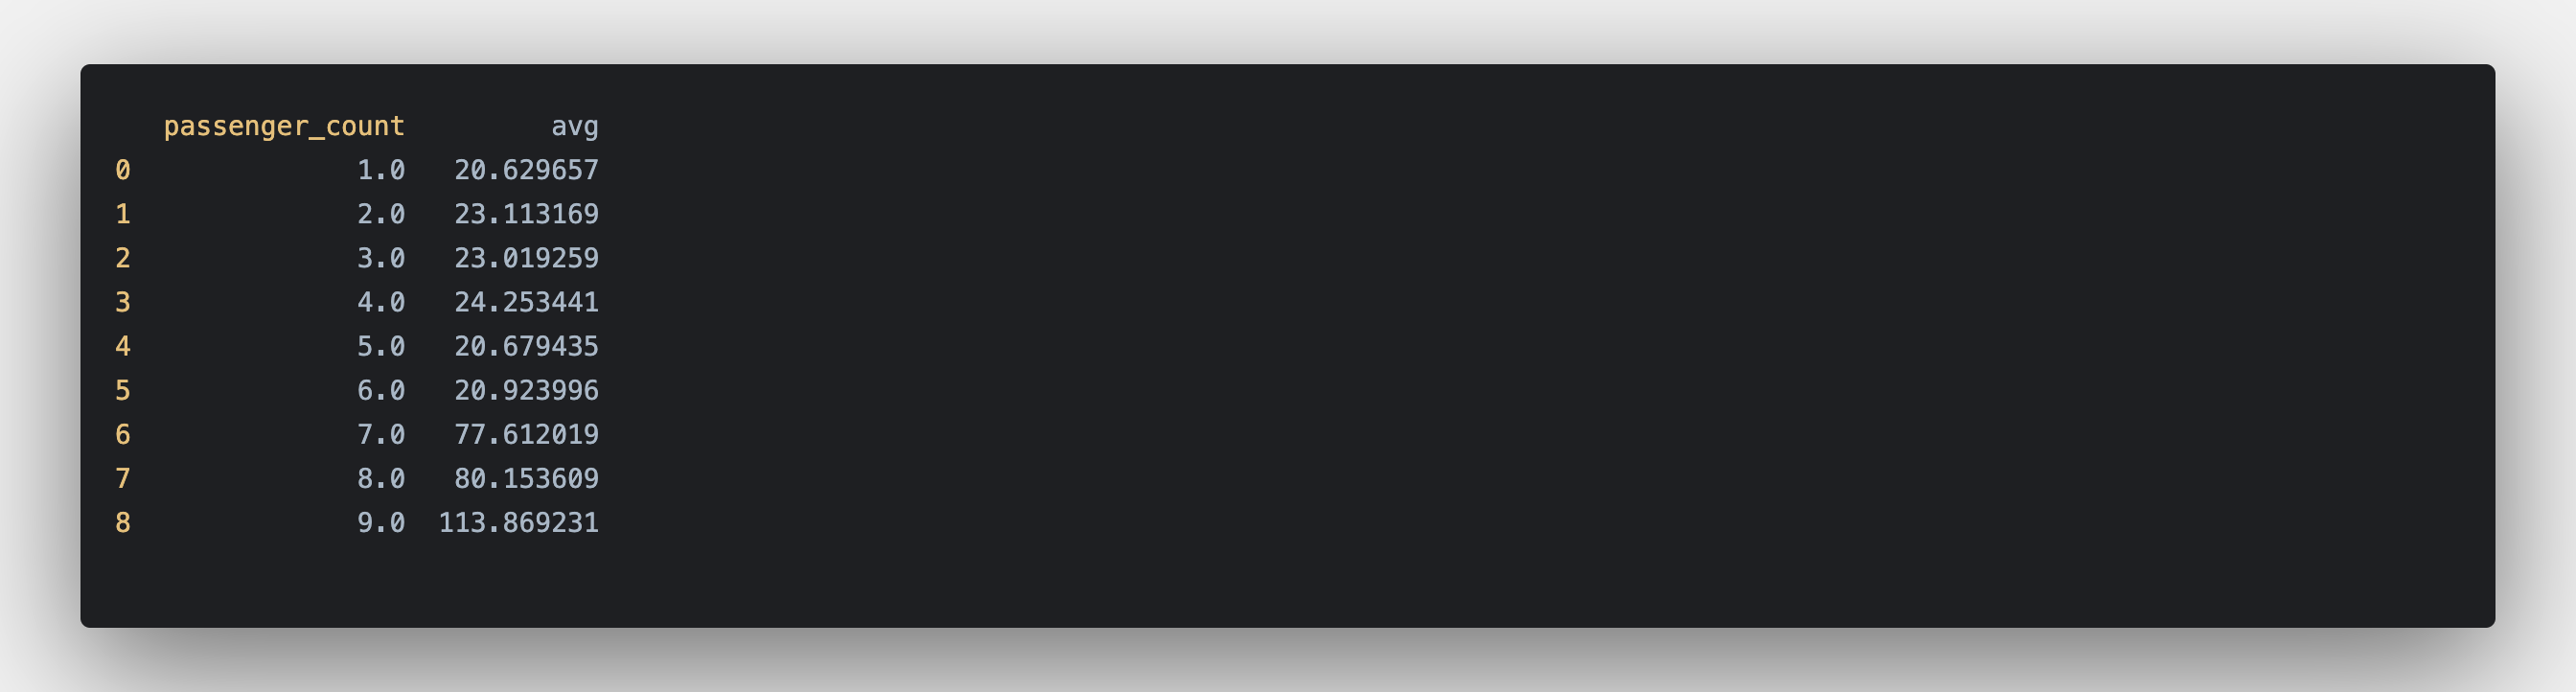
When the script finishes, you should see the average total amount paid by passengers. Interestingly, there is a huge difference in the average between passenger counts 6 and 7. The average is almost 2.5x for 7 passengers compared to 6.
By further analyzing the data, it may turn out what was the possible root cause increase, but probably bound to human nature: we like to share the cost of rides if we are going on a longer trip.
Summary
In this tutorial, we have learned how to load large datasets into QuestDB using Pandas DataFrames. By transferring data from Pandas to QuestDB, we have taken advantage of the database’s powerful data processing capabilities, enabling us to scale our analysis and data manipulation operations to handle large datasets.
The approach outlined in this tutorial is just one way to work with big data using Pandas and QuestDB. You can customize this method to suit your specific needs and continue to explore the possibilities of these powerful tools. The end goal is to make data analysis and manipulation easier and more efficient, regardless of the size of the dataset.
Published at DZone with permission of Gabor Boros. See the original article here.
Opinions expressed by DZone contributors are their own.
Comments