MCUXpresso IDE: A Unified Eclipse IDE for NXP's ARM Cortex-M Microcontrollers
Freescale and NXP combined last year. A result? Their newly released MCUXpresso IDE. See the latest features, ranging from more intuitive tools to debug probe discovery.
Join the DZone community and get the full member experience.
Join For FreeThere are many mergers going on in the industry, and one of the largest ones was in 2016 with the integration of Freescale Semiconductor with NXP Semiconductors, with both providing Eclipse-based IDEs to their customer base. Consequently, the company merger triggered a merger of the IDEs, and last week, NXP released the result: the MCUXpresso IDE.
MCUXpresso IDE
This article is part of a series to get up to speed using the new NXP MCUXpresso IDE.
Overview
MCUXpresso is basically ‘LPCXpresso on steroids’ (see “Embedded World Nürnberg 2017 Impressions: MCUXpresso, Hexiwear, NTAG, LPC800-DIP and Alan Hawse”), supporting both NXP Kinetis and LPC devices (ARM Cortex-M0(+)/M4/M7), and it is built upon the feature set of LPCXpresso. From LPCXpresso, it inherits the Pro edition option (with IDE email support and extended trace features), and like Kinetis Design Studio, it is free of charge and unlimited in code size. For existing LPCXpresso IDE users it brings unlimited code size (the free LPCXpresso IDE has a code size limit of 256 KByte) beside of all the extra features like MCUXpresso SDK support.
Traditionally, at the university, we are using a combination of CodeWarrior for MCU 10.x, Kinetis Design Studio v3.2, and LPCXpresso v8.2. Because the new IDE both supports Kinetis and LPC devices, I plan to migrate the LPCXpresso and Kinetis Design Studio course material to the new MCUXpresso IDE. In this post, I give a brief overview about some of the main features that I think will be very useful. Other than that, I think the information below is useful for anyone upgrading either from LPCXpresso or Kinetis Design Studio to the new NXP Eclipse IDE.
The IDE is available from http://www.nxp.com/mcuxpresso/ide. Downloading needs a user account at NXP, but no other registration or activation is needed for the free and code-size-unlimited version.
Support for the free version is community-based (http://www.nxp.com/mcuxpresso/ide/forum) as for Kinetis Design Studio and LPCXpresso. There is a Pro version available. which adds one year IDE email-based support plus extended trace support (an existing LPCXpresso Pro license is recognized by the MCUXpresso IDE, too).
I have used version 10.0.0 (Build 344).
Compared to other IDEs, the download size is rather small (576 MByte on Windows), and it is available on Mac and Linux, too (I have it installed on Windows 7 and 10 so far). It installs all the debug probe drivers.
Documentation
I think tools should not need a manual, as they should be intuitive so you don’t need to read the documentation. On the other hand, especially for new users or for advanced topics, having a look at the documentation is not a bad idea (even if it is only to avoid a ‘RTFM’ answer from the support):
The help menu has an entry for the electronic documentation:

Help Contents
This shows all the help files:

Help Content
There is a direct link to the MCUXpresso IDE User Guide too:

MCUXpresso User Guide
The electronic IDE user guide is searchable, so this usually should give me what I’m looking for:
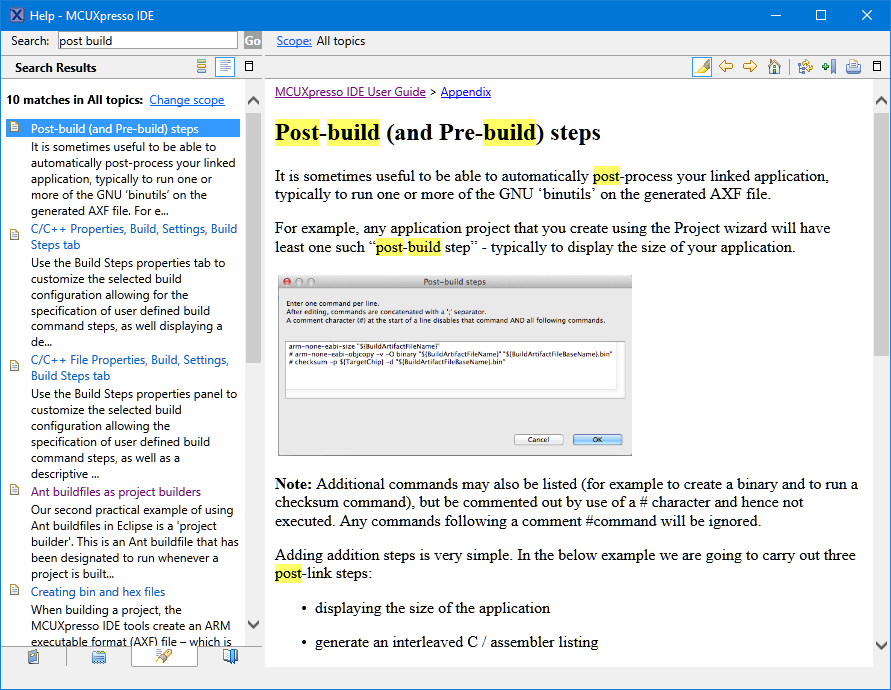
Help about post build steps
The documentation is accessible both from http://www.nxp.com/mcuxpresso/ide and from the installation folder of the IDE.
As LPCXpresso, the IDE includes a Quickstart Panel that gives us access to the most used functions:

Quickstart Panel
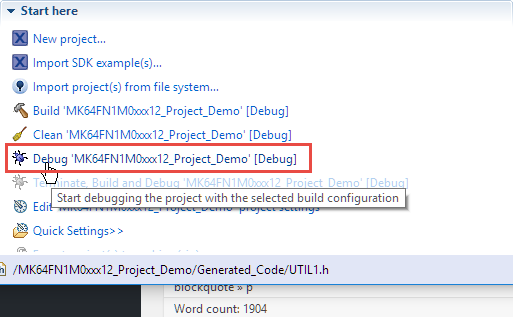
I strongly recommend to use the Quickstart Panel, especially using the blue icon in there to start a debug session (more about this below).
Students typically are a bit lost with finding the project settings in Eclipse or how to do a build/debug. Using that panel will make things easier for them to find.
It includes a ‘blue’ debug button to launch a debug session, and that’s the recommended way to start the debugger. The ‘blue’ one is present in the toolbar too.

Debug Toolbar Button
There is as well the default ‘green’ debug icon of Eclipse, but that one should only be used if you have a debug connection (launch configuration) configured, as the ‘blue’ one is able to automatically detect a debug probe and configure it automatically (more about this later).
MCUXpresso SDK
The IDE comes with legacy LPCOpen support for LPC devices. Everything else is data driven with the addition of the MCUXpresso (formerly Kinetis) SDK.
I have to download the SDK for a device from https://mcuxpresso.nxp.com/ using the SDK Builder:

SDK Builder
When building a new SDK/Configuration, make sure that the MCUXpresso IDE is selected so it can be used with the IDE:

MCUXpresso Configuration Setting
In the IDE, there is an SDK package manager which is available under Window > Show View > MCUXpresso IDE:

MCUXpresso Installed SDKs view
The easiest way to import the SDKs is to drag and drop the SDK ZIP file into that view:

Installed SDKs
The SDK package not only includes the driver sources files, but also example projects and everything else the IDE needs to know about the device — for example, toolchain support and debugger information.
By default, the SDK is used as a ZIP file. With this, the IDE extracts files from the ZIP and copies the files into the project. There is a workspace option to unzip the files to allow ‘linked files’ in the projects, but I do not recommend using such linked files in projects.
From the ‘Installed SDKs’ view, I can directly open the Config and Builder page using a toolbar button:

Button to open SDK Builder Page
For the classroom setup, I plan to download the SDK ZIP files and then pass it to the students so they can import the ZIP file(s).
New Projects
Projects can be created (as a ‘new project’) or imported from the SDK examples:

New Project or Import Example Project
For new projects, I can select a device or board from the SDK Wizard:

SDK Wizard
In the next dialog box, I can choose what I want to use in the project:

SDK Wizard Options
In the next Advanced Projects settings, I have options for the library and memory settings. Besides the Newlib and Newlib-nano, I have the choice of the Redlib, a proprietary library more optimized for embedded devices:

SDK Wizard Options
Importing example projects is very similar, except that I have the choice of which examples I would like to import:

SDK Example Importer
Using the previous SDK with the linked files was really hard (or even impossible?) to use, so I think students will very much like that new functionality.
The MCUXpresso IDE uses the GNU Tools for ARM Embedded Processors version 5 (Q3 2016 release). The IDE is using the same project file format/build settings as LPCXpresso, so legacy LPC projects can be imported easily. Existing Kinetis Design Studio projects can be used with a few migration/porting steps.
Kinetis Design Studio projects can be imported or migrated as the project format is different from the GNU ARM Eclipse one used in Kinetis Design Studio. I have ported several university KDS projects to MCUXpresso, but this is the subject of a future article.
There is an ‘MCU settings’ panel in the project settings that tells the IDE the device used with the memory map:

MCU Settings
This information is used for the managed linker scripts: By default, the IDE creates and maintains the GNU linker script, with other settings to manage the libraries, heap, and stack settings:

Managed Linker Scripts
I will probably disable the managed linker script feature. The GNU linker files are really not that hard to read/write/use, and hiding the linker scripts behind this generator makes the object allocation not very transparent. But for inexperienced users, that’s certainly a useful feature.
Debug Probes
The IDE supports P&E probes (Multilink, …), SEGGER probes (J-Link, …), and the LPC-Link/LPC-Link2 (CMSIS-DAP) probes. So the NXP embedded OpenSDA circuit on Kinetis Freedom and Tower boards are supported with P&E, Segger, and CMSIS-DAP firmware, the SEGGER and P&E commercial probes, and the NXP embedded LPC-Link and LPC-Link2 probes. I have the IDE working with different Tower, Freedom, and LPC boards and debug probes (my J-Link EDU is missing from the picture below):

Boards and probes
What is new for Kinetis Design Studio users? It supports the LPC-Link2 probe which can load either a CMSIS-DAP or Segger firmware (for LPC). The CMSIS-DAP (with KDS) never really worked well, so now I can use the LPC-Link2 with CMSIS-DAP to debug the Kinetis K22 on our robots:

LPC-Link2 with CMSIS-DAP debugging Robot
So that would be a very affordable debug probe option, as the LPC-Link2 is priced at US$ 20.
To debug the project, it is important to use the blue debug icon (and not the normal green one!). Use either the one in the toolbar:

Debug Button in the Eclipse Toolbar
Or the one in the Quickstart Panel:
Debug button in the Quickstart Panel
Using the green one only works properly if I have a project selected and a launch configuration available. Kinetis Design Studio works with the green debug button very well because the behavior for the green button has been enhanced in that Eclipse distribution. MCUXpresso uses the ‘stock Eclipse’ green debug button, which does not have that extension.
What is really cool is the probe discovery: When I start to debug the project, it offers me to pick from any of the detected probes:
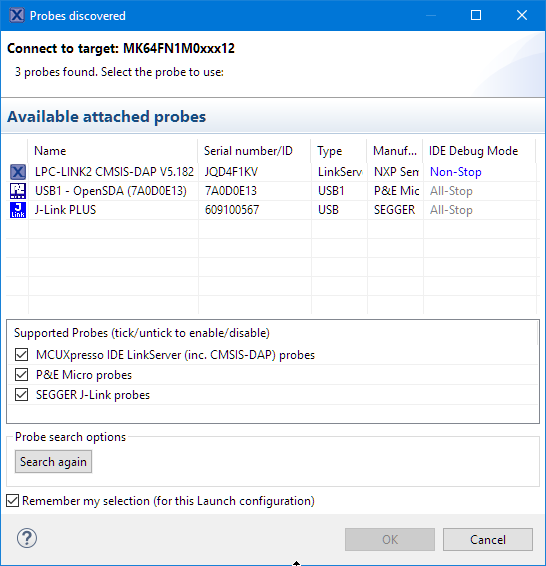
Probes discovered
With this, it automatically creates the launch configuration file in the project root folder.
In case I want to re-trigger a full probe discovery, I can delete the .launch files, and it will recreate them.
That feature will be very useful for our classroom setup, where students debug from one machine multiple boards with multiple debug probes. This will be now much simpler and easier with the probe discovery.
As in LPCXpresso (see CodeRed Debug Perspective in Kinetis Design Studio), the new IDE offers a ‘Develop’ perspective:

Debugging with MCUXpresso
Unlike in normal Eclipse, where I would switch between ‘C/C++’ and ‘Debug’ perspectives, I can stay in a ‘Develop’ perspective. Especially on small laptop displays, that unified perspective is a plus for the students, too.
Global Variables
Normally, Eclipse has a problem where it does not really show normal global variables (see Variable Debugging with Eclipse Kepler). Instead, the Expressions view had to be used (this has been a constant complaint from the students, too). MCUXpresso offers a ‘Global Variables View,’ which solves that problem: I can browse and add global variables to that special view:

Global Variables View
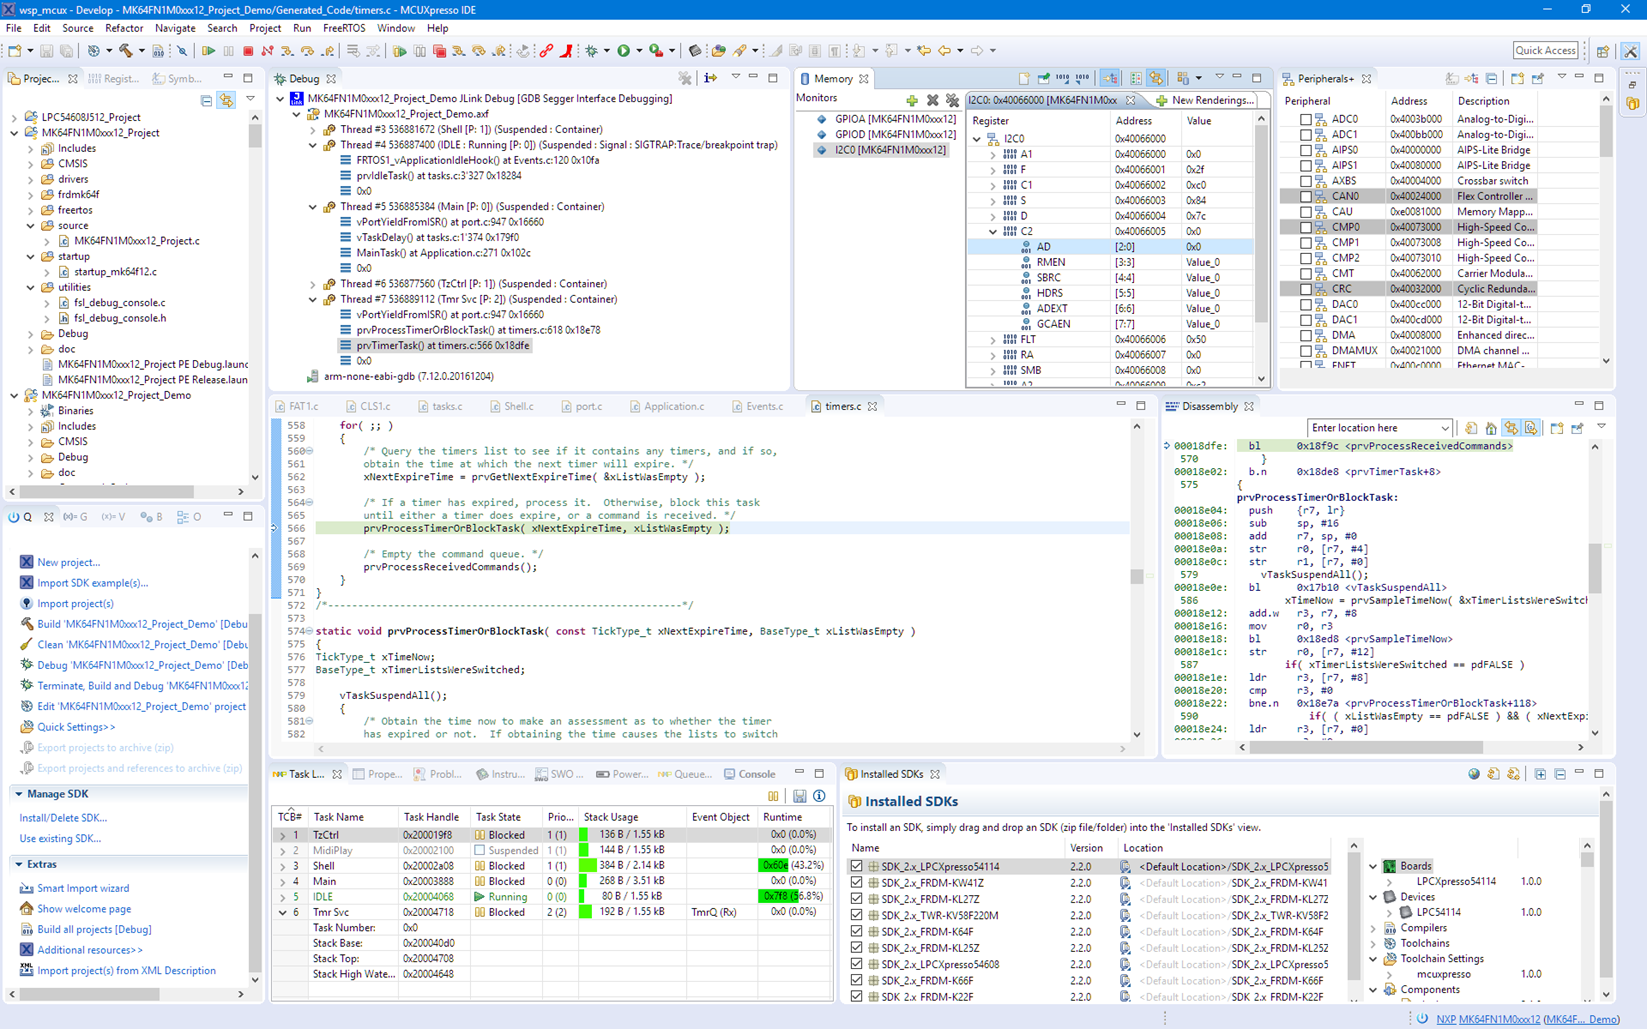
Kinetis Design Studio included the EmbSysRegView (see Freescale CMSIS-SVD Register Files with Eclipse MARS and EmbSysRegView), which worked well but did not automatically use the target device SVD files. In the MCUXpresso IDE, there is the ‘Peripherals+’ view, which basically extends the memory view:
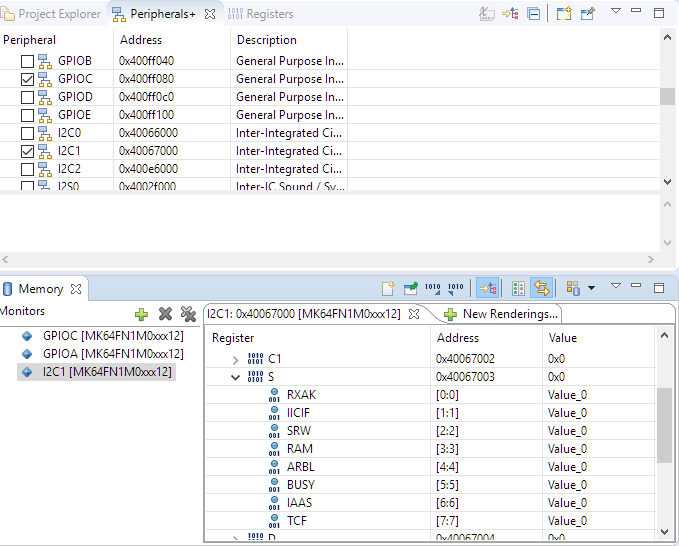
Peripherals View
I feel the EmbSysRegs view is somewhat more versatile and easy to use (but that’s probably only me?).
A mistake I made with the Peripherals+ view was trying to inspect a peripheral for which the clocks were not enabled. I only can inspect peripherals which are clocked and accessible!
FreeRTOS
What I really like in that IDE is the support for FreeRTOS! All the debug connections (P&E, Segger, and CMSIS-DAP) include FreeRTOS thread awareness:
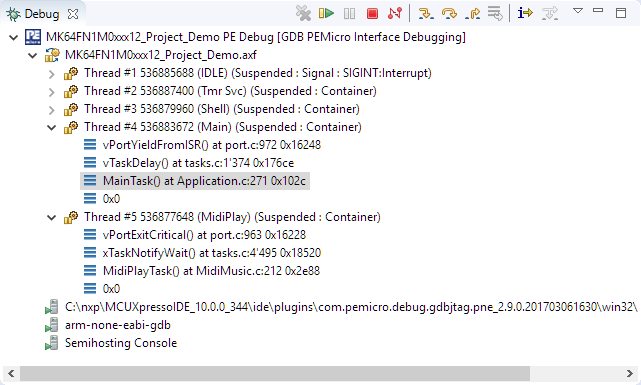
FreeRTOS Thread Awareness
Plus the IDE includes the NXP FreeRTOS Kernel views (see FreeRTOS Kernel Awareness for Eclipse from NXP) for Tasks, Heap, Timer, and Queues:

FreeRTOS Task List

FreeRTOS Heap Usage

FreeRTOS Queues

FreeRTOS Timers
Until now, students had to load that plugin. Now it is included in the IDE installation.
The MCUXpresso IDE combines the features of Kinetis Design Studio, plus LPCXpresso. For LPC users it has unlimited code size, Segger, and FreeRTOS support added. For Kinetis users, it adds CMSIS-DAP, trace support, automatic probe discovery, but there is no Processor Expert included. For Kinetis and LPC, it provides a unified and modern IDE and build system with a common SDK and nice project creation and added nice debugging features.
I have not touched on many other aspects and features like multicore support, watch/live variables, extended registers view, or any of the (really cool!) SWO/trace/profiling/printf features with the LPC-Link2 debug probe. So I think these things might deserve another article.
I'm planning more articles about the MCUXpresso IDE in preparation for the next semester, and compared to LPCXpresso and Kinetis Design Studio, I can use the new IDE with less effort in the class, as most things come pre-installed and several features make it easier to use.
I have explored areas like what other plugins I would add/install, or how to use or migrate existing Kinetis Design Studio projects and even how to use it with Processor Expert projects. And if you are interested in any particular topic, post a comment or thought and I try to get on it.
Happy Xpressing!
Published at DZone with permission of Erich Styger. See the original article here.
Opinions expressed by DZone contributors are their own.
Comments