Message Producer and Consumer Using Golang on CloudAMQP
This article explains a bit about how asynchronous messaging operates and gives an example using Golang and RabbitMQ as the message broker.
Join the DZone community and get the full member experience.
Join For FreeIntroduction
In this article, I will explain a sample code of producer and consumer written in Go with RabbitMQ acting as a message broker. We will use the RabbitMQ hosted in the cloud (CloudAMQP) instead of installing one in a local server.
A message broker is an architecture pattern where messages are translated from the formal messaging protocol of the publisher to that of the receiver. A few of the popular open source message brokers are Apache ActiveMQ, Apache Kafka, Apache Qpid, Hornetq from JBoss, and RabbitMQ (Mozilla Public License).
About CloudAMQP and RabbitMQ
CloudAMQP is a managed RabbitMQ server in the cloud. A RabbitMQ server cluster can be scaled on need basis at CloudAMQP and it comes with diagnostic tools to help identify common errors in your RabbitMQ cluster.
RabbitMQ is an open source message broker software where a producer is an application that sends messages to an exchange which is responsible for routing the messages to different queues with the help of bindings and routing keys. A binding is a link between a queue and an exchange. A consumer is an application that connects to the queue and subscribes to the messages which are to be processed. Messages placed onto the queue are stored until the consumer retrieves them. RabbitMQ follows Smart broker/Dumb consumer model with persistence, where messages are dequeued only when an acknowledgment is received. The Broker keeps track of the consumer state and supports multiple messaging protocols like AMQP, HTTP, MQTT and STOMP.

About Go
Go is a general-purpose language designed especially for systems programming with inbuilt support for garbage collection and concurrent programming. Its concurrency mechanisms make it easy to write programs that get the most of the multicore and networked machines. It’s a fast, statically typed, compiled language that feels like a dynamically typed, interpreted language.
Setup RabbitMQ Instance in Cloud
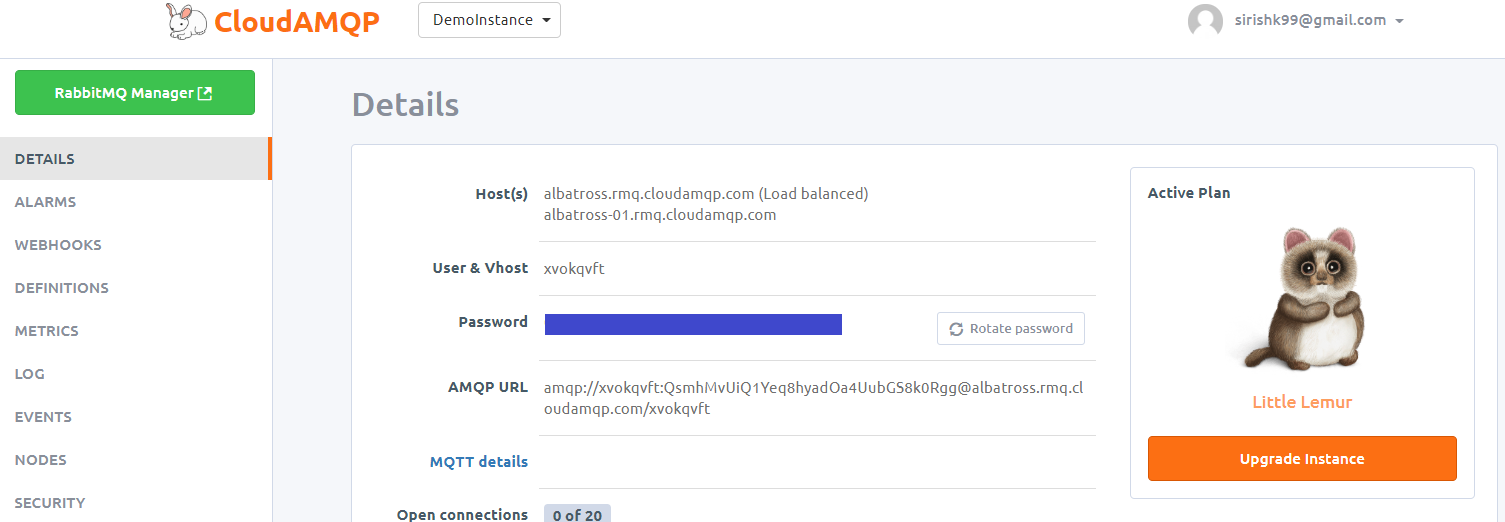
Instead of installing a RabbitMQ instance in a local server, let us provision an instance in the cloud using CloudAMQP which is managed RabbitMQ servers in the cloud. To get started you need to sign up for a free plan Lemur in CloudAMQP. The instance is immediately provisioned after sign up and you can check the details using RabbitMQ Manager like shown in the figure below. Make a note of the AMQP URL of your instance which we will use in the Producer and Consumer Program. Below is the screenshot of the DemoInstance which I've created in CloudAMQP.

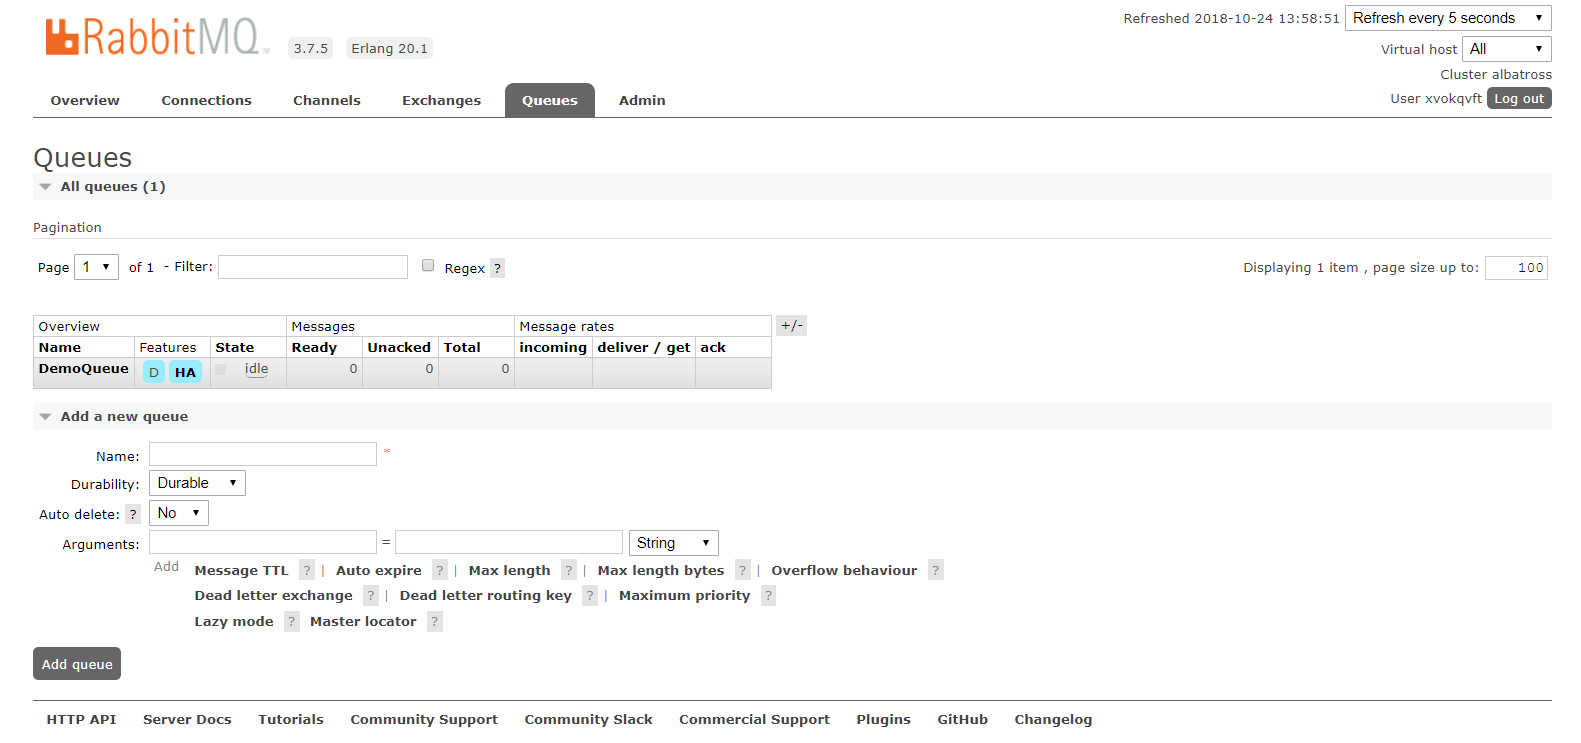
Once the instance is set up, create a Queue DemoQueue using RabbitMQ Manager. I've created a durable queue named DemoQueue with default attributes with the default routing key for the producer and consumer code. A screenshot of DemoQueue is shown below.
A few of the attributes which you should understand while declaring the queue:
Durable: Queue is persisted to disks and will survive the broker restart.
Exclusive: Queue is used by only one connection and will be deleted when that connection closes.
Auto Delete: A Queue that has had at least one consumer is deleted when the last consumer unsubscribes.
There are other optional queue paramters namely,
- Message TTL: A message that has been in the queue for longer than the configured TTL is said to be dead.
- Queue Length Limit: The maximum length of a queue can be limited to a set number of messages or a set number of bytes or both.
- Highly Available (Mirrored): Queues can be made mirrored across multiple nodes of a RabbitMQ cluster resulting in high availability.
- Priority Queue: A Queue can be priortized over other queues using the x-max-priority queue argument.
- Consumer Priorities: It allows you to ensure that high priority consumers receive messages while they are active.
Setup Go
Follow the instructions here to download and install Go. Test your Go installation by running a “hello, world” program
package main
import "fmt"
func main() {
fmt.Printf("hello, world\n")
}
To setup Go for AMQP, you need to download Streadway Go package available form GitHub.
C:\> go get github.com/streadway/amqp
C:\>go get github.com/kumarsirish/msgq/commonlib
Package gets installed in "$GOPATH\pkg" or to "%USERPROFILE%/go" if GOPATH enviornment variable value is not defined.
Producer Code
In the package main, import usual libraries like fmt , amqp , and commonlib .
package main

import (
  "fmt"
  "github.com/streadway/amqp"
  "github.com/kumarsirish/msgq/commonlib"
)
commonlib is a common library which contains a set of common functions hosted on msgq repository of GitHub. The FailOnError function outputs the connection success and failure message based on the "err" value.
package commonlib
import (
  "log"
  "fmt"
  )

func FailOnError(err error, msgerr string, msgsuc string) {
    if err != nil {
           log.Fatalf("%s: %s",msgerr,err);
        } else {
           fmt.Printf("%s\n",msgsuc)
    }
}
The next step is to connect to the Message broker. A connection is nothing but a TCP connection of the consumer with the Broker. AMQP connection string with a password is given in your Cloudamqp account.
// Connect to RabbitMQ server
    fmt.Println("Connecting to RabbitMQ ...")
    conn, err := amqp.Dial("amqp://xvokqvft:QsmhMvUiQ1Yeq8hyadOa4UubGS8k0Rgg@albatross.rmq.cloudamqp.com/xvokqvft")
 commonlib.FailOnError(err, "RabbitMQ connection failure", "RabbitMQ Connection Established")
    defer conn.Close()
Establish a connection to the Channel (virtual connection inside a connection).
ch,err := conn.Channel()
commonlib.FailOnError(err, "Failed to open a channel", "Opened the channel")
defer ch.Close()
The next step is to declare the queue to which messages will be sent. This function will also create the queue if not already created. Since we have already created the queue, it will establish the binding with the existing queue.
 q, err := ch.QueueDeclare(
    "DemoQueue", //name
    true, //durable
    false, //delete when unused
    false, //exclusive
    false, //no-wait
    nil, //arguements
    )
commonlib.FailOnError(err, "Failed to declare the queue", "Declared the queue")
Publish a plain text message to the queue.
body := "Hello Tony!"

err = ch.Publish(
    "", //exchange
    q.Name, //routing key
    false, //mandatory
    false, //immediate
    amqp.Publishing {
    ContentType: "text/plain",
    Body: []byte(body),
})

commonlib.FailOnError(err, "Failed to publish a message ","Published the message")
Once the above code is executed, the message will be placed in the DemoQueue queue and can be consumed. The next section will detail the consumer code.
Consumer Code
The initial code of consumer is same as the producer w.r.t. the following steps:-
streadway , fmt and commonlib The difference is the message consuming method. Following code consumes the message from the DemoQueue queue with same attributes as set during the queue declarations.
       msgs,err := ch.Consume(
                q.Name, //queue
                "", //consumer
                true, //auto-ack
                false, //exclusive
                false, //no-local
                false, //no-wait
                nil, //args
        )
        commonlib.FailOnError(err, "Failed to register a consumer ","Registered the consumer")
A Go routine to display all the messages and number of messages received.
msgCount :=0
go func() {
   for d := range msgs {
      fmt.Printf("\nMessage Count: %d, Message Body: %s\n", msgCount++, d.Body)
   }
}()
The consumer will wait for more messages in the queue until it times out after 100 seconds.
select {
     case <-time.After(time.Second * 100):
     fmt.Printf("Total Messages Fetched: %d\n",msgCount)
     fmt.Println("No more messages in queue. Timing out...")
}
This concludes the sample of producer and consumer code written in Golang. The complete code is hosted in GitHub and can be downloaded from msgq repository.
This code can further be enhanced to the needs of the programmer to try more features of message broker which will further help in their understanding of the subject.
Opinions expressed by DZone contributors are their own.

Comments