Mule 4: Using API Notebooks
This article explains how to use API Notebooks.
Join the DZone community and get the full member experience.
Join For FreeThis article explains how to use API Notebooks.
Let’s first understand what is an API Notebook and how does it help?
API Notebook is a web-based tool that is helpful in creating Interactive Tutorial, Examples, and showing a specific scenario/use case.
In the API notebook, an API client is generated using RAML definition.API Notebook uses the base URI from the RAML definition to generate the output.JavaScript is used in API Notebook to call the API resources and methods.
To understand how to write API Notebooks, lets take a use case.
Use Case
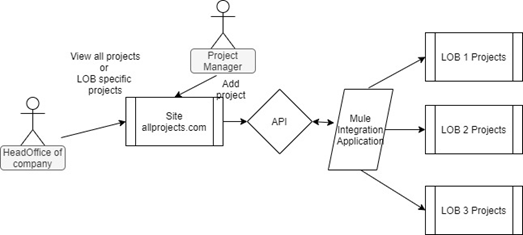
Head Office of an IT company MyInternetSolutions wants to interact with different LOBs (Line of Business) of its company to get the list of projects .Head Office would like to view the project details like - the headcount on the project, cost of the project , revenue of the project and profit/loss of the project.
An Intranet web application will be created. This web application will be used to add the projects by the project managers and project details will be viewed by the higher management /Head Office of MyInternetSolutions.
A Mule integration application will integrate with all the LOBs.
API Design
To design an API for this use case, we will first identify the resources.
Resources as per our use case are – projects and project. The projects resource is a collection resource with resource path /projects and the project resource is a nested resource with a resource path /projects/{projectId}.
For projects resource (/projects), we use the following methods:
GET – to get a list of all projects
POST – to create a new project
For project resource (/projects/{projectId}, we use following methods:
GET – to get a specific project using project id
DELETE – to delete a specific project using project id
PATCH – to update some details of a specific project using project id
A Simple RAML file for the use case is –
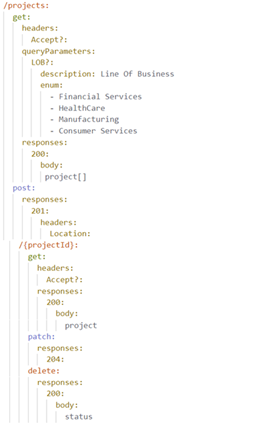
Two datatype fragments are used in above RAML – project and status
Publish the RAML Specification to Exchange
Publish this API to exchange.
Initially, the API version is v1 with asset version 1.0.0.
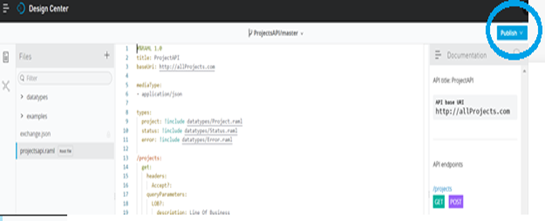
If the API is created in Anypoint designer, click on Publish button for publishing API to exchange:
Creating an API Notebook
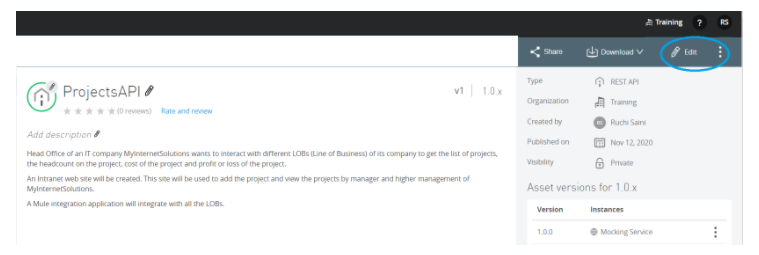
Once we publish the API to Exchange, we go to the Exchange Page of our API. Here we click on Edit.
Click on Add new Page - Specify the Page Name as API Notebook (any name would do)

Click the API Notebook icon and a global method API.createClient is generated automatically. This method is used to create an API Client in the Notebook. Below screenshot shows that an API client with the name “client” is created for projectsapi - RAML API Specification(version 1.0.0).

The client name will become a global variable with the client object.
The path segments of an API resource, separated by slashes, become nested JavaScript objects. So projects Resource with resource path - /projects is now a projects nested object and it will be used as {clientName}.projects and we can call methods like get, put, post, delete, etc. on these objects.
To get a specific project using project id , i.e. project resource with resource path /projects/{projectId} , we will use:
xxxxxxxxxx
client.projects.projectId('proj1').get();
To delete a specific project using project id:
xxxxxxxxxx
client.projects.projectId(‘proj1’).delete();
Request parameters and headers can also be passed while calling methods and the response consists of Response Body, status, and headers.
Anatomy of API Notebook
A notebook consists of a text cell and a code cell.
Text Cell — The text cell accepts markdown. Use the text cell to write some documentation
Code Cell — Use the API Notebook icon to create a code cell and write the JavaScript code in it.
API Notebooks for Different Scenarios
Lets create API Notebooks for different scenarios of our use case -
Scenario 1 - Get a list of all projects
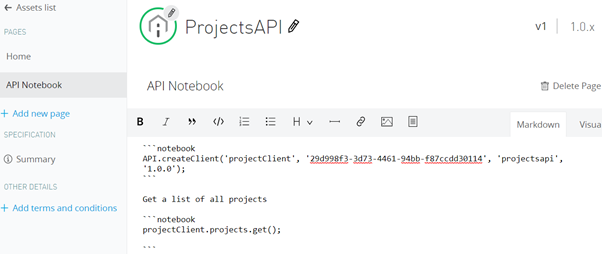
Create a new API Notebook.
In this API Notebook,when we click on API Notebook icon for the first time then there is an automatic generation of API.createClient. The client name can be changed and here the name is changed to "projectClient".
Add some documentation for example - Get a list of all projects (as shown in above notebook).
Click on API Notebook Icon again and this time it will create an Empty code cell. Add the java script code which will use the projectClient to access projects object and calls get() method over it.
Once API Notebook is created, save as draft :-
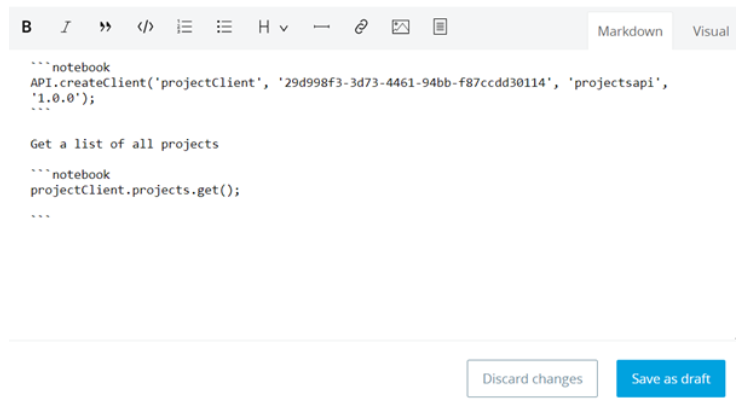
You will be forwarded to another page .
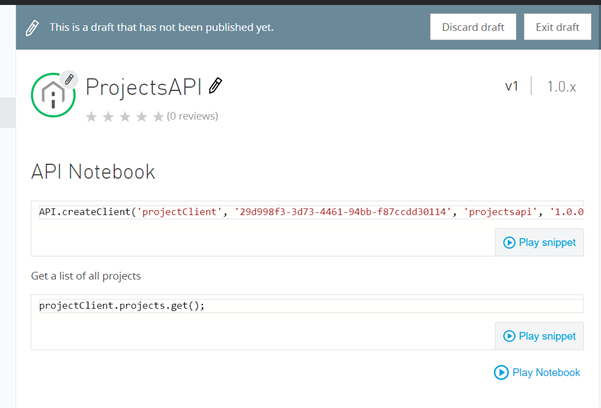
Click on Play Notebook to play this and see the results –

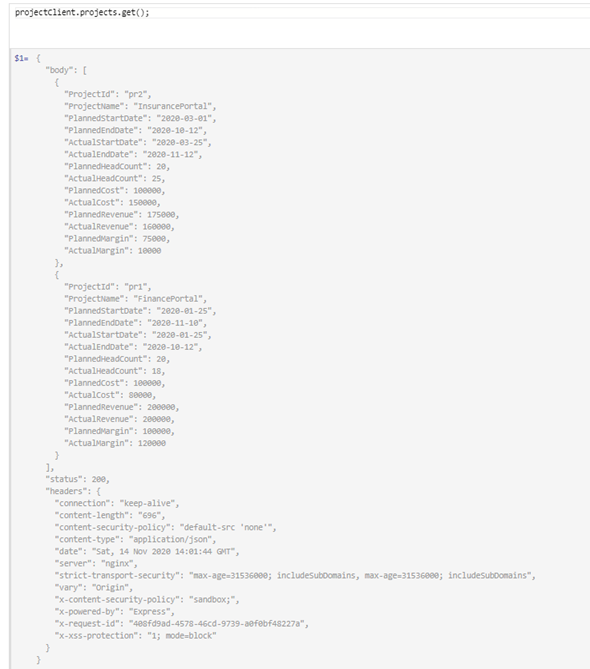
In the above screenshot, the response object is returned consisting of body, status, and headers. The body has a JSON Array, status is returned as 200, and the headers are returned as an object with all the response headers. The body, status, and headers can be accessed which we will see in the upcoming examples.
Scenario 2: Get a List of Projects for a Specific LOB

Create a new API Notebook with name - GetProjectsOfLOB.
Create API Client using API Notebook Icon and then use this client to get list of projects by passing the LOB query parameter.
Save the draft and click on Play Notebook to test this notebook.
Scenario 3: Get Profit or Loss of the Project in the Company

Create a new API Notebook with name - GetProfitLoss.
First, API.createClient is used to create the client
Next, we use this API client to access the objects that represents /projects/{projectId}. We use the objects to get a specific project by passing the project id. The response is stored in a variable with the name myproject.
This variable "myproject" is used to calculate the Profit Or Loss by subtracting the Actual Cost from Actual Revenue. Actual Cost and Actual Revenue are accessed from the response body i.e. {variableName}.body.propertyName.
Scenario 4: Add a New Project and Get the Location of New Project
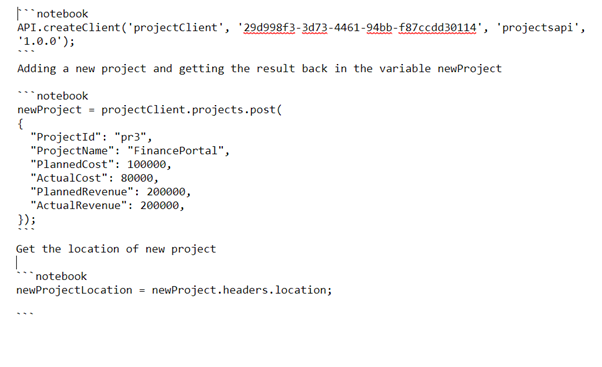
Create a new API Notebook with name - AddProject.
Again first, API.createClient is used to create the client. Using this client, we access the projects object and use the post method on projects object. The request body is passed as the argument of the post method and the response is stored in the variable newProject.
Using the response stored in the newProject variable, we access the location header.
Publish API Notebook
Once you are satisfied with your notebook, publish it.
My Udemy Course on Mule4: API Design using RAML 1.0
You can go through my Udemy course — Course Link.
This course covers — Design (Identify resources, methods, query params, headers, data types, examples), Reusability with ResourceTypes and Traits, Modularization with Library, Documentation, Testing, Publishing to exchange/portal, Creating API Notebook, and Versioning APIs.
Hope this article helps you!
Opinions expressed by DZone contributors are their own.

Comments