Mule CloudHub Connector: Part 2
In Part 1 of this series, we looked at two features of the Mule CloudHub Connector. Here in Part 2, explore the create, list, and mark notification features.
Join the DZone community and get the full member experience.
Join For FreeIn Part 1 of this series, we looked at two features of Mule CloudHub Connector. In total, there are 5 features provided by this connector as listed below:
- Get Application
- List Applications
- Create Notification
- List Notifications
- Mark Notification
In this article (Part 2), we will look at thelast 3 features of Mule CloudHub Connector from the above list.
Create Notification:
This helps you to create a notification for an associated application in an environment. It will appear in the Runtime Manager on the top right corner as a bell icon. Below is a sample demo with connector configuration.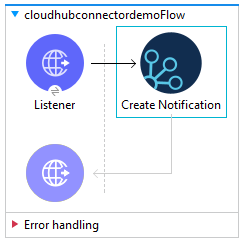
HTTP Listener Config:![HTTP Listener Config]()
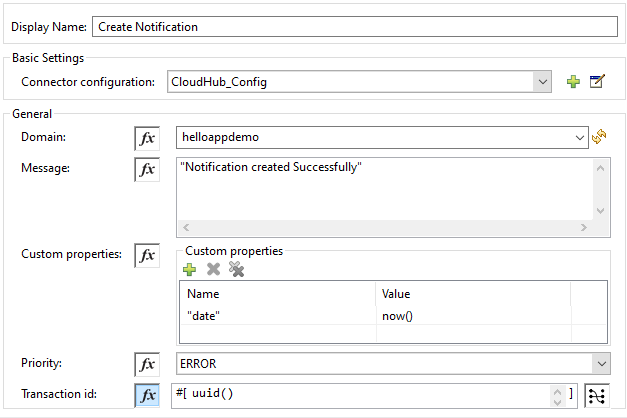
Create Notification Connector Config:
Following are the configuration details:
- Domain: Name of the Application for which notification has to be created
- Message: Notification Message
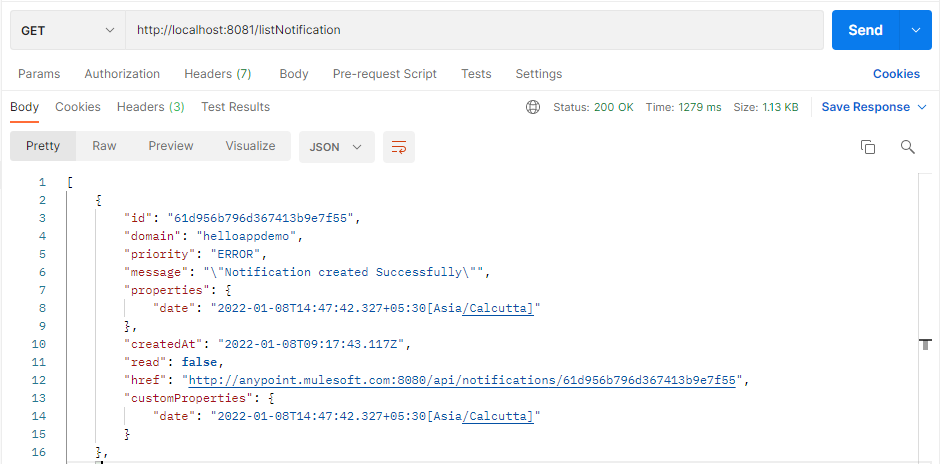
- Custom Properties: Additional information about the created Notification. This detailed information is visible only using List Notification feature
- Priority: ERROR, INFO or WARN
- Transaction ID: Any unique ID
![Create Notification Connector Config]()
![Display Application]()
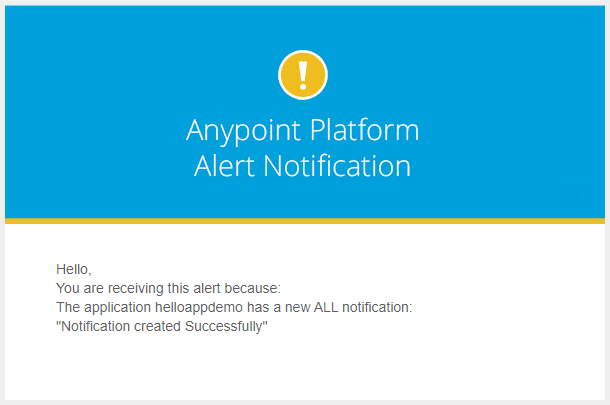
To get this notification as part of an email alert, you can configure Alert in Runtime Manager as shown below.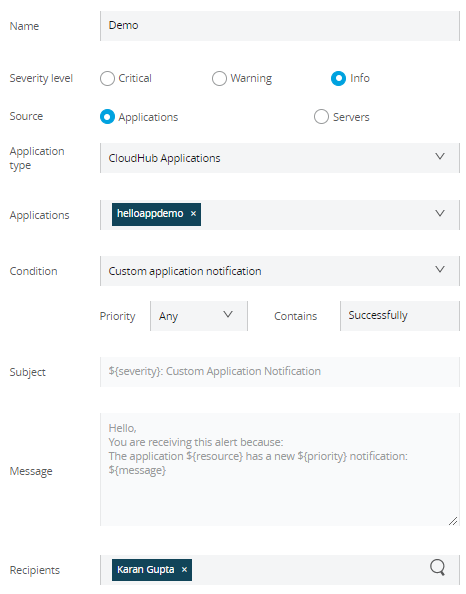
List Notification:
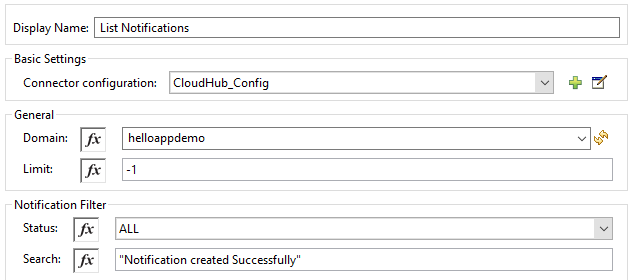
- This Feature helps to list/view notifications that are created.
- You can filter out the data based on Read/Unread Notification or else view all the notifications.
- You can also filter the list based on an expression that matches the notification message.
List Notification Config:
![List Notification Config]()
![Display Name: List Notifications]()
![Get List Notification]() Mark Notification:
Mark Notification:
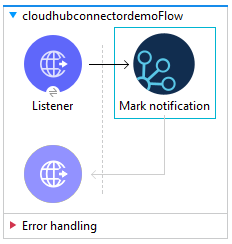
- This feature helps to mark Notification as Read/Unread based on the Transaction ID.
Mark Notification Config:


Opinions expressed by DZone contributors are their own.




 Mark Notification:
Comments