DZone
Thanks for visiting DZone today,
Edit Profile
  • Manage Email Subscriptions
  • How to Post to DZone
  • Article Submission Guidelines
Sign Out View Profile
  • Post an Article
  • Manage My Drafts
Over 2 million developers have joined DZone.
Log In / Join
Refcards Trend Reports
Events Video Library
Refcards
Trend Reports

Events

View Events Video Library

Related

  • On-Demand-Schedulers With MuleSoft CloudHub APIs
  • Ensuring Reliable Microservice Deployment With Spring Boot Build Info Maven Plugin
  • The Promise of Platform Engineering
  • The Missing Link in Cybersecurity: Culture

Trending

  • Chaos Engineering Has a Blind Spot. Agentic AI Lives in It.
  • Securing the AI Host: Spring AI MCP Server Communication With API Keys
  • Why DDoS Protection Is an Architectural Decision for Developers
  • Skills, Java 17, and Theme Accents
  1. DZone
  2. Software Design and Architecture
  3. Integration
  4. Mule 4: Hello World

Mule 4: Hello World

Let's take a look at a tutorial for beginners on Hello World in Mule. Also look at images and explanations for each step.

By 
Ram Chennupati user avatar
Ram Chennupati
·
Aug. 11, 18 · Tutorial
Likes (5)
Comment
Save
Tweet
Share
17.2K Views

Join the DZone community and get the full member experience.

Join For Free

Introduction

Many people are interested in learning Mule programming by themselves. When we are ready to start, it's always better to understand the basics and feel comfortable with the Anypoint Studio IDE and build and run the program with the basic components. Perhaps many of you have written hello world programs. Still, I believe giving basic details is always helpful to the MuleSoft community. I hope beginners will find this useful.

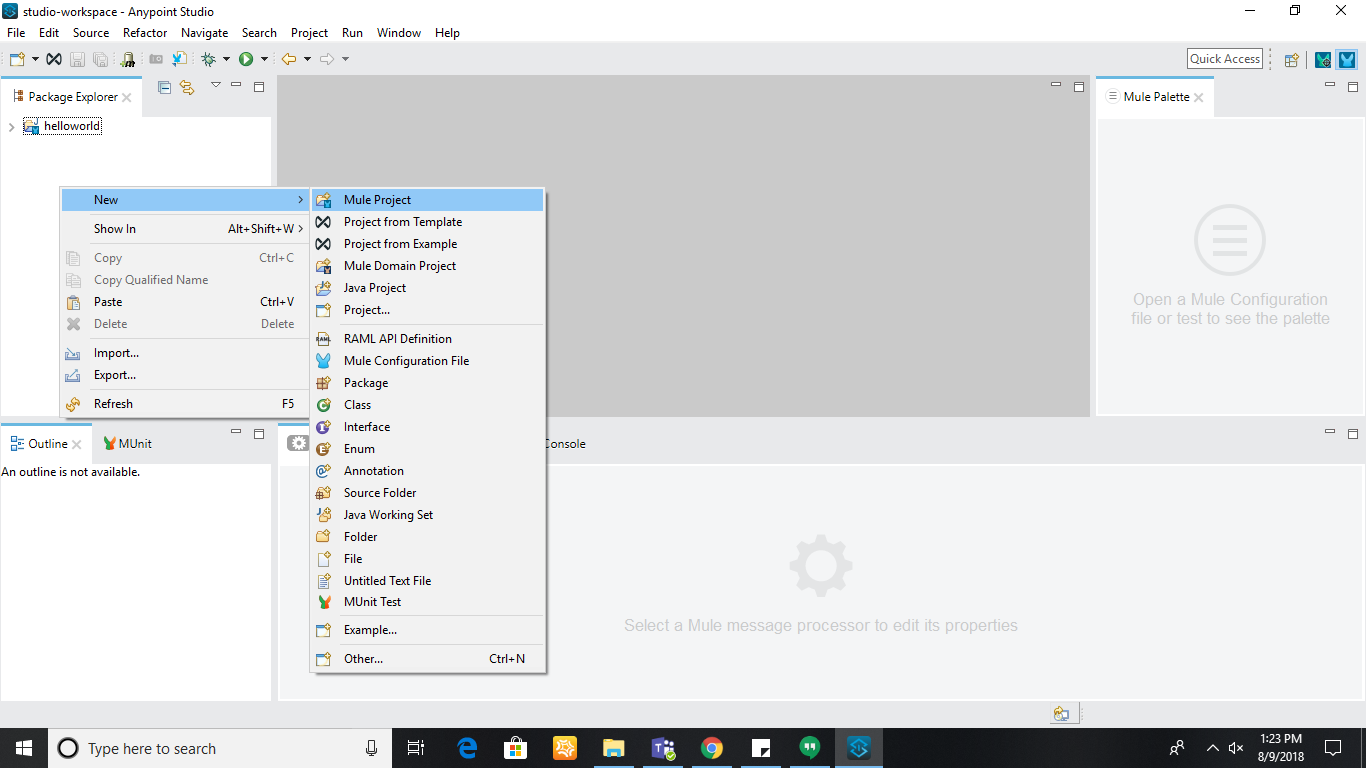
1. Create a new project as shown in the below screenshot. Right click on the left pane of Project Explorer and click on the MuleProject.

Image title

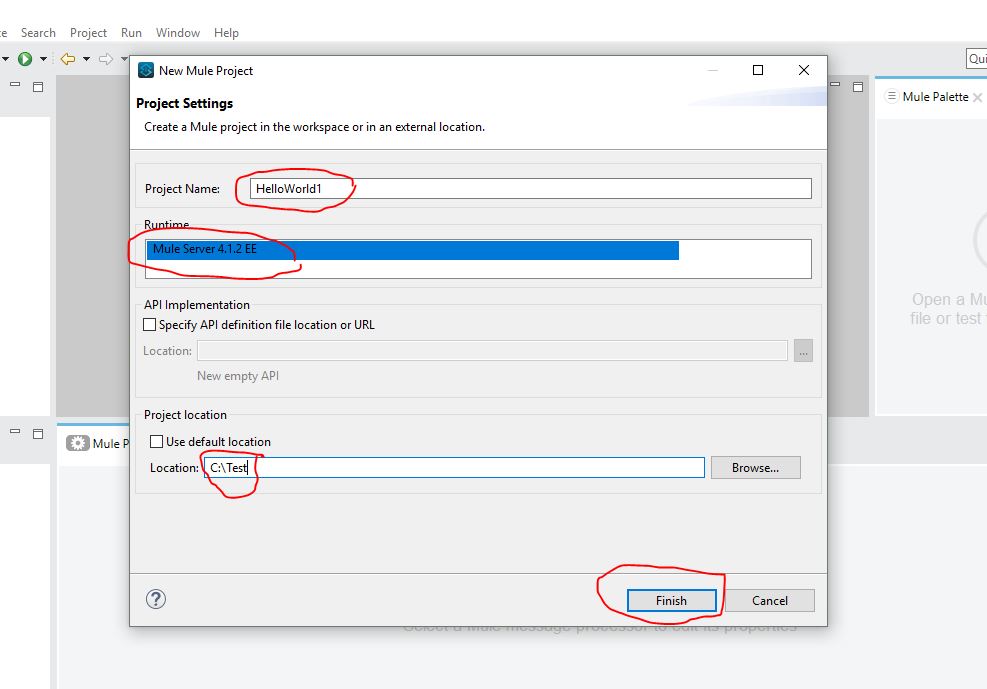
2. After clicking on the MuleProject, the below screen will be shown. Please make sure all the red circled sections are filled up.

Image title

3. Next, go through the folders created in the left pane. src/main/mule, src/main/java, src/main/resources,  src/test/java, src/test/munit, /src/test/resources,  and other folders are added to the project. 

Click on the helloworld1.xml file. on the right-hand side. You will notice a Mule Palette in which you will be able to view the components provided by MuleSoft.

Image title

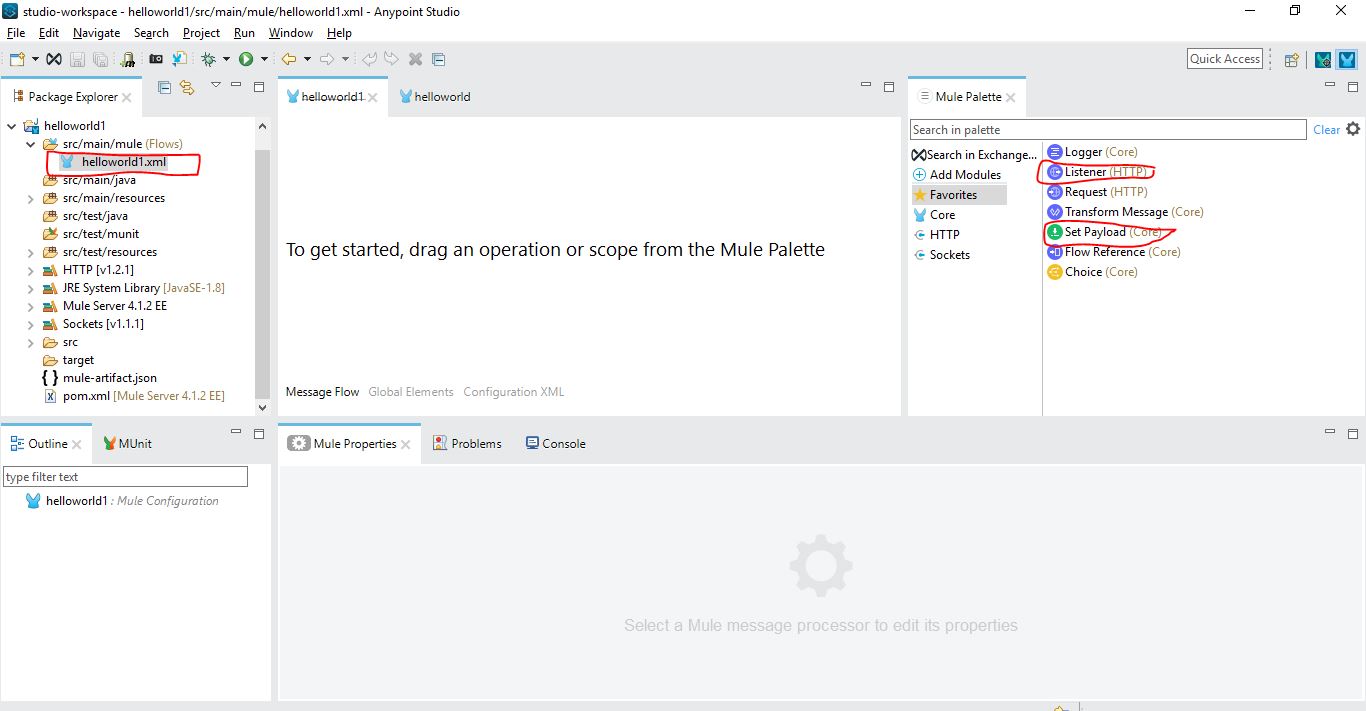
4. Drag and drop the Listener component, Set Payload components. After that, click on the "+" icon in "Listener"  properties.

HelloWorld

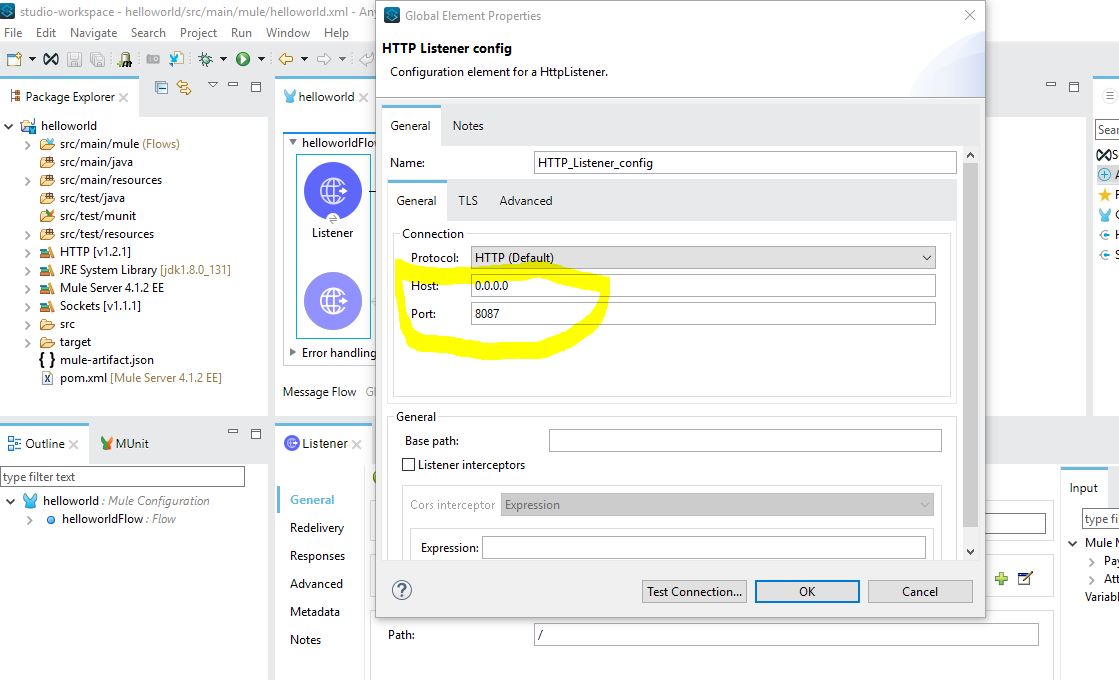
5. Next, fill up the Host and Port fields as shown in the below screen.

Image title

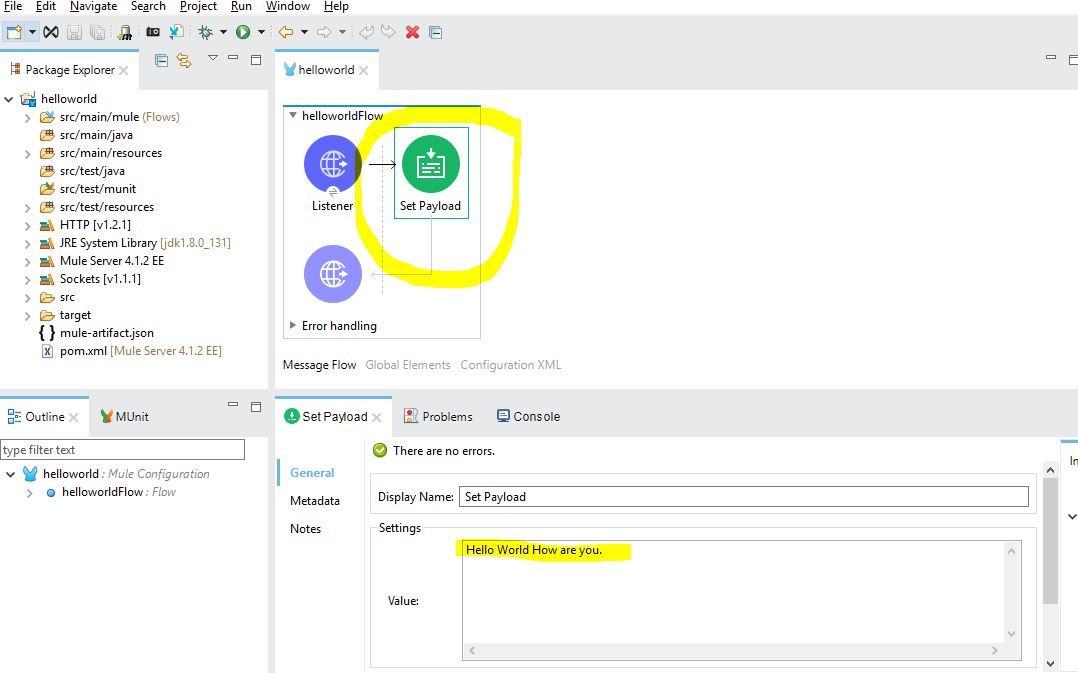
6. Next, click on "Set Payload." After that, you can view the properties section as mentioned in the below screen. Fill up the details as shown:

Image title

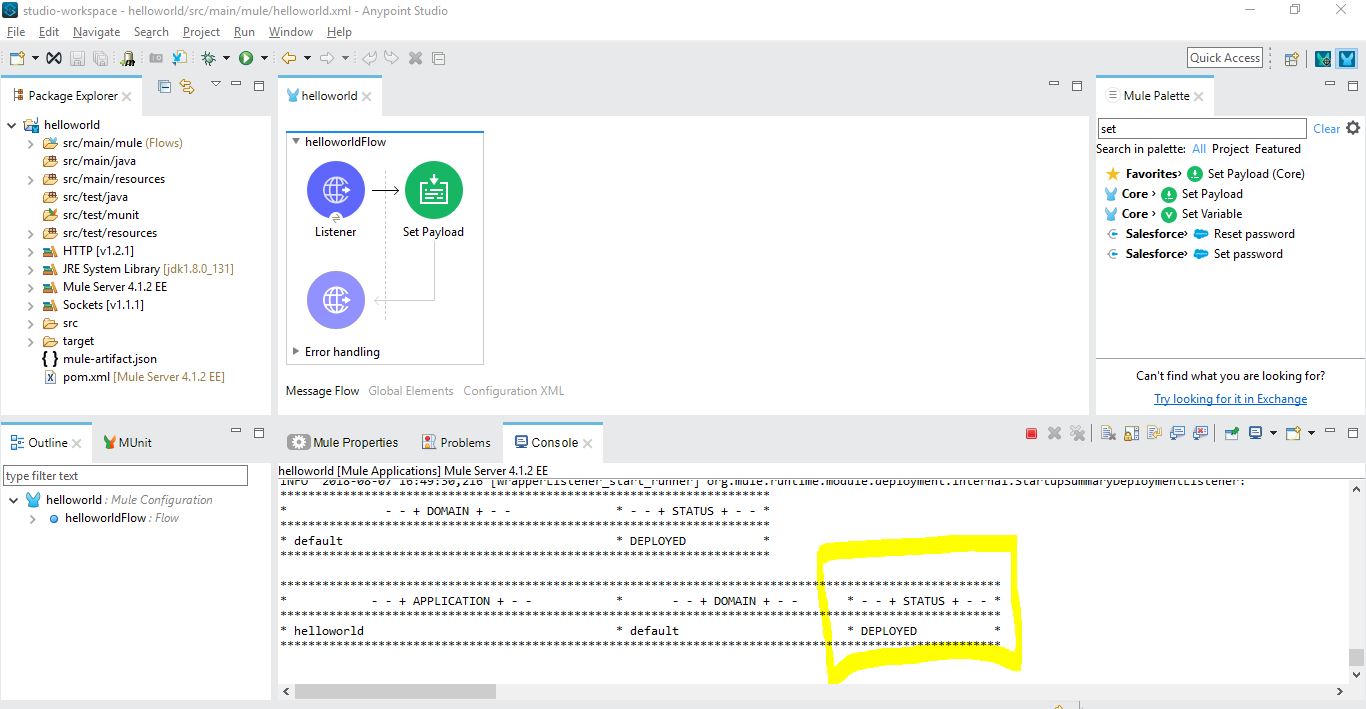
7. Right click on the project window and run the project.

Image title

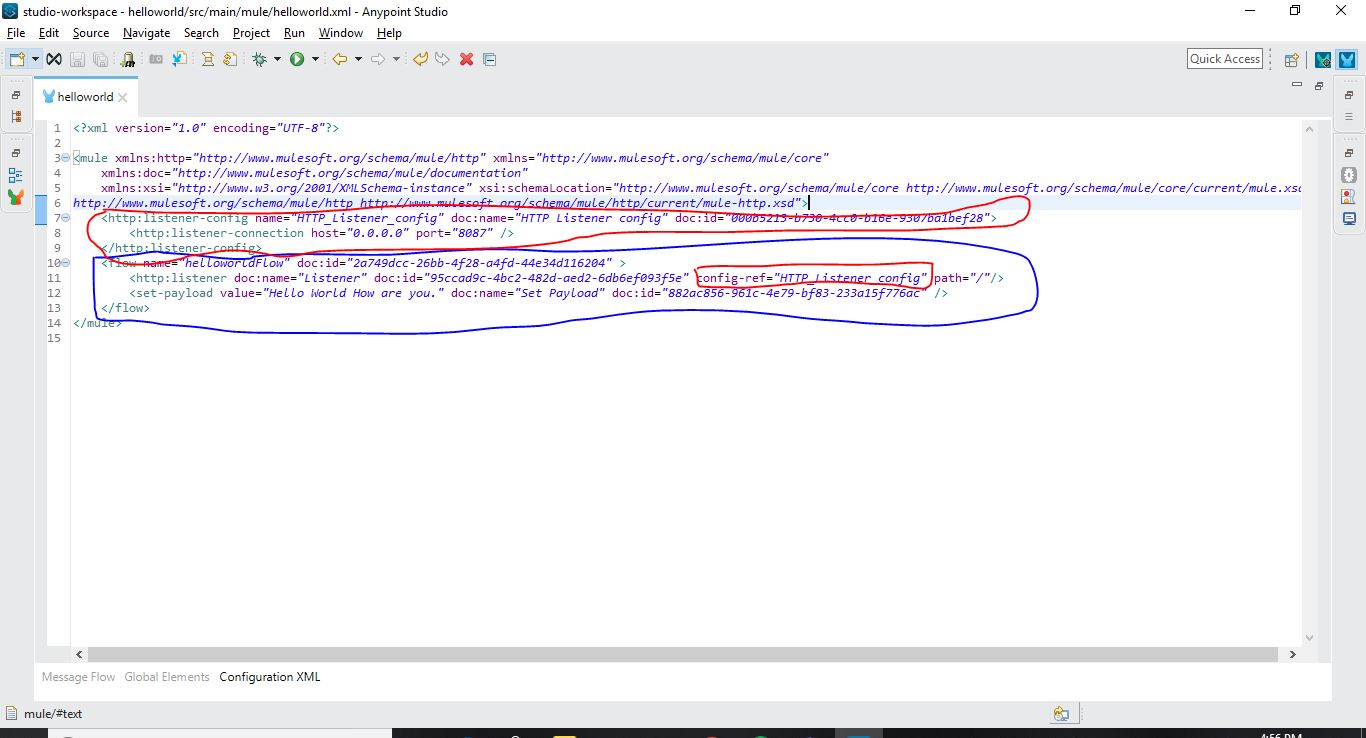
8. Verify the XML equivalent code of the project.

Image title

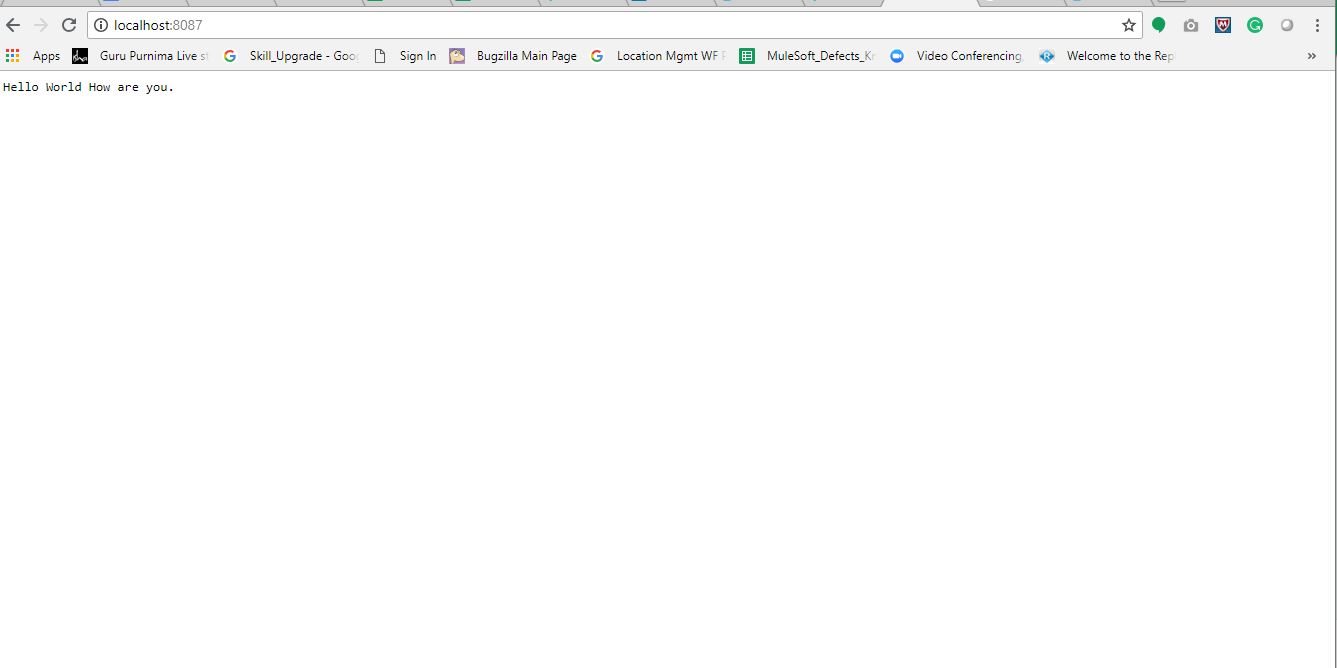
9. Run the localhost:8087 in the browser.

Image title


Conclusion

As it is a basic hello world program, you can start modifying the content of the Set Payload component and run the program once again. 

Payload (computing) Property (programming) MuleSoft Host (Unix) Icon IT Drops (app) Build (game engine)

Opinions expressed by DZone contributors are their own.

Related

  • On-Demand-Schedulers With MuleSoft CloudHub APIs
  • Ensuring Reliable Microservice Deployment With Spring Boot Build Info Maven Plugin
  • The Promise of Platform Engineering
  • The Missing Link in Cybersecurity: Culture

Partner Resources

×

Comments

The likes didn't load as expected. Please refresh the page and try again.

  • RSS
  • X
  • Facebook

ABOUT US

  • About DZone
  • Support and feedback
  • Community research

ADVERTISE

  • Advertise with DZone

CONTRIBUTE ON DZONE

  • Article Submission Guidelines
  • Become a Contributor
  • Core Program
  • Visit the Writers' Zone

LEGAL

  • Terms of Service
  • Privacy Policy

CONTACT US

  • 3343 Perimeter Hill Drive
  • Suite 215
  • Nashville, TN 37211
  • [email protected]

Let's be friends:

  • RSS
  • X
  • Facebook