MuleSoft OAuth 2.0 Provider: Password Grant Type
Learn to configure MuleSoft as an OAuth 2.0 provider with the Password Grant type, securing APIs and managing user authentication with best practices.
Join the DZone community and get the full member experience.
Join For FreeOAuth 2.0 is a widely used authorization framework that allows third-party applications to access user resources on a resource server without sharing the user's credentials.
The Password Grant type, also known as Resource Owner Password Credentials Grant, is a specific authorization grant defined in the OAuth 2.0 specification. It's particularly useful in scenarios where the client application is highly trusted and has a direct relationship with the user (e.g., a native mobile app or a first-party web application). This grant type allows the client to request an access token by directly providing the user's username and password to the authorization server. While convenient, it's crucial to implement this grant type securely, as it involves handling sensitive user credentials.
This article details how to configure MuleSoft as an OAuth 2.0 provider using the Password Grant type, providing a step-by-step guide and emphasizing security best practices. Implementing this in MuleSoft allows you to centralize your authentication and authorization logic, securing your APIs and resources.
Use Cases and Benefits
- Native mobile apps: Suitable for mobile applications where the user interacts directly with the app to provide their credentials.
- Trusted web applications: Appropriate for first-party web applications where the application itself is trusted to handle user credentials securely.
- API security: Enhances API security by requiring clients to obtain an access token before accessing protected resources.
- Centralized authentication: Allows for centralized management of user authentication within your MuleSoft environment.
Prerequisites
- MuleSoft Anypoint Studio (latest version recommended)
- Basic understanding of OAuth 2.0 concepts
- Familiarity with Spring Security
- A tool for generating bcrypt hashes (or a library within your Mule application)
Steps
1. Enable Spring Security Module
Create a Mule Project
Start by creating a new Mule project in Anypoint Studio.
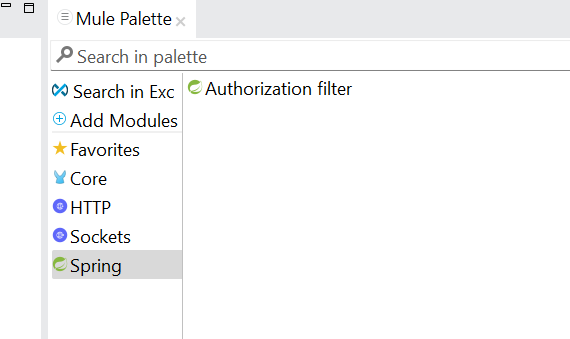
Add Spring Module
Add the "Spring Module" from the Mule palette to your project. Drag and drop it into the canvas.
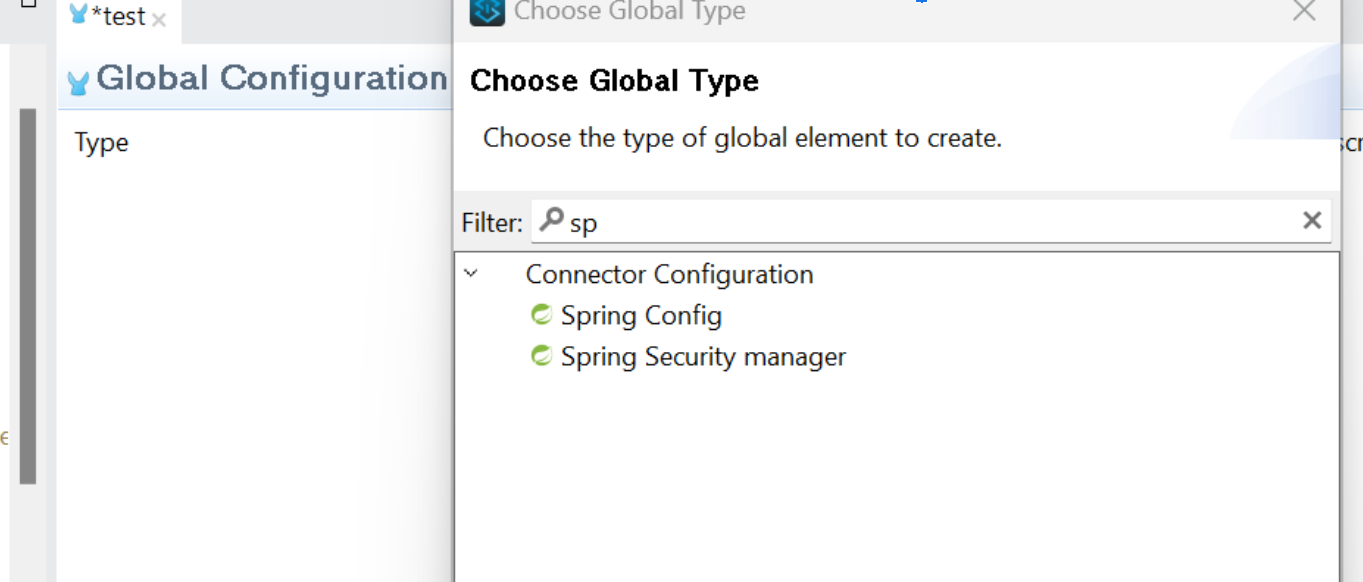
Configure Spring Security Manager
In the "Global Elements" tab, add a "Spring Config" and a "Spring Security Manager." These will appear as global elements.
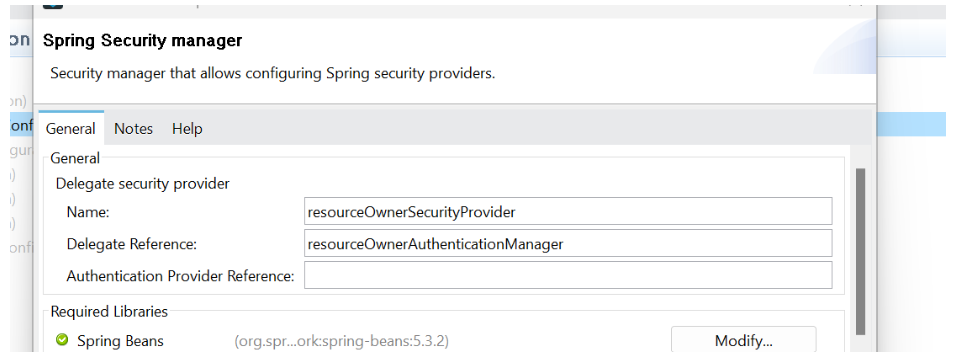
Configure the "Spring Security Manager"
Set the "Name" to resourceOwnerSecurityProvider. This is a logical name for your security manager.
Set the "Delegate Reference" to resourceOwnerAuthenticationManager. This links the security manager to the authentication manager defined in your Spring configuration.
Configure Spring Config
Set the "Path" of the "Spring Config" to your beans.xml file (e.g., src/main/resources/beans.xml). This tells Mule where to find your Spring configuration.
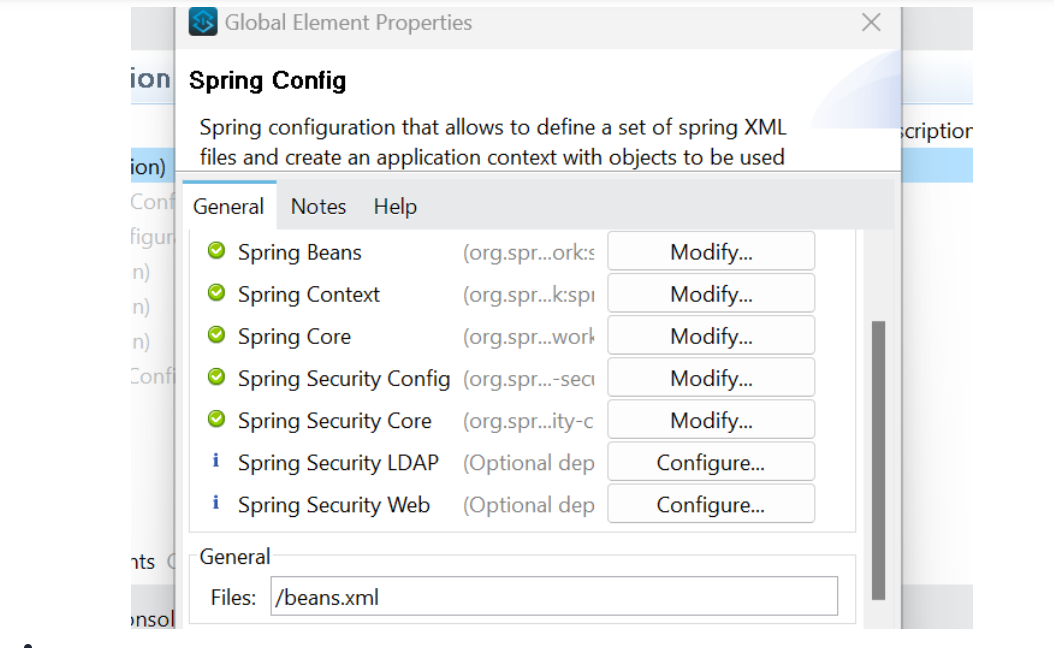
Create the beans.xml file in the specified location (src/main/resources/beans.xml). This file defines the Spring beans, including the authentication manager. Add the following configuration:
<?xml version="1.0" encoding="UTF-8"?>
<beans xmlns="http://www.springframework.org/schema/beans"
       xmlns:xsi="http://www.w3.org/2001/XMLSchema-instance"
       xmlns:ss="http://www.springframework.org/schema/security"
       xsi:schemaLocation="http://www.springframework.org/schema/beans
                           http://www.springframework.org/schema/beans/spring-beans-5.3.x.xsd  http://www.springframework.org/schema/security
                           http://www.springframework.org/schema/security/spring-security-5.3.x.xsd">

    <ss:authentication-manager alias="resourceOwnerAuthenticationManager">
        <ss:authentication-provider>
            <ss:user-service>
                <ss:user name="john" password="{bcrypt}$2a$10$somehashedpassword" authorities="READ_PROFILES"/>
            </ss:user-service>
        </ss:authentication-provider>
    </ss:authentication-manager>

</beans>
Critical Security
- Password hashing: The most important security practice is to never store passwords in plain text. The example above uses bcrypt, a strong hashing algorithm. You must replace
$2a$10$somehashedpasswordwith an actual bcrypt hash of the user's password. Use a tool or library to generate this hash. The{bcrypt}prefix tells Spring Security to use the bcrypt password encoder. - Spring security version: Ensure your beans.xml uses a current, supported version of the Spring Security schema. Older versions have known vulnerabilities. The provided example uses 5.3.x; adjust as needed.
2. Configure OAuth 2.0 Provider
Add OAuth Provider Module
Add the "OAuth Provider" module from the Mule palette to your project.
Add OAuth2 Provider Config
Add an "OAuth2 Provider Config" in the Global Configuration. This is where you'll configure the core OAuth settings.
Configure OAuth Provider
- Token store: Choose a persistent token store. "In-Memory" is suitable only for development and testing. For production, use a database-backed store (e.g., using the Database Connector) or a distributed cache like Redis for better performance and scalability.
- Client store: Similar to the token store, use a persistent store for production (database or Redis recommended). This store holds information about registered client applications.
- Authorization endpoint: The URL where clients can request authorization. The default is usually /oauth2/authorize.
- Token endpoint: The URL where clients exchange authorization codes (or user credentials in the Password Grant case) for access tokens. The default is usually /oauth2/token.
- Authentication manager: Set this to resourceOwnerSecurityProvider (the name of your Spring Security Manager). This tells the OAuth provider to use your Spring Security configuration for user authentication.
3. Client Registration Flow
You need a mechanism to register client applications. Create a separate Mule flow (or API endpoint) for this purpose. This flow should:
- Accept client details (e.g., client name, redirect URIs, allowed grant types).
- Generate a unique client ID and client secret.
- Store the client information (including the generated ID and secret) in the Client Store you configured in the OAuth Provider. Never expose client secrets in logs or API responses unless absolutely necessary, and you understand the security implications. Hash the client secret before storing it.
4. Validate Token Flow
Create a flow to validate access tokens. This flow will be used by your protected resources to verify the validity of access tokens presented by clients.
Use the "Validate Token" operation from the OAuth Provider module in this flow. This operation will check the token's signature, expiry, and other attributes against the Token Store.
5. Protected Resource
Create the API endpoints or flows that you want to protect with OAuth 2.0.
At the beginning of these protected flows, call the "Validate Token" flow you created. If the token is valid, the flow continues; otherwise, it returns an error (e.g., HTTP 401 Unauthorized).
Testing
1. Register a Client
Use Postman or a similar tool to register a client application, obtaining a client ID and client secret. If you implemented a client registration flow, use that.
2. Get Access Token (Password Grant)
Send a POST request to the /oauth2/token endpoint with the following parameters:
- grant_type: password
- username: john
- password: test (use the bcrypt hashed password if you're storing passwords securely)
- client_id: Your client ID
- client_secret: Your client secret
3. Access Protected Resource
Send a request to your protected resource, including the access token in the Authorization header (e.g., Authorization: Bearer <access_token>).
4. Validate Token (Optional)
You can also test the validation flow directly by sending a request with a token to the endpoint that triggers the "Validate Token" flow.
Conclusion
This document has provided a comprehensive guide to configuring MuleSoft as an OAuth 2.0 provider using the Password Grant type. By following these steps and paying close attention to the security considerations, you can effectively secure your APIs and resources. Remember that the Password Grant type should be used only when the client application is highly trusted.
For other scenarios, explore other OAuth 2.0 grant types like the Authorization Code Grant, which offers better security for less trusted clients. Always consult the official MuleSoft and Spring Security documentation for the latest information and advanced configuration options. Properly securing your OAuth implementation is paramount to protecting user data and your systems.
Relevant Links
Opinions expressed by DZone contributors are their own.
Comments