Multi-Factor Authentication (MFA) Configuration for Mulesoft Anypoint Platform Users
Mulesoft Anypoint Platform supports multi-factor authentication for your organizations’ Users. You can enable or disable MFA for individual users or all users.
Join the DZone community and get the full member experience.
Join For FreeThese days, the standard way to log into a secure application or system is multi-factor authentication.
It's the easiest and most popular way to secure enterprise users and access to their data. Users are validated from the following principle:
- Something the user knows (e.g., password, PIN, answer to a secret question, etc.)
- Something the user has (e.g., an app on mobile, SMS, soft token, hard token, security badge, etc.)
- Something the user is (fingerprint, palm print, voice, retina and iris patterns, signature, DNA, etc.)
Mulesoft Anypoint Platform supports multi-factor authentication for your organization’s users.
Steps to Enable MFA for Mulesoft Anypoint Platform
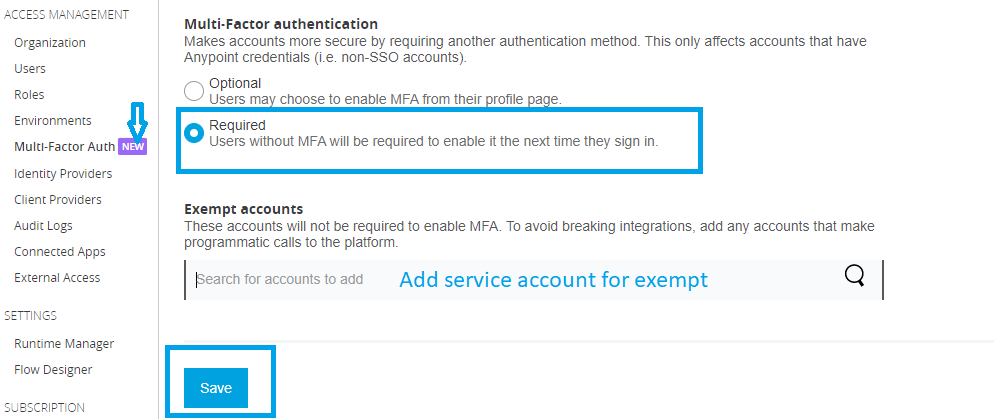
Enable Multi-Factor Authentication for All User Account
- Log into Anypoint Platform using an account that has the Organization Administrator permission.
- Navigate to Access Management.
- In the Navigation menu, click Multi-factor auth.
- Select Required.
- If you want to exempt specific users or service accounts from multi-factor authentication, add them to the Exempt Accounts section.
- Click Save. All nonexempt users in your organization are now required to configure a verification method when they log into the Anypoint Platform.
Note: Service users or accounts that make programmatic calls to Anypoint Platform should be exempt from multi-factor authentication because they cannot provide verification aside from a username and password.

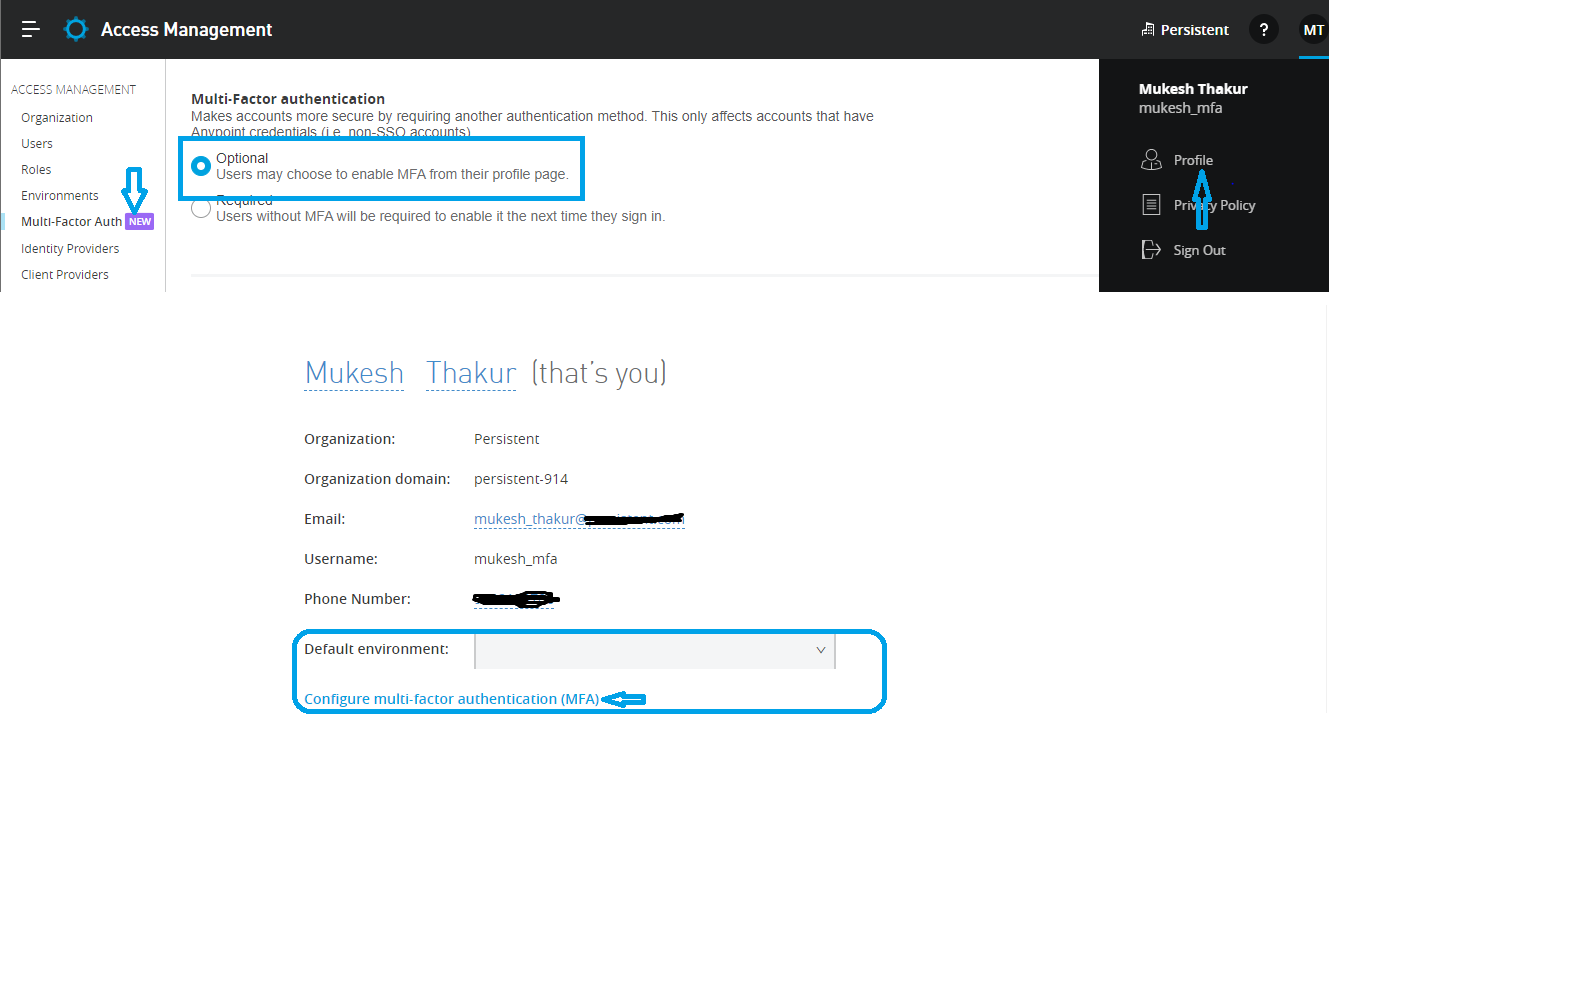
Enable Multi-Factor Authentication on Your User Account
Multi-factor authentication may enable the individual user instead of all users of the organization.
- Log into Anypoint Platform.
- Navigate to your user profile.
- Click Configure multi-factor authentication (MFA).
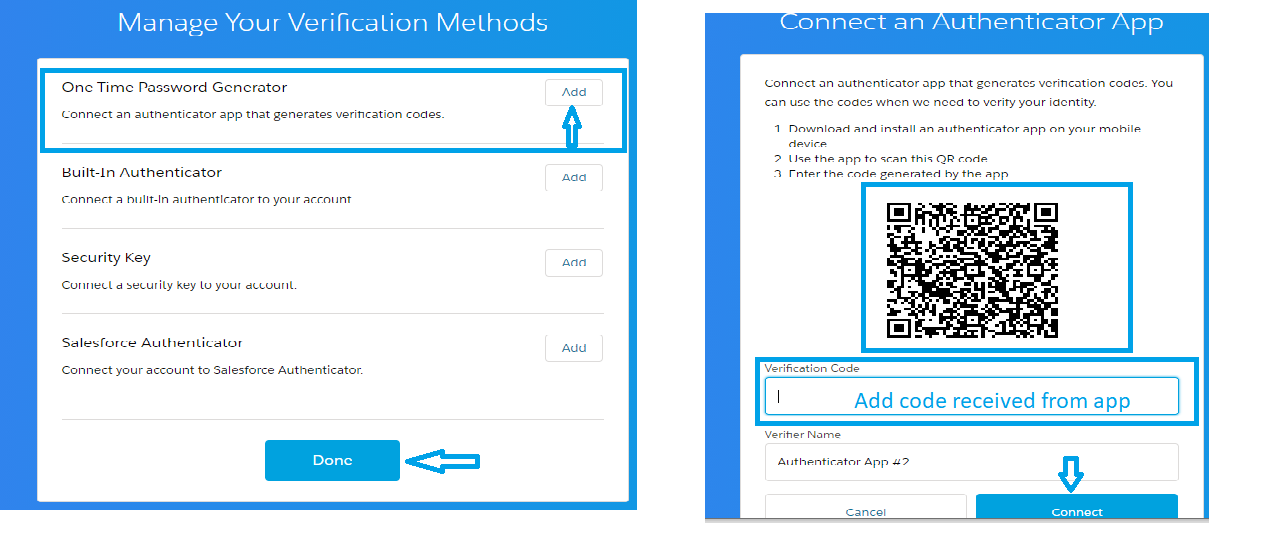
- The Manage Your Verification Methods interface appears.
- Next to the verification method you want to configure, click Add.
- Follow the instructions for your preferred verification method.

Add your verification method from the available options. For this demonstration, we will use One-Time Password Generator.

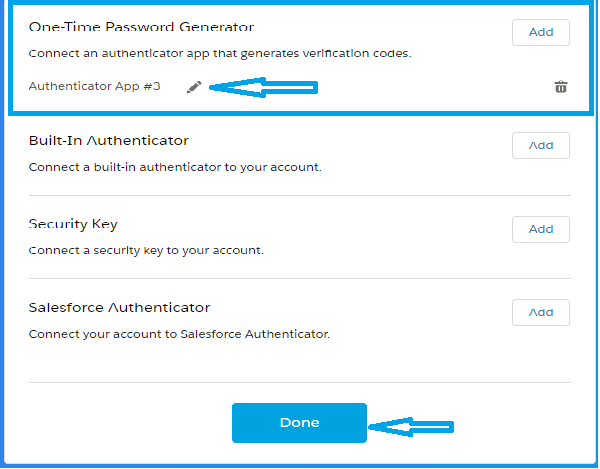
The Authenticator app will install by using a QR code through mobile. Upon adding a successful verification code, the authenticator app will be added, and email notifications from the Salesforce verification service will be received.
Note: An alternative to scanning the QR code is to add the verification code into the Authenticator mobile app.


The MFA set up is completed. When we log into the Anypoint Platform again, it will ask for a verification code.

To prevent service disruptions, identify any accounts (service accounts) that are used to programmatically call Anypoint Platform. We must either configure these service account calls by using the Connected Apps feature or add these accounts to the Exempt Accounts section when configuring multi-factor authentication.
Opinions expressed by DZone contributors are their own.

Comments