Multi-Tenant .NET Applications With Keycloak Realms
I use Keycloak Realms to isolate tenants. My .NET app switches Authority and ClientId dynamically to handle multiple realms with one codebase.
Join the DZone community and get the full member experience.
Join For FreeIntroduction
Note: You can download the source from GitHub.
I’ve been working on multi-tenant applications in the .NET ecosystem for quite a while, and one of the toughest challenges I consistently run into is secure tenant isolation — especially when different customers expect separate user bases, roles, and management capabilities.
My favorite solution to this has been Keycloak, an open-source identity and access management tool. With Keycloak, I rely on realms to isolate tenant configurations, then tie everything neatly together in my .NET application. Here’s how I do it.
Why Use Keycloak Realms?
Keycloak realms let you split each tenant into its own “space,” complete with distinct users, groups, roles, and OAuth/OpenID Connect clients. Since every realm operates like a silo, I can onboard a new customer (tenant) just by spinning up a new realm — no major code changes required. It’s a lot simpler than forcing one giant user directory to handle everyone in one place.
How It Fits Into .NET
From an ASP.NET Core standpoint, realms simplify how I structure authentication flows. Each realm is assigned its own issuer (Authority), ClientID, and optional Client Secret. All I need to do in my .NET code is determine which tenant the request belongs to, then configure the authentication pipeline to point to the right realm.
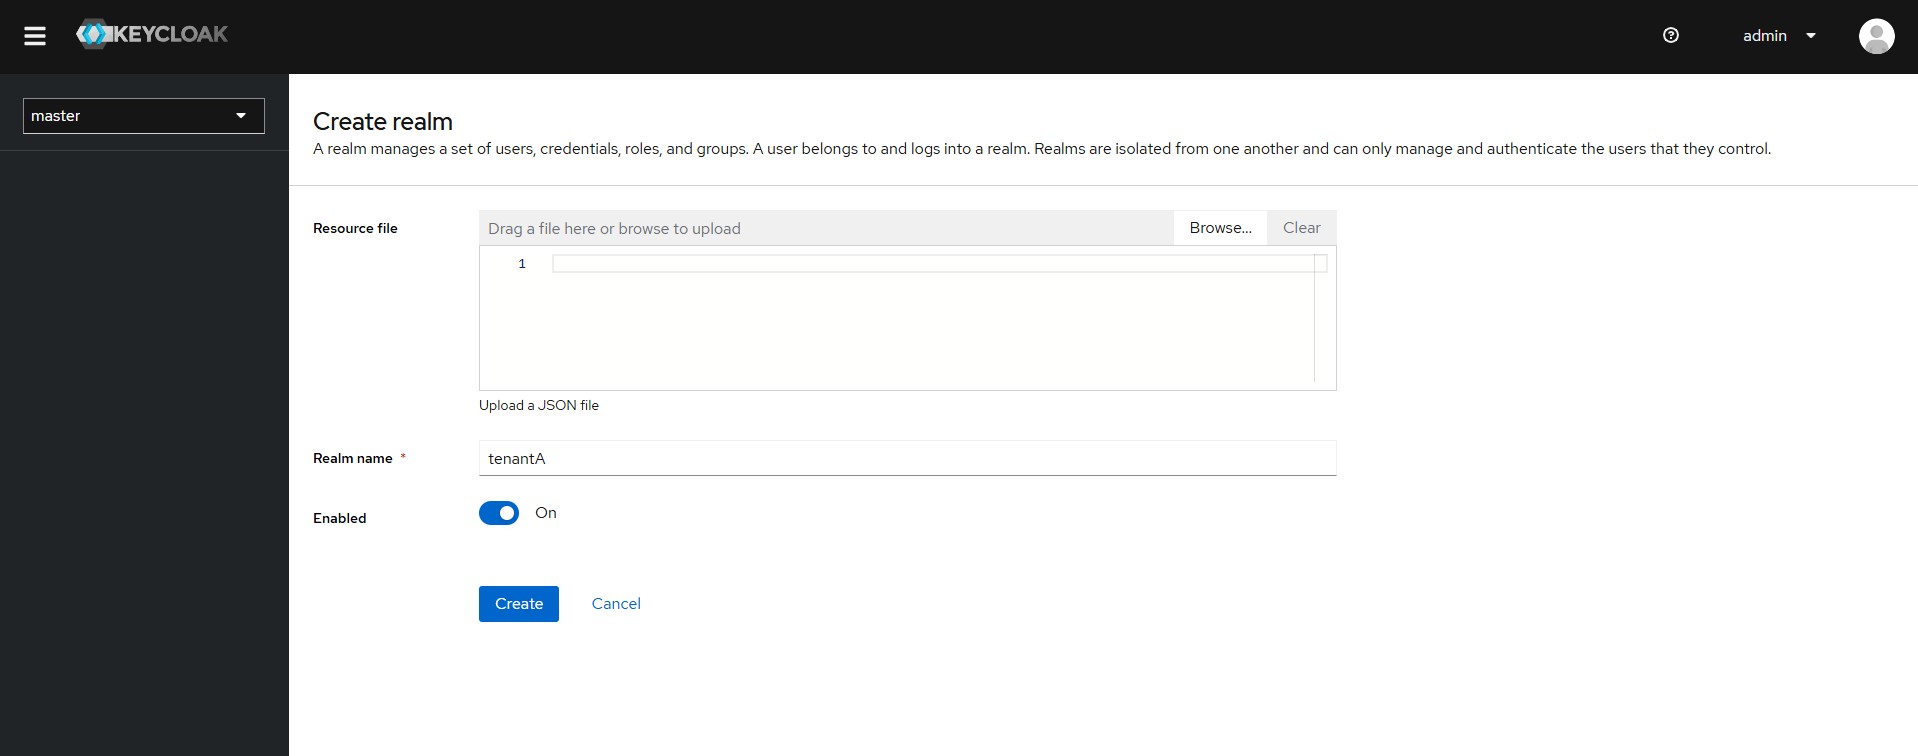
Keycloak Setup: Realms and Clients
Let’s imagine I have two tenants: Tenant A and Tenant B. In Keycloak:
- Create realm “tenantA.”
- Within it, add clients such as
admin_portalordistributor_portal.
- Within it, add clients such as
- Create realm “tenantB.”
- Similar approach: create a client for each distinct application.
Each realm keeps track of its own user directory. If Tenant A’s admin wants to disable a user, that’s done in the Tenant A realm only, leaving Tenant B untouched.
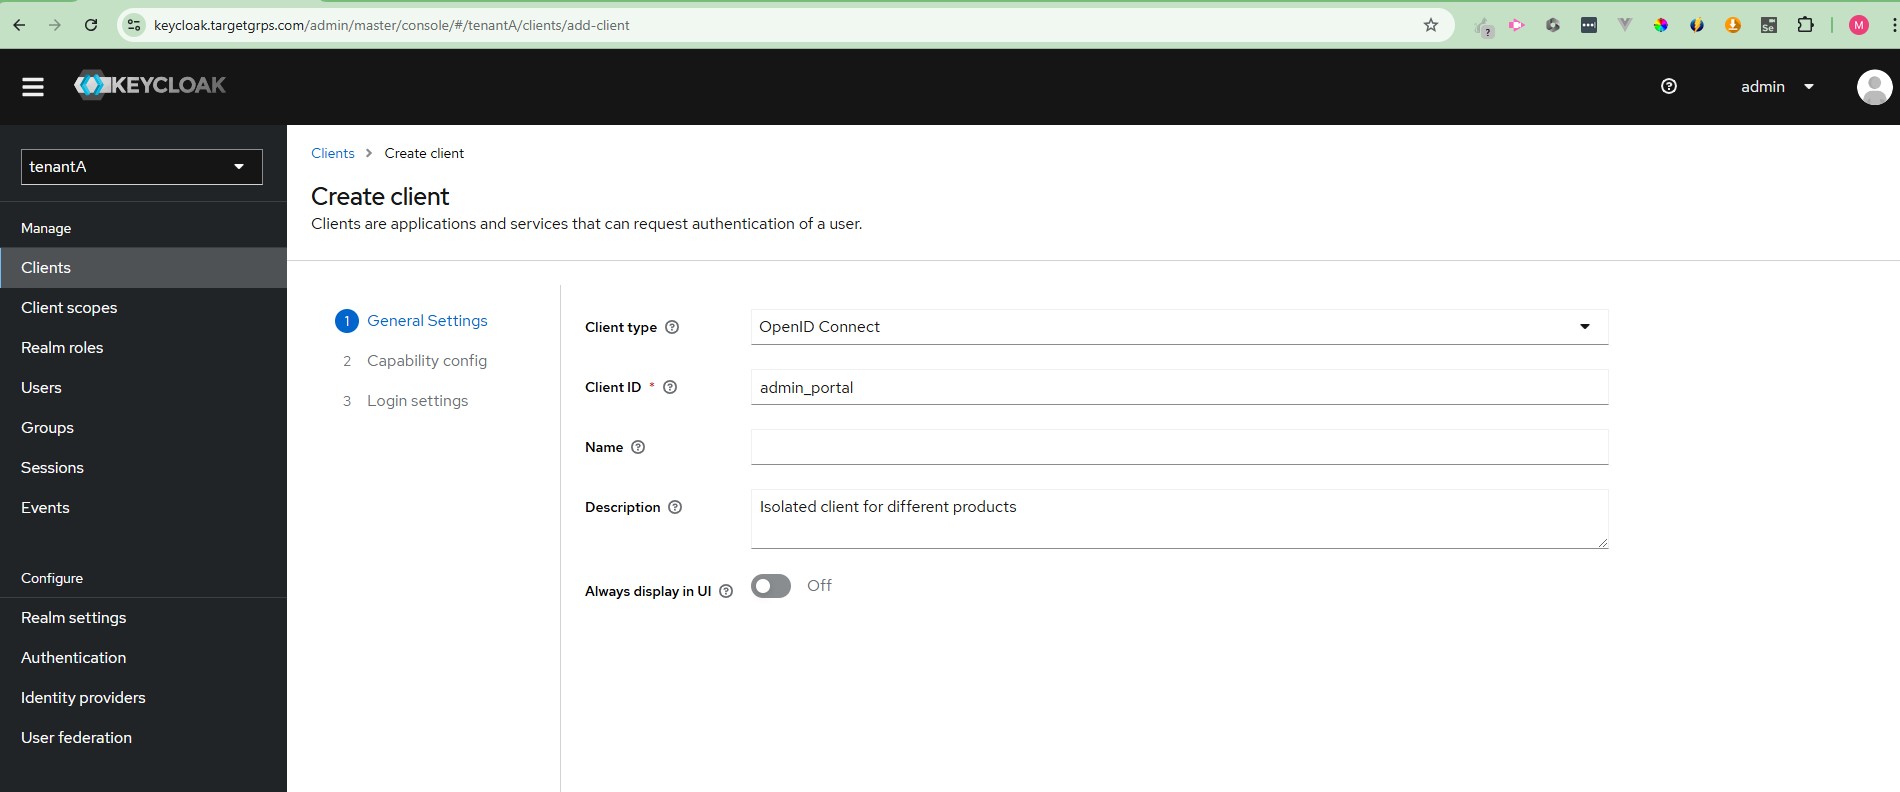
Isolated client for different products
Why So Convenient?
Because once realms and clients are configured, the day-to-day tasks for each tenant are neatly partitioned. Tenant A’s staff can’t mess with Tenant B’s configuration and vice versa.
Wiring It Up in .NET
Detecting the Tenant
In most of my projects, I rely on subdomains or frontend settings to figure out which tenant is currently hitting the application — like tenantA.myapp.com versus tenantB.myapp.com. If subdomains aren’t an option, you can pass a custom header, parse a path segment, or store a tenant identifier in JWT claims.
var host = context.Request.Host.Host;
var tenant = host.Contains("tenantA") ? "tenantA" : "tenantB";
Storing Realm Configurations
I keep a simple dictionary or JSON file that maps tenant names to Keycloak settings:
public static class MultiTenantAuthOptions
{
    public static Dictionary<string, TenantConfig> TenantSettings = new()
    {
        ["tenantA"] = new TenantConfig
        {
            RealmName = "tenantA",
            AuthorityUrl = "http://localhost:8080/realms/tenantA",
            ClientId = "admin_portal",
            ClientSecret = "SECRET_A"
        },
        ["tenantB"] = new TenantConfig
        {
            RealmName = "tenantB",
            AuthorityUrl = "http://localhost:8080/realms/tenantB",
            ClientId = "dist_portal",
            ClientSecret = "SECRET_B"
        }
    };
}
This way, my application picks the right AuthorityUrl and ClientId at runtime.
Custom JWT Bearer Events
ASP.NET Core normally uses a static configuration for JWT Bearer. But with multi-tenancy, I override it on the fly. For example:
public class MultiTenantJwtBearerEvents : JwtBearerEvents
{
    public override Task MessageReceived(MessageReceivedContext context)
    {
        var host = context.Request.Host.Host;
        var tenantKey = host.Contains("tenantA") ? "tenantA" : "tenantB";

        if (MultiTenantAuthOptions.TenantSettings.TryGetValue(tenantKey, out var cfg))
        {
            context.Options.Authority = cfg.AuthorityUrl;
            context.Options.TokenValidationParameters.ValidAudience = cfg.ClientId;
        }

        return base.MessageReceived(context);
    }
}
After that, my code can handle logins from different realms without any friction.
Realm-Specific Admins
Setting Up Admin Roles
Keycloak allows you to give each realm its own admin user. I like this because it gives each tenant control over their own user base, roles, and security rules — without risking cross-tenant confusion. The steps are straightforward:
- Go to Manage > Users, create a user named, say,
realmAdminA. - Assign roles like
manage-users,view-realm, and so on, specifically under therealm-managementclient in that realm. - That user can now do admin tasks only inside their realm.
Typical admin-level actions include:
- Disabling/enabling users
- Resetting passwords
- Handling group membership
- Checking user sessions and logging users out
- Configuring 2FA requirements
Because these admin permissions are scoped to a single realm, one tenant’s admin can’t see or break anything that belongs to another tenant. That separation is precisely what multi-tenant architectures need.
Logging and User Sessions
Keycloak logs all sorts of events — logins, logouts, failed attempts, password resets, etc. This is great for compliance and troubleshooting. Each realm admin can view logs relevant only to that realm.
Users, on their side, can see their own active sessions and end them if needed. It’s straightforward and keeps responsibility clearly divided.
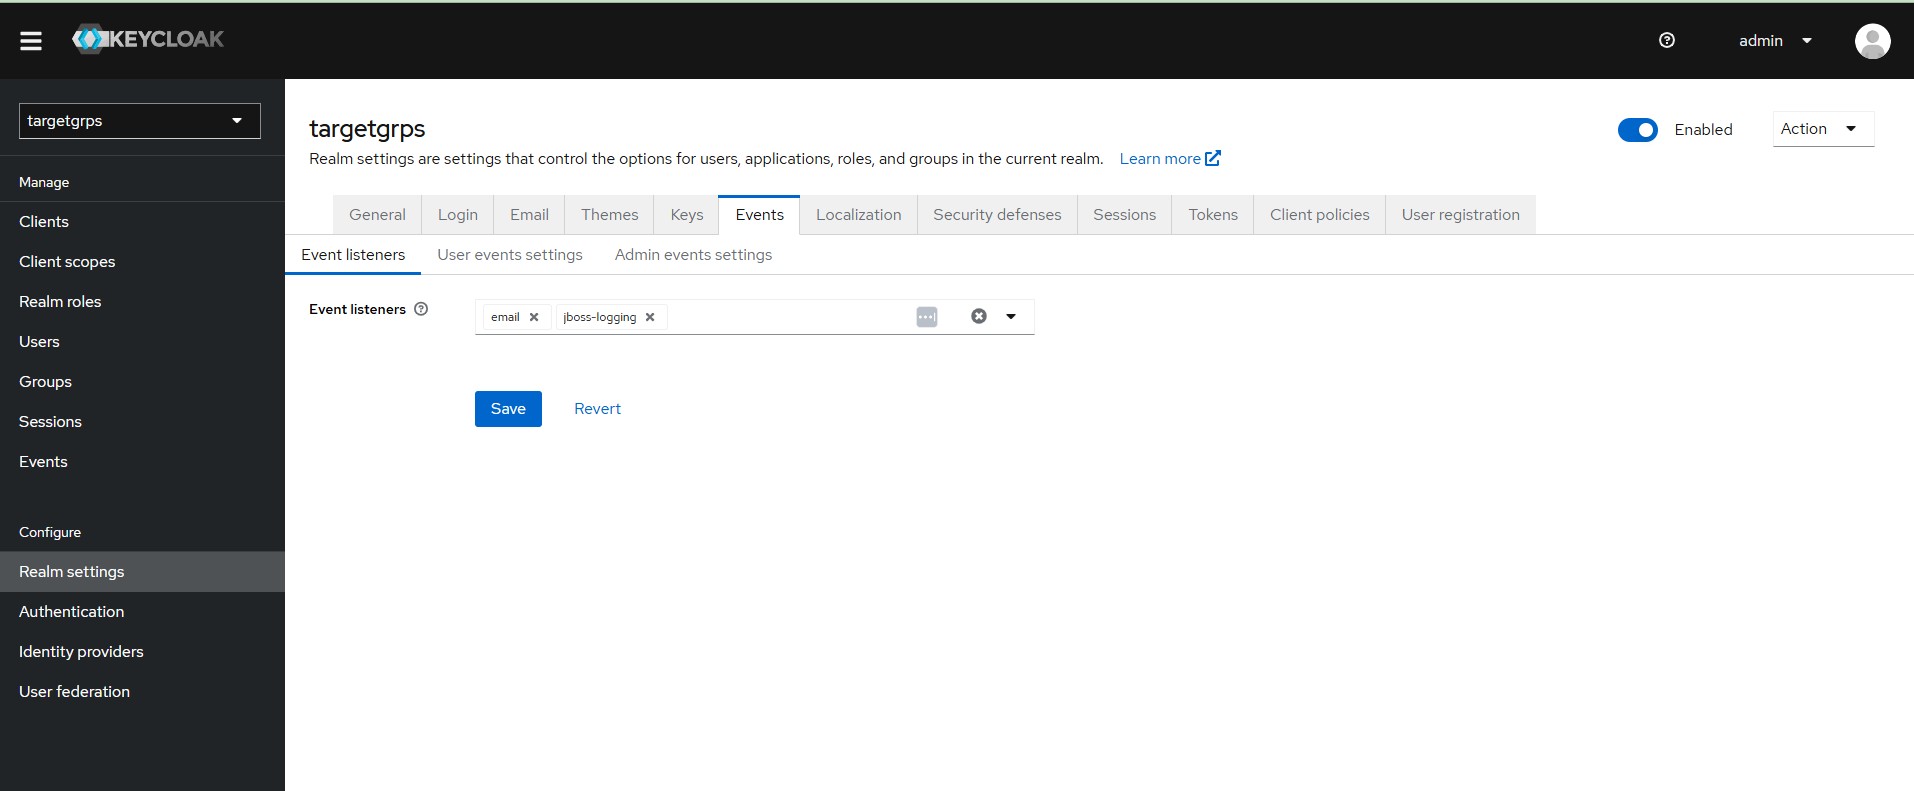
Configure what listeners receive events for the realm.
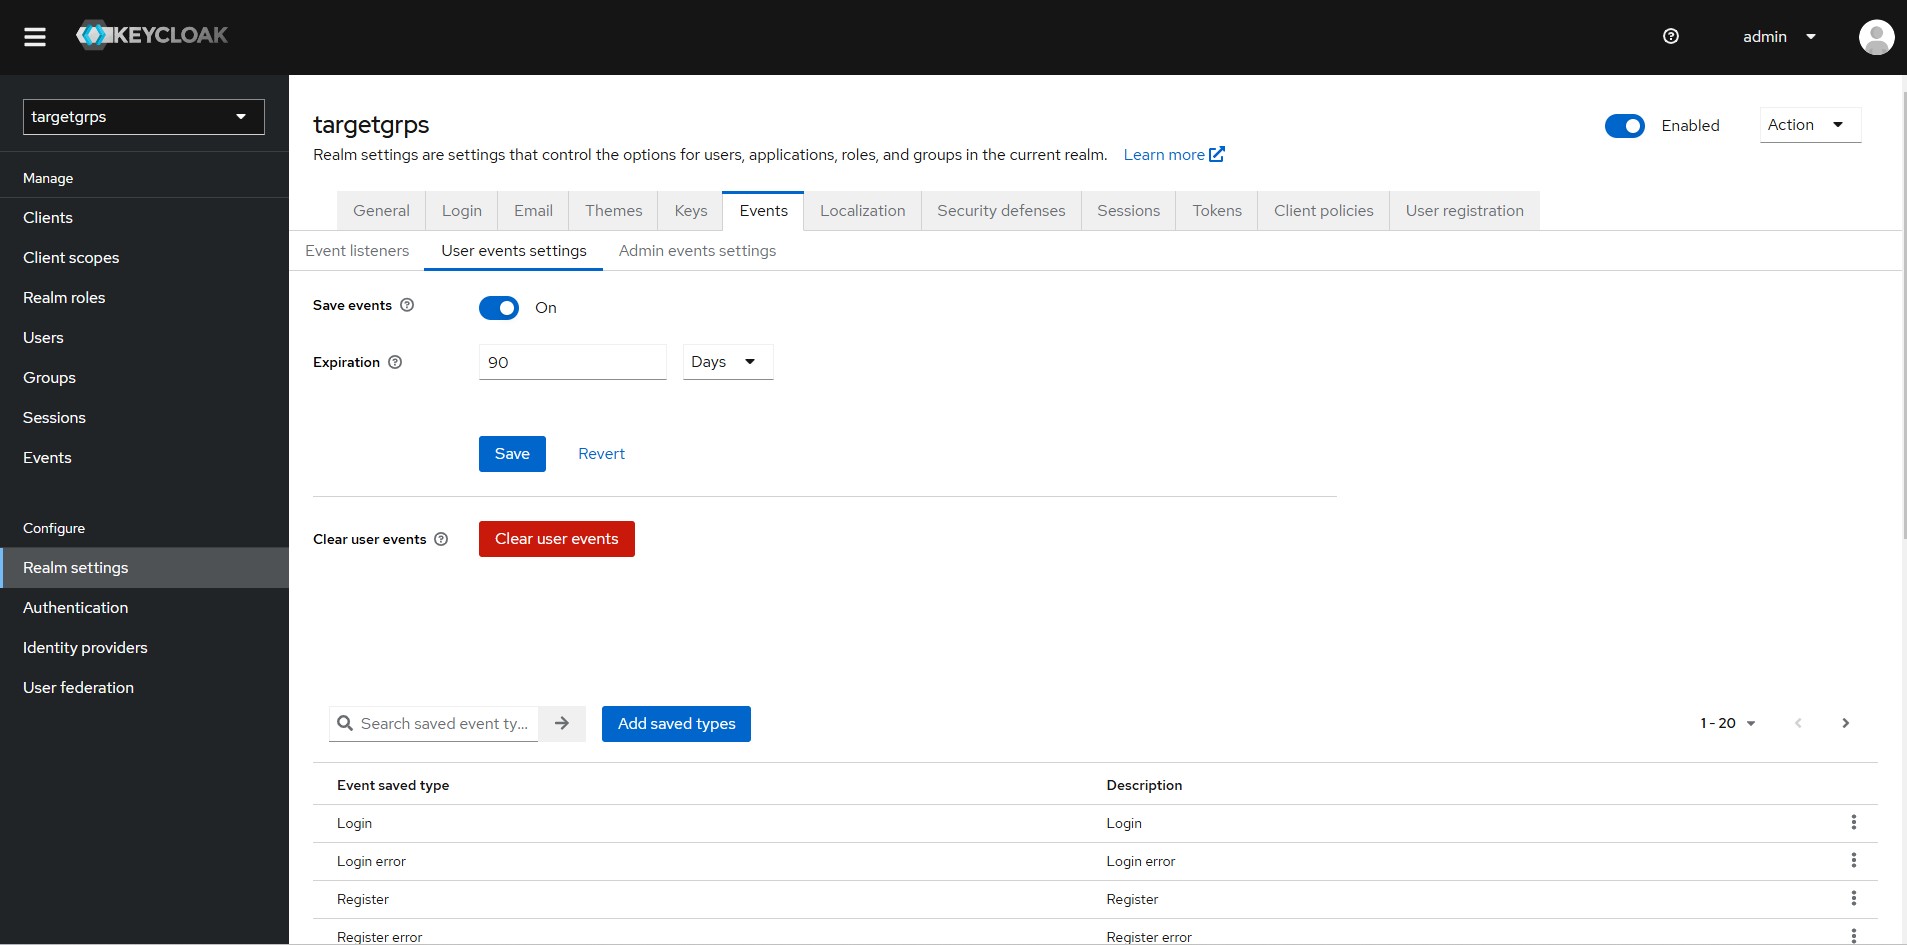
Configure what user events need to log for the realm.
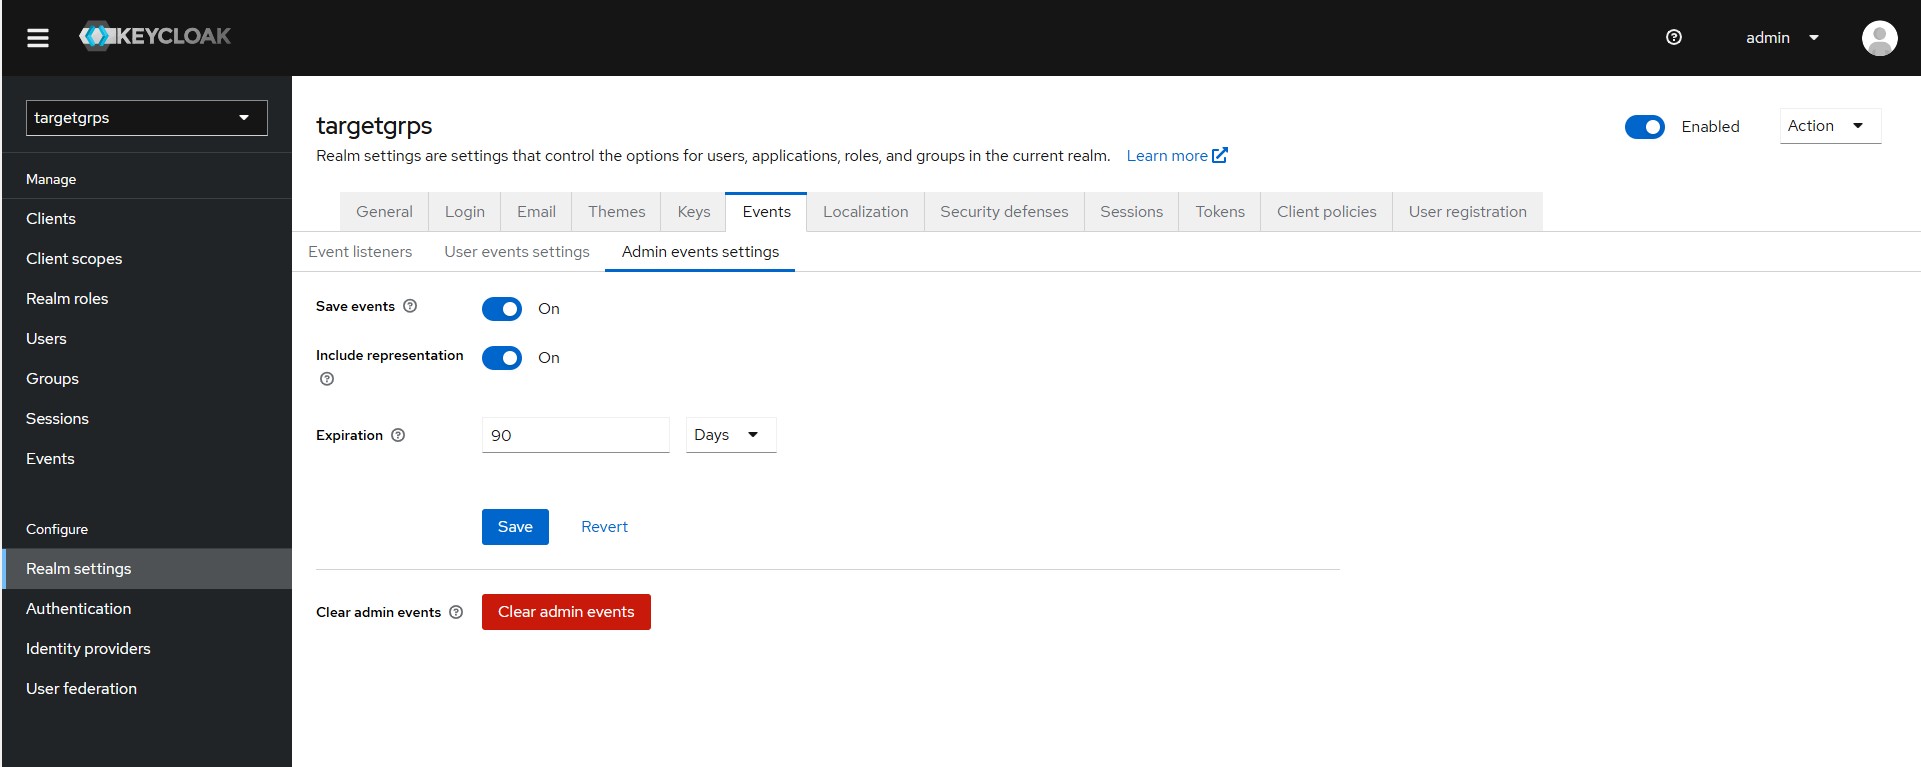
Configure what admin events need to log for the realm.
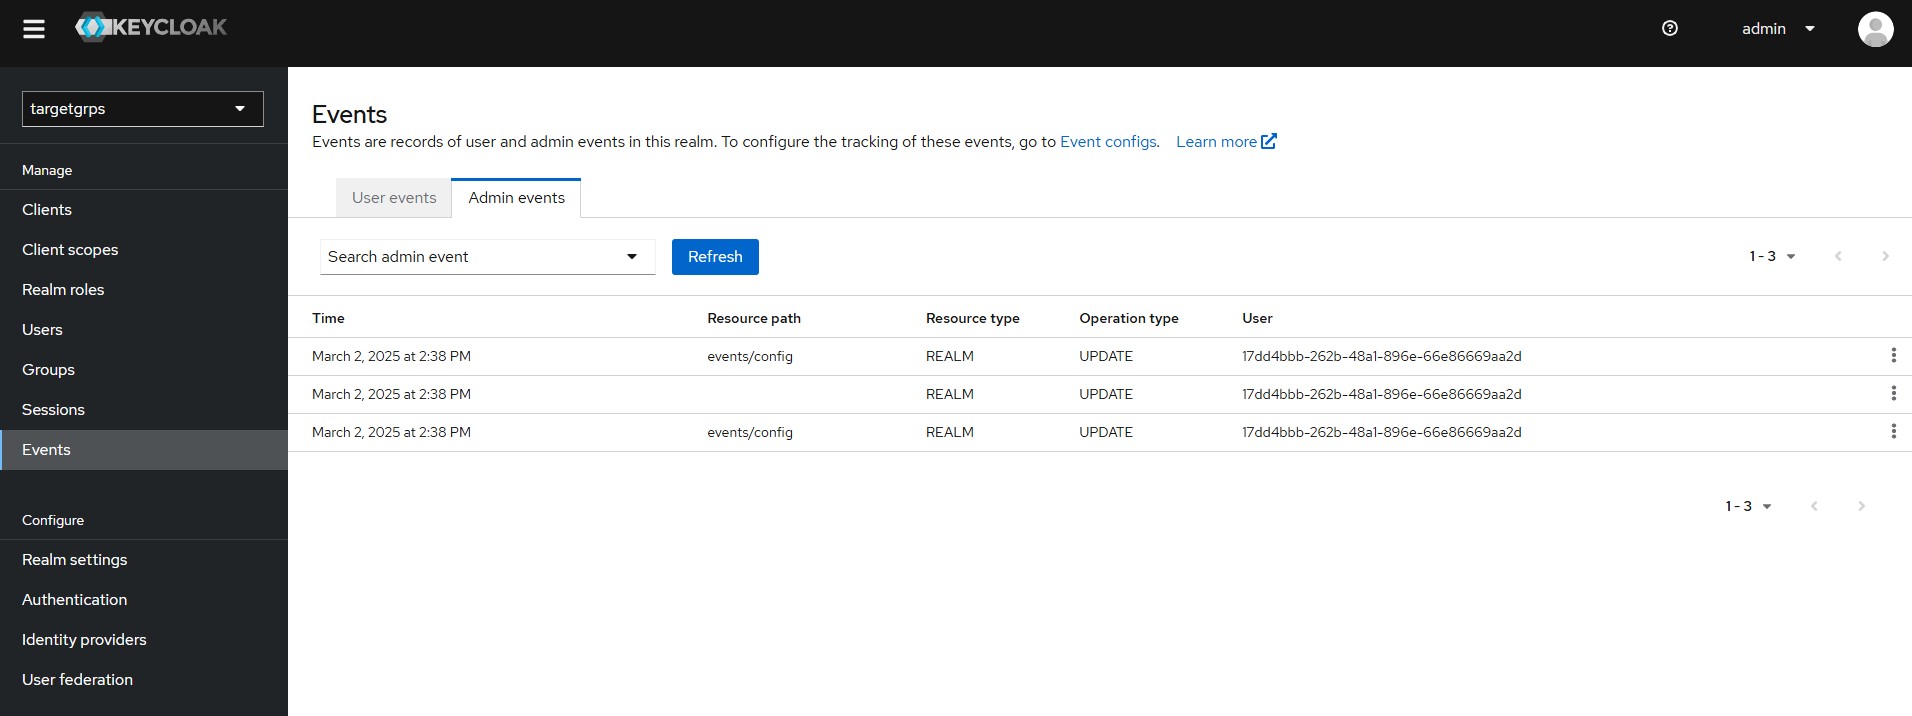
Events are records of user and admin events in this realm.
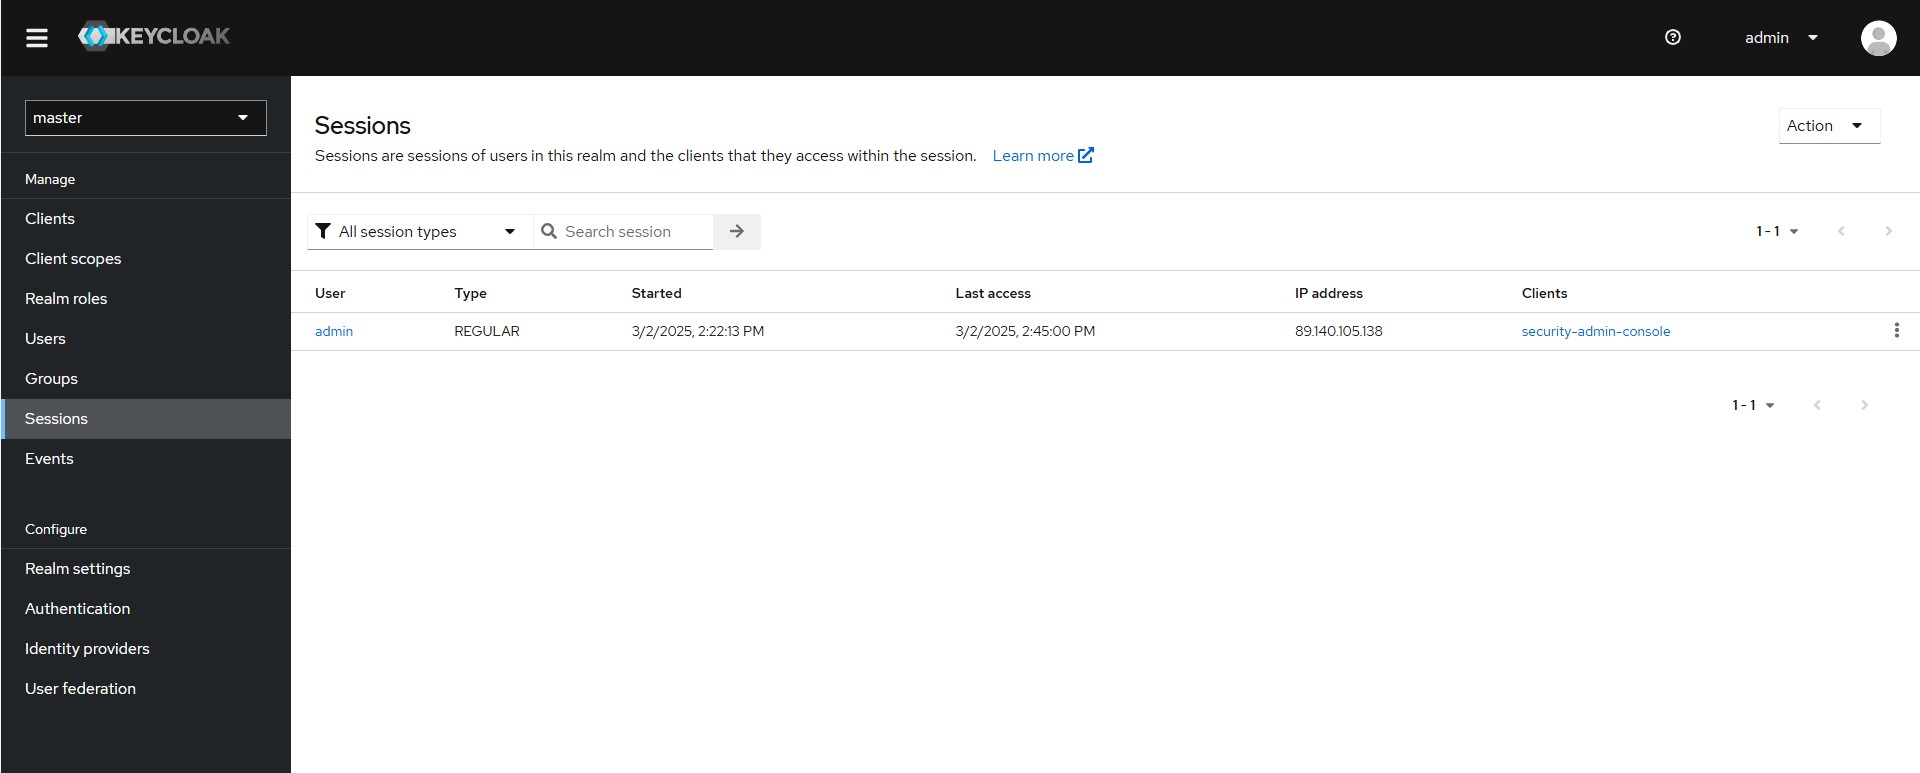
Sessions are sessions of users in this realm and the clients that they access within the session.
Migrating Existing Users
If you’re already running a legacy user store, you probably want to bring that data into Keycloak. I usually consider two methods:
- Just-in-time (JIT) Migration
- When a user logs in for the first time, your code checks the old database, validates credentials, and then creates the user in Keycloak.
- Bulk Migration
- Write a script that pulls all user records from the old system and calls Keycloak’s Admin REST API to create those users.
If you have hashed passwords in a non-standard format, you might require a forced password reset upon first Keycloak login. That’s typically safer than storing plaintext or messing around with custom hashing.
Data Isolation in .NET
Even though Keycloak realms takes care of identity isolation, your .NET application still has to respect multi-tenancy at the data layer. Usually, I rely on:
- Separate DB schemas or separate connection strings per tenant
- Scoped services that inject the current tenant ID and automatically filter queries
- Partitioned caches so you don’t accidentally serve cached data from Tenant A to Tenant B
It’s a two-layered approach: Keycloak ensures no identity overlap, and your application ensures no data overlap.
Final Thoughts and Best Practices
In my experience, setting up a realm per tenant simplifies nearly every security-related issue. It’s easy to reason about, easy to hand over partial admin rights, and straightforward to spin up new realms as you grow. A few parting tips:
- Automate realm creation: Take advantage of Keycloak’s Admin REST API or its realm import/export features.
- Monitor carefully: Use Keycloak’s built-in metrics or external tools (Prometheus, Grafana) to keep tabs on performance, login activity, and potential brute-force attempts.
- Watch the realm count: If you expect hundreds or thousands of tenants, weigh the overhead carefully — sometimes, grouping smaller tenants in a single realm is necessary.
By combining these Keycloak realms strategies with tenant-aware .NET code, I’ve built SaaS platforms that scale neatly while keeping each customer’s user base locked down. If you’re looking to simplify multi-tenant identity management on .NET, Keycloak realms might just save you a ton of hassle.
References
Opinions expressed by DZone contributors are their own.
Comments