NUnit Tutorial: Setting up NUnit Environment With Visual Studio
In this NUnit tutorial, you will learn to set up a test runner and Selenium WebDriver with Visual Studio for NUnit test case development.
Join the DZone community and get the full member experience.
Join For FreeNUnit is a popular open-source unit testing framework for C#. It is ported from the JUnit framework. It is one of the most popular test frameworks used for the development and execution of tests with the .NET language. In this NUnit Testing Tutorial, we look at the NUnit setup example of the environment for developing and executing NUnit tests.
NUnit eases automation testing with C# as it is compatible with automation test suites such as Selenium. Availability of annotations (or attributes) helps in speeding up the development of test cases. You can also use the NUnit framework for TDD (Test Driven Development).
In this NUnit testing tutorial, NUnit setup example is demonstrated using Visual Studio 2019. Most of the .NET developers use Visual Studio for writing code as it eases the process of test case development, debugging, testing, and maintenance. NUnit Visual Studio Adapter is used to execute NUnit tests as it works with all the current editions of Visual Studio.
Setting up Visual Studio For NUnit Test Case Development
Before we look at the NUnit setup example, we need to set up the development environment (or IDE) for NUnit test case development. You need to follow the below steps for installing Visual Studio 2019 (VS 2019):
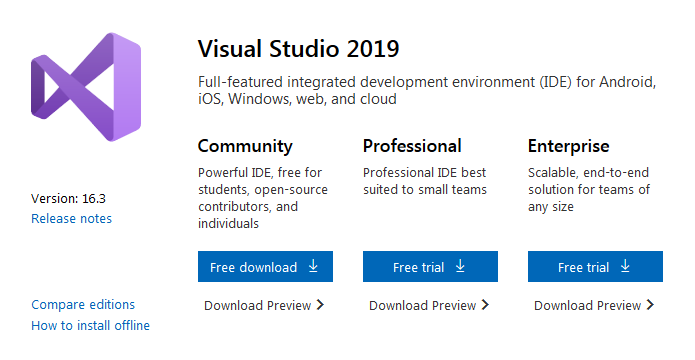
- Download the latest version of Visual Studio. Depending on the requirement, you can download the Community, Professional, or Enterprise edition of Visual Studio 2019. In this NUnit testing tutorial, we make use of the Community Edition of VS 2019.
![Visual Studio For NUnit Test Case Development]()
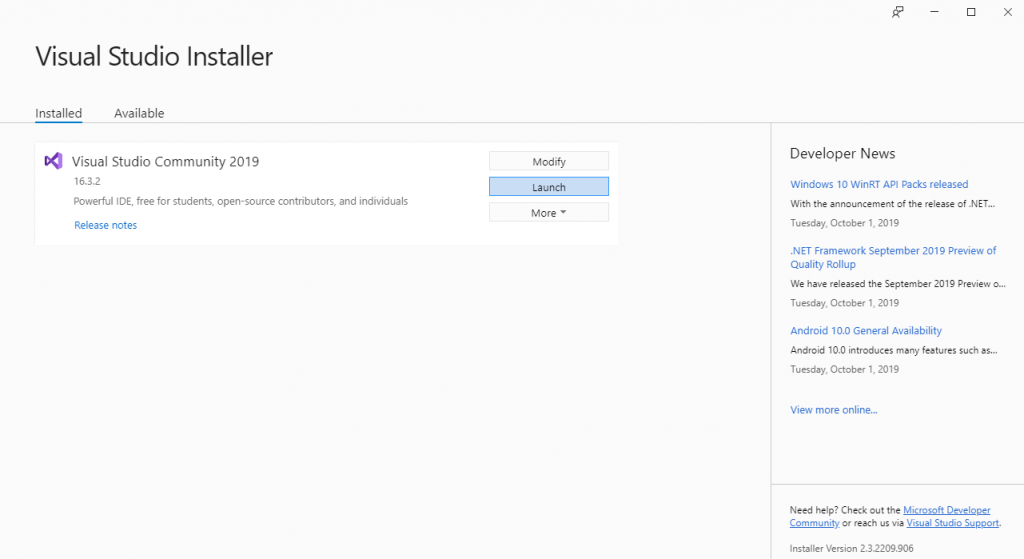
- As the NUnit framework will be used for Selenium automation, we install the necessary packages for development on the Windows platform.
![NUnit Framework]()
![NUnit Framework]()
- Restart the machine if required. Sign-in to the IDE in order to use the features such as pushing code to private Git repository, syncing settings, and more.

The next step is to install the NUnit framework along with setting up the NUnit Visual Studio Adapter.
Installing The Test Runner (NUnit Visual Studio Adapter)
Automation testing with C# and NUnit framework can be performed by installing the NUnit framework and NUnit test adapter. There are two options for installing the NUnit adapter – using Visual Studio extension or using NuGet Package Manager. In this NUnit testing tutorial, we show you the setup using both options.
1. NuGet Package
For installing the required NUnit packages, you can either use the IDE or use the NuGet Package Manager commands. If you are just getting started with NUnit, we would recommend that you use the IDE option.
1.1 Using Visual Studio IDE
To install the NUnit framework and NUnit Test Adapter, perform the following steps using the Visual Studio IDE:
- Create a new project by going to Visual Studio -> New -> Project
- Add Console.WriteLine(“Selenium C#”) to the newly created .cs file.
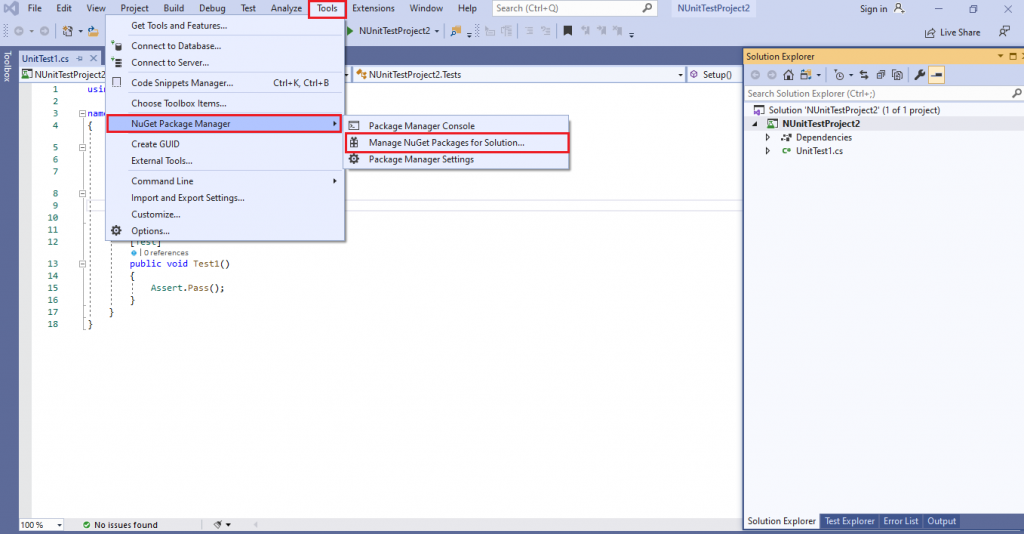
- Navigate to Tools -> NuGet Package Manager -> Manager NuGet Packages for Solution.
![Installing NUnit Framework and NUnit Test Adapter]()
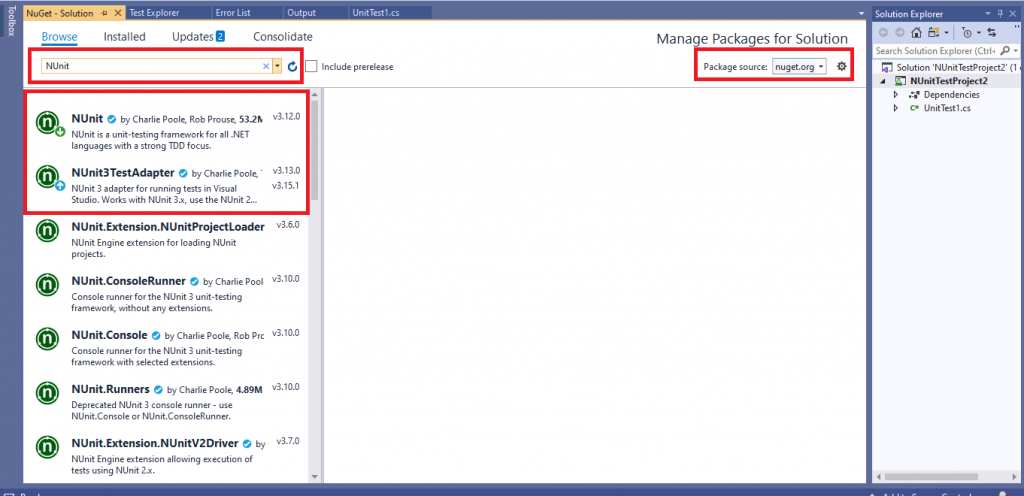
- Search for NUnit & NUnit Test Adapter in the Browse tab.
![Installing NUnit Framework and NUnit Test Adapter]()
- Click on Install and press OK to confirm the installation. With this installation, the NUnit framework can be used with C#.
1.2 Using Package Manager (PM) Commands
Instead of using the IDE, you can use the Package Manager (PM) commands for installing the required NUnit packages.
- For executing commands from the PM console, navigate to the Tools -> NuGet Package Manager -> Package Manager Console.
![Package Manager (PM) Commands]()
- Execute the following commands on the PM Console:
C#
Install-Package NUnit Install-Package NUnit3TestAdapter - Another PM command – Get-Package can be used to verify if the required NUnit packages are installed. It also shows the version of the installed package. Shown below is the command execution output:

PM> Get-Package

Id                                  Versions
--                                  --------
NUnit                      	     {3.12}
NUnit3TestAdapter   {3.16.1}
2. Visual Studio Extension
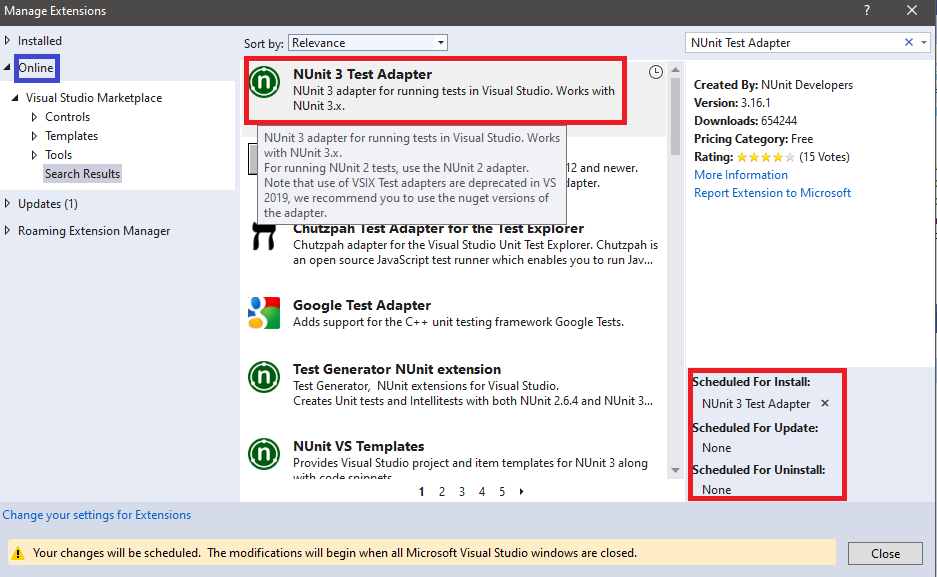
The advantage of installing the NUnit Adapter using Visual Studio Extension (VSIX) is that the extension will be automatically updated to the latest versions. Download the extension of NUnit Test Adapter from the Visual Studio gallery and double click on the same to install the extension.
A better option is to navigate to Tools -> Manage Extensions menu in Visual Studio. Click on Online and enter the search term as NUnit Test Adapter. Click on the search item labeled as NUnit 3 Test Adapter and install it.
With this NUnit setup example, we demonstrated how to set up the NUnit framework for Visual Studio. The steps listed in this NUnit testing tutorial can be used for getting started with Automation testing with C#.
Setting up Selenium WebDriver with Visual Studio
With the NUnit framework setup, you can now create NUnit Test Project in Visual Studio. In this NUnit testing tutorial, we will also cover the steps to set up Selenium WebDriver with Visual Studio in C#. Prior to installing the Selenium WebDriver framework, we create a new project in Visual Studio:
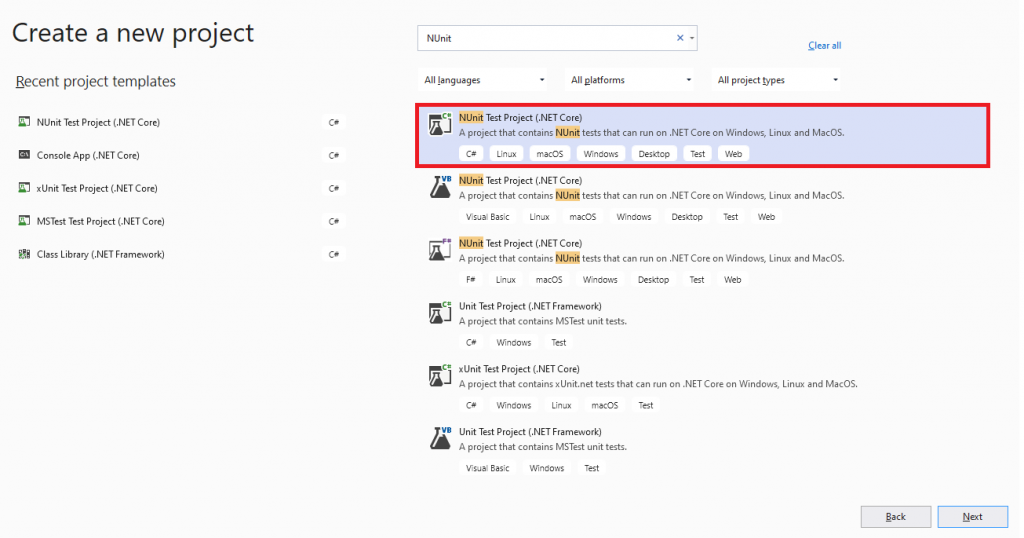
Open Visual Studio and create a new project of the type ‘NUnit Test Project (.Net Core)’.
![Setting up Selenium WebDriver with Visual Studio]()
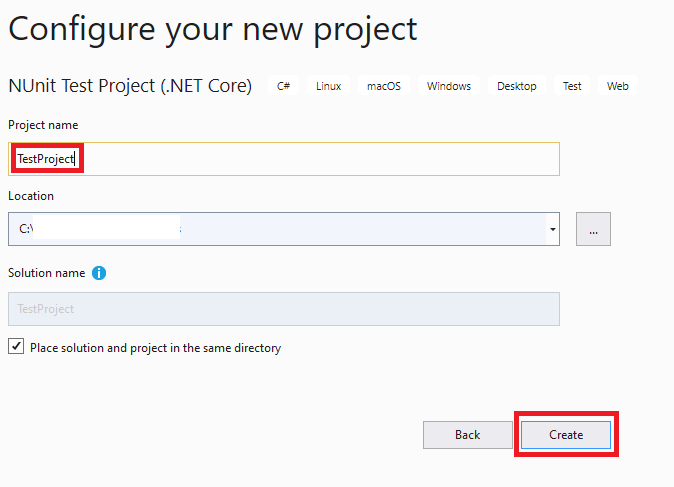
Give an appropriate name to the project and click Create.
![Setting up Selenium WebDriver with Visual Studio]()
As the created project is of type NUnit (.NET Core), the name for using the functionalities of the NUnit framework will be automatically included in the .cs file.
![Setting up Selenium WebDriver with Visual Studio]()

Steps to Download Selenium WebDriver
As the NUnit project is ready, the next step is to set up the Selenium WebDriver for Visual Studio. For downloading the Selenium WebDriver on Visual Studio, we use NuGet, a free & open-source package manager specifically designed for the Microsoft platform.
You can install the Selenium WebDriver using the NuGet Package Manager (PM) Commands, i.e., Command Line option or Visual Studio IDE.
1. Using Visual Studio IDE
Perform the following steps to download Selenium WebDriver for Visual Studio using the GUI:
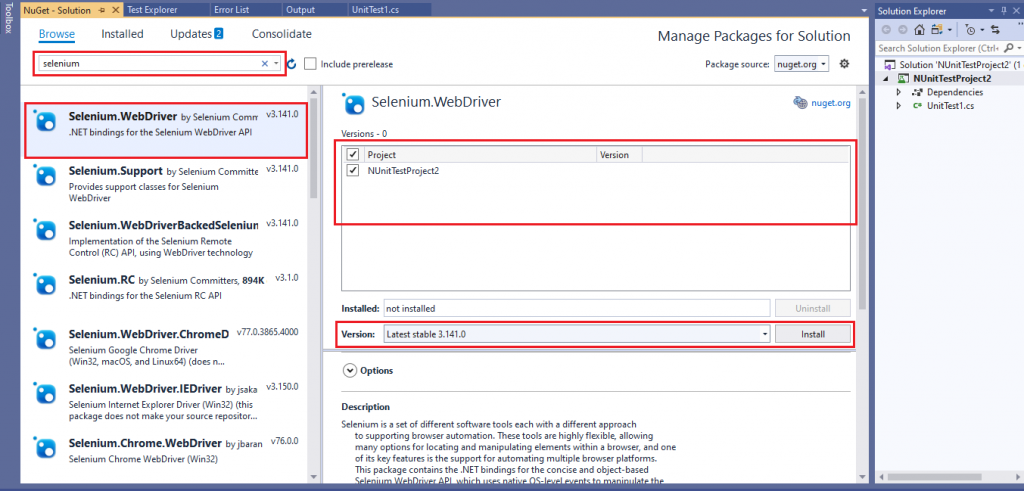
- Navigate to Tools -> NuGet Package Manager -> Manager NuGet Packages for Solution and search for ‘Selenium.’
![]()
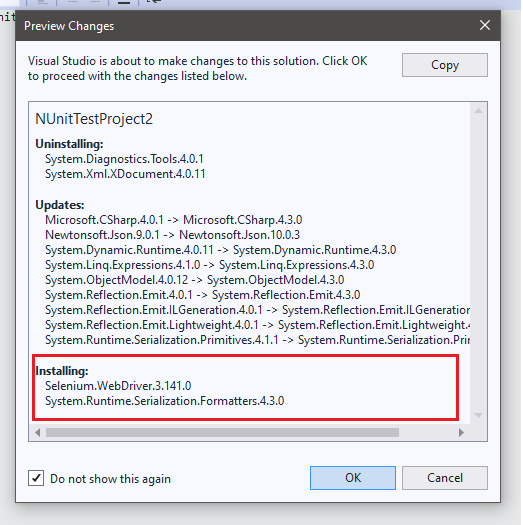
- Click on the Install button to install the Selenium.WebDriver package for the newly created project. At the time of writing this article, the latest version of Selenium WebDriver was 3.141.0
![Downloading Selenium WebDriver on Visual Studio]()
![Downloading Selenium WebDriver on Visual Studio]()
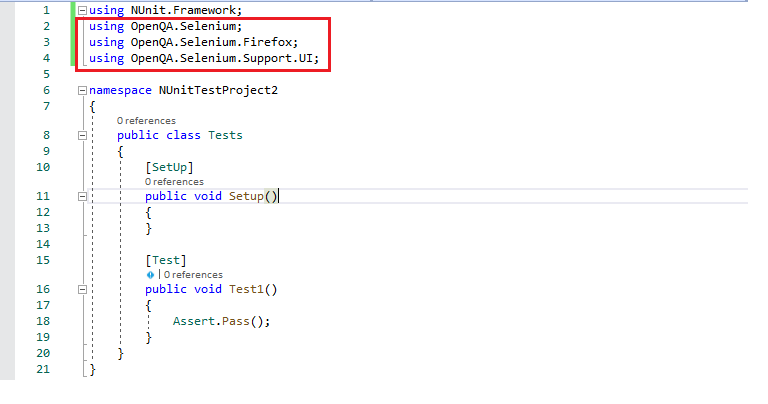
- On successful installation of Selenium.WebDriver package, you can use the Selenium framework in the C# code.
![Selenium framework in C# Code]()

2. Using Package Manager (PM) Commands
Instead of using the IDE, you can make use of the Package Manager (PM) commands for installing the required Selenium WebDriver package.
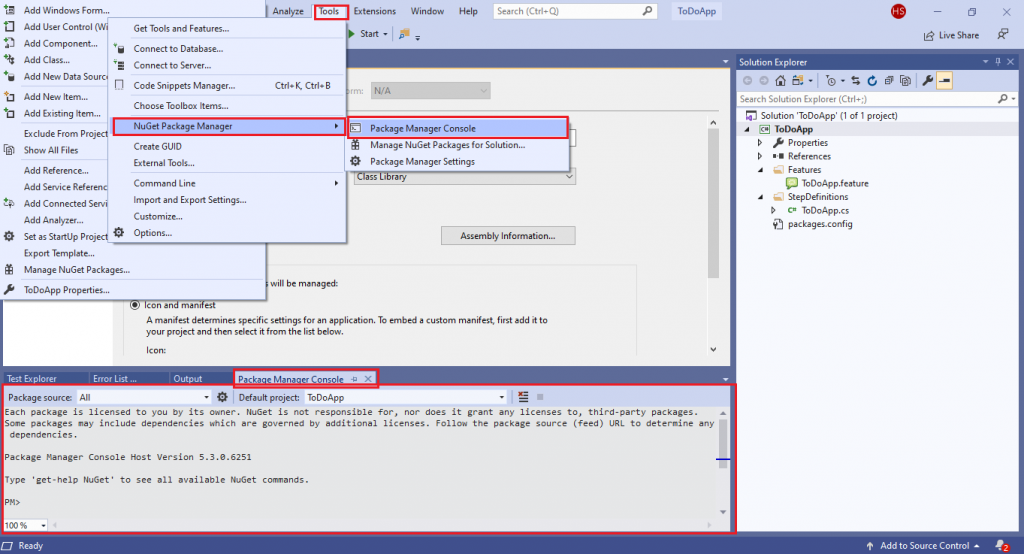
- For executing commands from the PM console, navigate to Tools -> NuGet Package Manager -> Package Manager Console.
![Package Manager Console]()
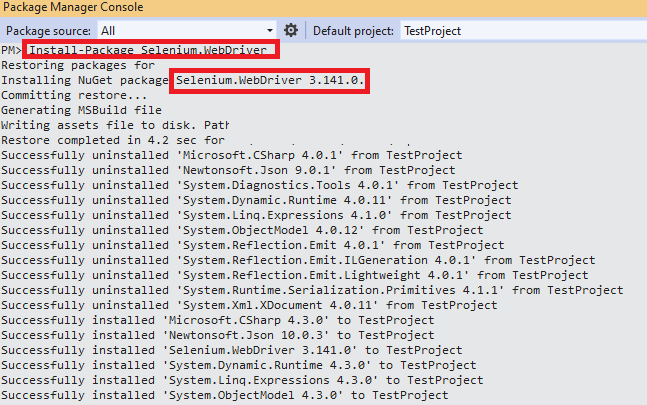
- Execute the following command on the PM Console:
Install-Package Selenium.WebDriver - In case you intend to perform the automated browser testing on the Chrome browser, you should also install the Selenium WebDriver for Chrome.
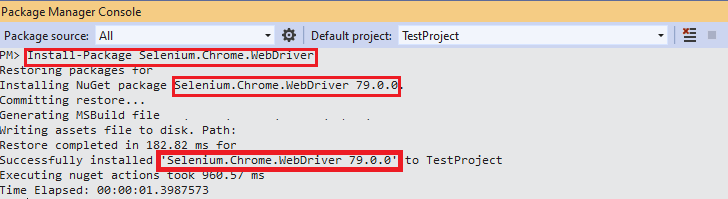
Install-Package Selenium.Chrome.WebDriver - Shown below is the snapshot of the Package Manager Console:
![Package Manager Console]()
![Package Manager Console]()
- Another PM command – Get-Package can be used to verify if the required NUnit packages are installed. It also shows the version of the installed package. Shown below is the command execution output:
PM> Get-Package

Id                                  Versions
--                                  --------
Selenium.WebDriver                  {3.141.0}
Selenium.Chrome.WebDriver           {79.0.0}
...... ......
...... ......
Conclusion

With this NUnit setup example, we demonstrated how to set up the NUnit framework & Selenium WebDriver with Visual Studio in C#. The steps listed in this NUnit testing tutorial can be used for getting started with automation testing with Selenium and C#. With the completion of NUnit & Selenium installation, you are all set to experience cross-browser testing with Selenium C#.
Published at DZone with permission of Himanshu Sheth. See the original article here.
Opinions expressed by DZone contributors are their own.
Comments