Using OAuth2 External Provider in Mule
Learn how to apply the OAuth2 policy in Mule to manage clients on the Anypoint Platform with OAuth 2.0 Access Token Enforcement.
Join the DZone community and get the full member experience.
Join For FreeIntroduction
In this tutorial, I'm going to explain the simple procedure for applying OAuth2 policy (using an external provider) for managing the clients in the Anypoint Platform.
Before We Start
Mule is skeptical in regard to security and there are many things that Mule lacks and needs improvement. As per the documentation, Mule supports only
PingFederate OAuth Token Enforcement policy,
OpenAM OAuth Token Enforcement Policy,
OAuth 2.0 Access Token Enforcement Using External Provider policy.
Here in this article, I am going to explain how to use OAuth 2.0 Access Token Enforcement Using External Provider policy.
Let's Get Our Hands Dirty
The Mule documentation provides an example of how to use the External OAuth Provider for client authentication. Unfortunately, the documentation is poor in regards to explaining the internals of what goes under the hood, so in this article, I will try to explain some internals as well as mount an External OAuth2 Provider.
The article will be divided into the following parts:
Creating a simple API in API Manager.
Implementation of the API and publishing it to CloudHub.
Create External OAuth2 Provider.
Create Proxy, Portal for the API and apply Security Policy.
Testing OAuth2.
Creating a Simple API in API Manager
I have created a very simple API named employee (version v1) in the API Manager. The code snippet is as shown below:
#%RAML 1.0
title: employee
version: v1

/employees:
  get:
    responses:
      200:
        body:
          application/json:
            example: |
              [{"name":"anupam","age":12},
               {"name":"anupam","age":12}]
Implementation of the API and Publishing to CloudHub
Now to implement the API in a project. I am using the simplest implementation for the article because it's not our main concern. Here is the simple implementation of the API:
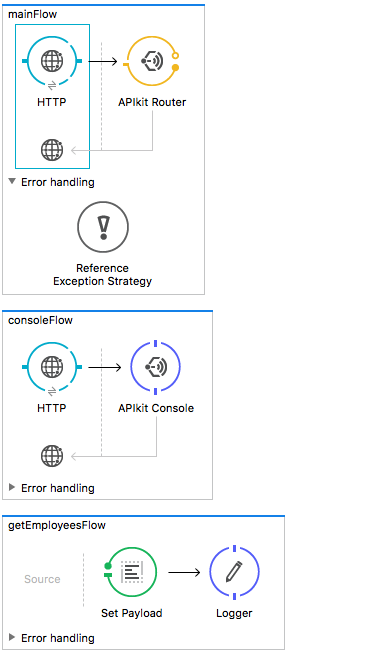
As per the implementation, if we hit http://localhost:8081/api/employees, we should receive the result in local. Let's suppose that after deploying it to CloudHub, the service is available at http://employees-service.cloudhub.io/api/employees.
Create External OAuth2 Provider
This is the most exciting part. Here is the complete source code. The code is extremely simple but needs some explanation.
How Does Your Application Connect to the API Manager?
Try running any Mule project and you should observe this log output:

Internally, there is an agent class, APIPlatformClientCoreExtension, that looks for two property values (client_id and client_secret) to connect to the Anypoint API Manager. Now, what are client_id and client_secret? These are nothing but the credentials of your Anypoint Platform.
Just browse to the Organization link of your Anypoint Platform account and you should see this infomation:
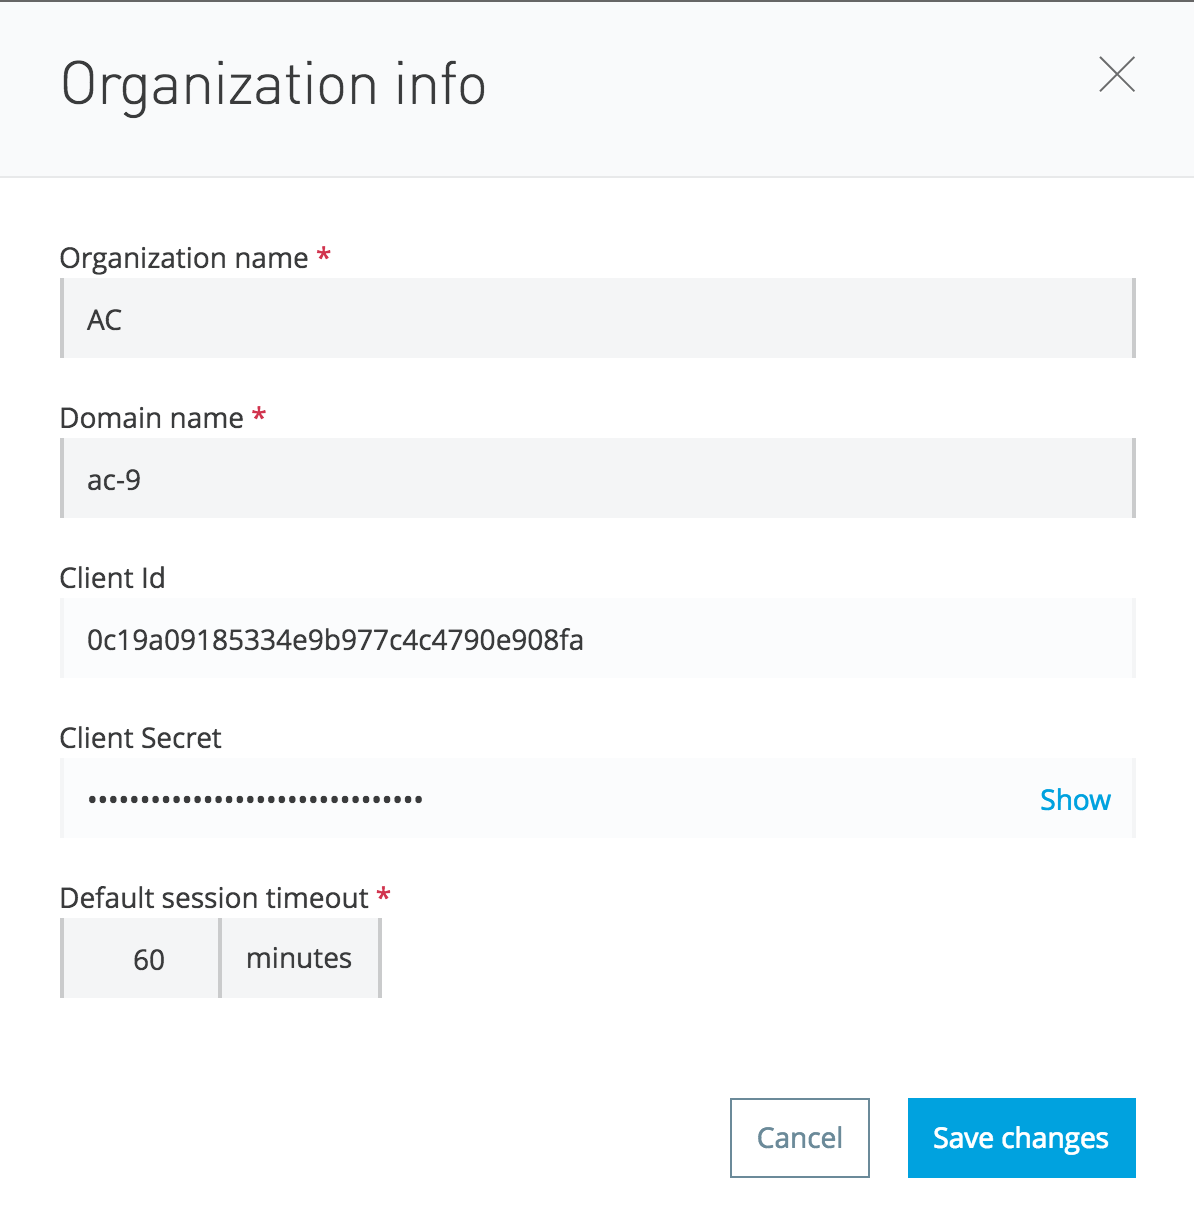
You can provide these credentials in the mule-app.properties of your project, as shown below:
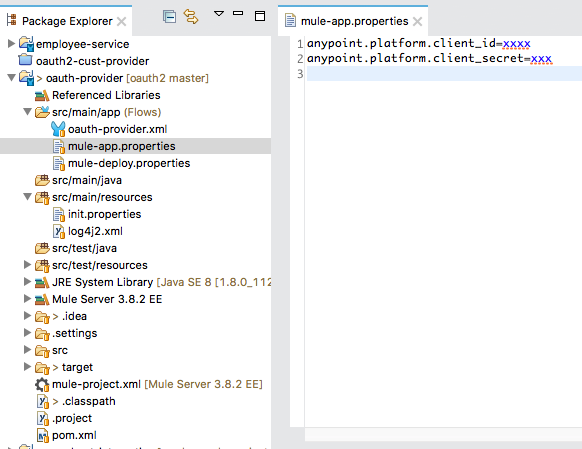
That's it. Now, run the project and you should see the following logs:

It means that now your application can connect directly to the API Manager. Awesome, right? Now you can use the API Auto Discovery, etc- cool stuff (I will write about it in another post).
Create the External OAuth2 Provider
To create an OAuth2 provider you must have the Enterprise Security module installed in your Anypoint Studio. Please read the first part of this article about how to install the security module and create a Maven project to use security components.
The OAuth2 provider that I have created is very simple, as shown below:
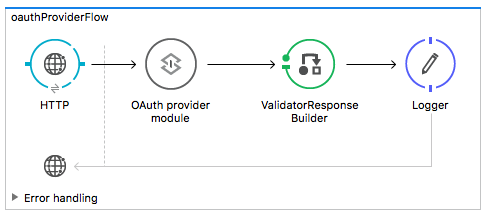
The most important part is the configuration of the OAuth provider module:
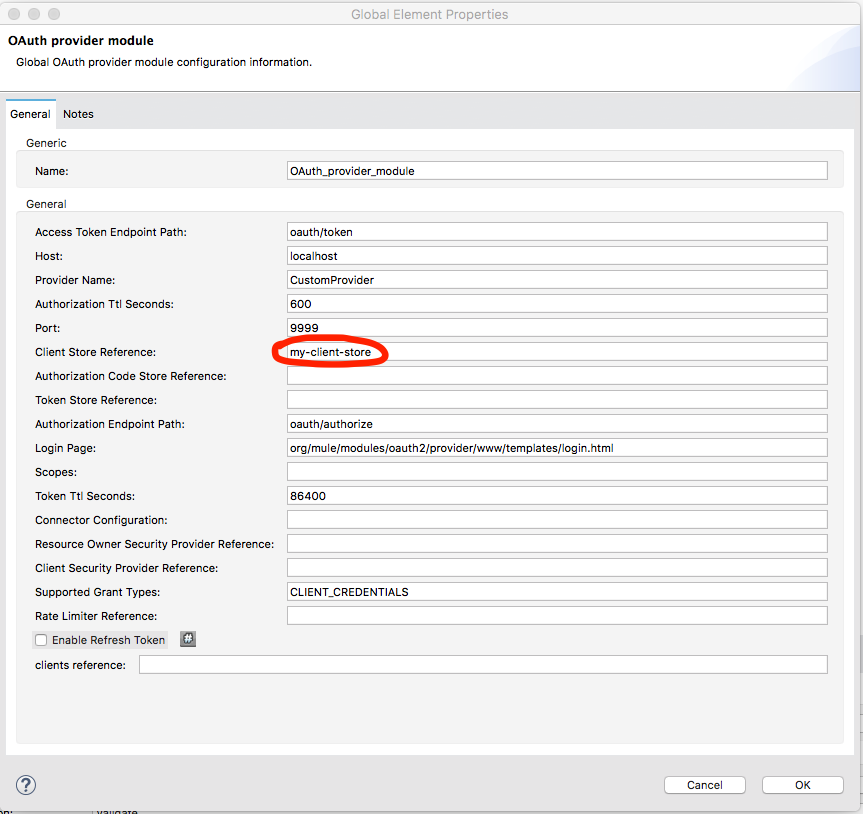
From the diagram, it's clear that the Access token URL is oauth/token and the Authorization URL is oauth/authorize. But is that enough? Of course not. What should be the complete URL for the Access token? Let's dig into this.
Let's look at the XML configuration:
<http:listener-config name="HTTP_Listener_Configuration"
host="0.0.0.0" port="${http.port}" doc:name="HTTP Listener Configuration" />
<api-platform-gw:client-store id="my-client-store"
doc:name="Client Store" />
<context:property-placeholder location="init.properties" />
<oauth2-provider:config name="OAuth_provider_module"
accessTokenEndpointPath="oauth/token" providerName="CustomProvider"
clientStore-ref="my-client-store" authorizationEndpointPath="oauth/authorize"
listenerConfig-ref="HTTP_Listener_Configuration" supportedGrantTypes="CLIENT_CREDENTIALS"
doc:name="OAuth provider module"></oauth2-provider:config>
In the oauth2-provider:config elements, we have defined listenerConfig-ref to refer to the HTTP listener that is localhost and port is 8081. So, our Access token URL will be http://localhost:8081/oauth/token?<params> (we will go to the params soon).
You can see the clientStore-ref element of the oauth2-provider configuration pointing to
<api-platform-gw:client-store id="my-client-store" doc:name="Client Store" />So what it is? Well, it's the magic, in short. When the application is connected to the API Manager (as explained in the previous section), it gets all the information of the clients (client_id, client_secret) and stores them in a store (in my case, I named it my-client-store).
That's it. Our simplest External OAuth2 provider.
Test the OAuth2 Provider
Now let's test our OAuth2 provider. Run the project, and in Postman, fire the request with the following request params to http://localhost:8081/oauth/token:
grant_type=client_credentials.
client_id=any client_id registered in your Anypoint Platform. We simply send our Anypoint Platform client_id.
client_secret=client_secret (related to the client_id) registered in your Anypoint Platform. We simply send our Anypoint Platform client_secret.
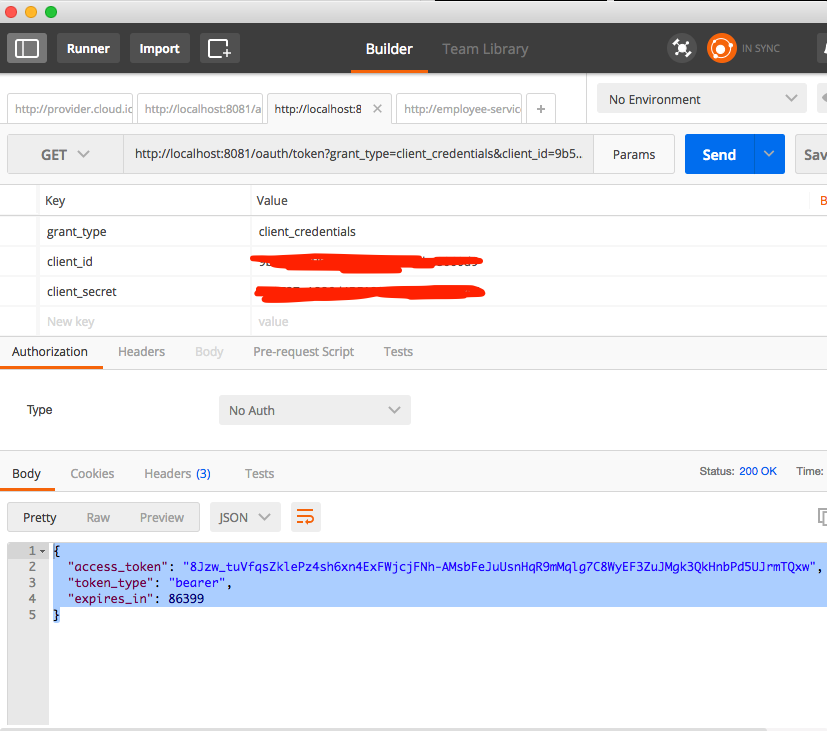
And in return, you get the access token. Awesome!
Validate the Access Token
Now let's look into the code again.
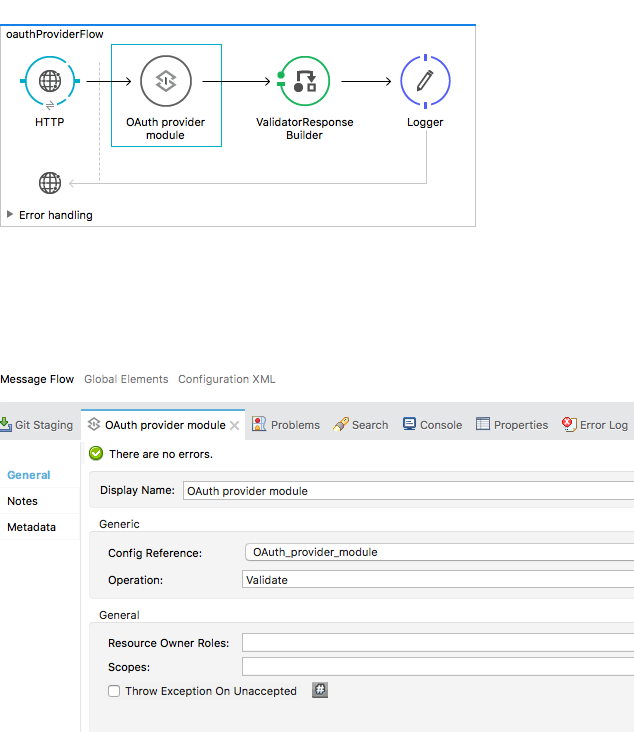
If you look into the Operation of the OAuth2 provider, you can see that we have defined it as Validate. Now look into the HTTP Listener path:
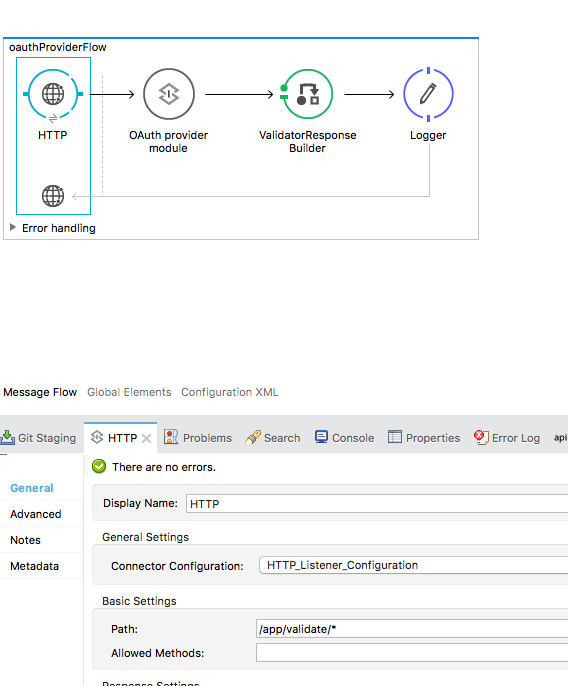
So, to validate the access token retrieved in the previous section, we must make a request to http://localhost:8081/app/validate?access_token=<access token received>.
Here is the response:
{"expires_in":86009,"scope":"", "client_id":"9b54d2f696644a1896de68b1be8060d9"}It means that our token is valid.
Deploy the Provider in CloudHub
Now let's deploy the provider in CloudHub.
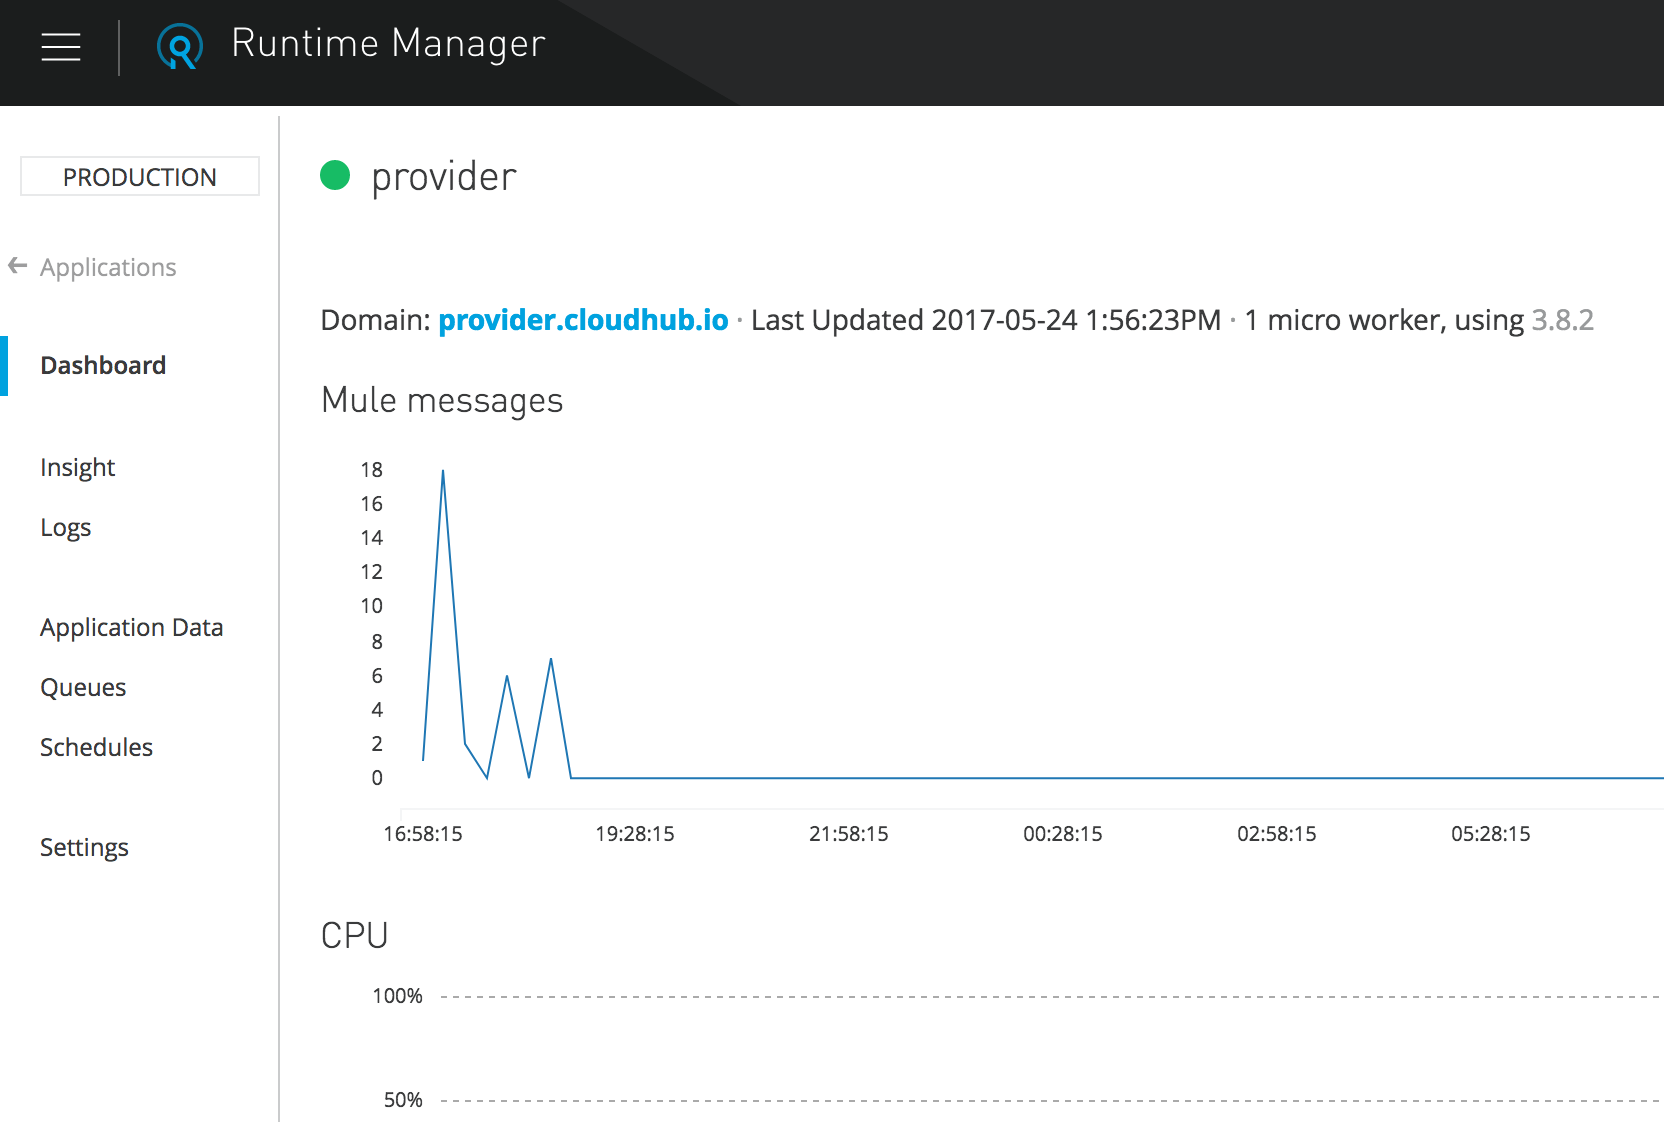
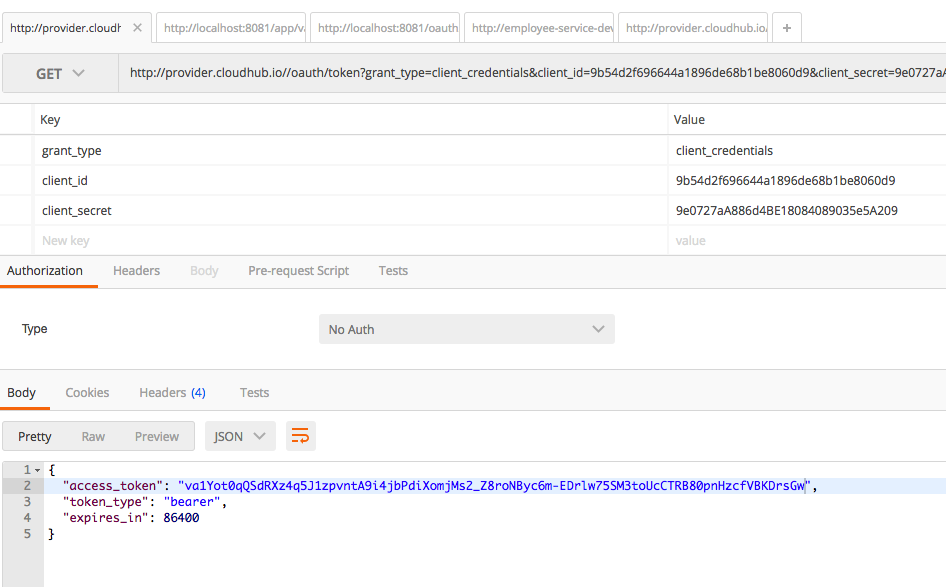
Now let's fire the same thing to the following URL:
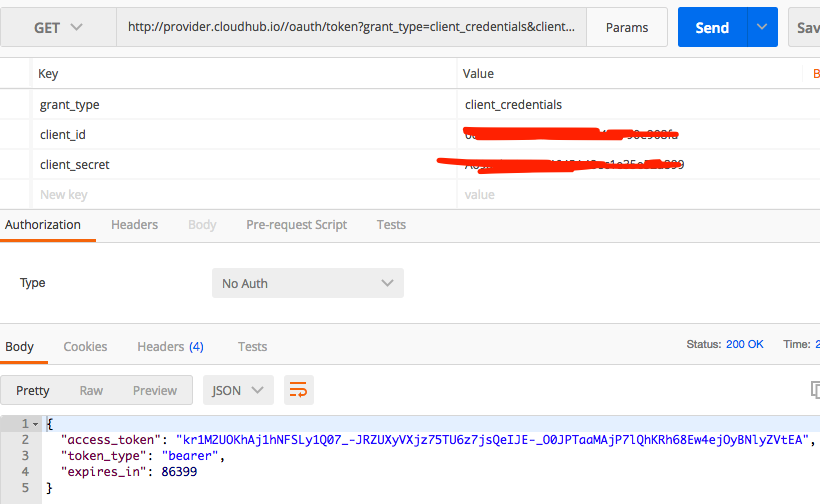
That's it. Our provider is working perfectly. Now let's validate the token. Fire a request to http://provider.cloudhub.io/app/validate?access_token=<obtained in the previous step>. You should get a positive response.
Create Proxy, Portal for the API and Apply Security Policy
Create a Proxy
Once our API definition and implementation are in hand, we can create a proxy for the API. Now what is an API Proxy? In short, an API Proxy is a layer that sits above our API implementation. It serves as kind of shield to protect our API implementation. By means of the API Proxy, one can govern the APIs applying various security policies, SLA tiers, etc. Here is how to create the API Proxy:
Click your API and its version (employee, v1); you can see the API Status block. Then click the configure endpoint link and configure the proxy.
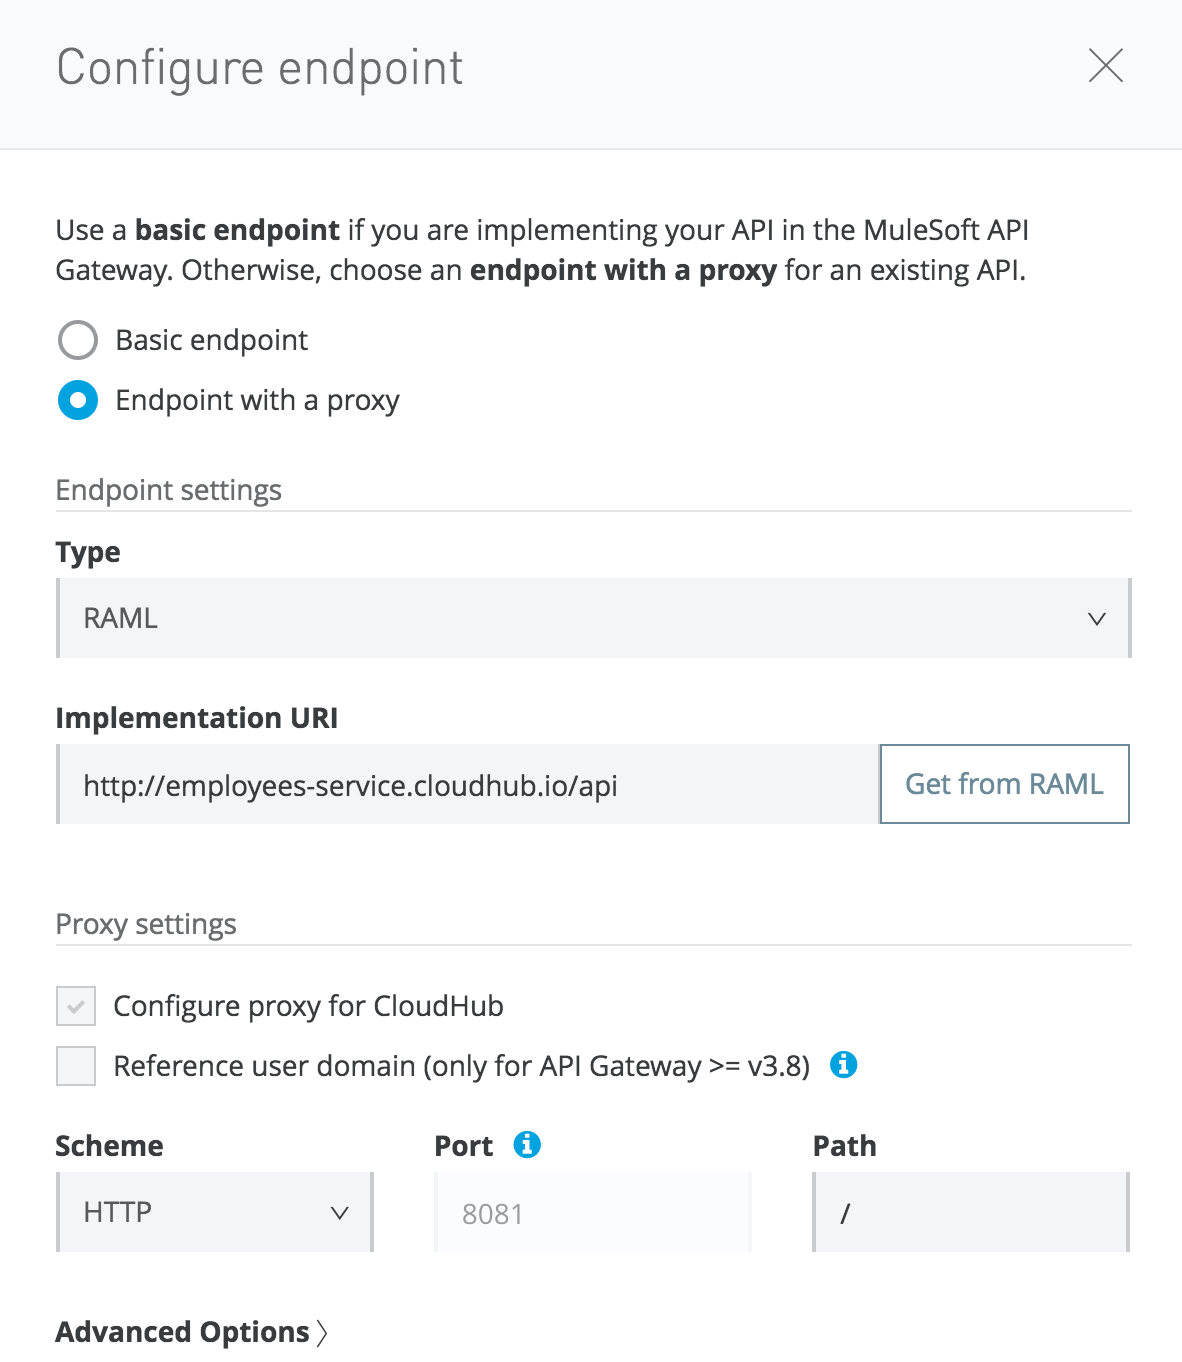
Here, the most important thing is the Implementation URI that you point to the actual implementation of the API. In our case, it will be http://employees-service.cloudhub.io/api that we have implemented and deployed in CloudHub as described in the previous section.
Then configure the proxy:
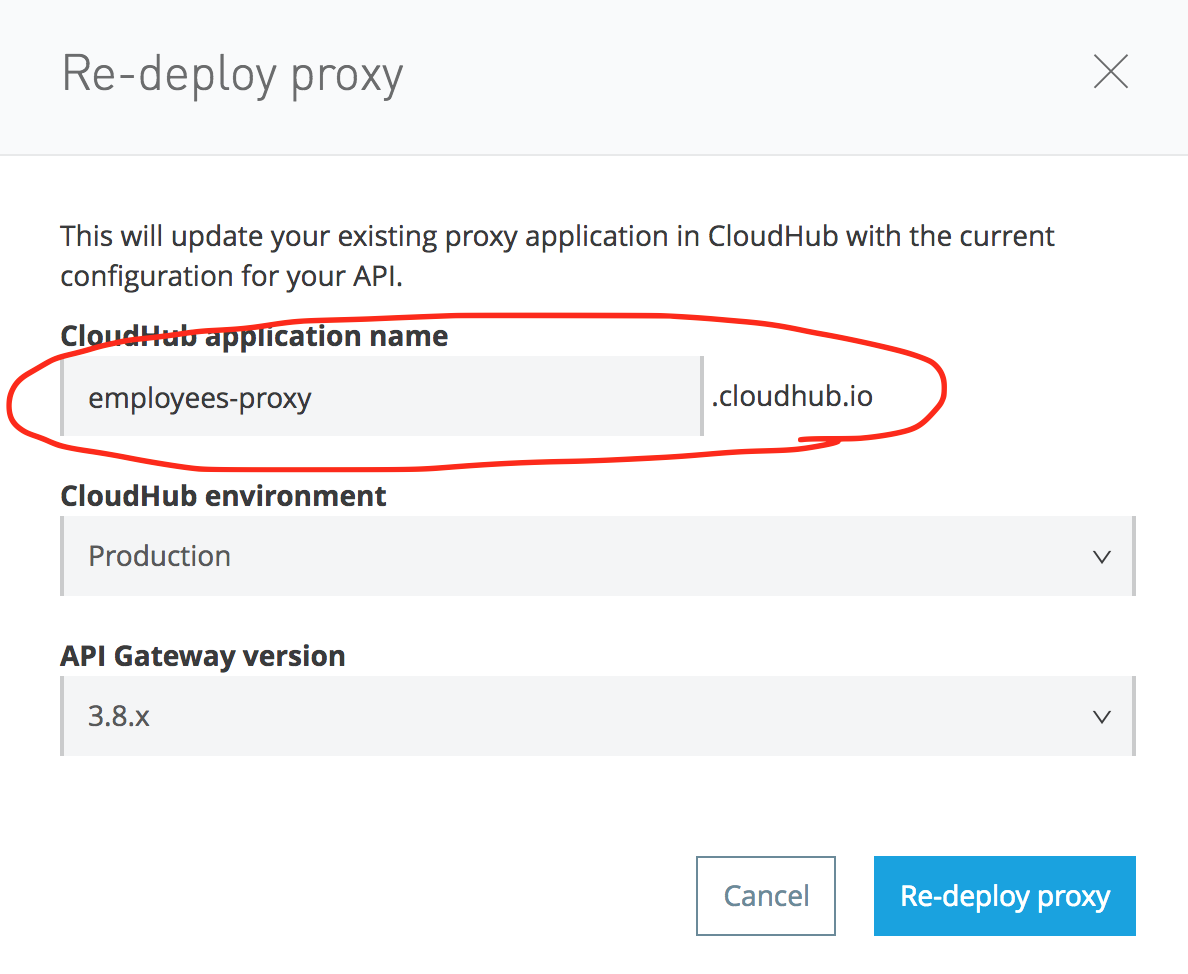
So, the proxy URL will be what will be made public for the users. In our case, it is http://employee-proxy.cloudhub.io/employees.
Create Portal
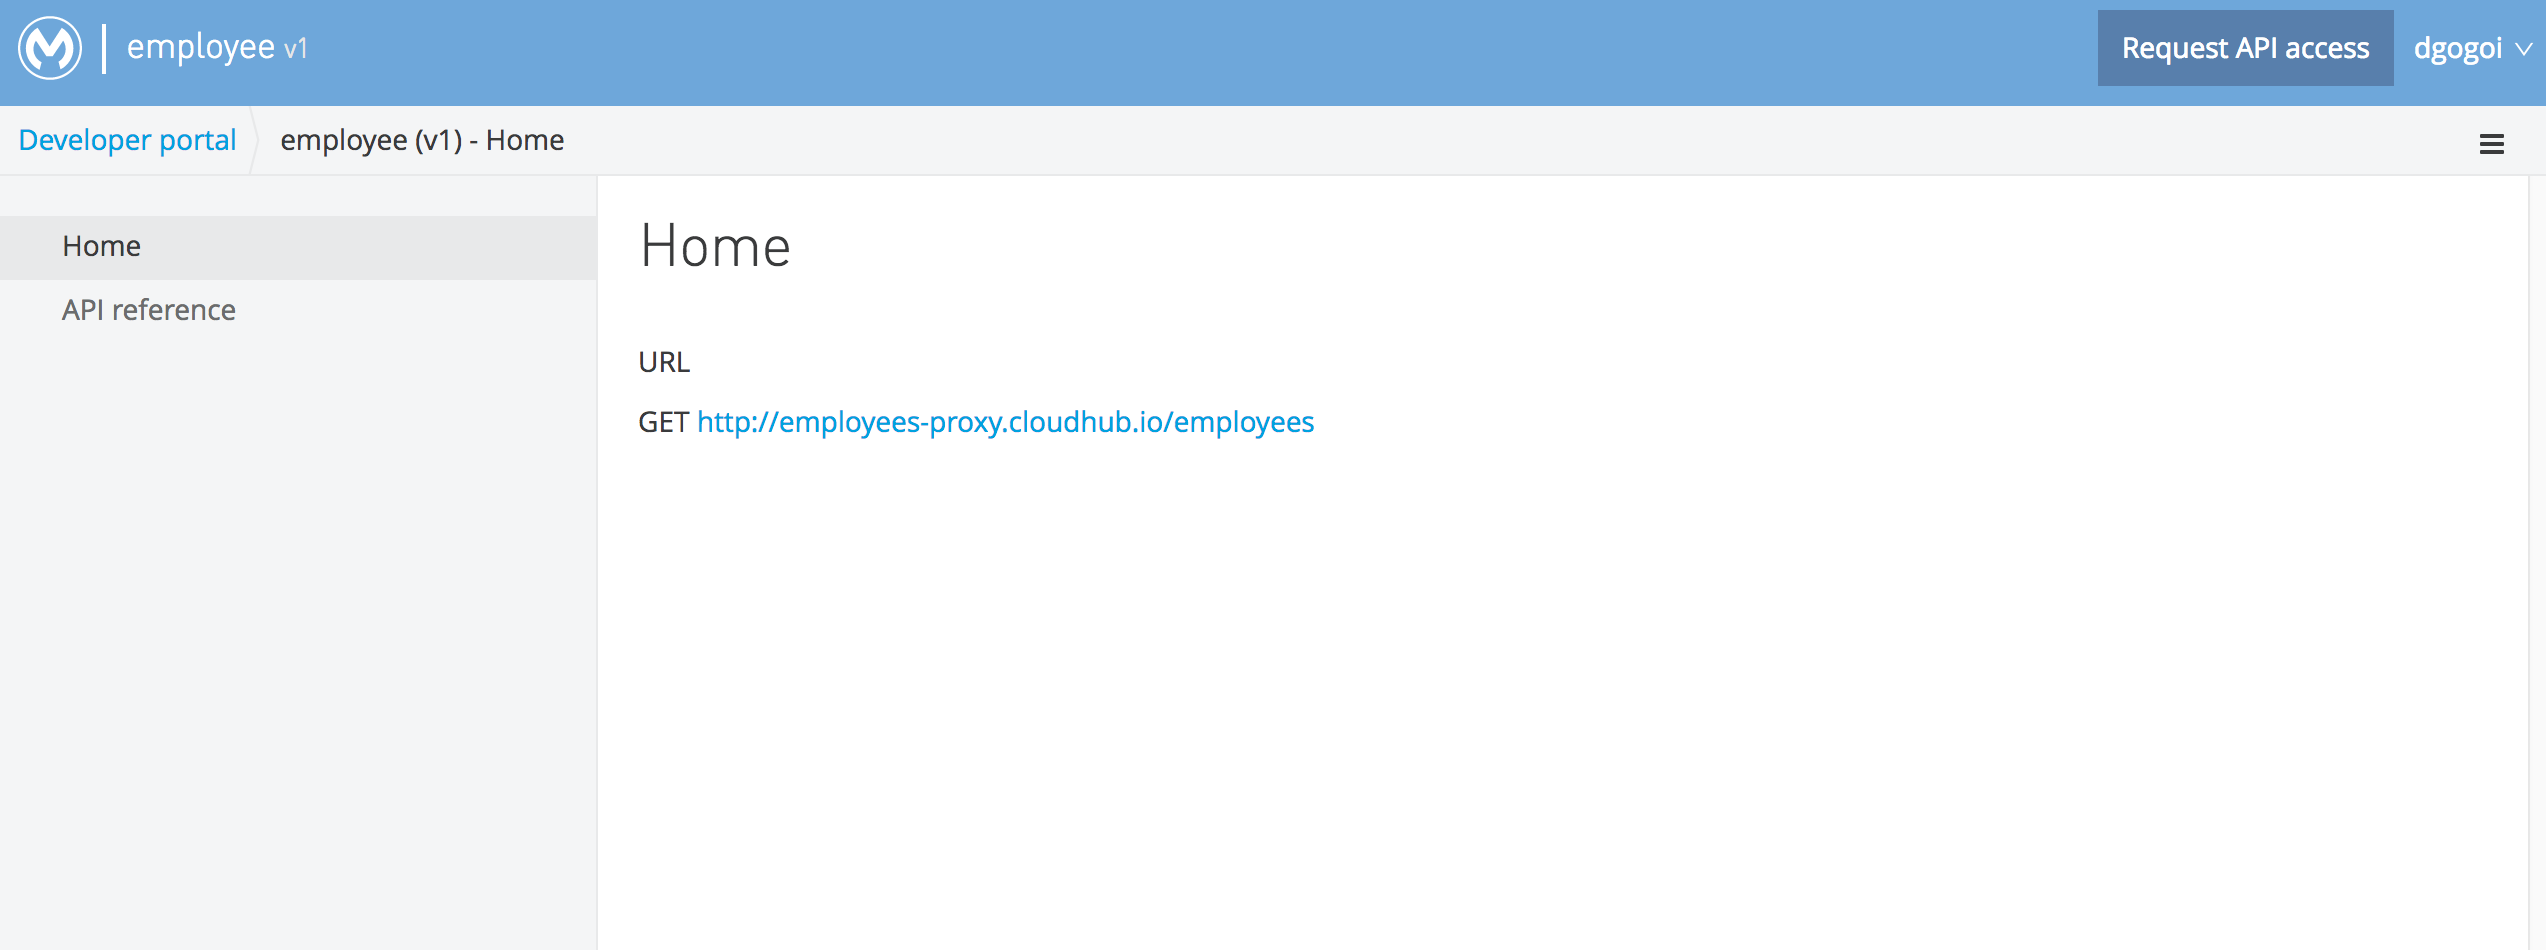
After defining the proxy, let's create a portal for our API. Browse the API, click its version, and create a basic portal. Here is a snapshot of my portal:
Apply Security Policy
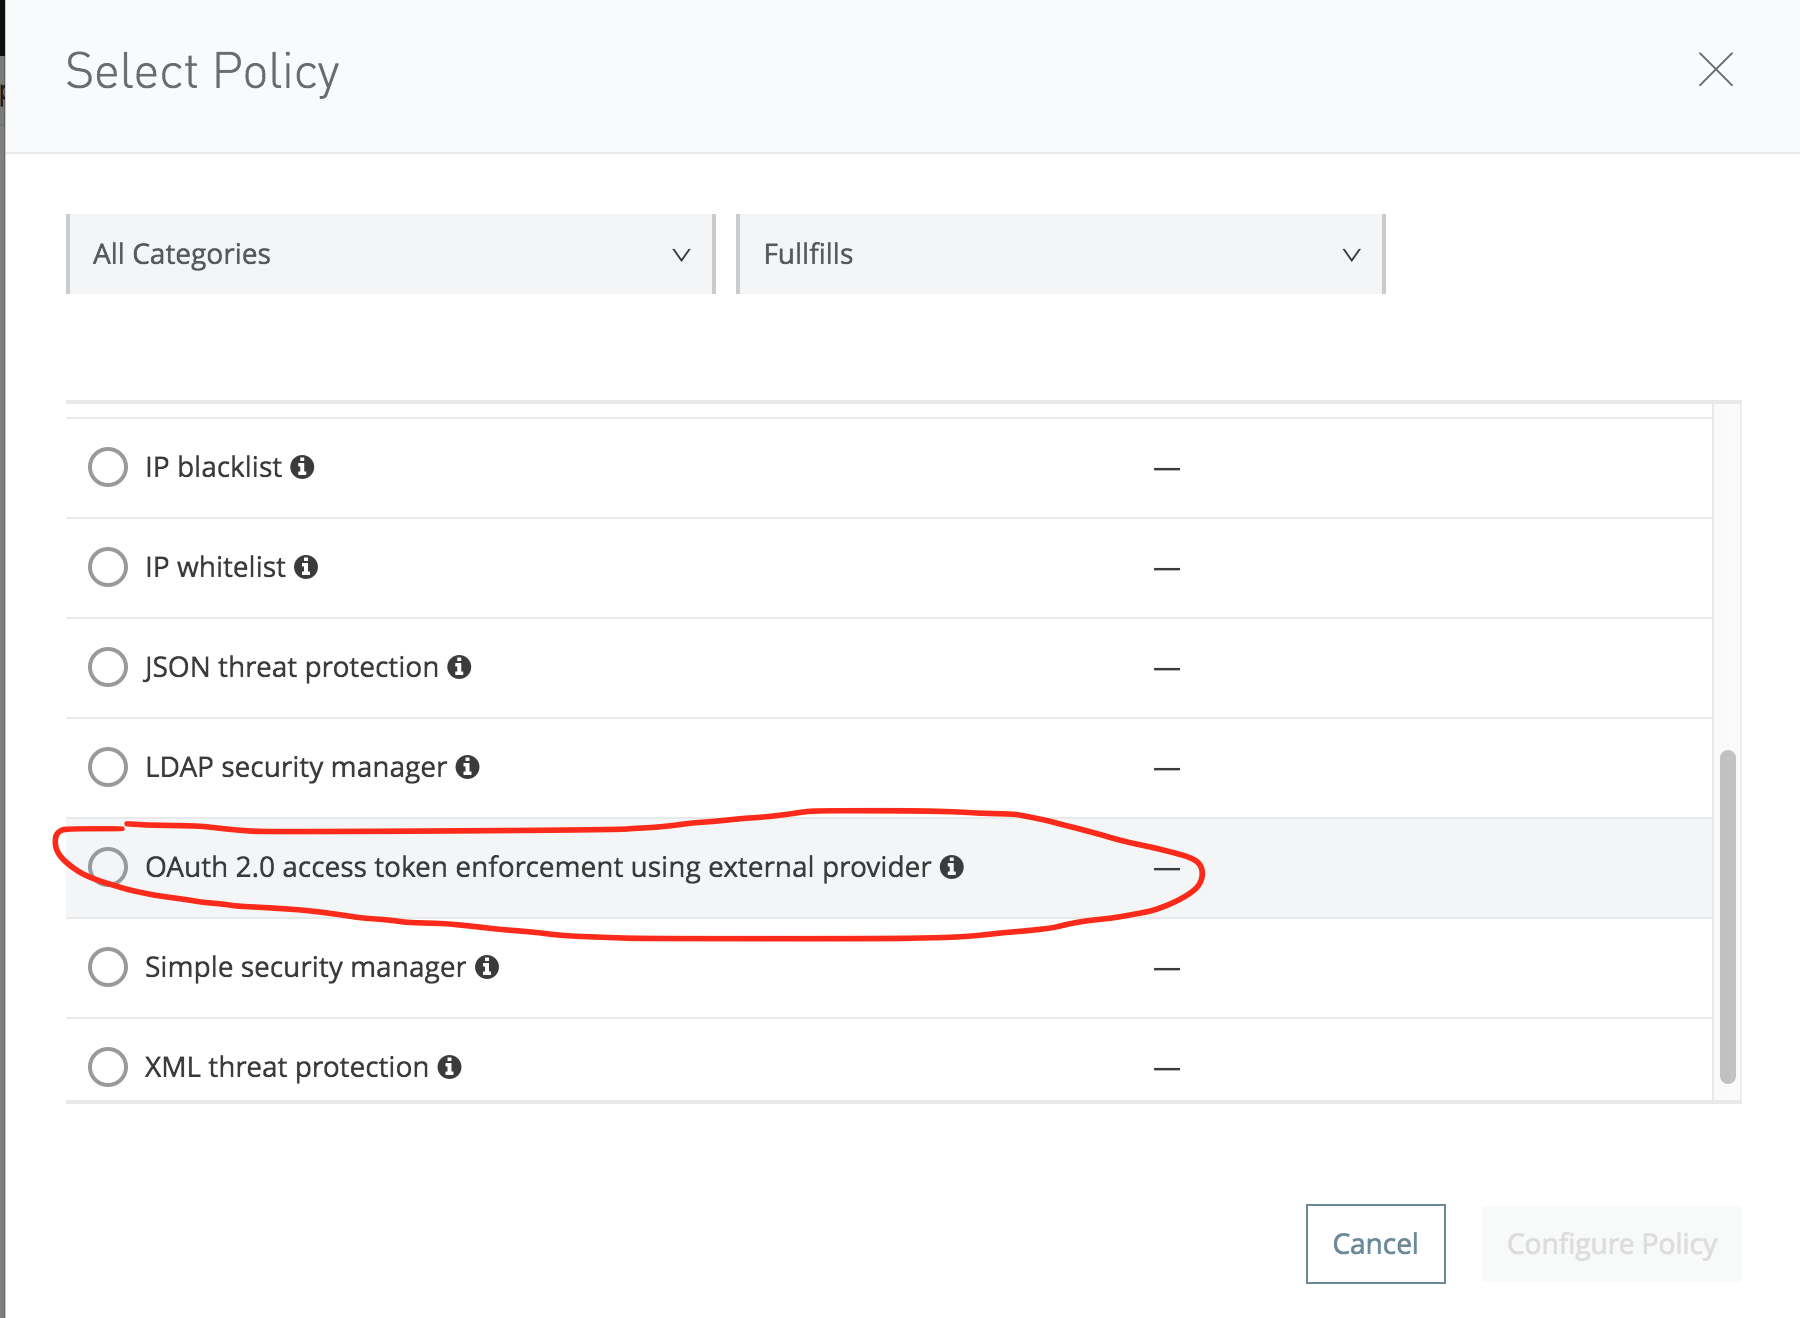
Browse the API and its version and click it. In the left-hand side pane, click the Policies link and apply the External OAuth2 policy, as shown below:
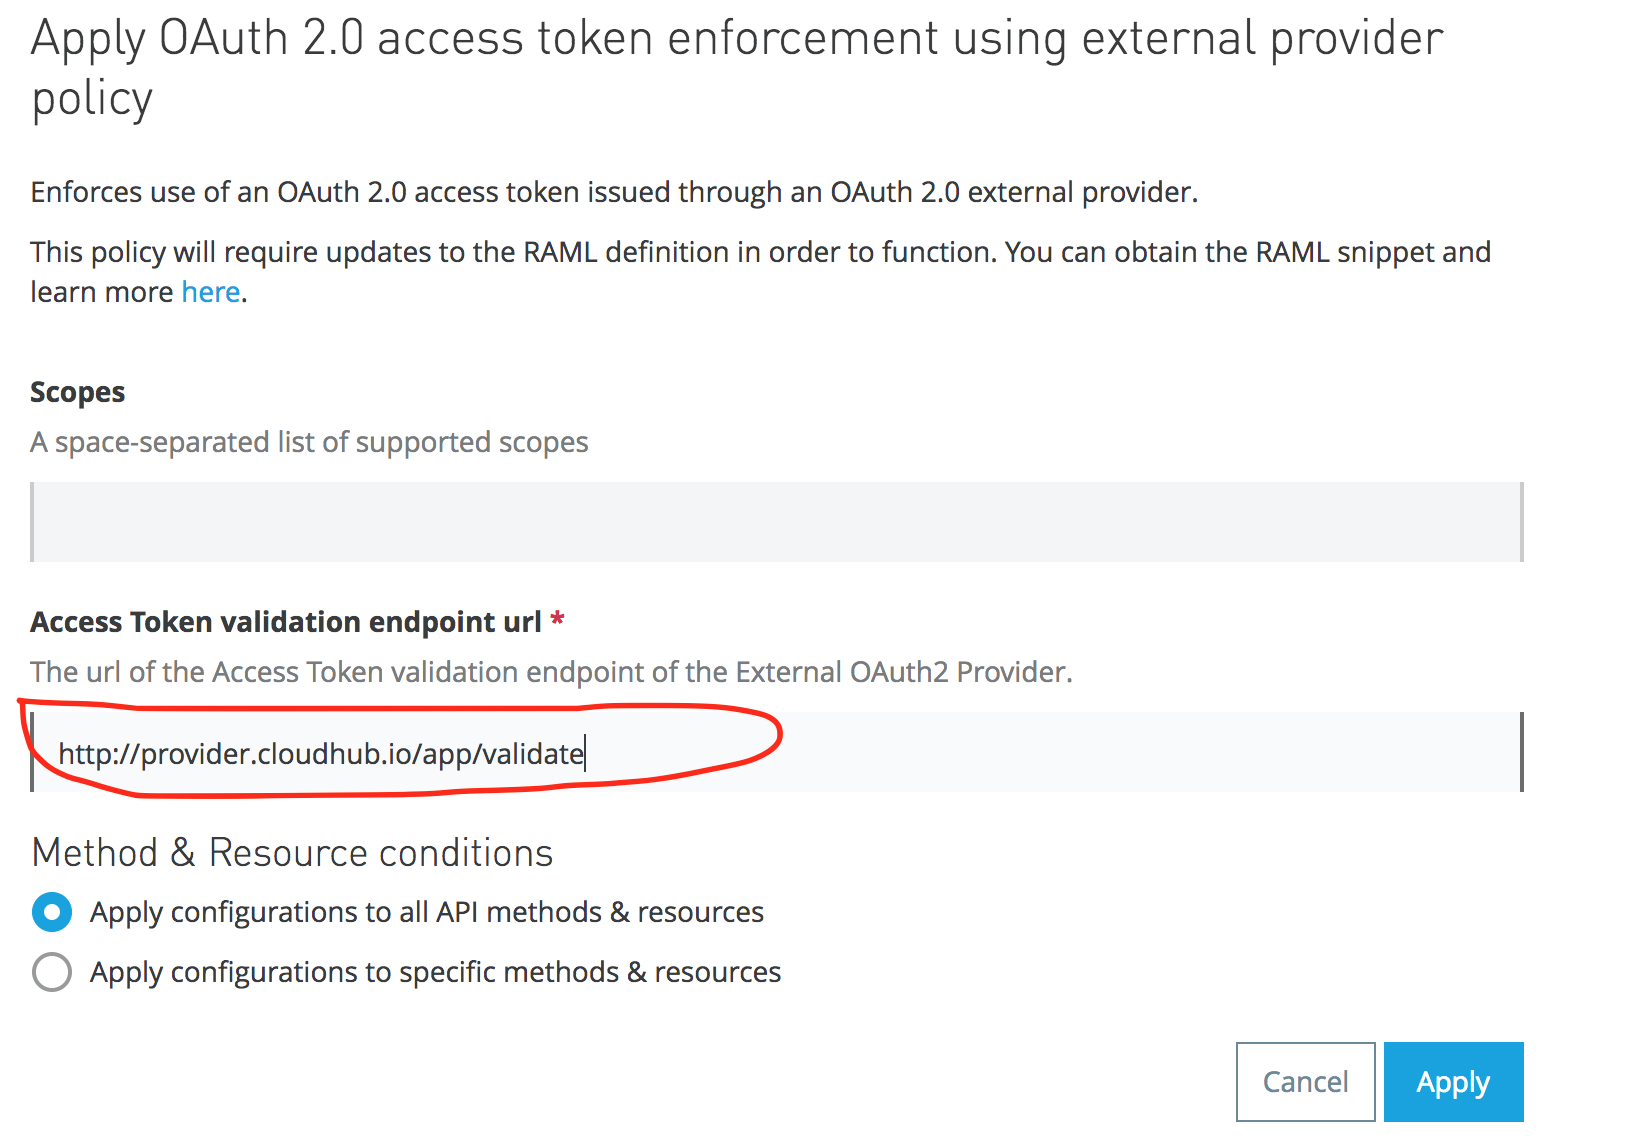
In the Access token validation URL, please enter http://provider.cloudhub.io/app/validate.
Testing OAuth2
Now let's try to access http://employees-proxy.cloudhub.io/employees.
You should get this response:
{ "error": "invalid_request", "description": "The required parameter access token is missing." }Now let's make a Client app request to the API in its portal.
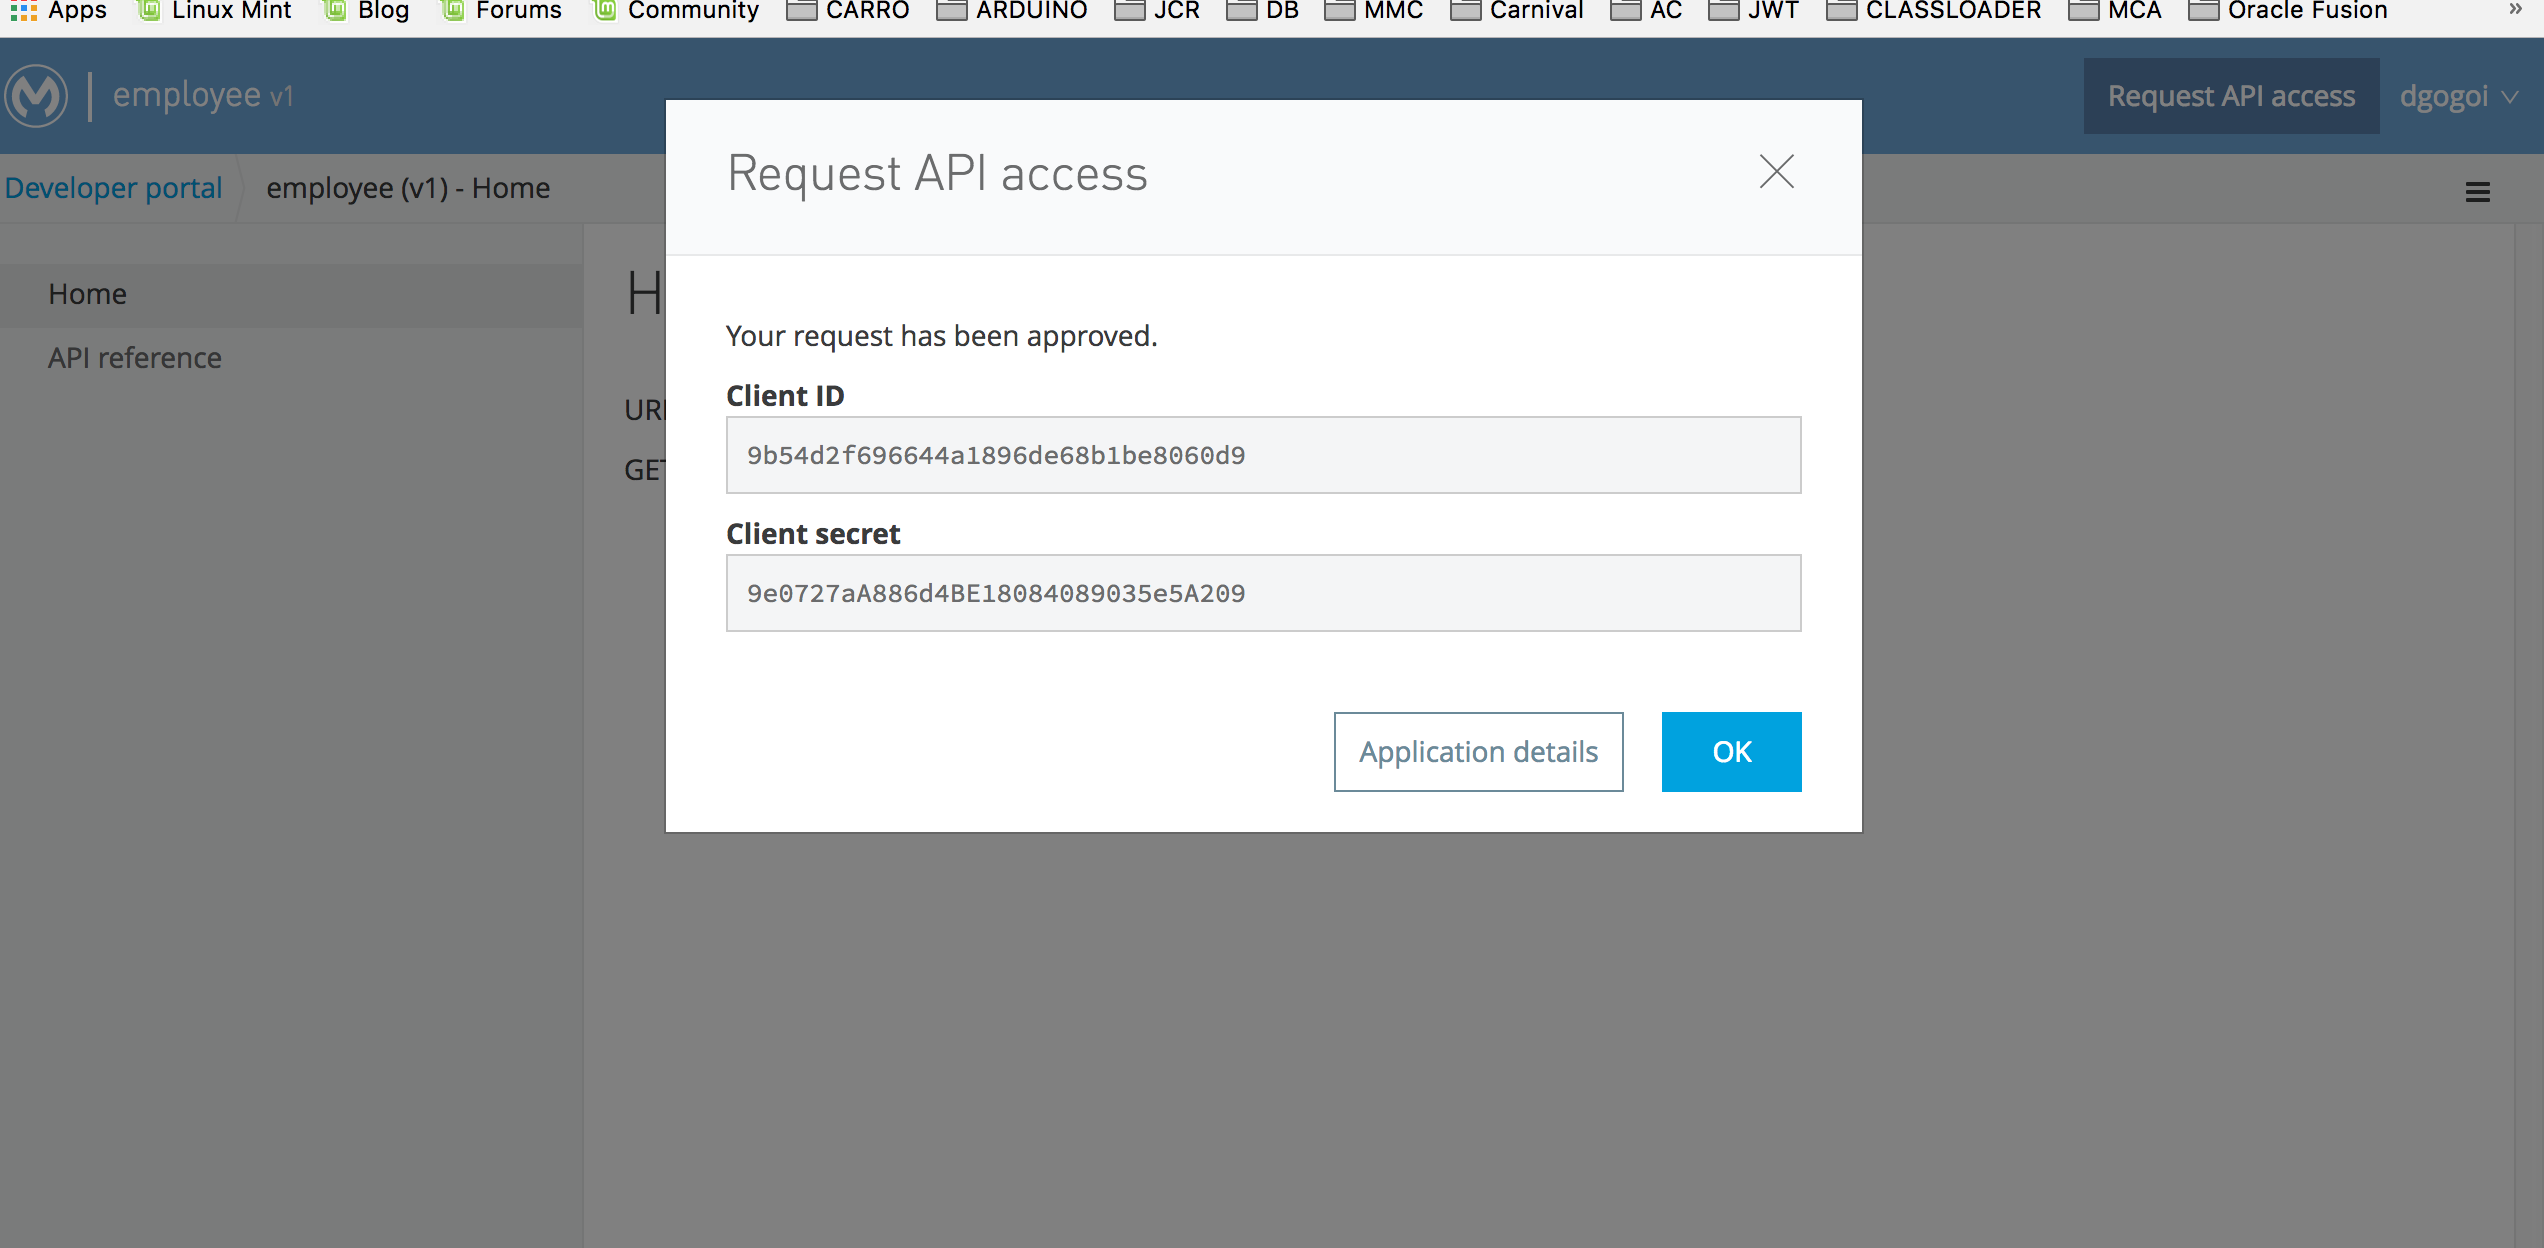
With the client_id and client_secret received, get the access token:
Finally, access our employees service:
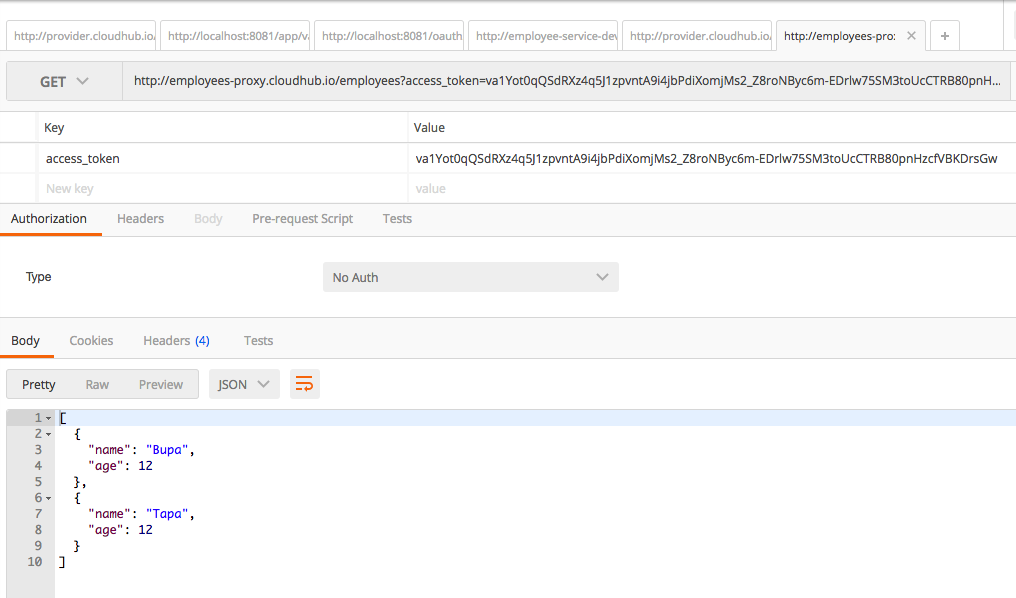
You can successfully access the service using the OAuth token.
Conclusion
In this tutorial, I have shown how to apply OAuth2 to manage the Clients using an External Provider. If you get problem while configuring the OAuth2 provider, set the http.port=8081 in the init.properties file. In CloudHub, it does not make sense, but sometimes when you set another port, it does not work.
Opinions expressed by DZone contributors are their own.

Comments