OpenLDAP and Camunda-Spring Boot App Integration in Windows
A developer gives a step-by-step tutorial on how to create an Open LDAP application and integrate it into an existing app running on Camunda and Spring Boot.
Join the DZone community and get the full member experience.
Join For FreeIn this article, we'll take a look at a working example of a Camunda-Spring Boot application, going over how to integrate it with LDAP, how to easily check-in with your local setup, and how to use these concepts in higher environments in your projects.
Prerequisites
To test Open LDAP Integration with Camunda on your local Windows machine, you need to have the below tools/software:
- Open LDAP for Windows.
- Apache Directory Studio (ApacheDS).
- Eclipse (for development) with Maven.
- Spring Boot 2.0.
- Java 8+.
Installing Open LDAP
Download Open LDAP for Windows here. Click on the .exe file to install it. Open LDAP provides five different database options:
- BDB (Berkley Database)
- MDB (Memory Mapped Database)
- LDAP (a proxy ahead of the actual LDAP server)
- LDIF (use of LDIF files)
- SQL Server
For this exercise, choose BDB while installing Open LDAP. Make a note to remember the password and Hostname that you set during installation and make sure the service is running on your machine.

Configuring the User Directory Using Apache Directory Studio
Download Apache Directory Studio from here and install it on your machine. Open it up and follow the below steps to complete the configuration.
- Open Apache DS. Click on the LDAP -> New Connection menu item. Enter the connection name of your choice along with the Hostname, which is the same as the Hostname we entered while installing Open LDAP.
![]()
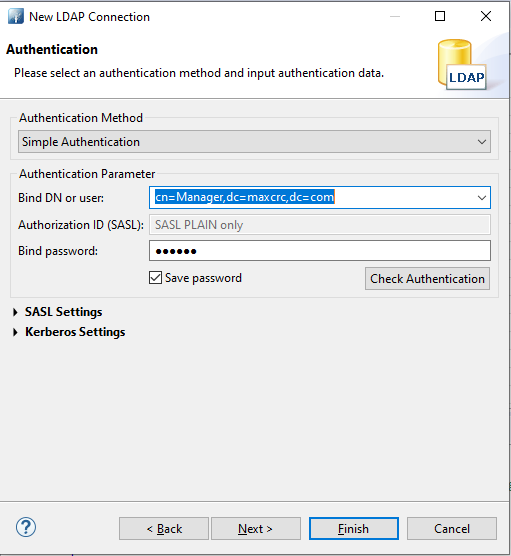
- Enter the user as
cn=Manager,dc=maxcrc,dc=com; the password should be the same as the password you created while installing Open LDAP.![]()
- With this connection setup, the next step is to try to create users for Apache Directory Studio. The connection will look like this:
![]() Right click on
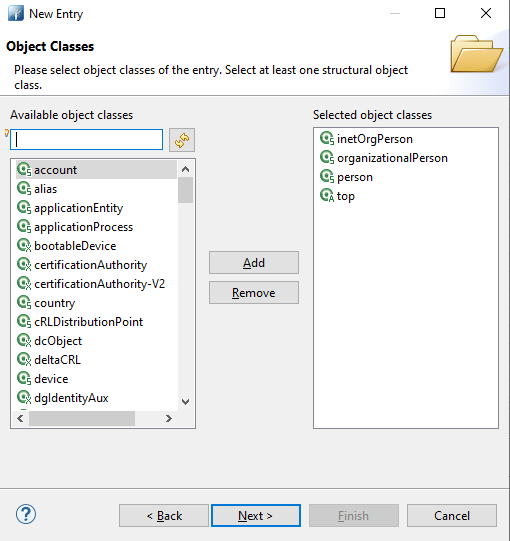
Right click on ou=peopleand select the option "New Entry" -> Next -> "inetOrgPerson"-> Next.![]()
![]()
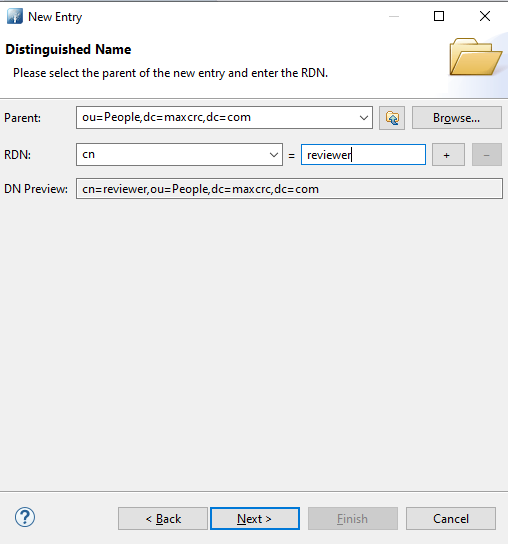
- The next step is to create some common names under which we can add multiple users. For this, set the value of RDN to
cnand give it a value (for this example, "reviewer"). Then click on Next and Finish. If any other value needs to be added feel free to do so.![]()
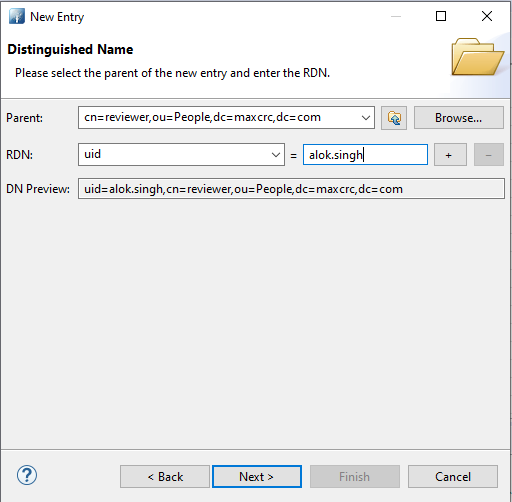
- To add users in
cn=reviewer, repeat steps 4 and 5 and then choose RDN as the uid and provide it with a value.![]()

 Right click on
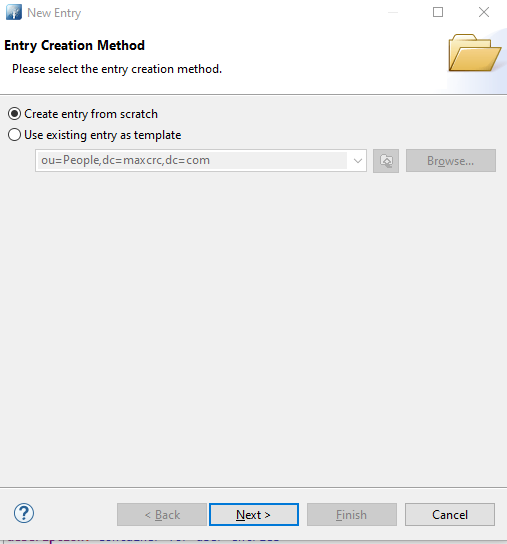
You can add other values to it, such as mail, mobile, and userPassword, by clicking on the + symbol.
Now, you have created a user in Open LDAP that can be used to connect to a Camunda application.
Integrating a Camunda Application With Open LDAP
Open your Camunda-Spring Boot Application. If don't have one created, you can use this link to create one.
Add the below LDAP-related dependency to your pom.xml file.
xxxxxxxxxx
<dependency>
<groupId>org.camunda.bpm.identity</groupId>
<artifactId>camunda-identity-ldap</artifactId>
<version>${camunda-version}</version>
</dependency>
<dependency>
<groupId>org.springframework.data</groupId>
<artifactId>spring-data-ldap</artifactId>
</dependency>
<dependency>
<groupId>org.springframework.ldap</groupId>
<artifactId>spring-ldap-core</artifactId>
<exclusions>
<exclusion>
<groupId>commons-logging</groupId>
<artifactId>commons-logging</artifactId>
</exclusion>
</exclusions>
</dependency>
Add the below Java code to enable the connection between LDAP and the configuration, as shown below:
x
package com.security;
import org.camunda.bpm.engine.impl.plugin.AdministratorAuthorizationPlugin;
import org.camunda.bpm.identity.impl.ldap.plugin.LdapIdentityProviderPlugin;
import org.springframework.context.annotation.Bean;
import org.springframework.context.annotation.Configuration;
import org.springframework.security.config.annotation.web.builders.HttpSecurity;
import org.springframework.security.config.annotation.web.configuration.EnableWebSecurity;
import org.springframework.security.config.annotation.web.configuration.WebSecurityConfigurerAdapter;
public class WebSecurityConfig extends WebSecurityConfigurerAdapter {
protected void configure(HttpSecurity http) throws Exception {
http.csrf().disable();
http.authorizeRequests().antMatchers("/").permitAll();
http.headers().frameOptions().disable();
}
public static AdministratorAuthorizationPlugin administratorAuthorizationPlugin() {
AdministratorAuthorizationPlugin plugin = new AdministratorAuthorizationPlugin();
plugin.setAdministratorUserName("alok.singh");
return plugin;
}
public static LdapIdentityProviderPlugin ldapIdentityProviderPlugin() {
LdapIdentityProviderPlugin plugin = new LdapIdentityProviderPlugin();
plugin.setServerUrl("ldap://localhost:389");
plugin.setManagerDn("cn=Manager,dc=maxcrc,dc=com");
plugin.setManagerPassword("secret");
plugin.setBaseDn("ou=People,dc=maxcrc,dc=com");
//plugin.setUserSearchBase("ou=People");
plugin.setUserSearchFilter("(objectclass=person)");
plugin.setUserIdAttribute("uid");
plugin.setUserFirstnameAttribute("cn");
plugin.setUserLastnameAttribute("sn");
plugin.setUserPasswordAttribute("userPassword");
//plugin.setGroupSearchBase("ou=Gruppen");
//plugin.setGroupSearchFilter("(member={0})");
//plugin.setGroupIdAttribute("ou");
//plugin.setGroupNameAttribute("cn");
//plugin.setGroupMemberAttribute("member");
//plugin.setAuthorizationCheckEnabled(true);
return plugin;
}
}
xxxxxxxxxx
ldap
principalcn=Manager,dc=maxcrc,dc=com
passwordsecret
port389
urlldap//localhost389
Start the Sprint Boot application and use the given username/password to login to your Camunda web app (http://localhost:8080/app/welcome) using the same username/password you created while configuring a user in OpenLDAP.
Opinions expressed by DZone contributors are their own.
Comments