Basic Overview of MUnits, How to Organize Them, and Best Practices
Learn how to create and run tests in the MUnits framework. Plus, learn about the basic components needed for tests, the MUnit test recorder, and test results.
Join the DZone community and get the full member experience.
Join For FreeHi, I'm a nearshore MuleSoft Developer and this article is a basic overview of how to test your Mule applications with MUnits.
At the moment of publishing the article, I’m using:
- Anypoint Studio: 7.11.0
- Runtime: 4.4.0
- MUnit: v2.3.6
- MUnit Tools: v2.3.6
Brief Introduction to Testing
Testing is a word that focuses on the need to validate that an application works as expected.
Unit testing is a software testing methodology: An application is separated into units or sets of code and multiple tests are performed on it, with different case scenarios to check that each scenario works as designed. By “works as designed,” I mean that the incoming data produce the expected results.
To speed up the testing phase, there are frameworks that assist with the process of setting up input values and comparing the results with the expected ones. They even allow us to mock, which means simulating the functionality of external systems.
In Mule applications, what we are going to test are the flows since they represent the basic unit of functionality.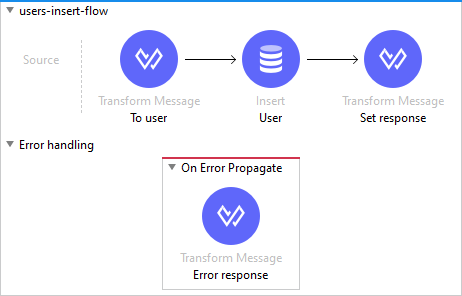
Figure 1. Flow that inserts a user in a database (user-insert-flow).
The flow has two paths: 1) It performs a transformation, adds data, inserts the payload, and sets the response and status code to 200, and 2) it can also have an error and the status code is set to 400.
If needed, tests can be created over the same flow but with different value entries. Each test will represent a different case scenario:
- Case scenario 1: Valid entry, to prove the successful response.
- Case scenario 2: Wrong value, to prove that the flow fails and that the result will be an error response.
Anypoint Studio comes with an entire testing environment to create tests very similar to how Mule flows are developed. MUnit Framework allows us to mock and spy processors, verify calls to them, ignore specific test cases, and generate coverage reports.
In this article, you are going to find a basic overview of the MUnit framework:
- How to create tests
- MUnit test recorder
- How to run tests
- The basic components to create a test
- Code coverage and test result
- Best practices for MUnit
How to Create a Test
Testing components are accessible only in Mule suites. You can create a test case by right-clicking on the flow.
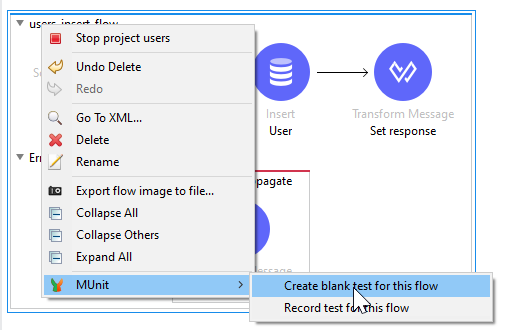
Figure 2. Creating a test flow for user-insert-flow.
A test case will be created. We mentioned before that MUnits are developed in a very similar way to a Mule application because a test case is very similar, but it has different sections.
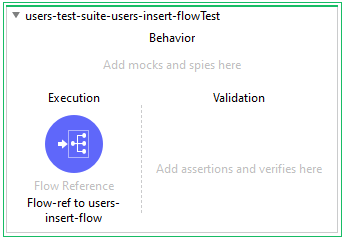
Figure 3. A generated MUnit test flow with a
flow reference to execute user-insert-flow.
Every section has a purpose for building the desired scenario.
The behavior section is used to alter or inspect the behavior of processors. Here is where you declare spy and mock components. We will review mock and spy later.
Execution is where you place your testing logic, which will start to be processed as soon as the test runs.
Validation is executed after the execution section. It can contain assertions and verifications that will help you confirm the resulting values after the flow execution.
The test flow will be created inside an XML test suite. This XML file is placed under src/test/munit folder and can contain multiple tests, you can create as many suites as you want, depending on how you want to group your tests.
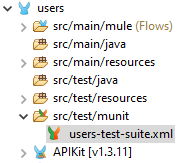
Figure 4. The users-test-suite.xml in its folder.
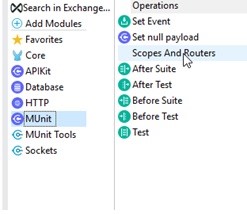
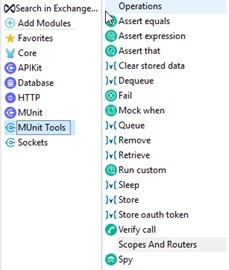
Only in test suites will you be able to access the testing components. In the Anypoint Studio palette, MUnit is going to be divided into two main modules:
MUnit |
MUnit Tools |
|
|
Figure 5, 6. The modules of MUnit with its components.
Processors
To explain some of the processors used in MUnit, the users-insert-flow will be used as an example and will be checked for a correct insertion case scenario.
Set Event
Click here to view the set event documentation.
This is used to prepare the Mule message at the beginning of the test, so it has the desired values.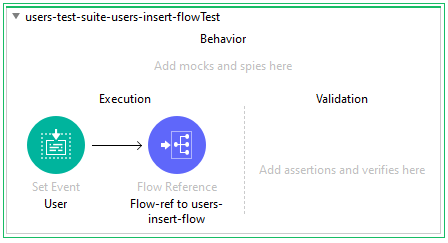
Figure 7. Set event component in the test flow before calling the insert operation.
Payload, attributes, errors, and variables can be defined.
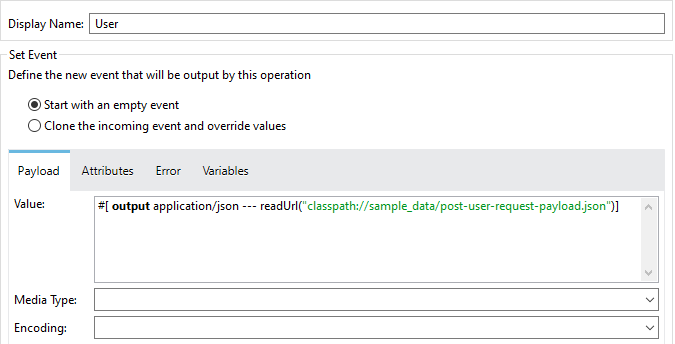
Figure 8. Setting the payload event, referencing an external file.
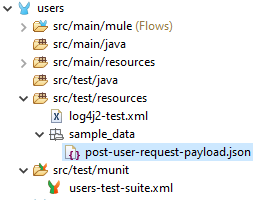
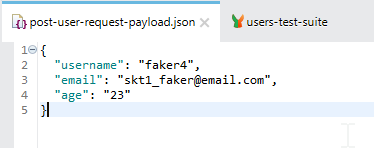
Figure 9, 10. The external file post-user-request-payload.json is placed in test resources and its content is a user data example.
Mock When
Click here for the mock when documentation.
The mock processor is used to simulate the behavior of another component. The mocking processor is especially handy when you do not want to execute an operation (e.g., calls to external services) and just simulate it as if it was executed.

Figure 11. Mock When component added in the behavior section to mock an insertion in the database.
When setting up a mock processor, MUnit allows you to identify the component you want to mock by its existing attributes (easily identifiable in the XML view).
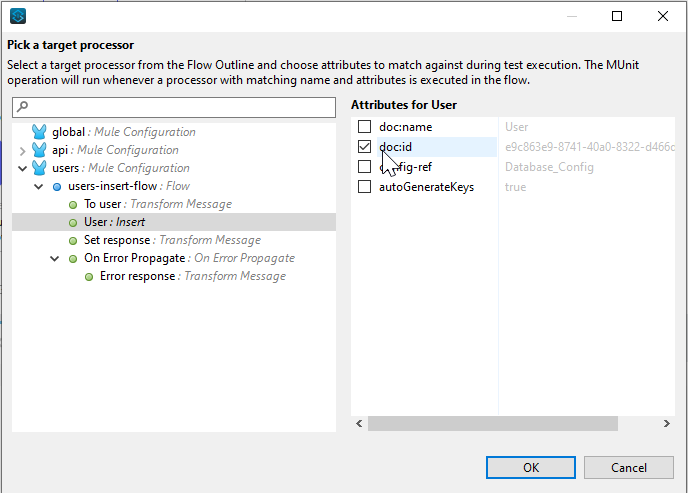
Figure 12. Picking the insert processor to mock the database operation.
It fakes what was executed by defining response values in the payload, attributes, variables, and error. The idea is to fake a response that looks as close as possible as if the real element were executed.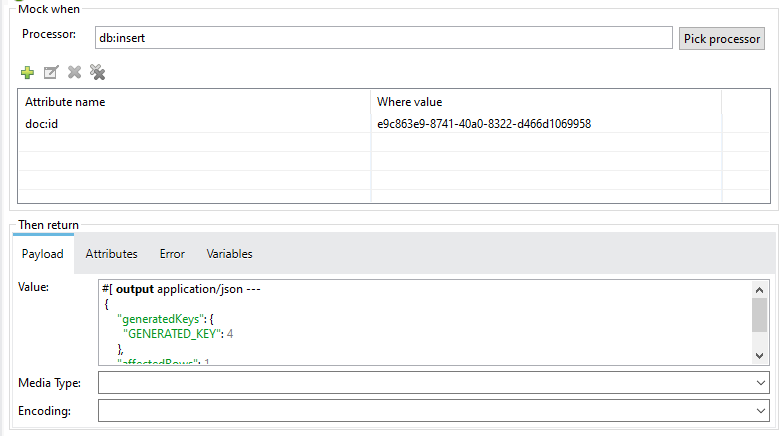
Figure 13. Setting the payload and simulating the database response of inserting a user with ID 4.
All the components that make a match with the selected attributes will be picked by the MUnit mock processor and its behavior will be the one configured.
Assert Equals
Click here for the assert equals documentation.
Assert equals checks to see that two values are equal.
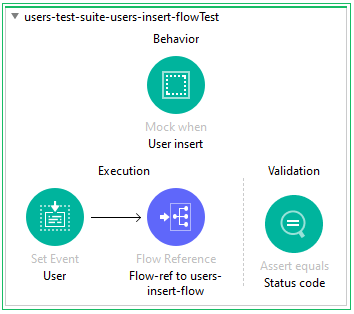
Figure 14. Assert equals component added in the validation section.
It takes actual and expected, which are values to compare, and the message, which will be displayed in case the comparison fails.
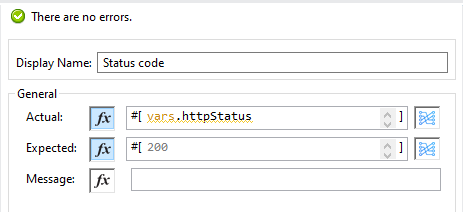
Figure 15. Assert equals component added in the test flow.
Spy Event
Click here for the spy event documentation.
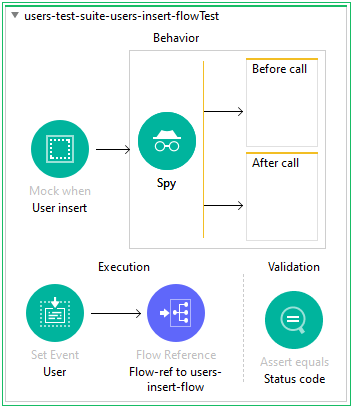
Figure 16. Spy component added in the test flow.
Spy executes operations before and after the execution of a component. Choose a component to spy on and the criteria to identify it.
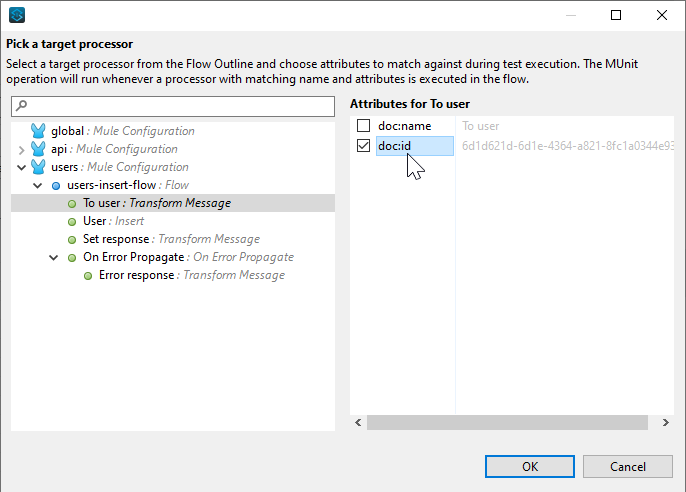
Figure 17. Picking "to user" to validate the values before and after the execution of this transform message.
In the spy processor, components like assertions can be added to spy on the state.
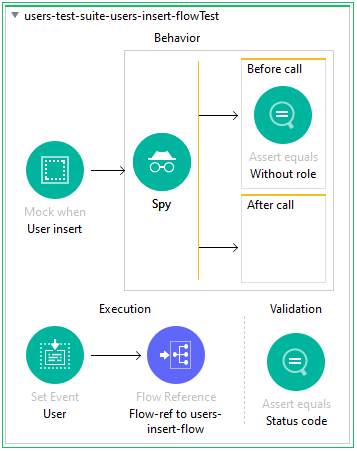
Figure 18. Adding the without role assertion in before call section.

Figure 19. Without role verifies that the role fields do not exist before calling the transform message.
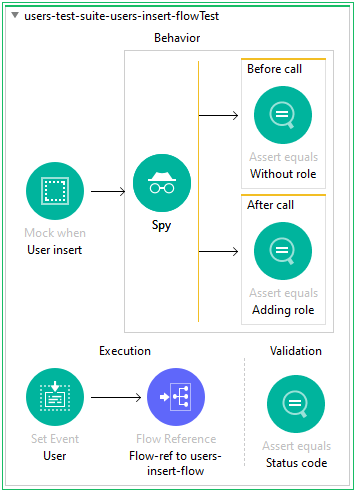
Figure 20. Adding role assertion in after call section.

Figure 21. Adding role asserts that the role “user” is been added after calling the transform message.
Verify Call
Click here for the verify documentation.
This confirms that a specified processor was in fact called during the execution. It is commonly placed in the validation section, and it can be configured to check how many times the processor was executed. If the verify call recognizes that the component was not executed at the specified times, the test will fail.
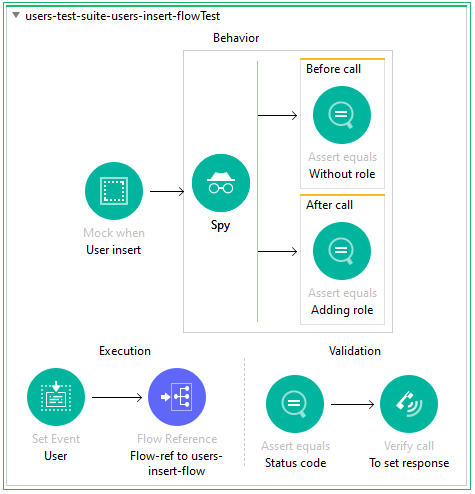
Figure 22. In the validation section, there is verify call/to set response.
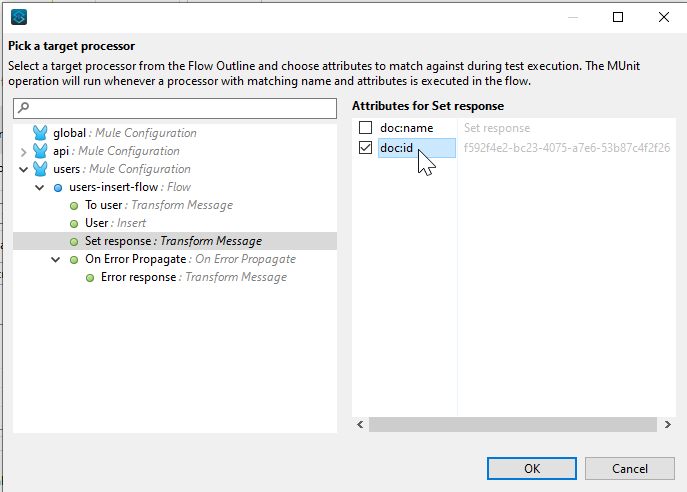
Figure 23. Picking "set response" transform message, by id.

Figure 24. Configuring that set response/transform message, was called one time during execution.
MUnit Test Recorder
There is another option to generate the structure of a test. The MUnit test recorder allows you to run your app, perform an actual request, record the data (variables, attributes, payloads utilized in the process), and then it gives the option to select what components you would like to mock, spy, verify, assert, etc. You can find more information by following this link.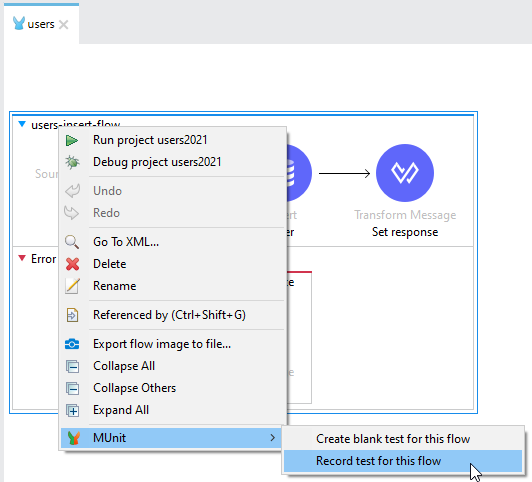
Figure 25. Creating a test with the MUnit test recorder.
How to Execute Tests
In Anypoint Studio, right-click on the file > run MUnit suite. This will execute all the tests placed in the suite, but individual tests can be ignored if needed.

Figure 26. Options displaying when right-clicking on the MUnit suite.
The tests can also be executed with the Maven command in a command-line window, placed in the project’s root folder. Type the command mvn test.
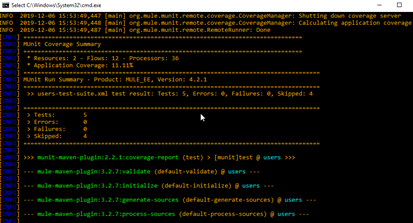
Figure 27. Test results in command line after executing mvn test over the project files.
Test Results and Code Coverage
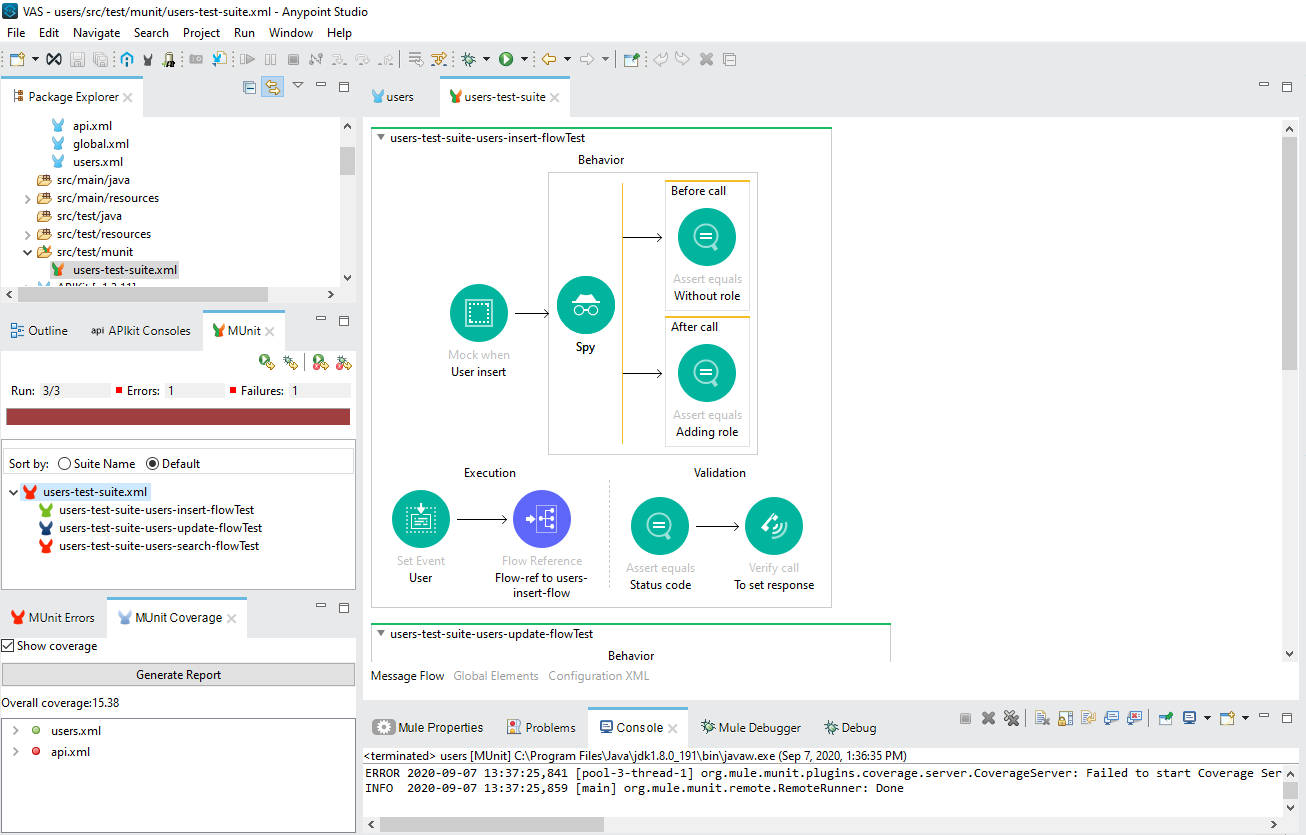
Figure 28. Perspective view after running some tests. There are MUnit, MUnit Errors, and MUnit coverage tabs.
The test results are shown on the MUnit tab, and the colors represent the status of the test. Green is a successful test, blue is a test that ran but the behavior was not as expected, and red is a test that had an error in the execution.
In the MUnit Errors tab, you can find the reason for the failed test or the error in execution.
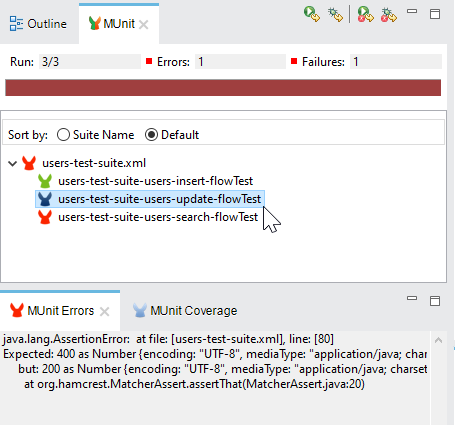
Figure 29. Three tests are executed. In the first one, the user-test-suite-users-update-flowTest passed. The second one and selected was executed correctly, but it expected a status code 400 and got a 200 instead. The last test could not be executed.
Code coverage is a testing metric based on the number of processors executed in every flow when the tests suites run.
Figure 30. When running user-test-suite-users-update-flowTest that tests users-insert-flow, the to user, user and, set response components are executed so they are marked with a green mark.
To generate the coverage report, look for the MUnit coverage tab and click on "generate report."
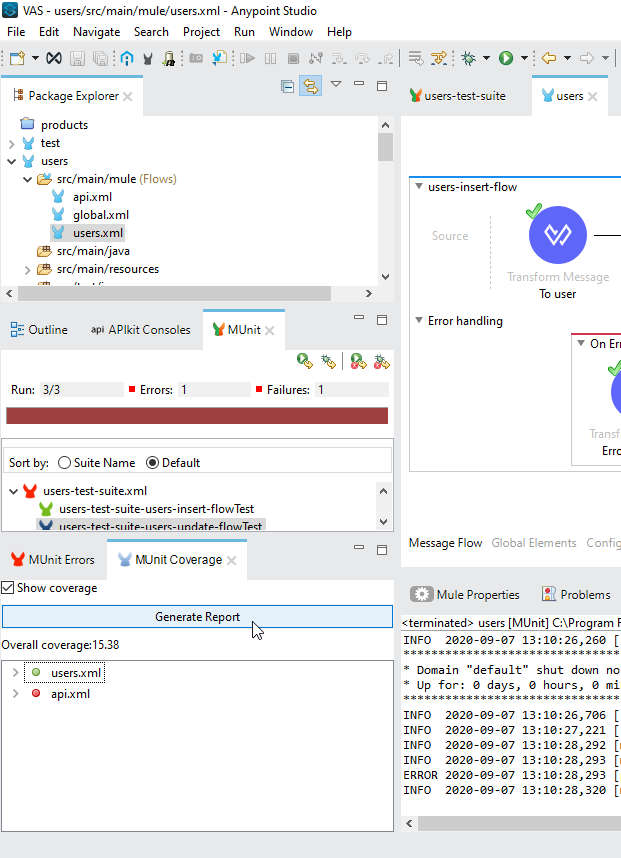
Figure 31. Generating a coverage report for users-test-suite.
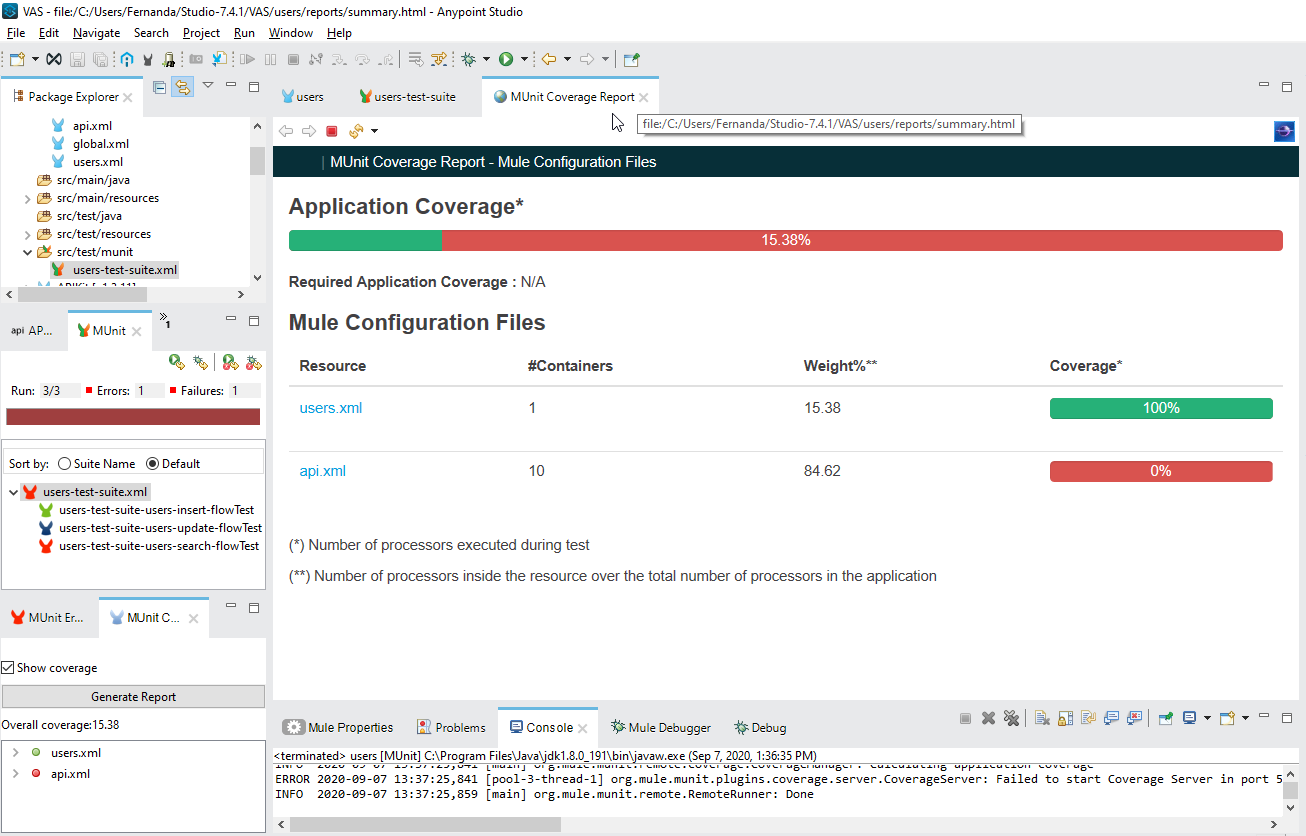
Figure 32. Coverage report with the percentage.
The ideal coverage will be 100% because it shows that each component in the application was executed under the prepared conditions and met the validations. However, keep in mind that the coverage by itself does not reflect good testing and scenario fulfillment. Also, is not always possible or determinant to achieve the 100%, which is why a recommended coverage is between 80% and 100%.
Best Practices
Do: |
Why: |
Identify the units of code that you want to test. It is more about testing particularly important scenarios than achieving coverage. |
Achieving the coverage can be useless if you do not test the logic of the application. |
Recognize the preconditions and postconditions for your test. Know what values you will need at the beginning to run your code and what values you expect at the end of the test. |
When you recognize the logic of the entries and outputs, it is easier to build the test. |
Identify the processors to mock and select them with the attribute |
|
Rename the MUnit processors to represent their function. |
It helps to identify them over the same components. |
Use descriptive names for the tests and add a description in the component’s settings section. |
Explain that the intention of the tests makes them more readable and understandable. |
Organize tests in suites and use descriptive names as filenames to identify the scope of the suite. |
It is easier to look for a test if is organized inside the suite with a descriptive name that represents the purpose of the group of tests. |
Mock the components that depend on external resources, like databases, web services, queues, etc. And don't forget Mock outbound connectors. |
Unit tests are not integration or functional tests. There is no need to make real calls or trigger other functionality — and it can be counterproductive as unit tests tend to be automated and can be executed at any time. |
Use files to specify sample inputs, responses, or return values. Save them in the src/test/resources folder, and read them with readURL Datawave function. |
Having a separate file is easier to read and update, and it can promote reusability. |
A good metric is to have code coverage between 80% and 90%. |
Coverage above 80% means that most of the functionality is tested. |
References:
[1] https://docs.mulesoft.com/munit/2.2/
[2] https://www.whishworks.com/blog/mulesoft/overview-munit-2-testing-framework
[3] https://docs.mulesoft.com/munit/2.2/coverage-maven-concept
[4] https://blog.vsoftconsulting.com/blog/understanding-munit-test-in-mulesoft-mule-4
Opinions expressed by DZone contributors are their own.

Comments