Pulsar on KubeSphere: Installing Distributed Messaging and Streaming Platform
Apache Pulsar and KubeSphere are powerful tools for cloud-native applications. In this post, we'll demonstrate how to deploy Pulsar on KubeSphere from scratch.
Join the DZone community and get the full member experience.
Join For FreeKubeSphere, an open-source container platform running on Kubernetes, provides users with an app-centric experience. In this connection, it features a comprehensive set of tools for developers to manage apps across their entire lifecycle. In this article, I will demonstrate how to install Apache Pulsar on a KubeSphere cluster as an example. Apache Pulsar, a cloud-native, distributed messaging and streaming tool, represents a go-to platform to meet the real-time event-streaming needs of enterprises.
Before You Begin
To install Pulsar on KubeSphere, you need to do the following beforehand:
- Create a Kubernetes cluster with KubeSphere installed. You can deploy both Kubernetes and KubeSphere using KubeKey on public cloud instances or in an air-gapped environment. KubeKey is a lightweight, brand-new Kubernetes installer. It installs Helm 3.0+ on your Kubernetes cluster by default, which is also a must for Apache Pulsar. Alternatively, use a managed Kubernetes service such as Google Kubernetes Engine (GKE) or Azure Kubernetes Servce (AKS) to create a Kubernetes cluster, and then install KubeSphere with ks-installer. In production, it is recommended that you choose the second option because managed services can free you from additional settings (for example, persistent storage and load balancers) as you deploy workloads.
- Enable the KubeSphere App Store. As you can notice from the Pulsar documentation, it can be installed on a Kubernetes cluster through its Helm chart. The KubeSphere App Store allows you to add a Helm repository and install apps in it on KubeSphere as app templates on the KubeSphere console. The KubeSphere App Store is powered by OpenPitrix, an open-source web-based system to package, deploy, and manage different types of apps across their entire lifecycle.
Note: For more information, make sure your environment meets the prerequisites for both KubeSphere and Apache Pulsar.
In my environment, I created a Kubernetes cluster through Google Kubernetes Engine. The following table lists the machines in my cluster for your reference. Feel free to configure your cluster based on your own needs.
| Host IP | System | Cluster Version |
|---|---|---|
| 10.128.0.5 | Ubuntu 20.04.3, 6 vCPUs, 8 GB of memory | Kubernetes 1.21.5, KubeSphere 3.2.1 |
| 10.128.0.6 | Ubuntu 20.04.3, 6 vCPUs, 8 GB of memory | Kubernetes 1.21.5, KubeSphere 3.2.1 |
| 10.128.0.7 | Ubuntu 20.04.3, 6 vCPUs, 8 GB of memory | Kubernetes 1.21.5, KubeSphere 3.2.1 |
Installing Pulsar as an App Template on KubeSphere
KubeSphere boasts a highly interactive and responsive user interface where tenants with different roles can perform corresponding actions directly. That said, admin users can run commands with kubectl in its web-based terminal as always. For demonstration purposes, I used the built-in account admin throughout the entire steps.
Note: In fact, with the multi-tenant system of KubeSphere, you can easily set accounts and assign roles to them without manually creating RBAC-related resources like Role and RoleBinding objects. With them in place, it is the responsibility of each user to do their own job in a cluster, such as adding an app repository and deploying an app. Check out this quickstart article in the KubeSphere documentation to learn more.
Now, let’s get started with our journey.
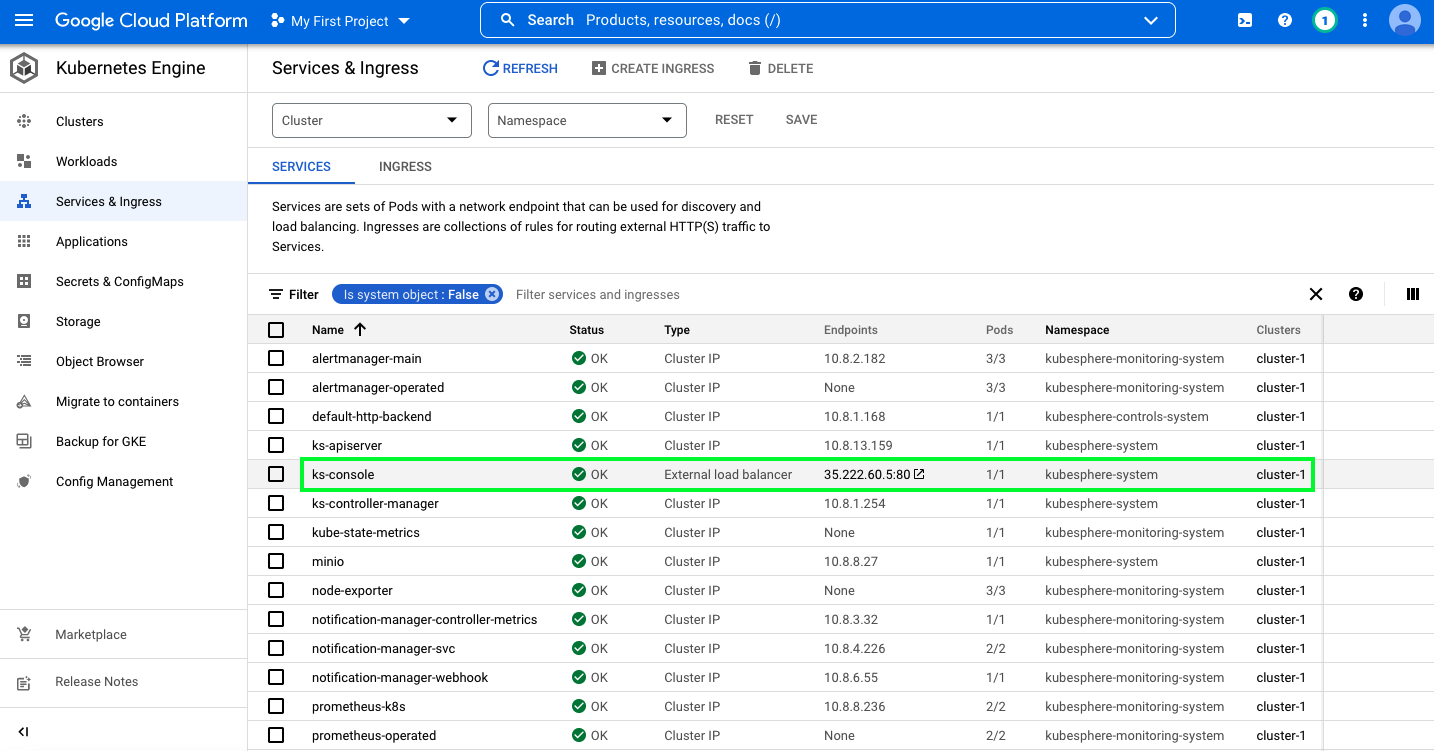
Log in to the KubeSphere console with the default account and password (
admin/P@88w0rd). Keep in mind that the console Pod, controlled by a Deployment (ks-consolein thekubesphere-systemnamespace), is exposed with a Kubernetes Service calledks-consoleviaNodePortby default. That means you can access it by using any of the node IP addresses in your cluster with the port number (port30880). If you are using a Kubernetes cluster hosted on GKE like me, it is recommended that you change the Service type toLoadBalancer. In this way, Google will assign a public IP address to the Service automatically, helping route traffic to the Pod in a more secure and reliable way.![Kubernetes Engine > Services & Ingress > ks-console]()
- In the KubeSphere console, go to Access Control in Platform. This is the place where you manage all workspaces, accounts, and platform roles. To manage Pulsar resources in a unified way, create a workspace first. As you can see from the image below, there is a workspace called
pulsarin my cluster.![Pulsar workspace]()
Click the workspace and navigate to App Repositories under App Management. The App Repositories page lists all repositories added in the selected workspace. Add the Pulsar repository as below:
![Add pulsar repository]()
Note that adding the Pulsar repository is only one of the multiple ways to install it on KubeSphere. You can also upload its Helm chart file as an independent app template and release it to the KubeSphere App Store.In addition to the repository, we also need Secrets for Pulsar. The username (
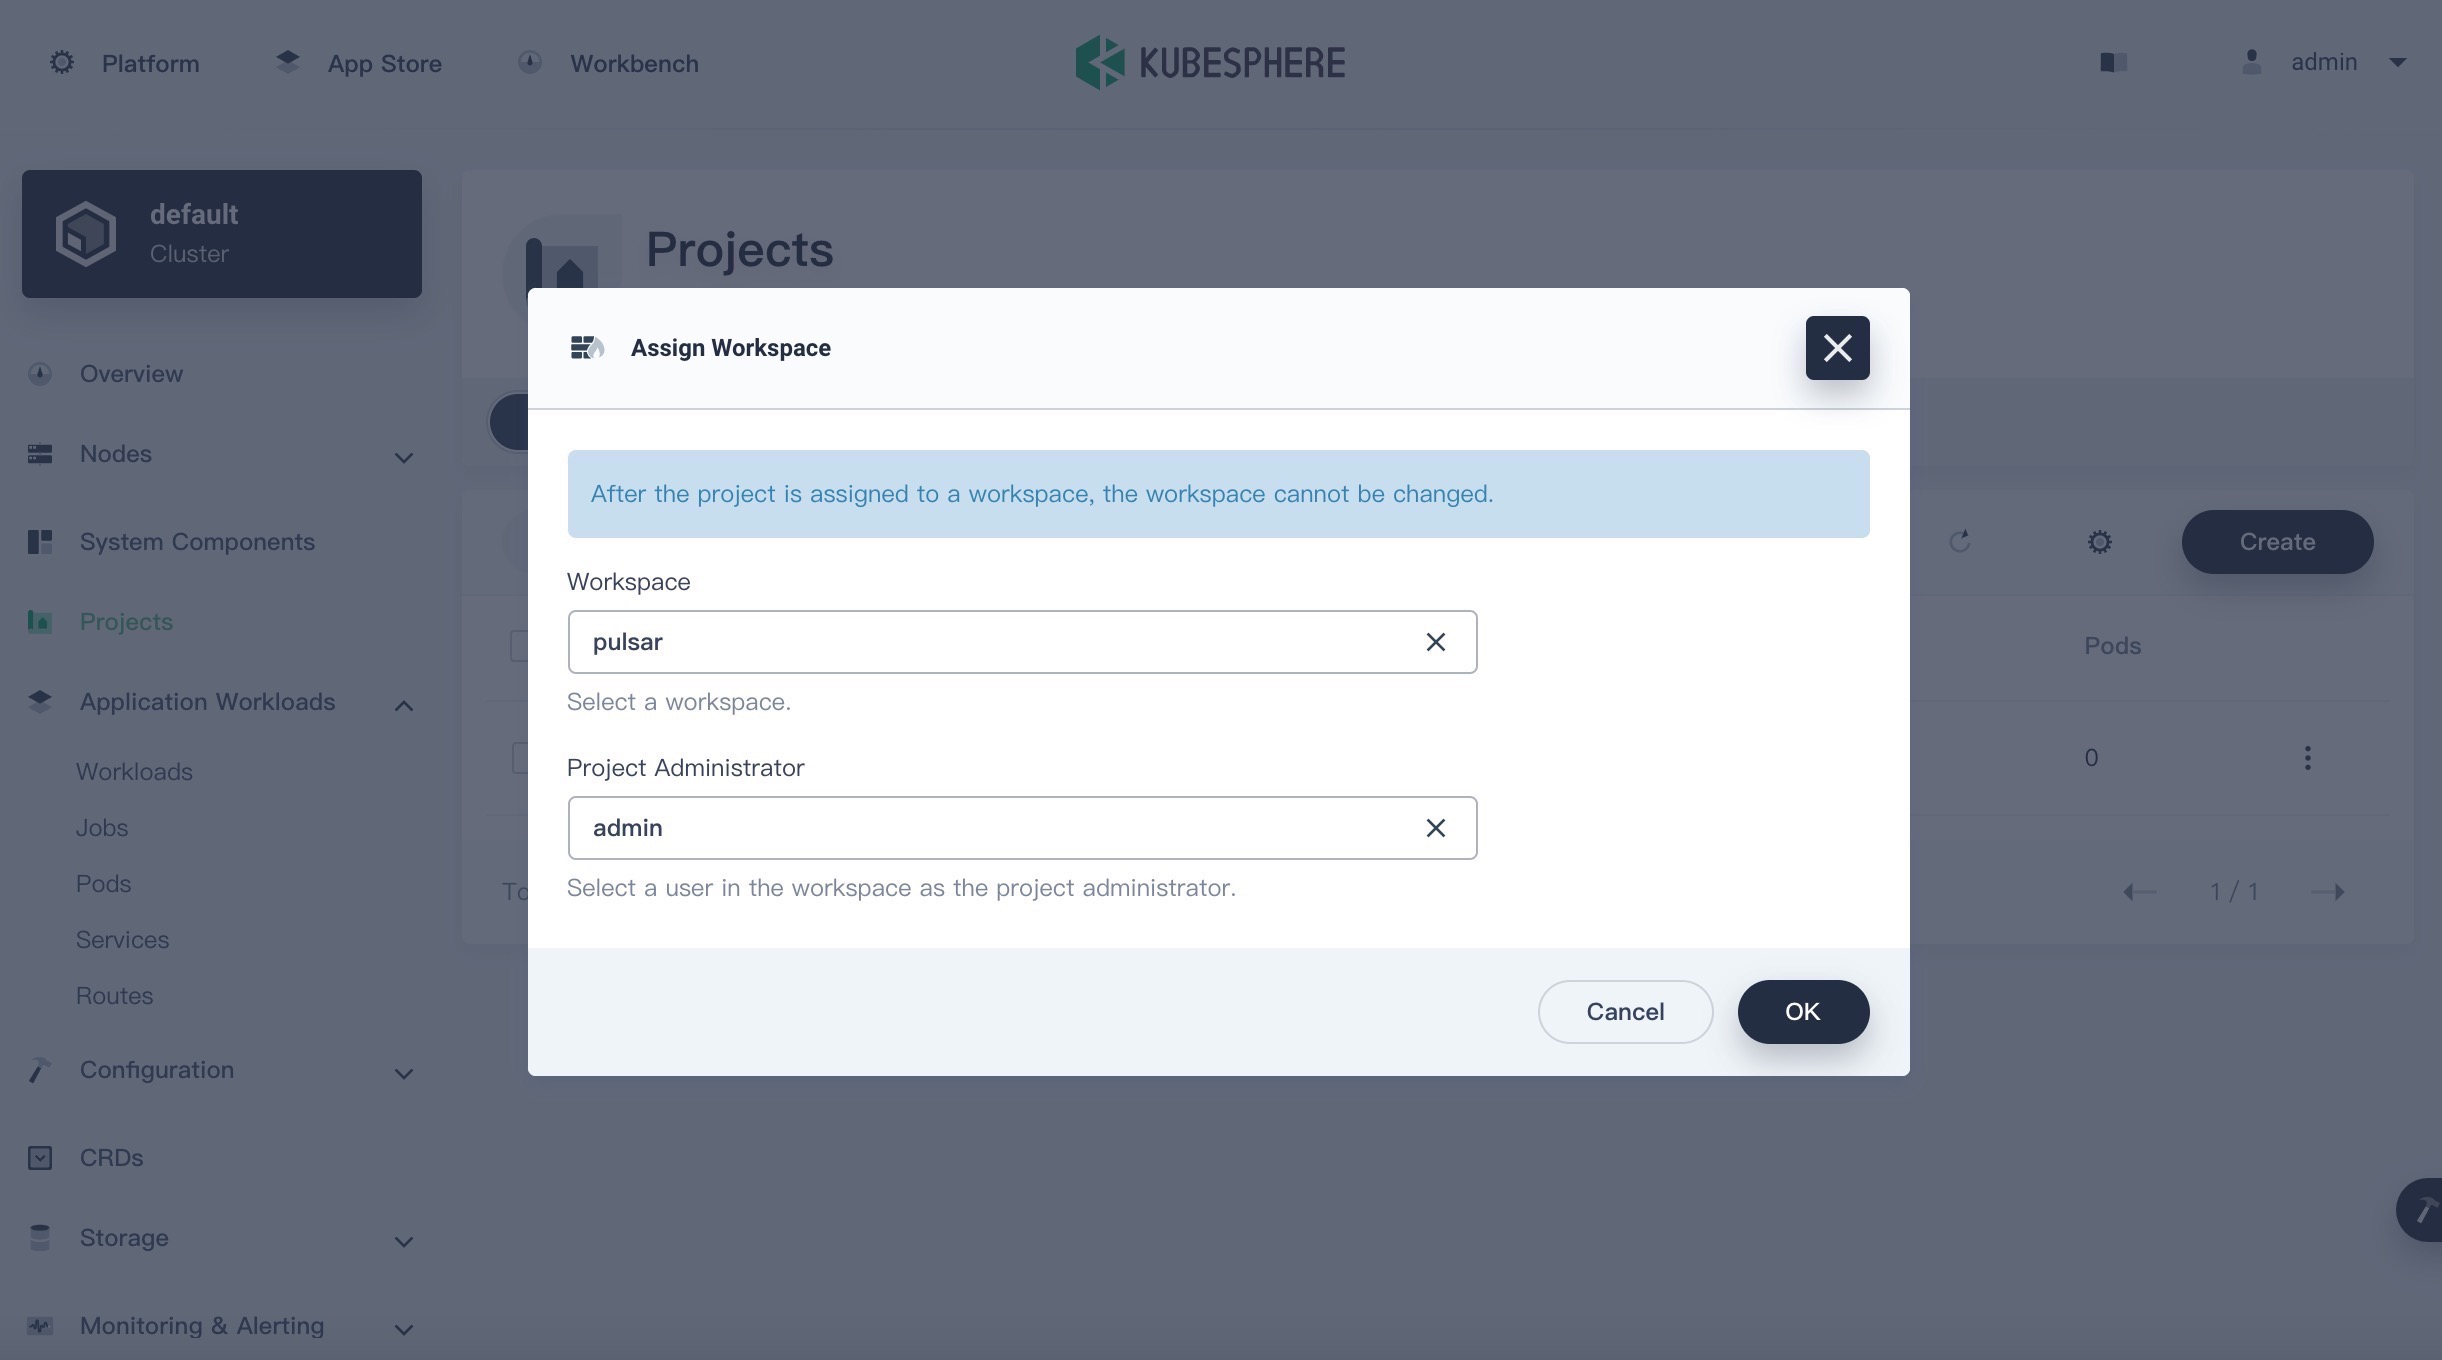
pulsar) and password (pulsar) stored in them can be used to log in to the Grafana dashboard and Pulsar Manager later. You can create these Secrets one by one, but I highly advise you to use a script provided in the Pulsar documentation. Clone a GitHub repository and run the script to set these Secrets automatically.Shellgit clone https://github.com/apache/pulsar-helm-chart cd pulsar-helm-chart ./scripts/pulsar/prepare_helm_release.sh \ -n pulsar \ -k pulsar-mini \ -c- The above commands create a namespace called
pulsarin your Kubernetes cluster. To add it to thepulsarworkspace, go to Cluster Management in Platform and manually assign it to the workspace.![Assign pulsar namespace]()
For more information, see Add Existing Kubernetes Namespaces to a KubeSphere Workspace.
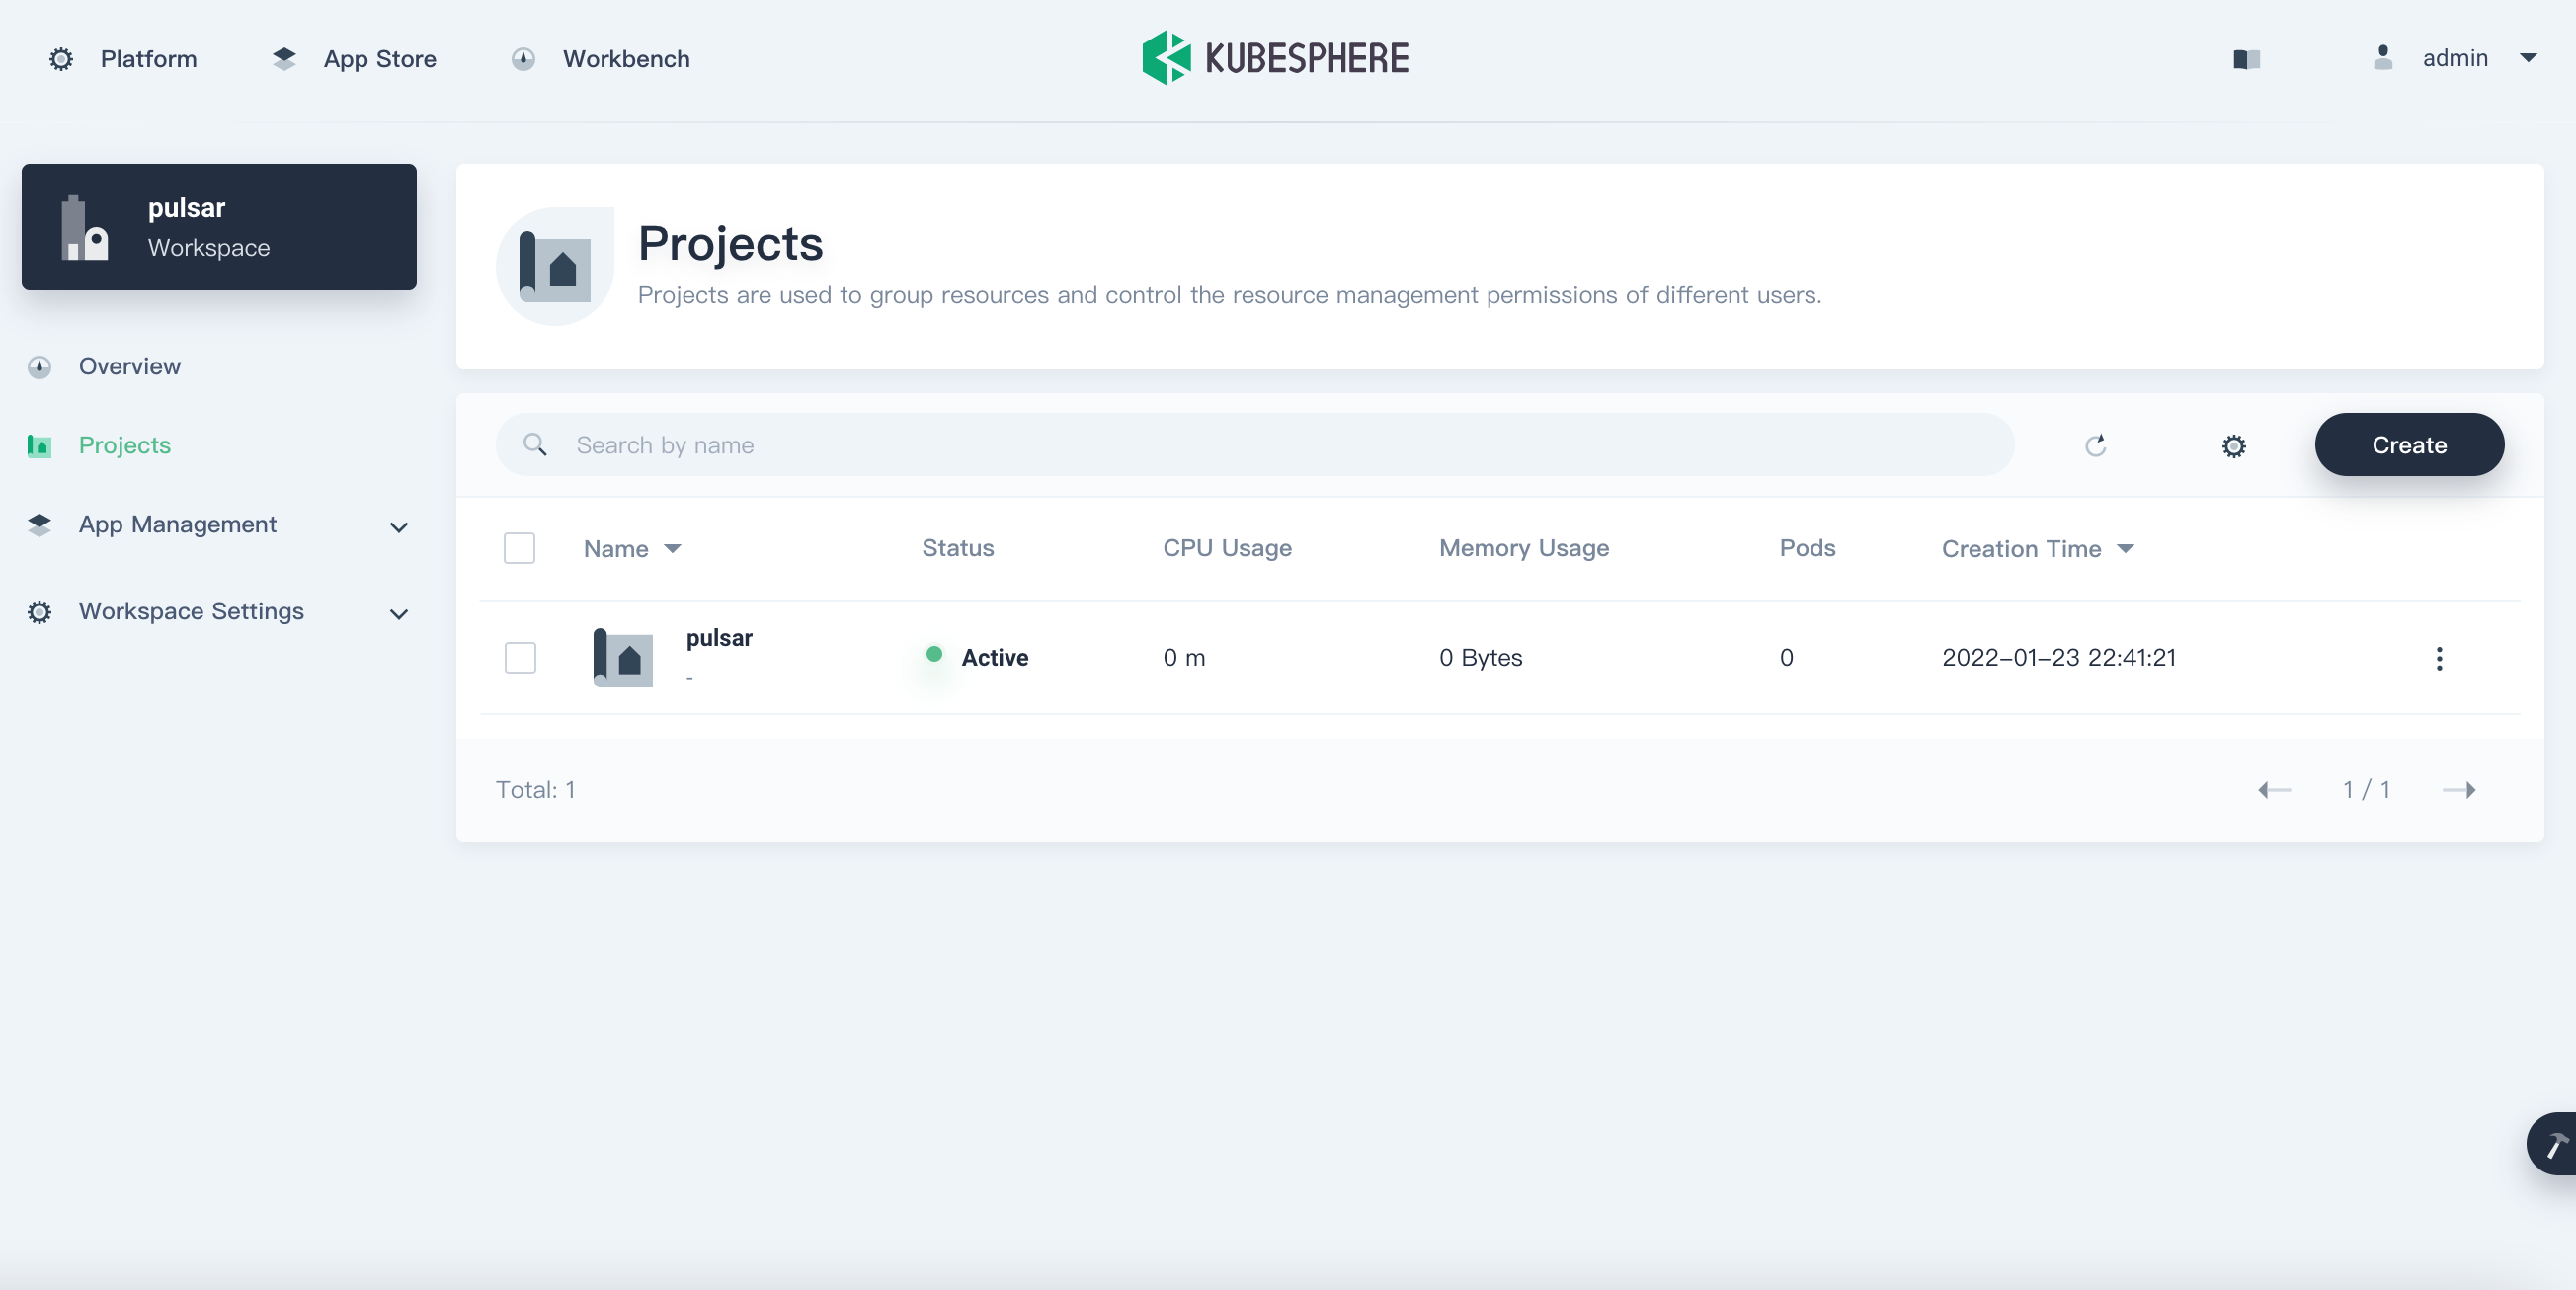
- Now let’s get back to the
pulsarworkspace. We can see that thepulsarnamespace has been added. In KubeSphere, a Kubernetes namespace is known as a KubeSphere project. Click it to see details.![Details of pulsar workspace]()
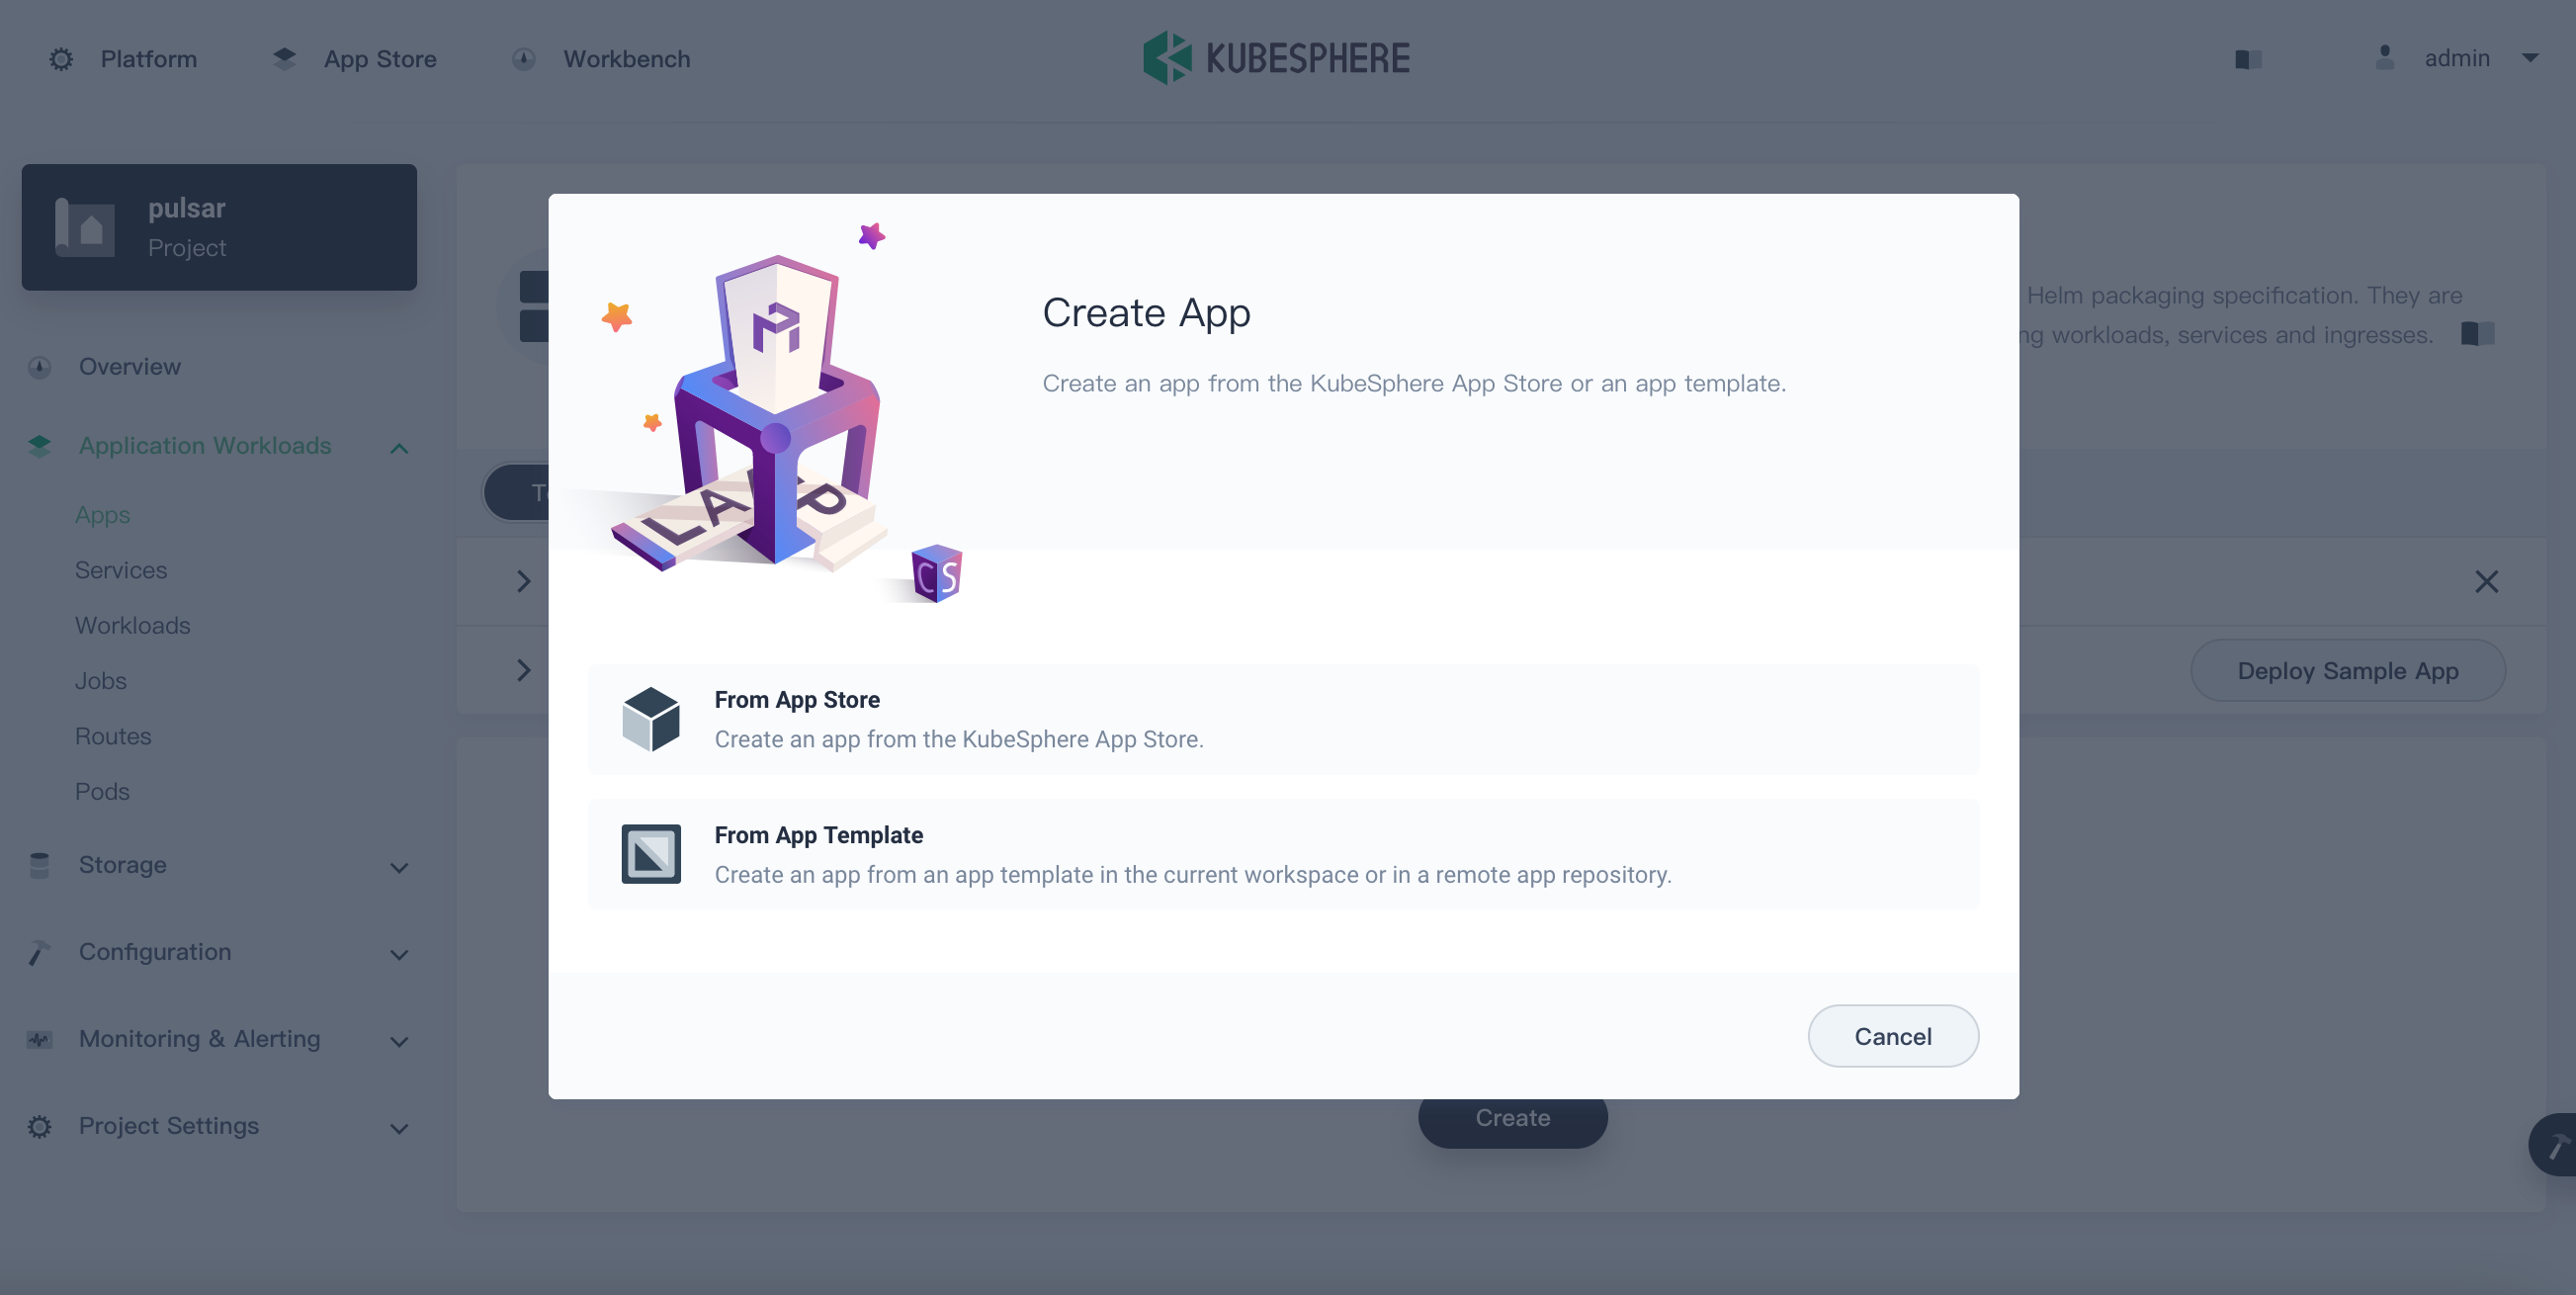
Go to Apps under Application Workloads. Click Create on the Template-Based Apps tab and select From App Template.
![Create template-based app]()
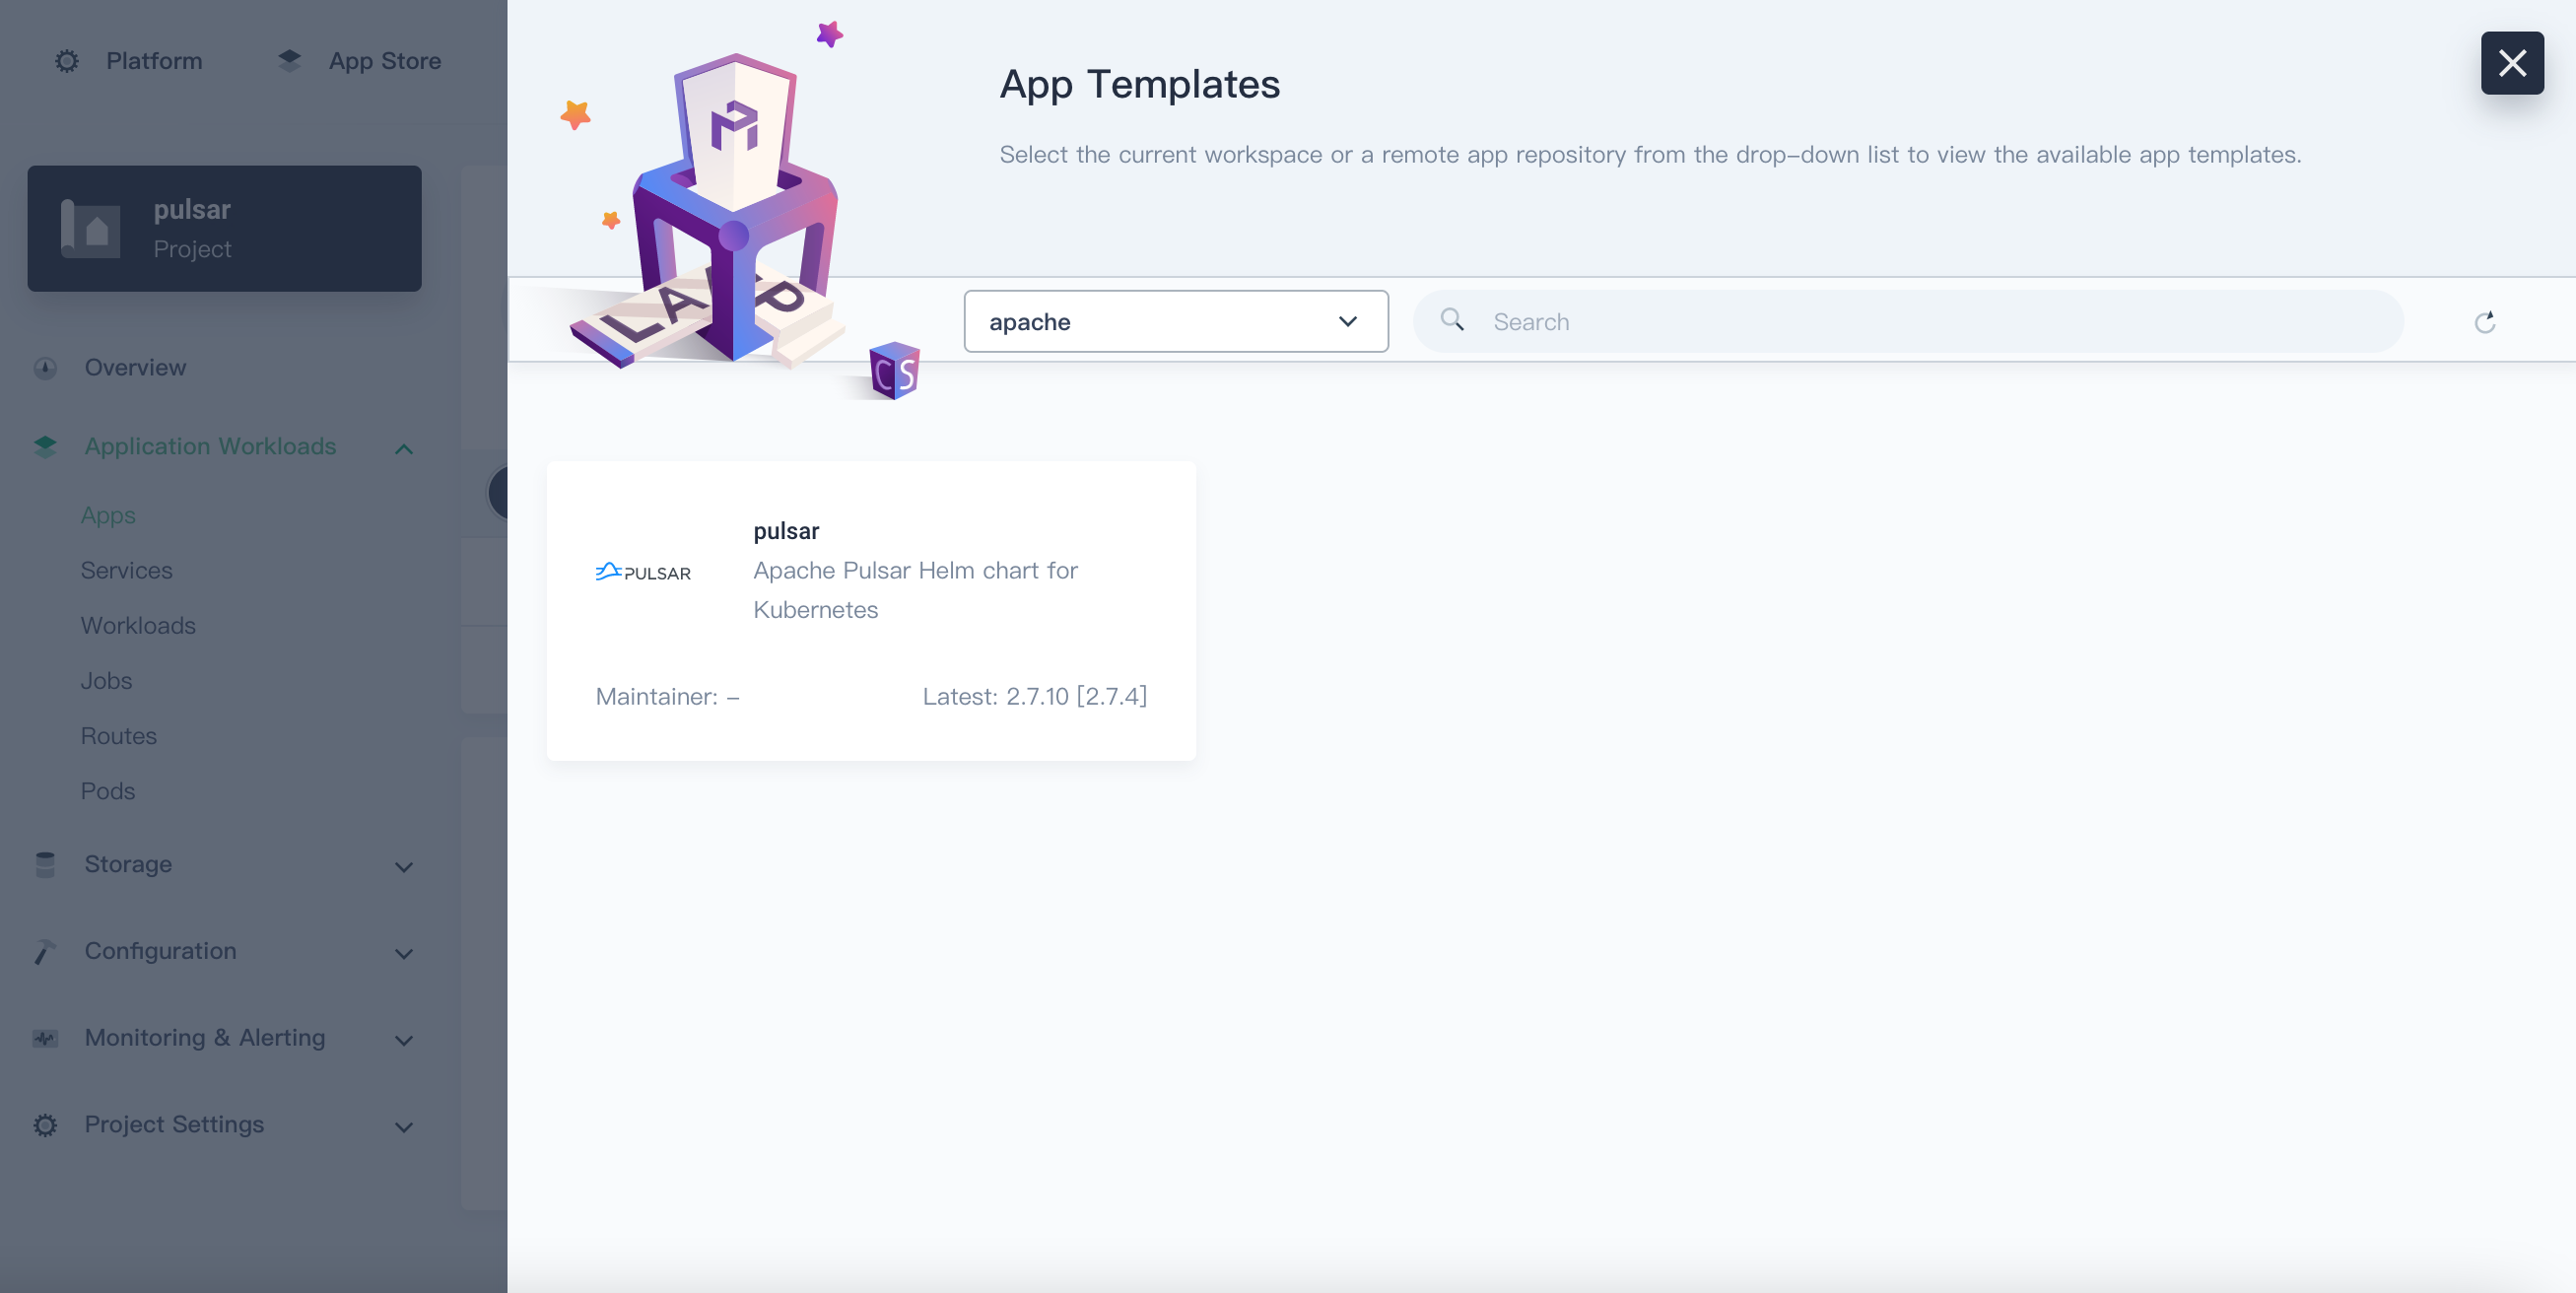
Switch to the
apacherepository that stores the Pulsar Helm chart.![Apache repository]()
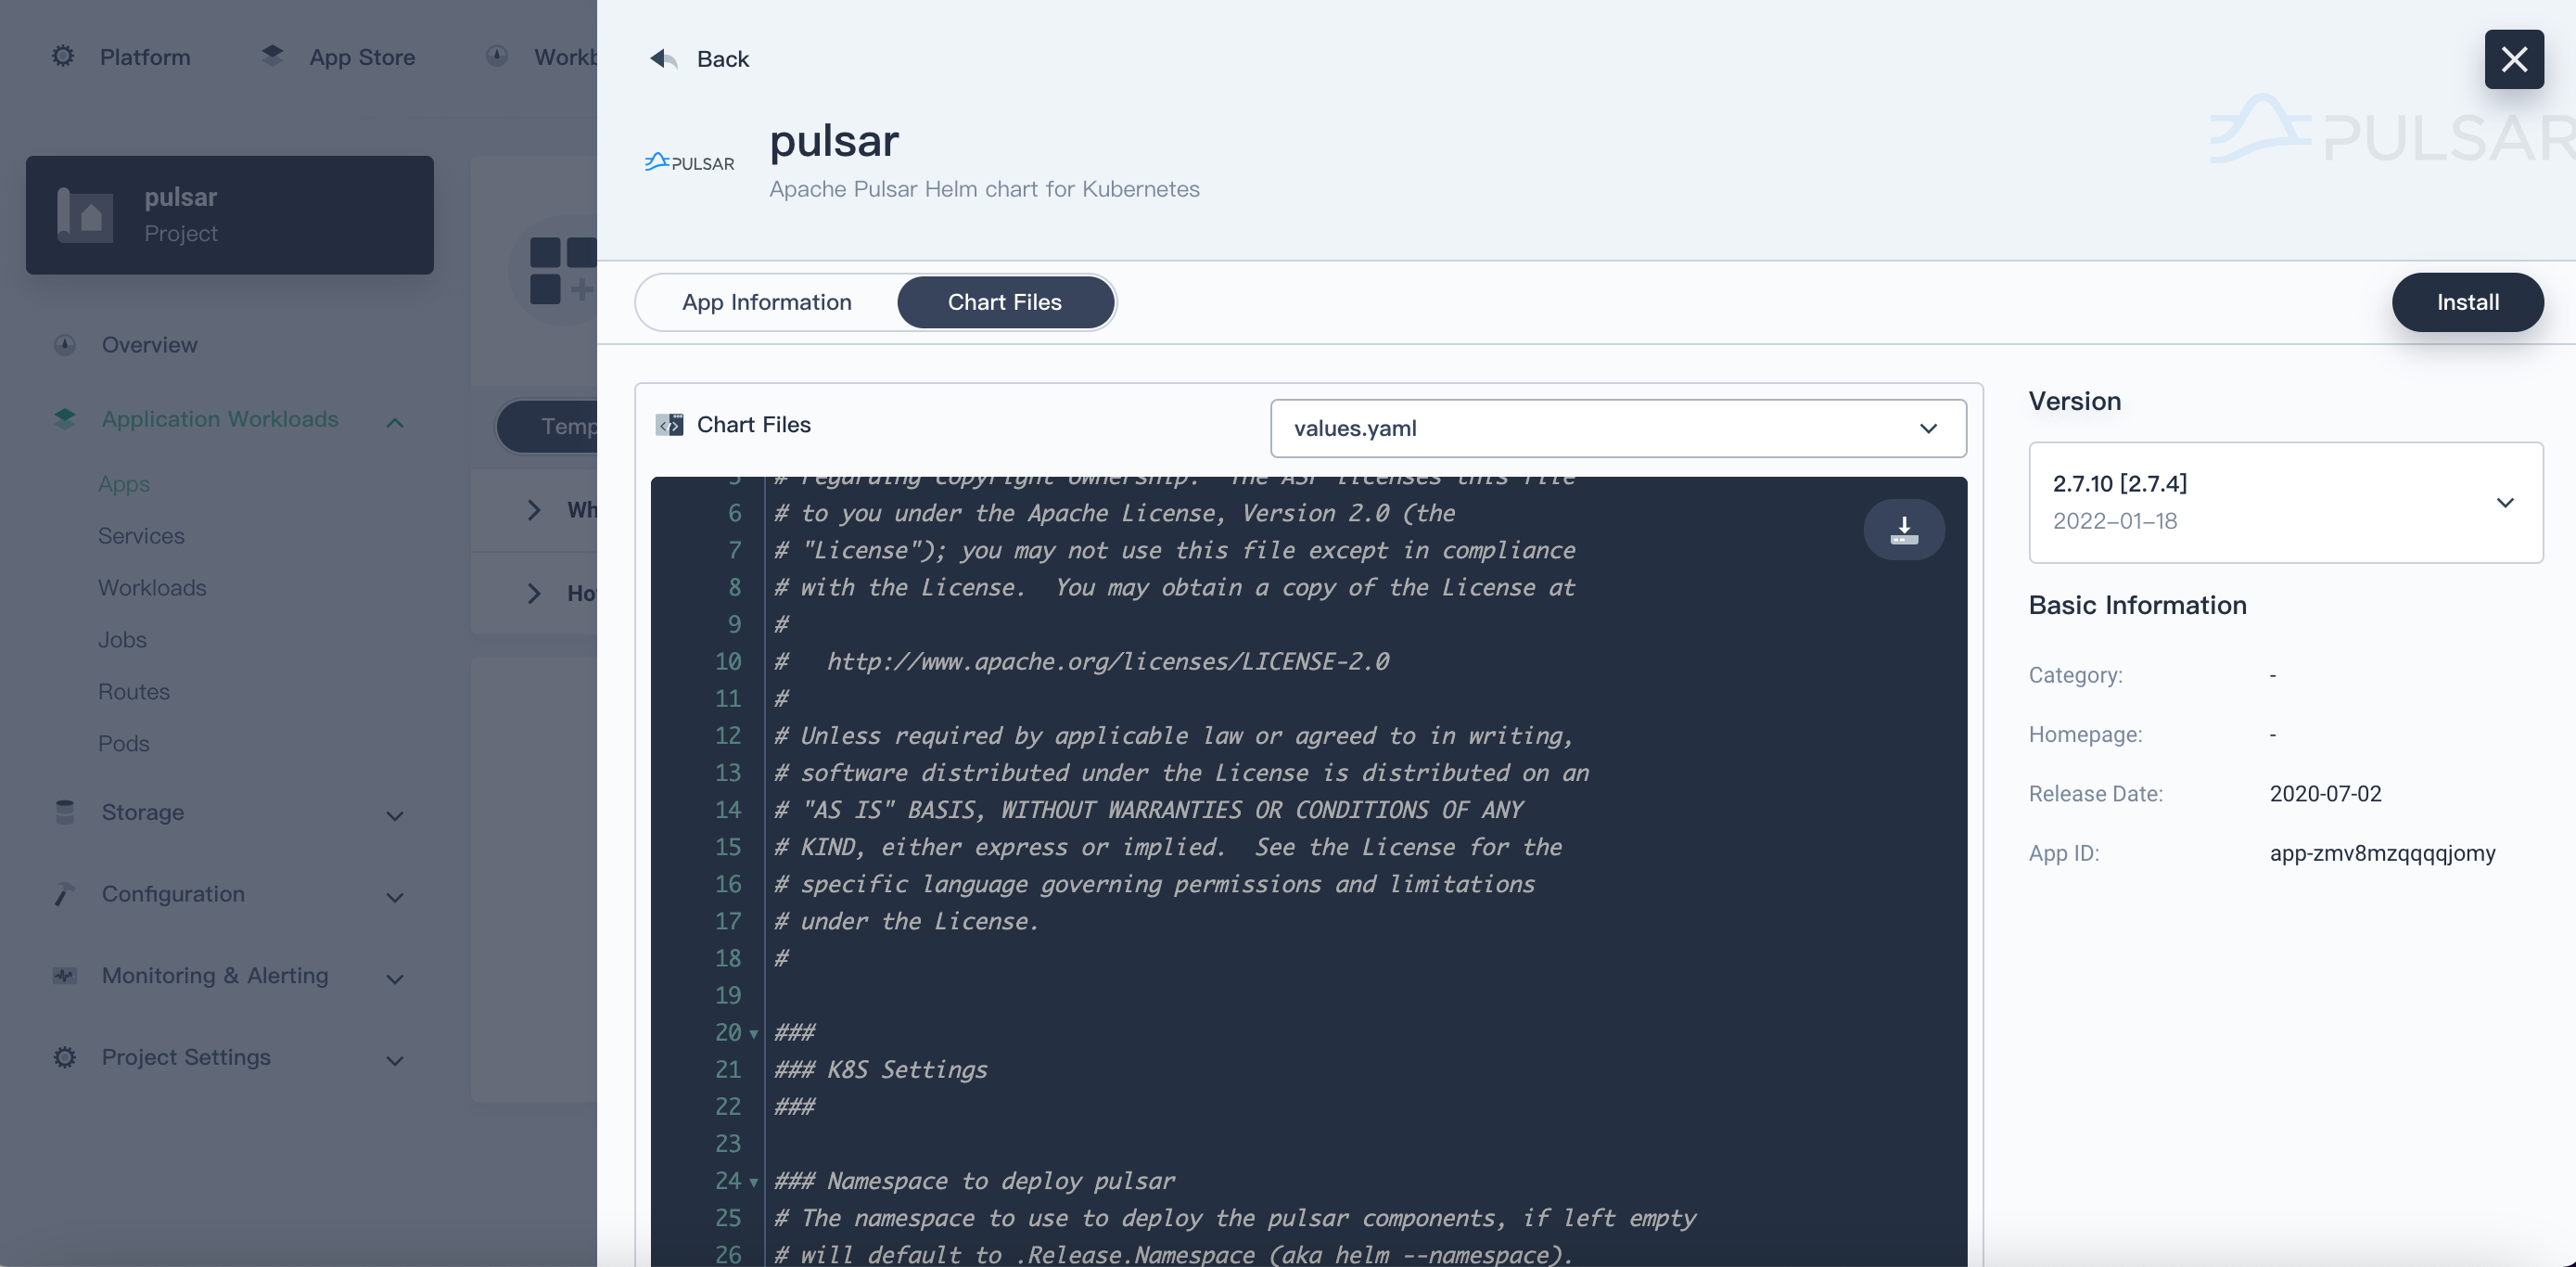
Click Pulsar. On the Chart Files tab, we can view the configuration from the console directly. From the drop-down menu on the right, we can also see the available versions.
![Chart files]()
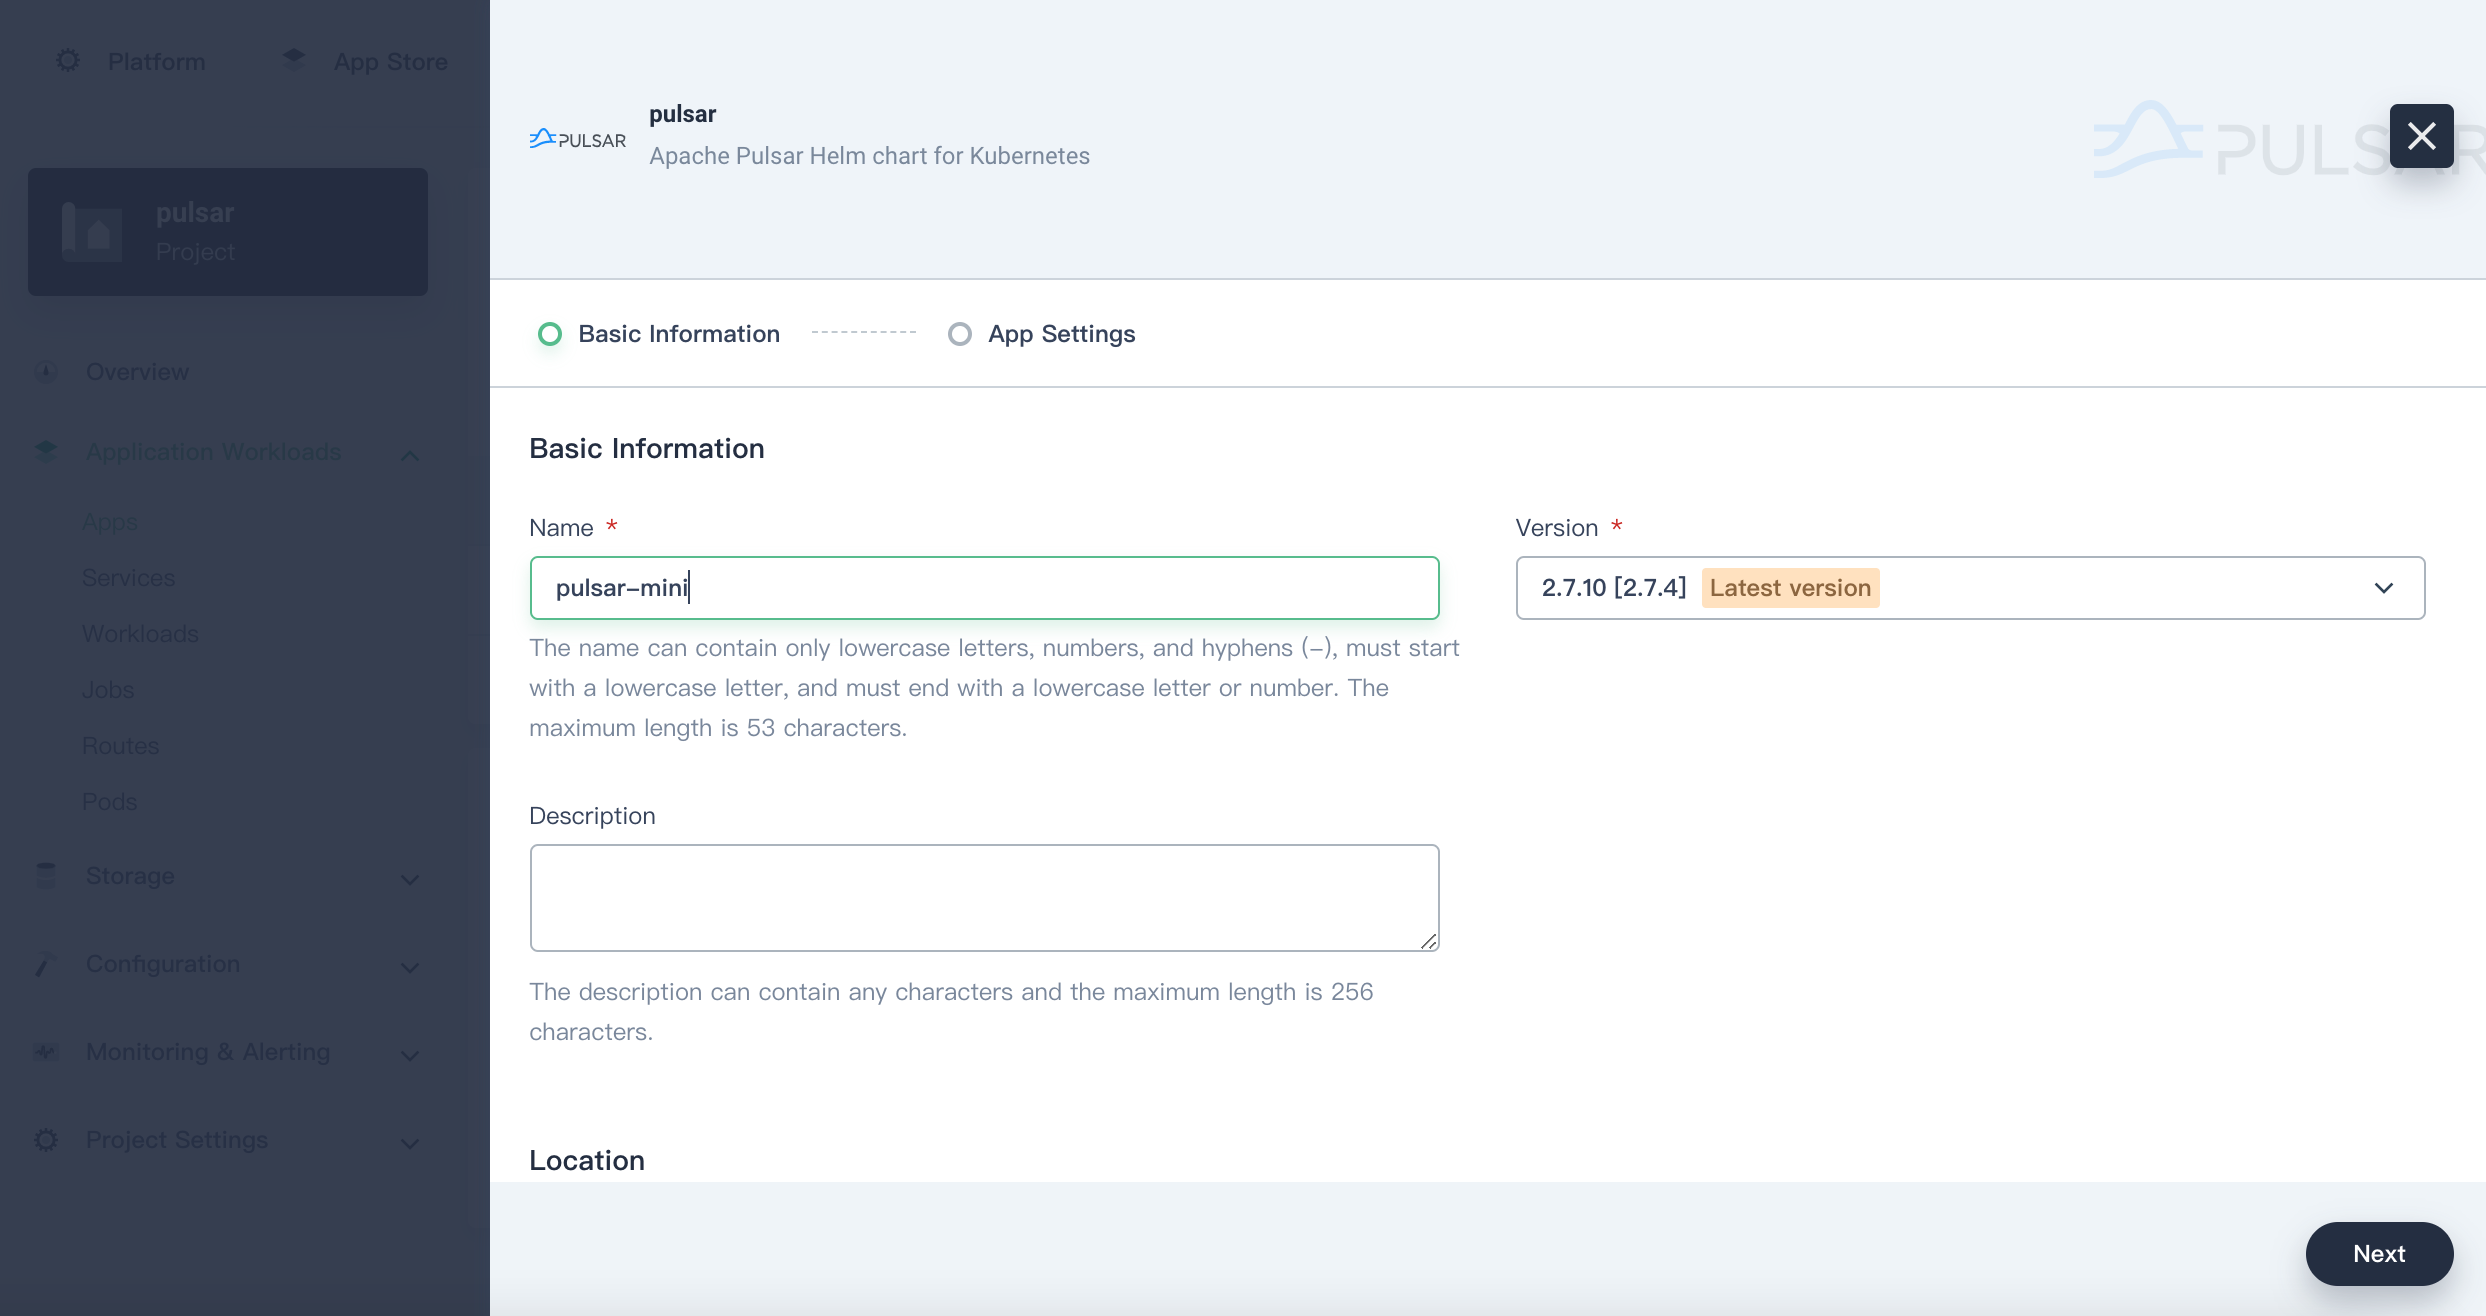
Click Install. On the Basic Information page, confirm the app name, version, and project (namely, namespace) where Pulsar will be deployed. Click Next to continue.
![Basic information page]()
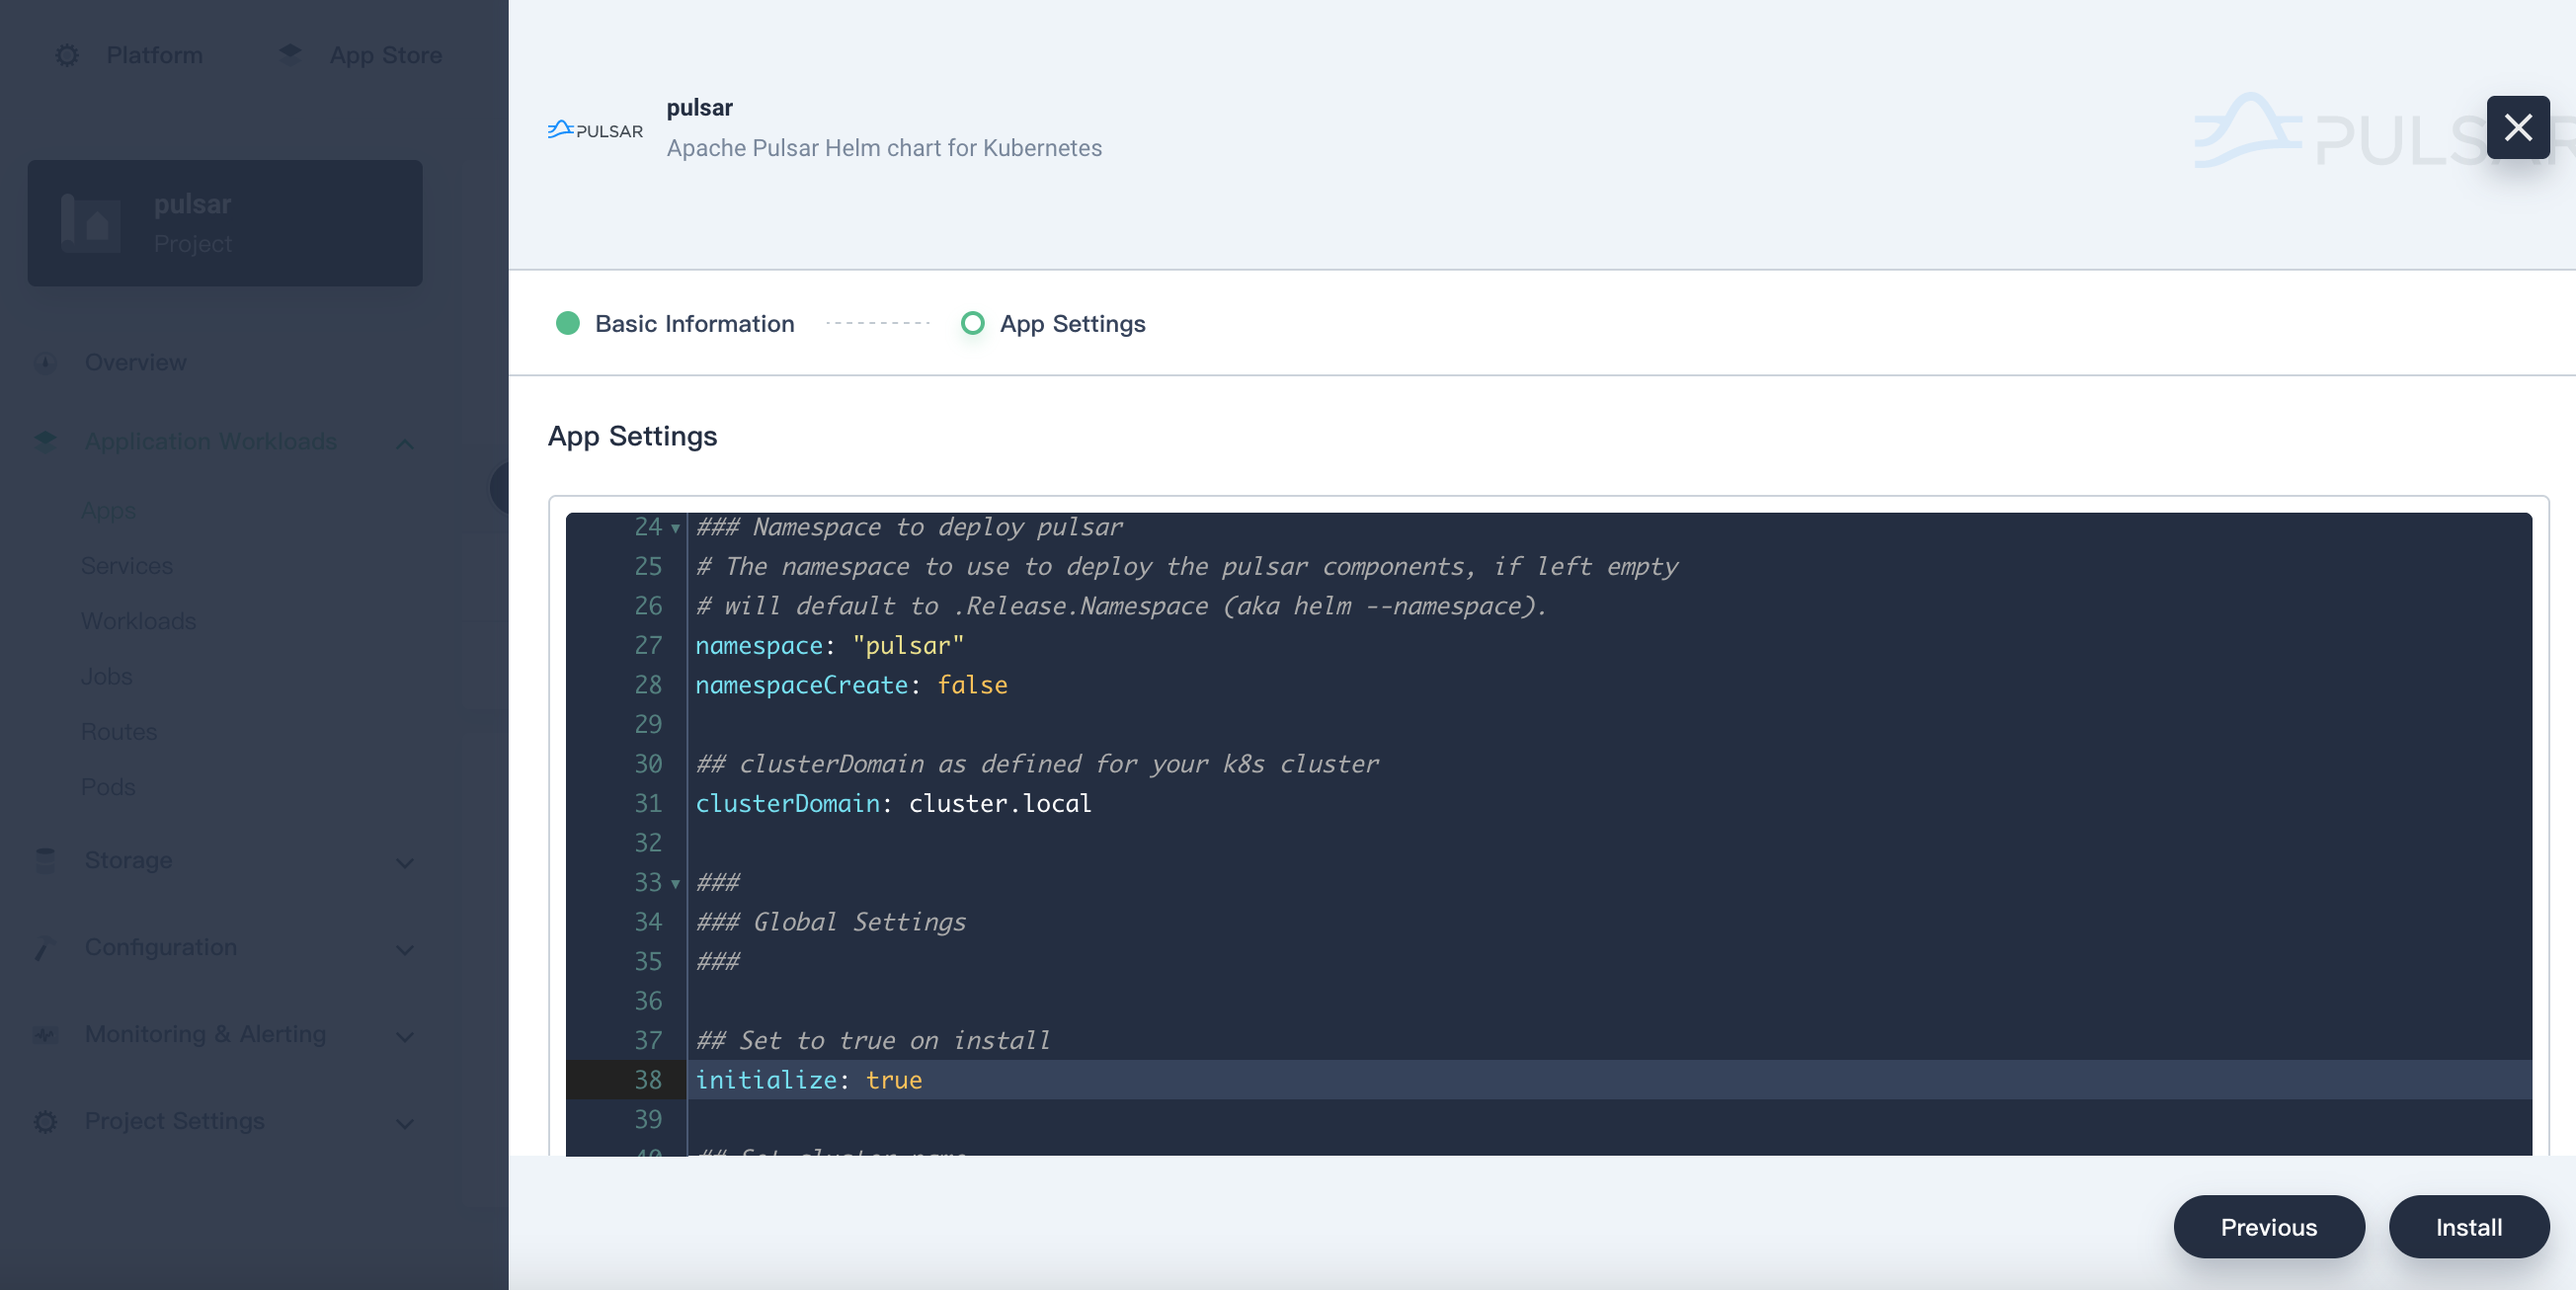
Edit the
values.yamlfile in this step. When you are done, click Install. Keep in mind that you need to set the value ofinitializetotruewhen installing Pulsar the first time. This command installs and starts Pulsar.![App settings: code]()
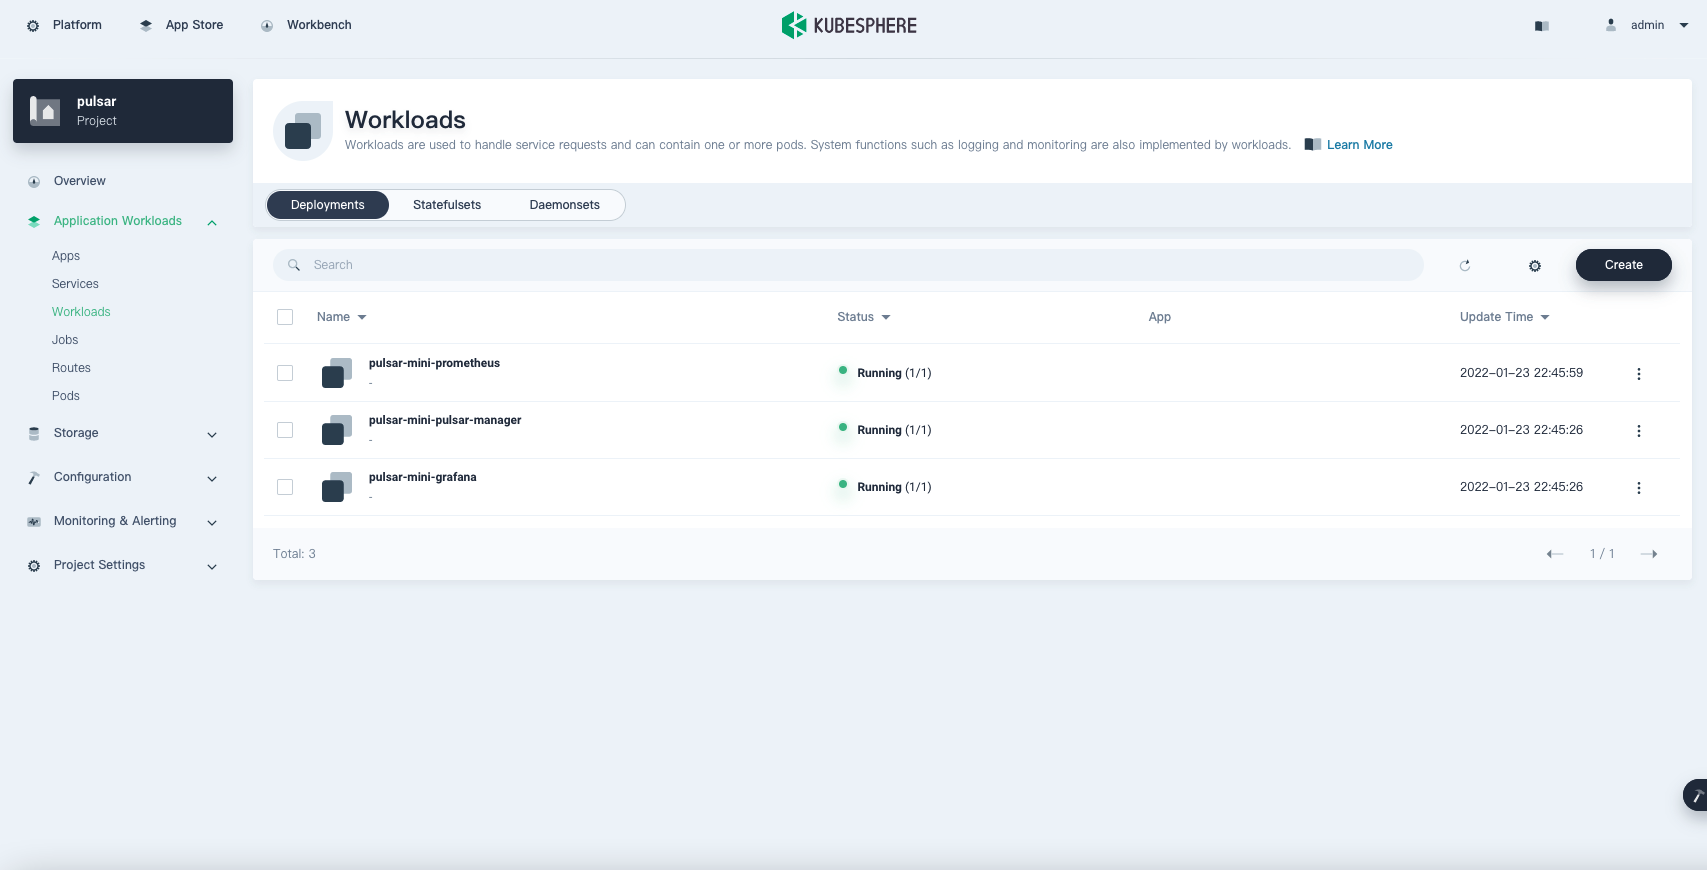
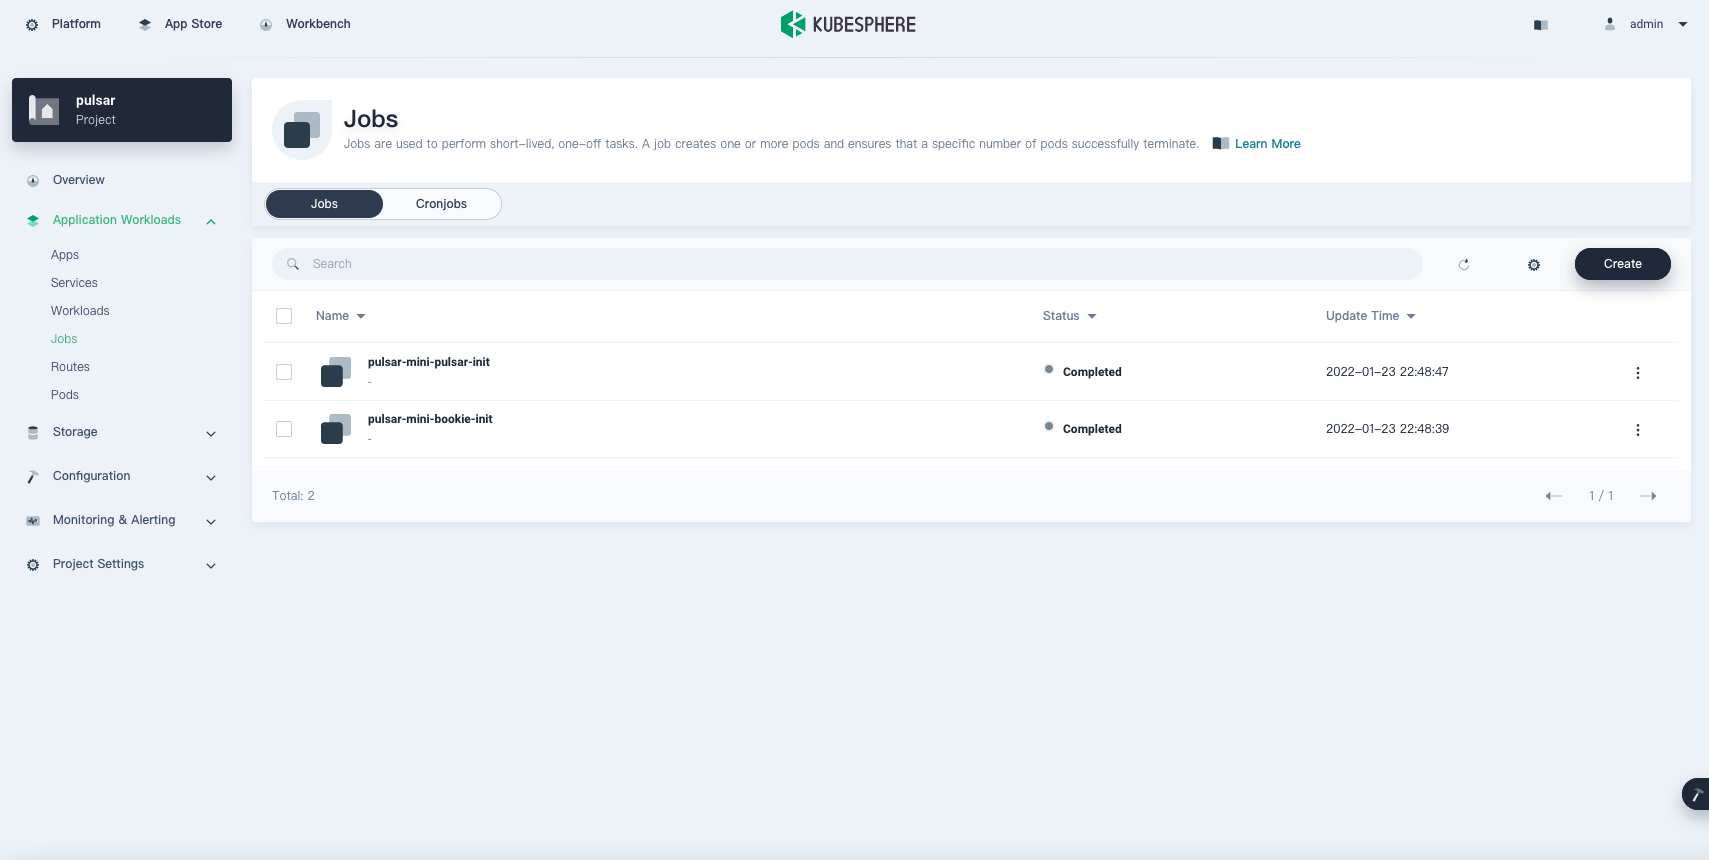
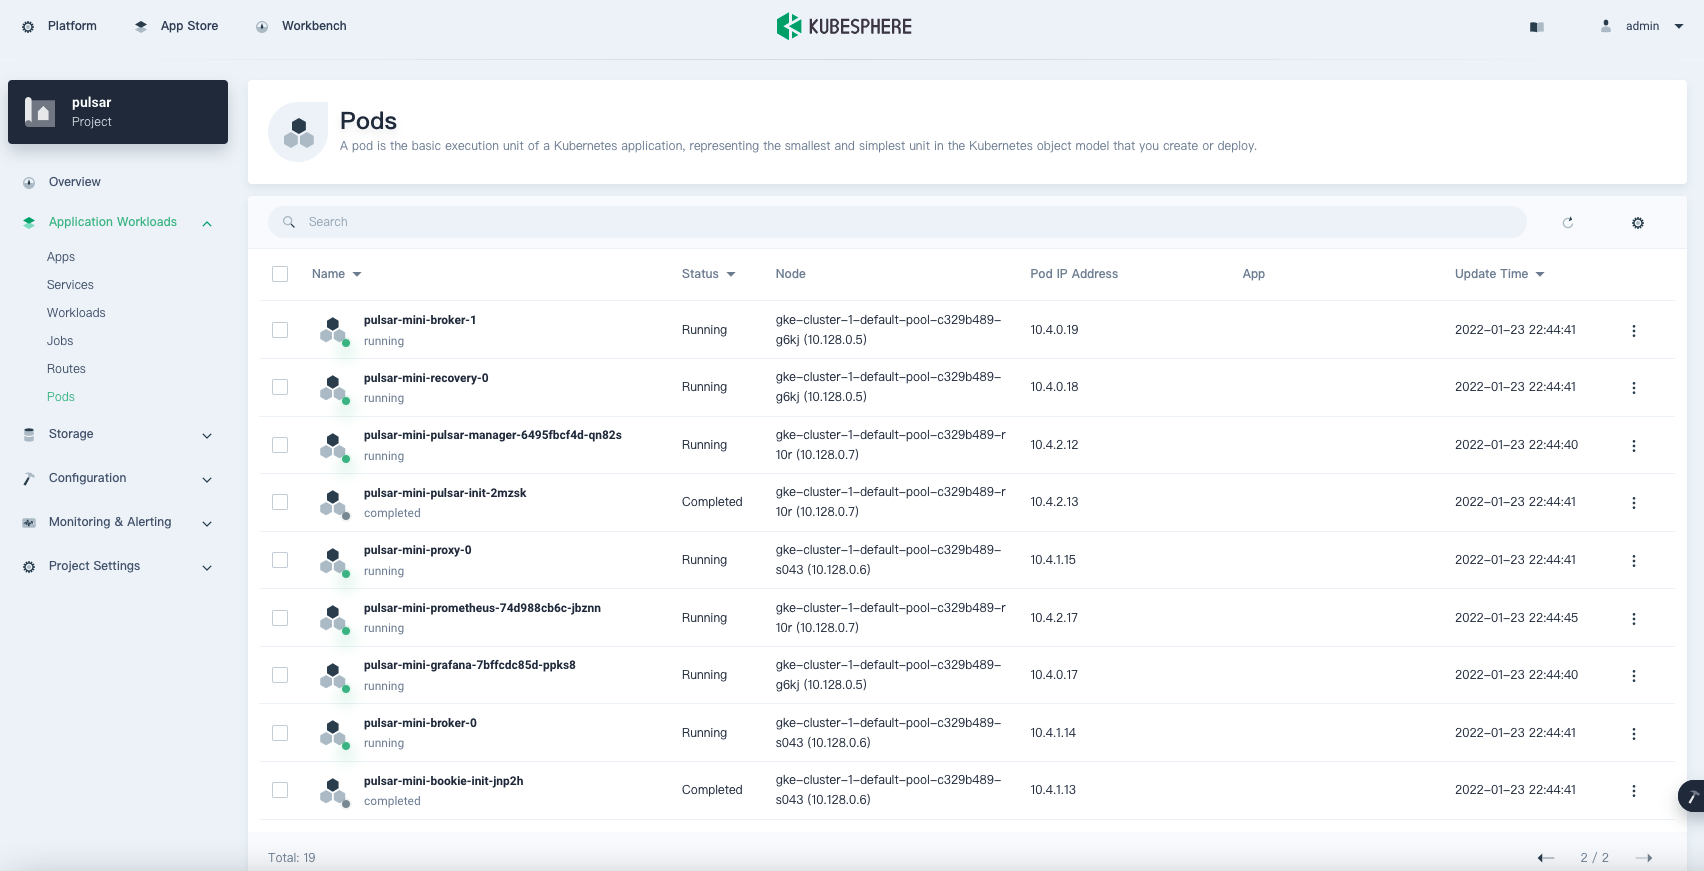
- Wait for Pulsar to be up and running. Switch between Services, Workloads, Jobs, and Pods to check all resources are ready.
![Services list]()
![Workloads list]()
![Jobs list]()
![Pods list]()


Using pulsar-admin to Create Pulsar Tenants, Namespaces, and Topics
pulsar-admin is the command-line interface (CLI) tool for Pulsar. You can perform the following steps to create resources with pulsar-admin.
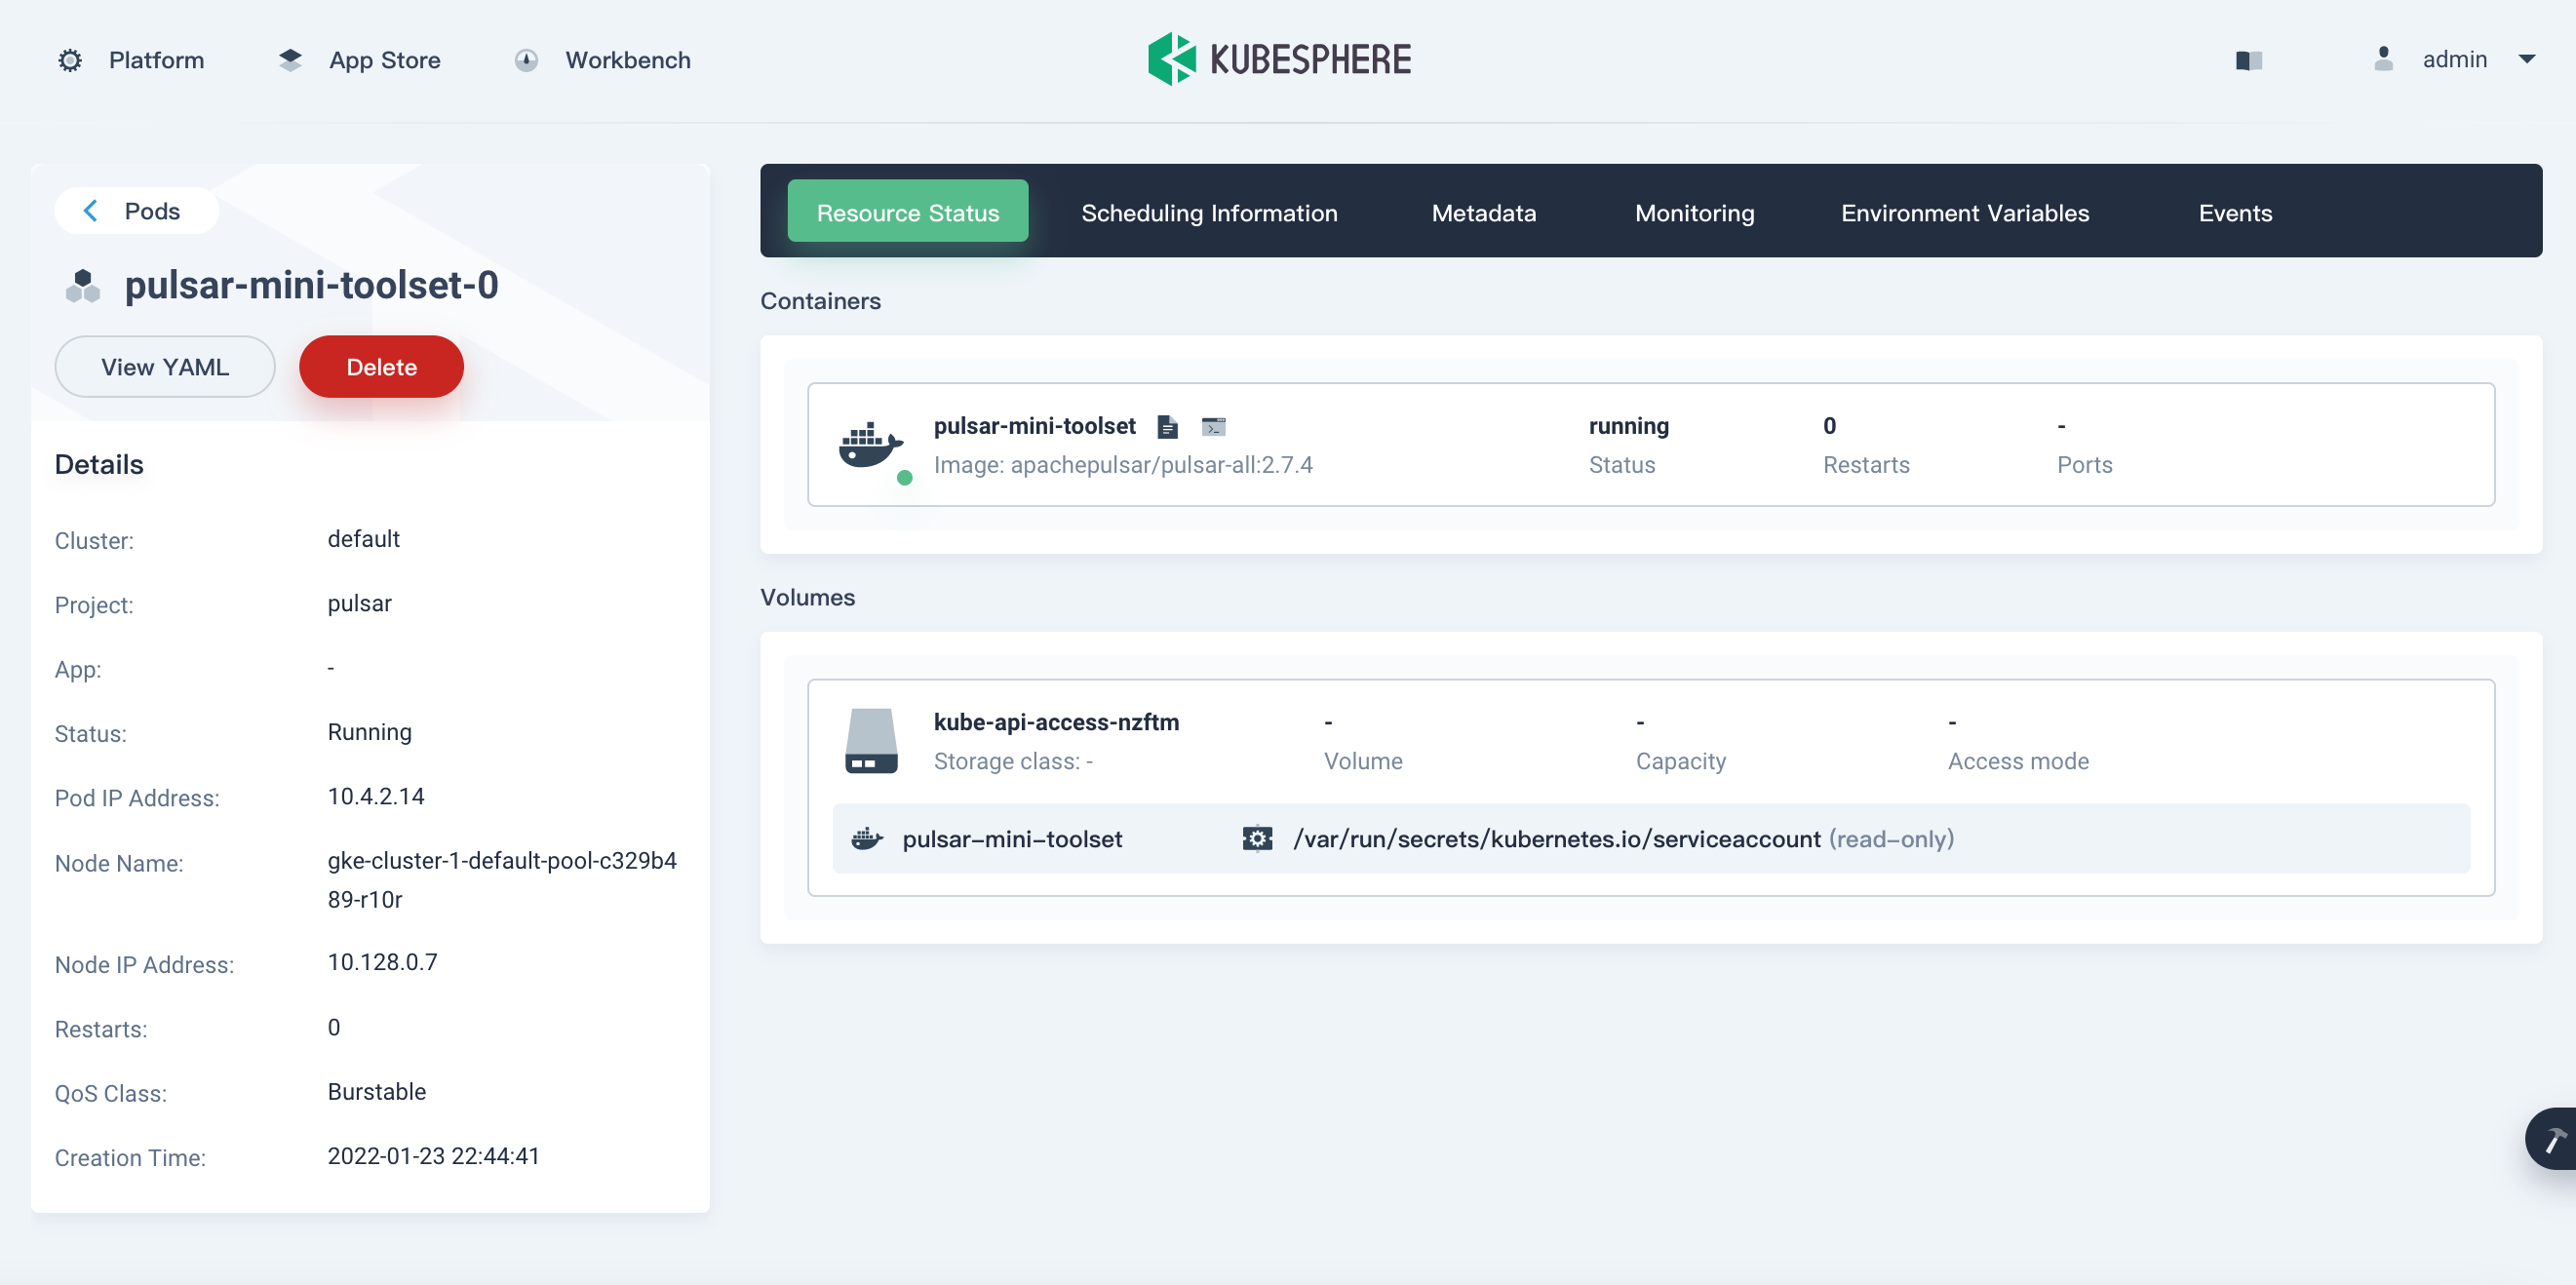
Navigate to the
toolsetPod and click the terminal icon on its detail page to access its container.![pulsar-mini-toolset-0]()
A terminal will appear, where we can run commands in the container of the Pod directly. Create a tenant named
apacheand list all the tenants.Shellbin/pulsar-admin tenants create apache bin/pulsar-admin tenants listIn the
toolsetcontainer, create a namespace namedpulsarfor the tenantapacheand list the namespaces of the tenantapacheto see if the namespace is created successfully.Shellbin/pulsar-admin namespaces create apache/pulsar bin/pulsar-admin namespaces list apacheExpected output:

Accessing Pulsar Manager
Pulsar Manager is a web-based visualized tool for managing and monitoring Pulsar. We can follow the steps below to access it.
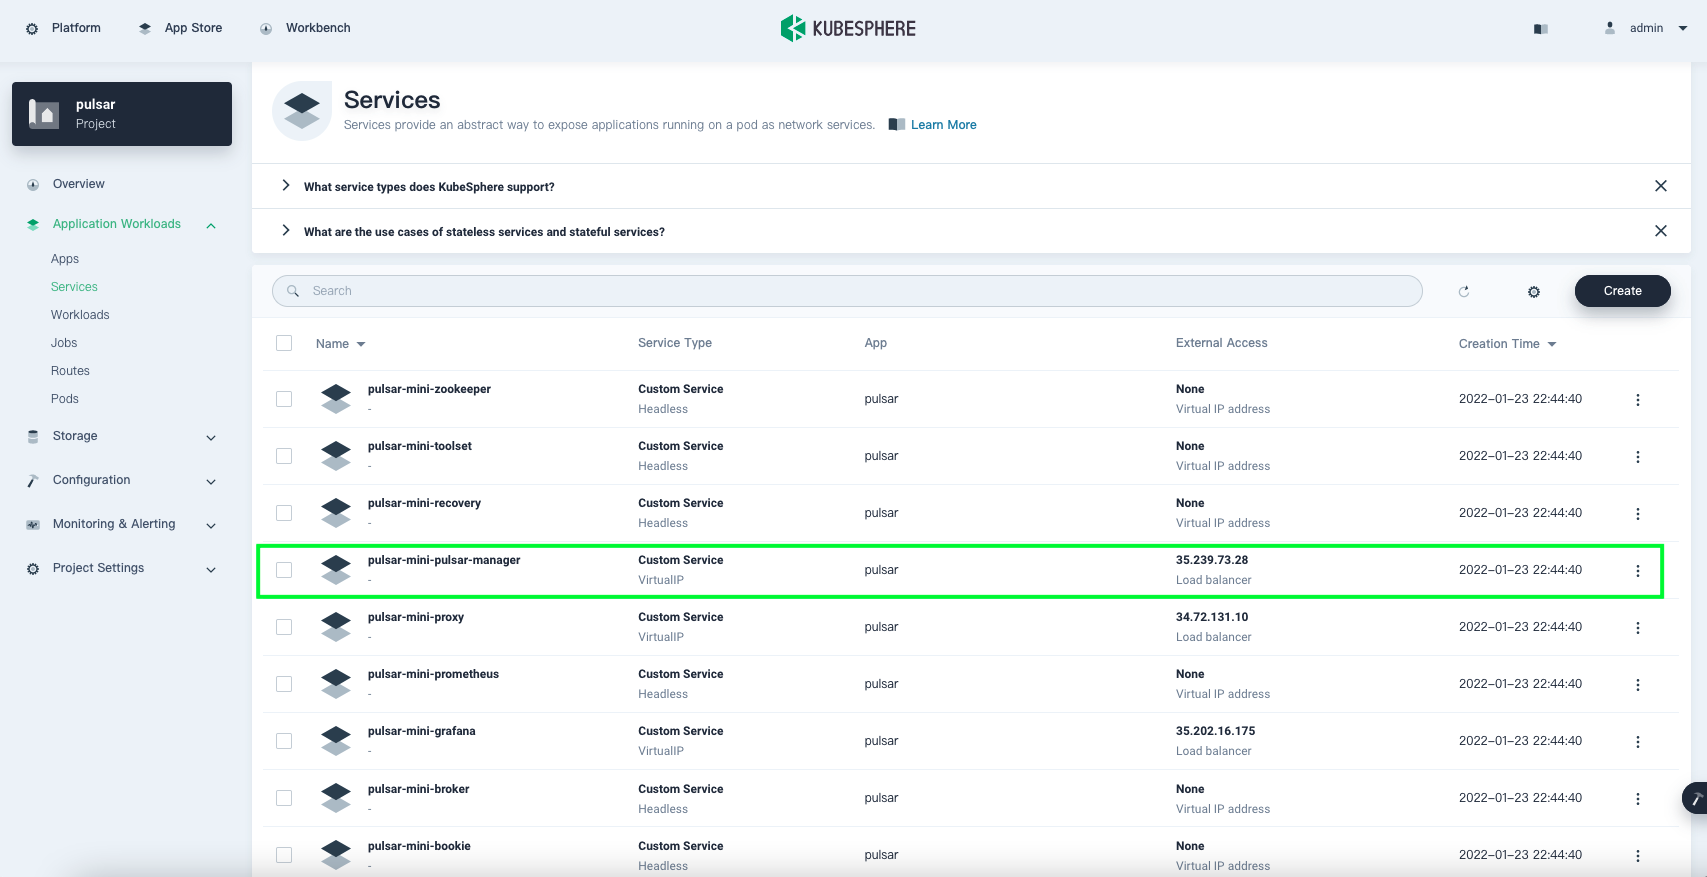
- Navigate to the
pulsar-managerService and go to its detail page. By default, the Pulsar Manager Pod is controlled by a Deployment (pulsar-mini-pulsar-managerin my example), exposed by a Service viaLoadBalanceras shown below.![pulsar-mini-pulsar-manager]()
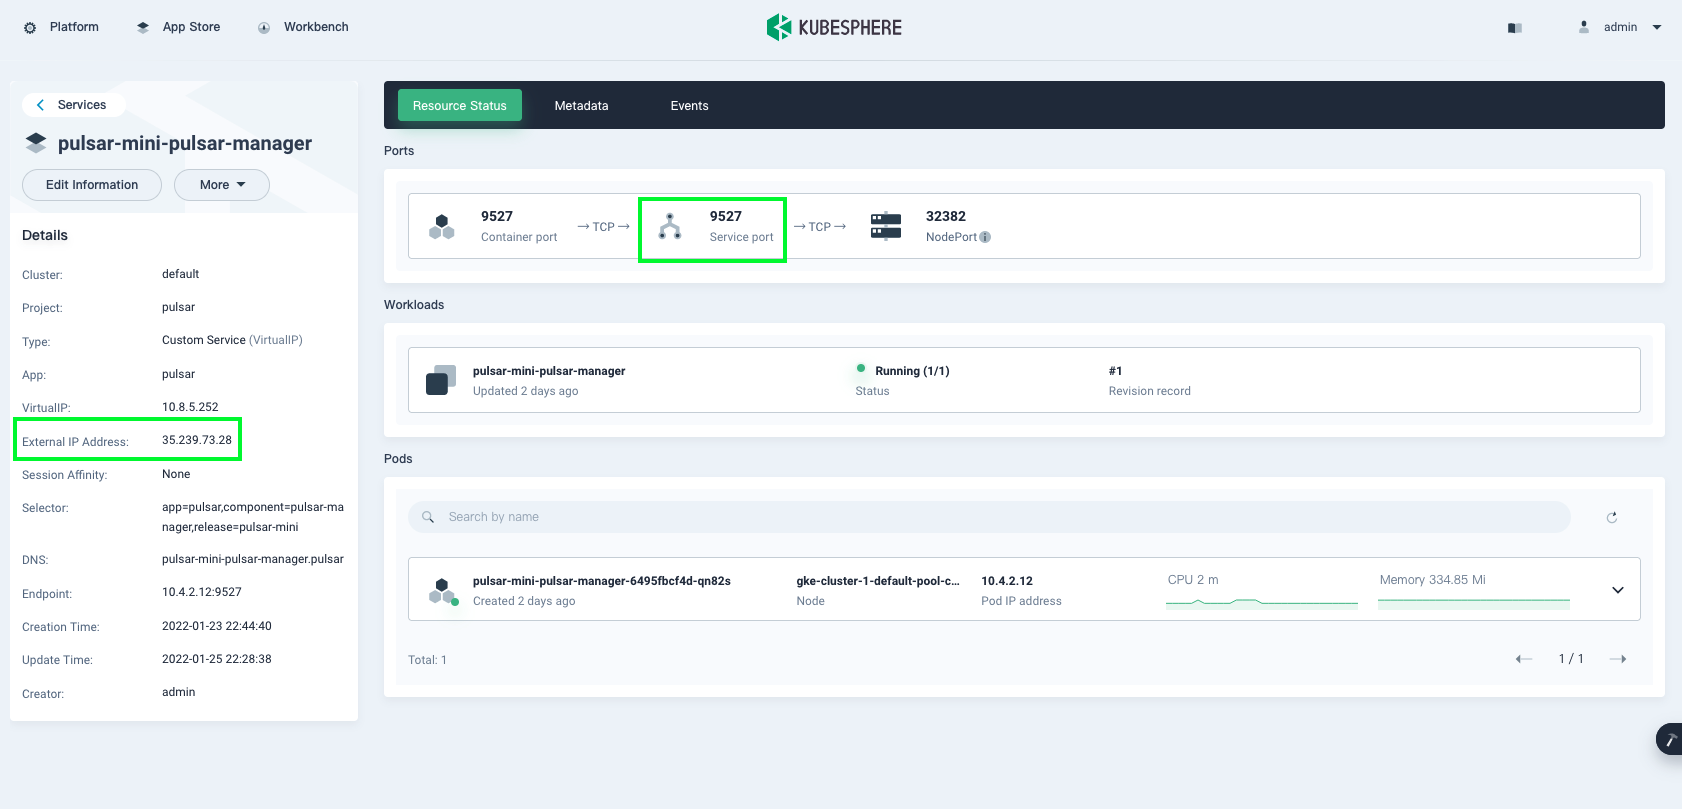
- If you are using a managed Kubernetes service, the provider will assign a public IP address to it. Access Pulsar Manager using the IP address (
35.239.73.28) and the Service port (9527).![Locating IP address and Service port]() If no available public IP address is assigned for the
If no available public IP address is assigned for the LoadBalancerService (this may happen if your cluster is created on cloud instances directly without load balancers or in a private environment), access Pulsar Manager using a node IP address and the node port. However, you may need to configure relevant firewall rules or port forwarding rules depending on your environment. Use the username (
pulsar) and password (pulsar) to log in to Pulsar Manager.![Login screen]()
Create an environment as needed.
 If no available public IP address is assigned for the
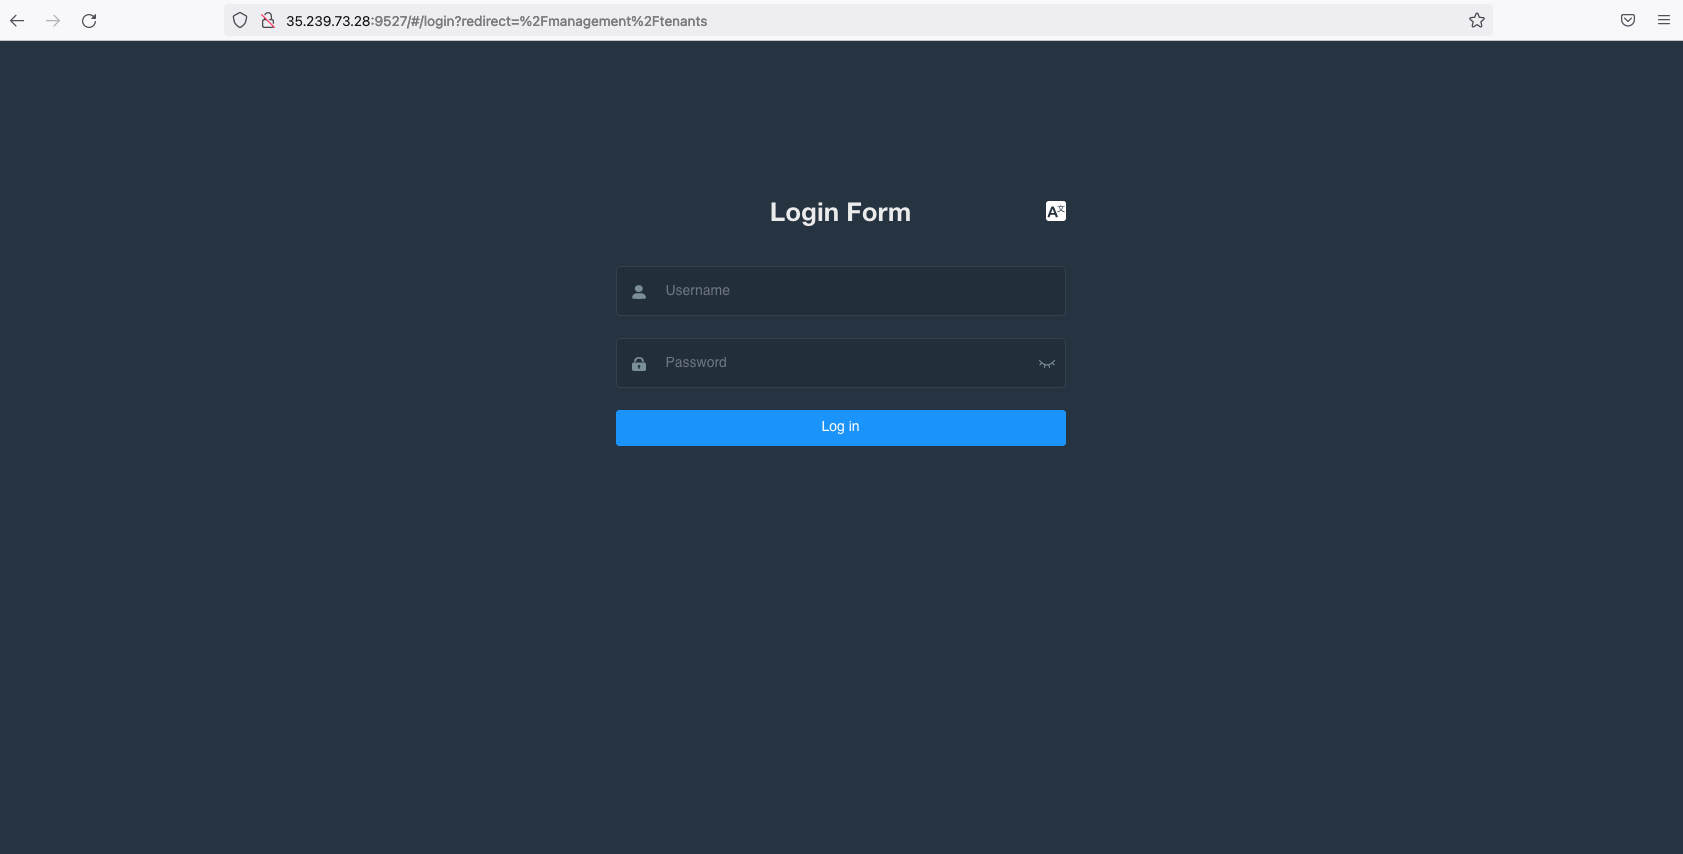

Both Apache Pulsar and KubeSphere have much to offer for enterprise users and open-source enthusiasts. What I have covered in this article only serves as a quickstart for someone who wants to get a glimpse of them. Check out their latest documentation to understand more.
Opinions expressed by DZone contributors are their own.
Comments