Remote Monitoring With 360 Cameras and Raspberry Pi
Learn how you can build a DIY 360° camera robot with Rasberry Pi that can help businesses adapt to the new workflows required by COVID-19 restrictions.
Join the DZone community and get the full member experience.
Join For Free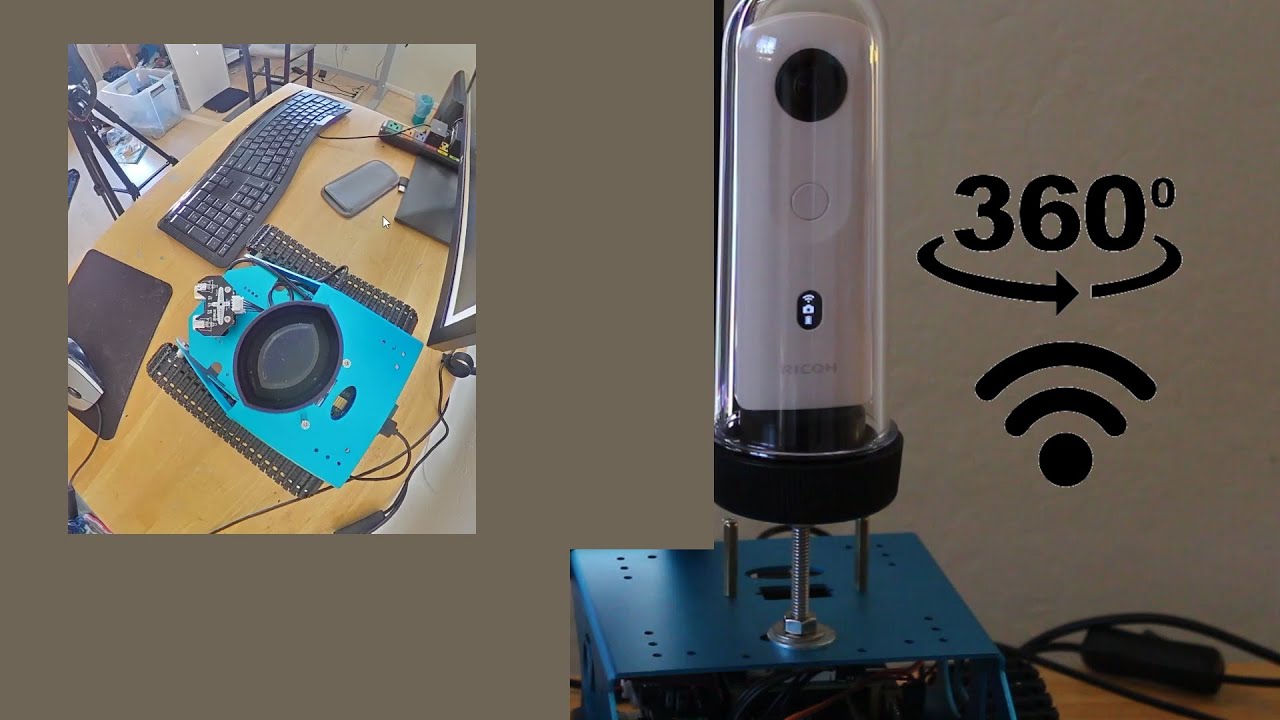
I built a prototype remote-monitoring system that provides surveillance and virtual inspection for businesses adapting to COVID-19 restrictions. For simplicity, the system uses 360° still-images rather than video or live stream. After working with hundreds of companies using 360° cameras to provide millions of virtual experiences, my analysis showed that 360° still-images are the most popular way to bring products to market in early 2021.
My assessment evaluated questions and use cases from the RICOH THETA Developer forum API Usage category and private online business meetings and discussions.
Remote Monitoring Equipment and Infrastructure
I decided on the following building and hardware criteria for the project:
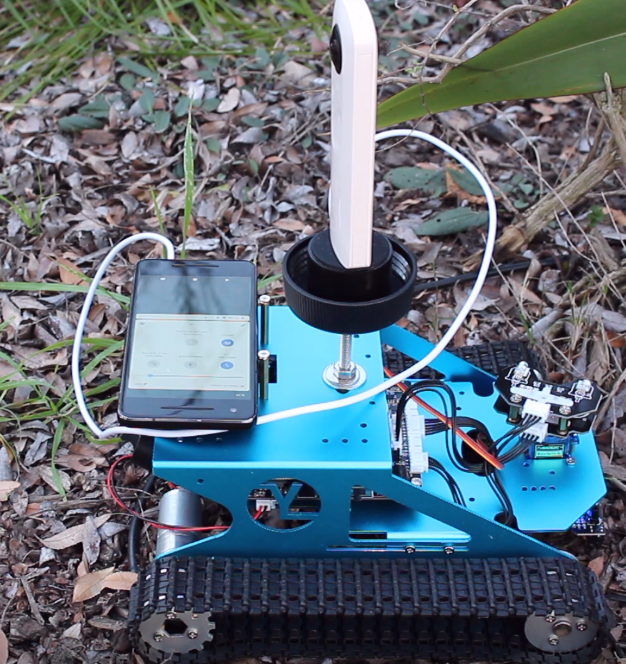
- Flexibility to position the camera with a robot
- Raspberry Pi 4 with 4GB of RAM for both the robotics and camera controllers
- Still 360° images°
- Clear camera case
- Wi-Fi connection between camera and controller
Flexibility to Position the Camera With a Robot
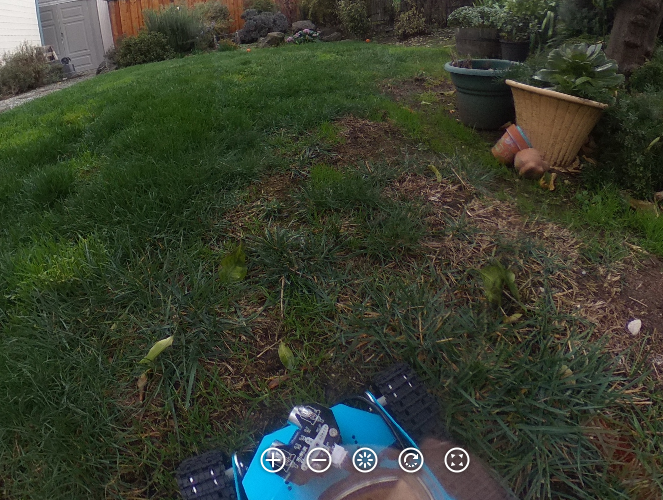
This flexibility enables remote surveillance required by either COVID-19 restrictions or hazardous conditions, such as radiation analysis. This demonstration uses a toy robot to reduce costs and keep the project accessible for prototyping. These same camera control techniques can easily be applied to industrial robots.
Raspberry Pi 4 With 4GB of RAM
The Raspberry Pi can be used with either Robot Operating System (ROS) or another Linux variant. The standard Raspberry Pi OS was chosen in consideration of project accessibility for developers and businesses.
Still 360° Images
Still-images are the most popular media format for 360° cameras. They provide the highest resolution imagery and smallest file size. This is the easiest format to work with, and thus provides the highest probability of project completion.
Clear Camera Case
A clear camera case protects the camera from rain, grease, and dirt. There's a growing trend to use consumer cameras such as the RICOH THETA in high-volume commercial environments. This elevated use has likewise increased the need to protect these cameras from potential damage. I wanted to protect the camera from both the robot falling into a small hole and from adverse weather. One aspect of this project would measure how the case impacted image quality.
Wi-Fi Connection Between Camera and Controller
Although it's more reliable to control the camera with a USB connection and libptp with Picture Transfer Protocol (PTP), I chose the Google Open Spherical Camera API over Wi-Fi. The OSC API, called the WebAPI by RICOH, is easier to implement for quick evaluation.
Advantages of Still-Images Over Live Streaming
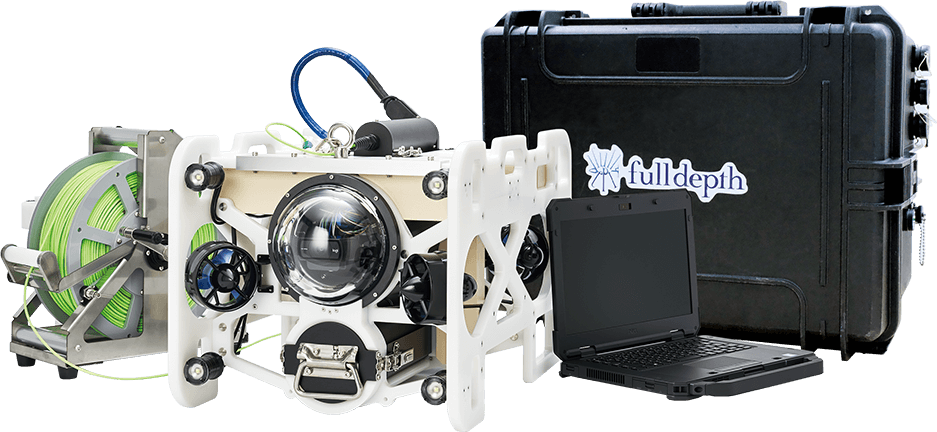
I augmented the community information with research based on online discussions. These included conversations with engineers at underwater inspection drone company fulldepth and real estate robotics company unusly to provide feedback based on their experience with robotics controllers.
Robotics company fulldepth is testing 360° live streaming in a robot designed to operate 300m below the ocean surface.
My previous article, Add Live Virtual Experiences to Your Application, focused on live streaming 360° video. Although this format is extremely popular for prototyping and certain commercial deployments, more activity in our forum focused on 360° still-images used for monitoring and virtual tours.
I initially planned to use the Raspberry Pi with RTP to stream to a Windows 10 computer. The engineers at fulldepth contributed a technique to stream 360° video from the Raspberry Pi, and with their specifications and code for the streaming portion, I could likely implement live streaming from the RPi4 from my robot.
Ultimately, I used 360° images instead of video. The most influential factor was the strong interest in images from the used car, real estate, and construction industries that need to reinvent their workflows due to COVID-19. These industries prefer still images for their:
- Higher resolution images look better to humans and help AI estimate distances
- Greater control of image parameters such as exposure (light and dark) and color
- Ability to use high-dynamic-range imaging (HDR) to compensate for bright areas (sun shining through a window). HDR takes multiple shots of the same scene at different exposures and merges them, taking the best exposure areas from each shot
While planning the build, I also communicated with an engineer at a global automotive manufacturer who used 360° live streaming to assess human interaction with the onboard OLED panels in the vehicle. With live streaming, the panels were too bright to be visible.
Although live streaming is the future and I will return to another live streaming project, I decided the unique needs for 2021 called for a robotic focus.
Camera Controller Implementation
To make the camera easier to use from the Raspberry Pi robotic controller, I built a library and command line application in Dart. Dart was chosen for the library because I can reuse the same code in Android and iOS applications with Flutter. Dart compiles to native binaries that run on the Raspberry Pi without Dart already being installed. With the command line tool built for the Raspberry Pi, bash scripts could automate camera control.
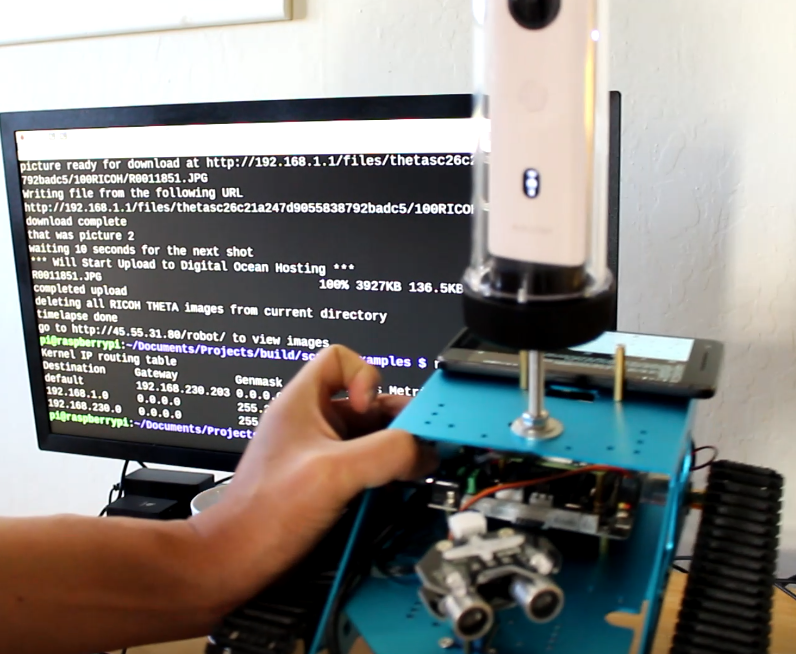
To control the camera from the Raspberry Pi, the developer can use simple bash scripts. The below example does the following:
- Sets different camera options (turning off auto-sleep or auto-power)
- Deactivates self-timer
- Prints camera options to the console for verification
- Deletes all old RICOH THETA images from the current upload directory, so the robot will only upload fresh images
- Starts the process to take 500 pictures
- Downloads the image of each picture from the camera to the Raspberry Pi with Wi-Fi
- Uploads each image to a remote cloud-based server for viewing with an Apache webserver
x
# disable offDelay
./theta offDelay --off
# disable sleepDelay
./theta sleepDelay --off
# turn off self timer
./theta exposureDelay --seconds=0
# turn off shutter volume "beep"
./theta shutterVolume --low
# confirm settings
./theta getOptions
sleep 1s
# THIS WILL DELETE ALL THETA IMAGES IN THE SCRIPT DIRECTORY
rm R00*.JPG
echo start timelapse photography loop test
echo images will be viewable at http://45.xx.xx.xx/robot/
# example of loop to take 500 pictures for timelapse
# increase the number 500 below to 300 to take 300 pictures
# example {1..300}
for counter in {1..500}
do
./theta takeAndDownload
echo that was picture $counter
((counter++))
# if you want to have the timelapse spaced 30s apart
# sleep 30s
echo 'waiting 10 seconds for the next shot'
sleep 10s
# if you want to take a shot every 5 minutes
# sleep 5m
echo '*** Will Start Upload to Digital Ocean Hosting ***'
scp -r *.JPG [email protected]:/home/craig/robot/`date +"%Y%m%d%H%M"`.JPG
echo completed upload
echo deleting all RICOH THETA images from current directory
rm R001*.JPG
done
echo timelapse done
echo go to http://45.xx.xx.xx/robot/ to view images
The tool used in the bash script is free and open source. I started a blog to show various uses of the tool. A recent post covers additional lessons and four videos explaining the robot.
Lessons Learned
These are the top lessons learned when I moved the Raspberry Pi robot from my office to the field for untethered autonomous operation:
Untethered Battery Power Management
The onboard power source of the robot is too weak to effectively run the RPi4 with all the accessories I jammed onto the robot. The Raspberry Pi Dramble blog has more test results on RPi power consumption.
As I normally test the Raspberry Pi while it is plugged into a wall outlet, the move to battery power was a bit of a culture shock. I need to be more careful with the power consumption of accessories, such as a Wi-Fi adapter plugged into the Raspberry Pi, when it is untethered.
Mobile Network Workarounds
Moving from the Wi-Fi router in my office to a mobile hotspot using LTE was also unexpectedly tricky. As I’m using a Pixel 2 for a hotspot in place of an actual mobile router, I needed to type ip neigh from the Pixel to find the IP address of the Raspberry Pi with Termux. I then used a laptop to SSH into the Raspberry Pi and set up the scripts that controlled the camera. My article 6 Tips for Effective Use of Node on Android Devices covers the use of Termux on Android to get access to the Linux shell.
Network Routing on the Raspberry Pi
When the Raspberry Pi booted with two Wi-Fi interfaces, it set two default, conflicting gateways. I needed to manually delete the default route to the THETA and route traffic from the 192.168.1.0 subnet on the Raspberry Pi to the THETA.

Unexpected Business Benefits of Robot Prototypes
The robot is an educational and ideation project. I use it to teach programming techniques, but I did not expect it to provide valuable experience in optimizing manual operations. I was surprised that it accelerated the development of unrelated projects. For example, the command line testing tool written to test the camera API from the Raspberry Pi robotic controller became widely used internally to test the camera API from Windows and Mac computers. This was made possible by the decision to use Dart for building the tool and library, as well as the dart compile command.
Another unexpected outcome was that we started to use bash scripts with the tool to perform automated tests on the camera API to help mobile app developers. As the camera API is a REST-like HTTP API, we can run the JSON payloads from Dart and have the tests be relevant to developers using Swift, Kotlin, or Java. Since I was running the tests on the Raspberry Pi for the robot, I simply copied the results into the forum when I saw a question. It helped mobile app developers, so we started to use WSL2 on Windows 10 to run the bash scripts from our Windows workstations.
Conclusion
Building your own robot is a fantastic way to focus your ideas. Untethered remote operation introduces several new problems related to power management and headless configuration. It's fun to overcome these problems, and it's extremely satisfying when the robot works.
In addition to power management and network configuration, you could consider a custom library for your unique sensors or backend system. If you choose flexible technology that can also work with your business systems, the lessons learned from your robot may yield unexpected benefits while you're already having fun, immersed in the creativity of what will be possible for robots in the future.
Opinions expressed by DZone contributors are their own.
Comments