Secure Sensitive Data With Mule Credentials Vault
In this post, we'll go over securing sensitive data using the Mule Credentials Vault, from setup to actually using it to protect your data.
Join the DZone community and get the full member experience.
Join For FreeMule Credentials Vault is used to encrypt the data in a .properties file. Data is stored in the properties file as a name-value pair. It can store various information like usernames, passwords, and security tokens. This data is very sensitive and required by the application at runtime. So you need to store the data in a properties file as encrypted data to restrict it from unauthorized access and to protect the data. To do this, use the three ingredients below:
Mule Credentials Vault.
Global Secure Property Placeholder element.
A key to unlock the vault.
In the context of Anypoint Enterprise Security, the property file which stores the encrypted property is know as a Mule Credentials Vault.
Placeholders, Keys, and Vaults
In Mule, you can set up several variations of the Placeholder-Vault-Key relationship.
One-to-One-to-One Relationship
A one-to-one-to-one relationship is simple. This relationship uses one key that decrypts the properties in one property file.

One-to-One-to-Many Relationship
This relationship uses one key to decrypt the properties in multiple property files.
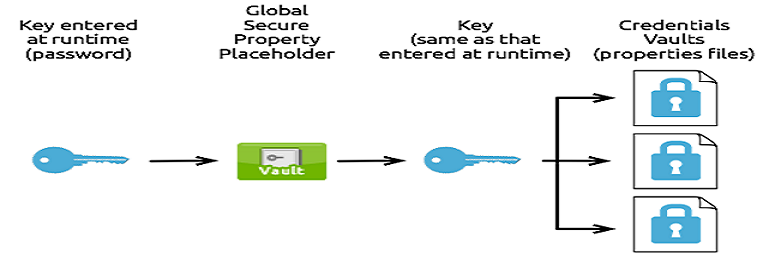
Many-to-Many-to-Many Relationship
This relationship uses one key to decrypt the properties in only one property file.
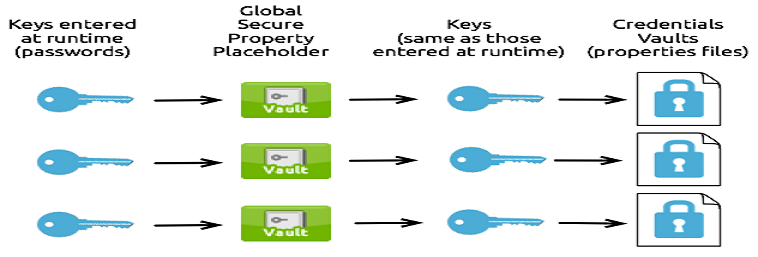
Now, we will walk through how to create a mule credentials vault.
Encrypt Properties
First, make sure that Anypoint Enterprise Security is installed in your Anypoint Studio.
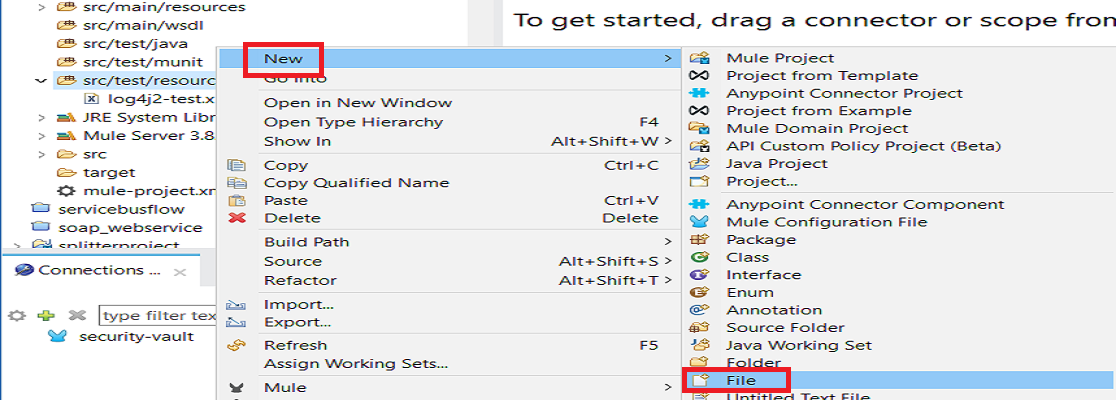
Go to src/main/resources folder in your Mule application and right click it. Select New > File.
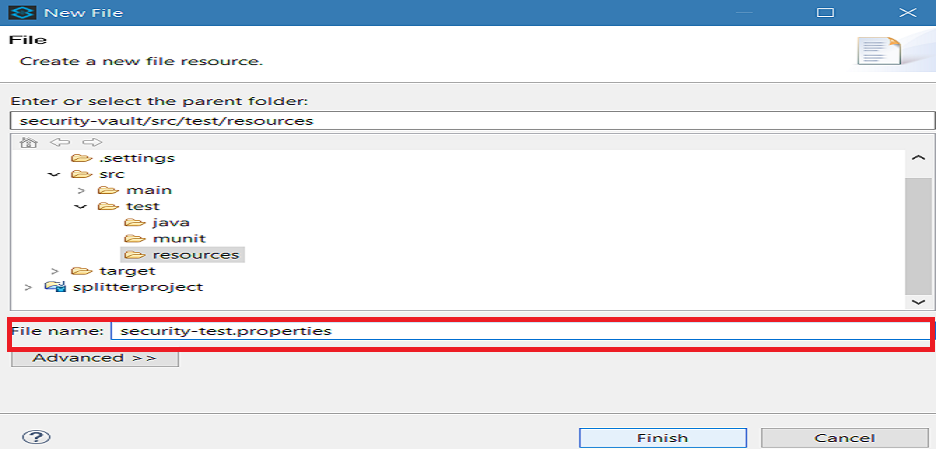
In New file wizard, enter the filename security-test.properties. You can enter the filename of your choice but make sure the file extension is .properties and click Finish.
Close the .properties file by clicking on the ex.
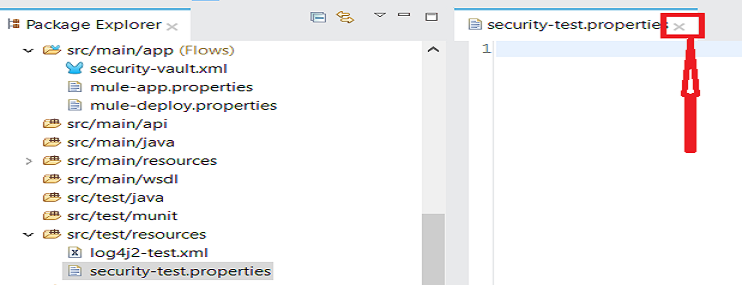
In Package Explorer, right-click on the .properties file and select Open With > Mule Properties Editor.
 Click on the green add button to open the 'Add a new property' dialog.

Add Key-Value as per your requirements.
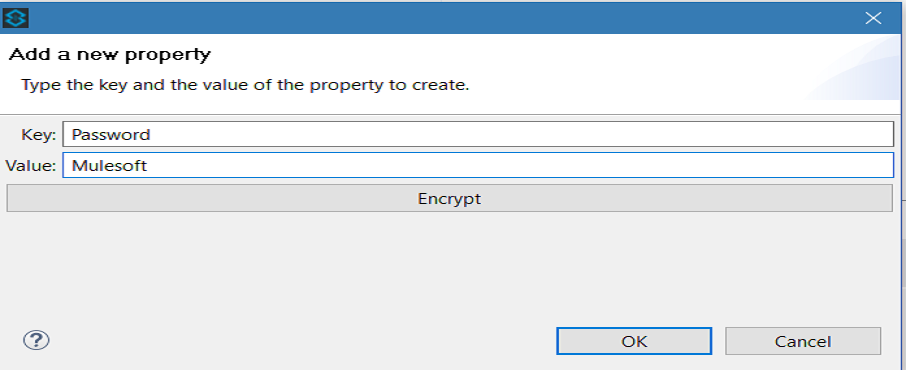
If you do not want to encrypt the data, simply click ok to add a new property to the properties file. However, if you want to encrypt the data click on Encrypt button. This will open a new dialog in which you need to provide Key and select Algorithm that can be used to encrypt the data.
This Key is very important. The key that you enter to encrypt the properties file is the same key that the administrator enters at runtime. Be sure to keep this key secure and pass it to the administrator(s) who deploys and runs your Mule application.
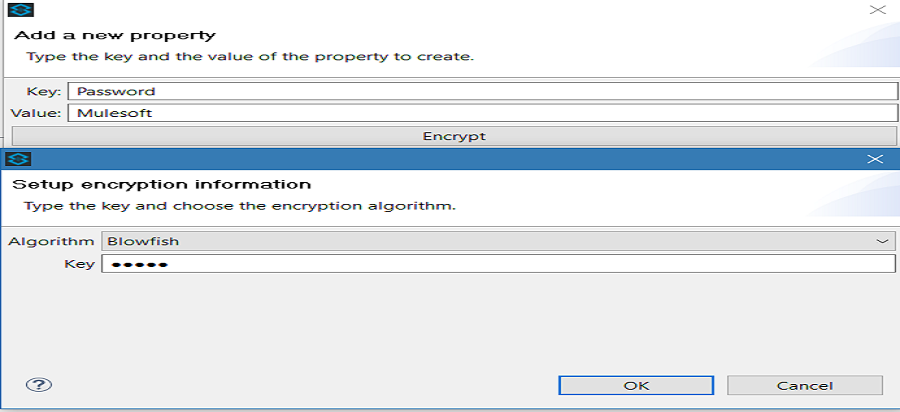
Click OK to complete the encryption.
In the Add a new property dialog, Studio displays the encrypted value in the Value field (see below). Click OK to save the property.
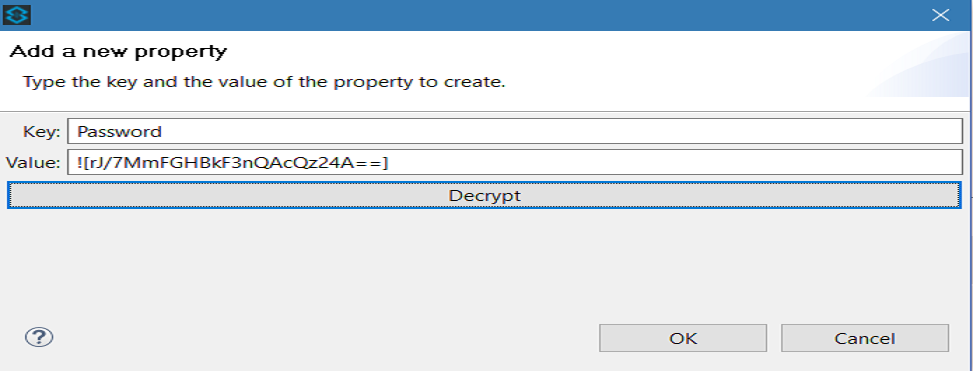
Repeat all the above steps to add more properties in the property file.
Set Global Secure Property Placeholder
Under Global Mule Configuration, create Secure Property Placeholder.
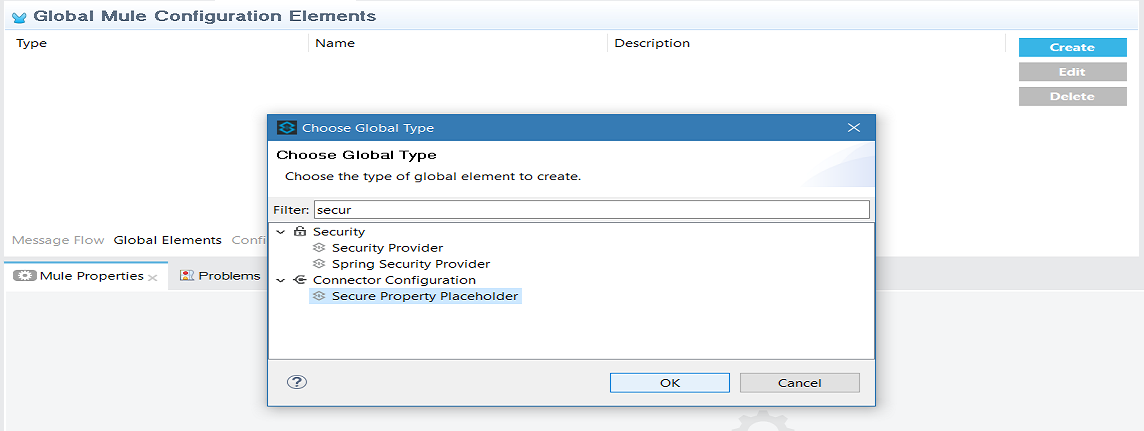
Configure the field values of the global element.
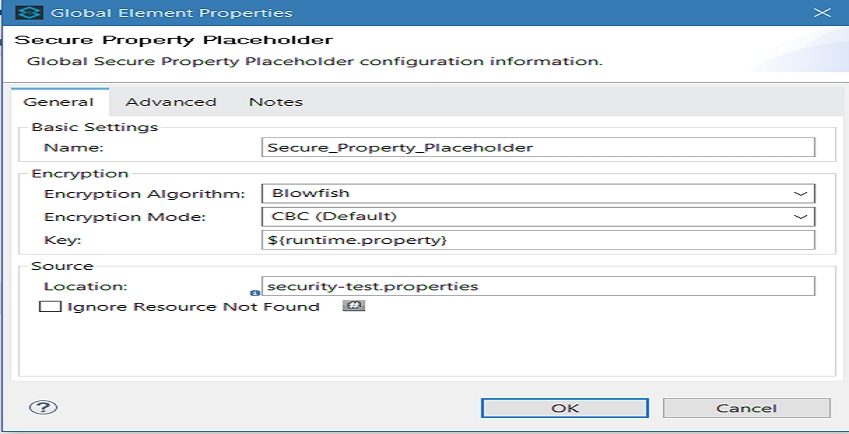
Field |
Value |
Name |
It is a unique name for your global secure placeholder. |
Encryption Algorithm |
The type of algorithm you used to encrypt the content of the Credentials Vault. |
Encryption Mode |
The procedure that allows Mule to repeatedly use a block cipher with a single key. |
Location |
It is the name of the property file that the key unlocks. |
Key |
The word or phrase to unlock the Credentials Vault according to the system property you define in this field. For example, ${production.myproperty} instructs Mule to demand the key at runtime. |
Now, you know how to secure your sensitive data with Mule Credentials Vault.
Here is the video tutorial.
Published at DZone with permission of Jitendra Bafna, DZone MVB. See the original article here.
Opinions expressed by DZone contributors are their own.

Comments