Secure Your Spring Boot Apps Using Keycloak and OIDC
This blog explores integrating Spring Security with Keycloak using OpenID Connect. It also provides examples and unit tests.
Join the DZone community and get the full member experience.
Join For FreeIn this blog, we will take a closer look at Spring Security, specifically in combination with Keycloak using OpenID Connect, all supported with examples and unit tests. Enjoy!
Introduction
Many applications are supported by means of authentication and authorization. However, it is also something software developers find difficult to grasp. In this blog, Spring Security is introduced, which is Spring's solution for adding security to your Spring applications. By means of examples and unit tests, you will learn the annotations and Spring classes. The end goal is to set up an application using OpenID Connect in combination with Keycloak. An introduction to OpenID Connect and Keycloak can be found in a previous blog. It is advised to read this blog if you are not yet familiar with the concepts.
Another valuable resource is the course "Securing a REST API with OAuth 2.0" from the Spring Academy.
Extra information about Spring Security classes can be found at the Spring Security website.
Sources used in this blog can be found on GitHub.
Prerequisites
Prerequisites for reading this blog are:
- Basic Spring Boot knowledge
- Basic Docker Compose knowledge
- Basic Keycloak knowledge
- Basic OpenID Connect knowledge
Application Without Security
First of all, you need an application that needs to be secured. So, let's start with defining a basic Spring Boot application with a controller. Two endpoints are available:
- A hello-get GET endpoint that returns a Hello World message
- A hello-post POST endpoint that returns the content of the JSON body that has been received
@RestController
@RequestMapping("/api")
class MyController {

    @GetMapping("hello-get")
    String helloGet() {
        return "Hello World!";
    }

    @PostMapping("hello-post")
    String helloPost(@RequestBody HelloBody body) {
        return body.content;
    }

    static class HelloBody {
        private String content;

        public String getContent() {
            return content;
        }

        public void setContent(String content) {
            this.content = content;
        }
    }

}
Run this application.
mvn spring-boot:runInvoke the GET endpoint.
$ curl http://localhost:8080/api/hello-get
Hello World!
Invoke the POST endpoint.
$ curl -X POST http://localhost:8080/api/hello-post -H "Content-Type: application/json" -d '{"content":"Hello MyDeveloperPlanet!"}'
Hello MyDeveloperPlanet!
An integration test that tests this behavior looks as follows.
@SpringBootTest(webEnvironment = SpringBootTest.WebEnvironment.RANDOM_PORT)
@AutoConfigureMockMvc
class MyControllerTest {

    @Autowired
    private MockMvc mockMvc;

    @Test
    void testHelloGet() throws Exception {
        mockMvc.perform(get("/api/hello-get"))
                .andExpect(status().isOk())
                .andExpect(content().string("Hello World!"));
    }

    @Test
    void testHelloPost() throws Exception {
        mockMvc.perform(post("/api/hello-post")
                        .contentType(MediaType.APPLICATION_JSON)
                        .content("{\"content\":\"this is a message\"}"))
                .andExpect(status().isOk())
                .andExpect(content().string("this is a message"));
    }
}
This is nothing special and should look familiar to you. The API is publicly available to everyone.
Default Spring Security
Now, what happens when you add the spring-boot-starter-security to the pom?
<dependency>
  <groupId>org.springframework.boot</groupId>
  <artifactId>spring-boot-starter-security</artifactId>
</dependency>
Start the application, and you will see the following in the logs.
2025-04-06T13:55:36.694+02:00  WARN 20568 --- [MySpringSecurityPlanet] [           main] .s.s.UserDetailsServiceAutoConfiguration :

Using generated security password: c4e251e5-7f83-4f8f-80d7-2b6f1ee19277

This generated password is for development use only. Your security configuration must be updated before running your application in production.

2025-04-06T13:55:36.702+02:00  INFO 20568 --- [MySpringSecurityPlanet] [           main] r$InitializeUserDetailsManagerConfigurer : Global AuthenticationManager configured with UserDetailsService bean with name inMemoryUserDetailsManager
A global AuthenticationManager is configured with UserDetailsService and a security password is generated.
Invoke the GET endpoint just like before, but add the option -i in order to include the HTTP response headers in the response. An HTTP Unauthorized is returned.
$ curl -i http://localhost:8080/api/hello-get
HTTP/1.1 401
Set-Cookie: JSESSIONID=87B04B6798E0AEF691B7268F1EB70677; Path=/; HttpOnly
WWW-Authenticate: Basic realm="Realm"
X-Content-Type-Options: nosniff
X-XSS-Protection: 0
Cache-Control: no-cache, no-store, max-age=0, must-revalidate
Pragma: no-cache
Expires: 0
X-Frame-Options: DENY
Content-Length: 0
Date: Sun, 06 Apr 2025 11:57:31 GMT
Invoke the POST endpoint, and an HTTP Unauthorized is returned.
$ curl -i -X POST http://localhost:8080/api/hello-post -H "Content-Type: application/json" -d '{"content":"Hello World MyDeveloperPlanet!"}'
HTTP/1.1 401
Set-Cookie: JSESSIONID=058E1DDBF694AD6F871E649D25C855A2; Path=/; HttpOnly
X-Content-Type-Options: nosniff
X-XSS-Protection: 0
Cache-Control: no-cache, no-store, max-age=0, must-revalidate
Pragma: no-cache
Expires: 0
X-Frame-Options: DENY
WWW-Authenticate: Basic realm="Realm"
Content-Length: 0
Date: Sun, 06 Apr 2025 11:58:14 GMT
Adding the dependency definitely changed something. Now, add Basic Authentication to the request using the user and the generated password (the generated password will be different in your case, of course).
Invoke the GET endpoint.
$ curl -i -u user:c4e251e5-7f83-4f8f-80d7-2b6f1ee19277 http://localhost:8080/api/hello-get
HTTP/1.1 200
X-Content-Type-Options: nosniff
X-XSS-Protection: 0
Cache-Control: no-cache, no-store, max-age=0, must-revalidate
Pragma: no-cache
Expires: 0
X-Frame-Options: DENY
Content-Type: text/plain;charset=UTF-8
Content-Length: 12
Date: Sun, 06 Apr 2025 11:59:22 GMT

Hello World!
This works, that's nice. Invoke the POST endpoint. Still, an HTTP Unauthorized is returned.
$ curl -i -u user:c4e251e5-7f83-4f8f-80d7-2b6f1ee19277 -X POST http://localhost:8080/api/hello-post -H "Content-Type: application/json" -d '{"content":"Hello World MyDeveloperPlanet!"}'
HTTP/1.1 401
Set-Cookie: JSESSIONID=6CD15CEB569E51D0BAA3180BD6C86BC5; Path=/; HttpOnly
X-Content-Type-Options: nosniff
X-XSS-Protection: 0
Cache-Control: no-cache, no-store, max-age=0, must-revalidate
Pragma: no-cache
Expires: 0
X-Frame-Options: DENY
WWW-Authenticate: Basic realm="Realm"
Content-Length: 0
Date: Sun, 06 Apr 2025 12:00:46 GMT
The reason for this is the lack of a CSRF token (Cross-Site Request Forgery).
It is possible to solve this using curl, but a bit cumbersome too. So let's try to fix this with the integration test. When you run the integration test from the previous paragraph, you will notice that both tests also fail as expected.
Add the dependency spring-security-test to the pom.
<dependency>
  <groupId>org.springframework.security</groupId>
  <artifactId>spring-security-test</artifactId>
  <scope>test</scope>
</dependency>
Add the annotation @WithMockUser at the class level.
@SpringBootTest(webEnvironment = SpringBootTest.WebEnvironment.RANDOM_PORT)
@AutoConfigureMockMvc
@WithMockUser
class MyControllerTest {
...
}
Run the test. Test testHelloGet is successful, test testHelloPost fails due to the missing CSRF token. Add to the POST, and the tests succeed.
@Test
void testHelloPost() throws Exception {
    mockMvc.perform(post("/api/hello-post")
                    .with(csrf())
                    .contentType(MediaType.APPLICATION_JSON)
                    .content("{\"content\":\"this is a message\"}"))
            .andExpect(status().isOk())
            .andExpect(content().string("this is a message"));
}
OIDC Keycloak
Default Spring Security uses HTTP Basic Authentication, but the goal is to use OIDC together with Keycloak. Therefore, you need to configure the Spring Boot application as a Resource Server. Add dependency spring-boot-starter-oauth2-resource-server to the pom.
<dependency>
    <groupId>org.springframework.boot</groupId>
    <artifactId>spring-boot-starter-oauth2-resource-server</artifactId>
</dependency>
In the application.properties, you set the log level for Spring Security to TRACE. This way, you can see what Spring is doing under the hood.
logging.level.org.springframework.security=TRACEAlso, configure the issuer-uri and the audiences. The issuer-uri can be retrieved via the Keycloak mydeveloperplanet realm via the Realm settings → Endpoints. The audiences must correspond to the Client ID as configured in Keycloak. See a previous post on how Keycloak is configured.
spring.security.oauth2.resourceserver.jwt.issuer-uri=http://localhost:8081/realms/mydeveloperplanet
spring.security.oauth2.resourceserver.jwt.audiences=application-1
Run the Spring Boot application, but do not start Keycloak yet.
Invoke the GET endpoint without authentication. Note that the authentication has changed to Bearer instead of Basic. The response is an HTTP Unauthorized because no token has been added.
$ curl -i http://localhost:8080/api/hello-get
HTTP/1.1 401
Set-Cookie: JSESSIONID=3204D41B15A9EEF892A661E9E3EFDC92; Path=/; HttpOnly
WWW-Authenticate: Bearer
X-Content-Type-Options: nosniff
X-XSS-Protection: 0
Cache-Control: no-cache, no-store, max-age=0, must-revalidate
Pragma: no-cache
Expires: 0
X-Frame-Options: DENY
Content-Length: 0
Date: Sat, 19 Apr 2025 08:01:40 GMT
Let's use an old token (which is not valid anymore) and invoke the endpoint.
$ curl -i http://localhost:8080/api/hello-get
  -H "Authorization: Bearer eyJhbGciOiJSUzI1NiIsInR5cCIgOiAiSldUIiwia2lkIiA6ICJ4U0c4eU5TYk90MTZqZmwyWWRZQjU1WkRocUNoeE9BNlREeWxHWjBXVzcwIn0.eyJleHAiOjE3NDM4Njg4NjIsImlhdCI6MTc0Mzg2ODU2MiwiYXV0aF90aW1lIjoxNzQzODY3OTgxLCJqdGkiOiIxNWM2OGU5NS1kYTUyLTRkZDgtYmJhNC1mNjVhZWYzODU2ZDciLCJpc3MiOiJodHRwOi8vbG9jYWxob3N0OjgwODAvcmVhbG1zL215ZGV2ZWxvcGVycGxhbmV0IiwiYXVkIjoiYWNjb3VudCIsInN1YiI6ImJhMDdiYmE0LWQwMGQtNGNkNC1iYmYzLTNkZDczZGY2YjMwYyIsInR5cCI6IkJlYXJlciIsImF6cCI6ImFwcGxpY2F0aW9uLTEiLCJzaWQiOiIwYzQ3NzZhYy00Y2RkLTQ5OWEtOGQxNC04NDMwY2E5MjY2MTkiLCJhY3IiOiIwIiwiYWxsb3dlZC1vcmlnaW5zIjpbImh0dHA6Ly9sb2NhbGhvc3Q6ODA4MSJdLCJyZWFsbV9hY2Nlc3MiOnsicm9sZXMiOlsib2ZmbGluZV9hY2Nlc3MiLCJkZWZhdWx0LXJvbGVzLW15ZGV2ZWxvcGVycGxhbmV0IiwidW1hX2F1dGhvcml6YXRpb24iXX0sInJlc291cmNlX2FjY2VzcyI6eyJhY2NvdW50Ijp7InJvbGVzIjpbIm1hbmFnZS1hY2NvdW50IiwibWFuYWdlLWFjY291bnQtbGlua3MiLCJ2aWV3LXByb2ZpbGUiXX19LCJzY29wZSI6Im9wZW5pZCBlbWFpbCBwcm9maWxlIiwiZW1haWxfdmVyaWZpZWQiOmZhbHNlLCJuYW1lIjoiR3VudGVyIE15ZGV2ZWxvcGVycGxhbmV0IiwicHJlZmVycmVkX3VzZXJuYW1lIjoiZ3VudGVyIiwiZ2l2ZW5fbmFtZSI6Ikd1bnRlciIsImZhbWlseV9uYW1lIjoiTXlkZXZlbG9wZXJwbGFuZXQiLCJlbWFpbCI6ImEuYUBleGFtcGxlLmNvbSJ9.IaNcjxrjHYnksDMo1384-TsQZ5gxG1sZmZui9aNcw1XfS7S-oEHddOqV3GllYg33eXlBUWjFr7-E4aj6w_roZc3yGeX3OhARywrvdgNKOmRdcGhTjVMxjBTf3n9mYyMlqK7BDSGPkvP3BRiWUYnZHUpuwSfMFADklfwvJyiAVhYLqSISx4D1QzxoFrmXbkVHnKjgLnzb_fVxD38I8w6t3Y3OzdAFKQNAJ1TCUf84CV4eg8TwrpayBIfyXjolWlUma3cQpr7pwXV6KZQFeV8rWoScjURmfOLi0SfvCQ3ldSQOjohd0kC995eECGHAr6npYRtYYZUCfdJSeYS9YmLKqA"
Take a look at the Spring Boot log. This tells you that Spring Boot is trying to contact the Authorization Server in order to validate the token.
2025-04-19T10:09:17.644+02:00 ERROR 10558 --- [MySpringSecurityPlanet] [nio-8080-exec-2] o.a.c.c.C.[.[.[/].[dispatcherServlet]    : Servlet.service() for servlet [dispatcherServlet] in context with path [] threw exception

org.springframework.security.oauth2.jwt.JwtDecoderInitializationException: Failed to lazily resolve the supplied JwtDecoder instance

...
Caused by: java.lang.IllegalArgumentException: Unable to resolve the Configuration with the provided Issuer of "http://localhost:8081"
Time to start Keycloak. Navigate to the directory keycloak/compose-realm and start Keycloak.
Invoke the GET endpoint again. This time, you notice in the logs that Keycloak is contacted. You also notice that the Granted Authorities have the value ROLE_ANONYMOUS. This is the internal role Spring Security uses for anonymous access.
2025-04-19T10:33:03.789+02:00 TRACE 10558 --- [MySpringSecurityPlanet] [nio-8080-exec-4] o.s.s.w.a.AnonymousAuthenticationFilter  : Set SecurityContextHolder to AnonymousAuthenticationToken [Principal=anonymousUser, Credentials=[PROTECTED], Authenticated=true, Details=WebAuthenticationDetails [RemoteIpAddress=127.0.0.1, SessionId=null], Granted Authorities=[ROLE_ANONYMOUS]]
2025-04-19T10:33:03.789+02:00 TRACE 10558 --- [MySpringSecurityPlanet] [nio-8080-exec-4] o.s.s.w.a.ExceptionTranslationFilter     : Sending AnonymousAuthenticationToken [Principal=anonymousUser, Credentials=[PROTECTED], Authenticated=true, Details=WebAuthenticationDetails [RemoteIpAddress=127.0.0.1, SessionId=null], Granted Authorities=[ROLE_ANONYMOUS]] to authentication entry point since access is denied
Besides the fact that the token is invalid, there is also a problem with the Client Secret. When starting the Docker Compose file, a pre-configured realm, mydeveloperplanet, is imported. However, secrets are not exported. In order to solve this, navigate to the Keycloak administration console and log in with admin/admin. Execute the following steps in order to generate a new Client Secret.
- Select the realm mydeveloperplanet
- Click Client in the left menu and select application-1 in the clients list
- Select tab Credentials
- Regenerate a Client Secret
Let's see whether it is possible to get a response. Before that, you need to execute some curl commands for the OIDC flow. See a previous post for an elaborate explanation.
Retrieve the authorization code. Enter the following URL in the browser.
http://localhost:8081/realms/mydeveloperplanet/protocol/openid-connect/auth?client_id=application-1&response_type=code&redirect_uri=http://localhost:8080/callback&scope=openidIn the address bar of the browser, the callback URL is invoked. It appears that the following URL uses the code parameter as the authorization code. Copy it.
http://localhost:8080/callback?session_state=9c28cd09-9986-44c7-9eb3-9afc98719a56&iss=http%3A%2F%2Flocalhost%3A8081%2Frealms%2Fmydeveloperplanet&code=e3cab2c5-6b64-4472-852a-d9942ab27f7b.9c28cd09-9986-44c7-9eb3-9afc98719a56.cd1a8e63-eb45-487b-9f0d-8b4fd16d4f8eRetrieve the access token via a terminal using curl. You should replace the client_secret with your own secret and the code with the authorization code from above. In the response, the access_token is the one you need for accessing the API.
$ curl -X POST \
"http://localhost:8081/realms/mydeveloperplanet/protocol/openid-connect/token" \
-H "Content-Type: application/x-www-form-urlencoded" \
-d "grant_type=authorization_code" \
-d "client_id=application-1" \
-d "client_secret=y754fFqJfCcYVP1msf4SbjcNSOMRvaaJ" \
-d "code=e3cab2c5-6b64-4472-852a-d9942ab27f7b.9c28cd09-9986-44c7-9eb3-9afc98719a56.cd1a8e63-eb45-487b-9f0d-8b4fd16d4f8e" \
-d "redirect_uri=http://localhost:8080/callback"
{"access_token":"eyJhbGciOiJSUzI1NiIsInR5cCIgOiAiSldUIiwia2lkIiA6ICJNc1BjTDlicHlkbU1oOVoyQXdLSXZLVTV2RlZDa1FjUUJwb2Uzd0VSUlBNIn0.eyJleHAiOjE3NDUwNTQ4MTYsImlhdCI6MTc0NTA1NDUxNiwiYXV0aF90aW1lIjoxNzQ1MDUxNzk1LCJqdGkiOiJkYjJiNDdmMS0wODNhLTRkMWUtYWQ4Ny1iN2FlNjEzYjYxMzYiLCJpc3MiOiJodHRwOi8vbG9jYWxob3N0OjgwODEvcmVhbG1zL215ZGV2ZWxvcGVycGxhbmV0IiwiYXVkIjoiYWNjb3VudCIsInN1YiI6IjljNjBjZWM2LWYyMTQtNGFkOC1hOGNhLWIwY2E2MGJjY2ZhZiIsInR5cCI6IkJlYXJlciIsImF6cCI6ImFwcGxpY2F0aW9uLTEiLCJzaWQiOiI5YzI4Y2QwOS05OTg2LTQ0YzctOWViMy05YWZjOTg3MTlhNTYiLCJhY3IiOiIwIiwiYWxsb3dlZC1vcmlnaW5zIjpbImh0dHA6Ly9sb2NhbGhvc3Q6ODA4MCJdLCJyZWFsbV9hY2Nlc3MiOnsicm9sZXMiOlsib2ZmbGluZV9hY2Nlc3MiLCJkZWZhdWx0LXJvbGVzLW15ZGV2ZWxvcGVycGxhbmV0IiwidW1hX2F1dGhvcml6YXRpb24iXX0sInJlc291cmNlX2FjY2VzcyI6eyJhY2NvdW50Ijp7InJvbGVzIjpbIm1hbmFnZS1hY2NvdW50IiwibWFuYWdlLWFjY291bnQtbGlua3MiLCJ2aWV3LXByb2ZpbGUiXX19LCJzY29wZSI6Im9wZW5pZCBwcm9maWxlIGVtYWlsIiwiZW1haWxfdmVyaWZpZWQiOmZhbHNlLCJuYW1lIjoiR3VudGVyIE15ZGV2ZWxvcGVycGxhbmV0IiwicHJlZmVycmVkX3VzZXJuYW1lIjoiZ3VudGVyIiwiZ2l2ZW5fbmFtZSI6Ikd1bnRlciIsImZhbWlseV9uYW1lIjoiTXlkZXZlbG9wZXJwbGFuZXQiLCJlbWFpbCI6ImEuYUBleGFtcGxlLmNvbSJ9.QAOObEnJxmfJ5E4Klxjm6q5Uo49Gxk5FXjXxWXUBCP2fiNpczsS5266PxrmyReoBXYTGMZj3LphO6t4pwAb4SC12aH0woArlcmG80gx_F78DoHmXVkfXnkVlaQphf9nSoTwSM2nVENSFkKSnlNSe8SPsXPnfRMK7JMNhlDRbf_0AoeoOFZUupxqruUjEyzDbTCXYjS4uiYGLLK-9twdkZU5aT2FdfmWAo7SoCRVbjLABVbykX_9l4VZLWDdTh876lpaMuR4RJ9orwVRJFkZHLo-1F0gsEYsF-Kh9yHkXmgYDPzC3dSrWi90F_pNa7RbLz0qPGyAMxo50jXmTgGKiJA","expires_in":300,"refresh_expires_in":1800,"refresh_token":"eyJhbGciOiJIUzUxMiIsInR5cCIgOiAiSldUIiwia2lkIiA6ICJhYWNjYzIzMC1mNDQ1LTQ2MjctYTNmMy02ZGFmZmMyNmFlN2MifQ.eyJleHAiOjE3NDUwNTYzMTYsImlhdCI6MTc0NTA1NDUxNiwianRpIjoiNGQxMGZmMzEtYTYwMC00YmM4LTk1OTQtN2E3ZGIzZTFhNTkzIiwiaXNzIjoiaHR0cDovL2xvY2FsaG9zdDo4MDgxL3JlYWxtcy9teWRldmVsb3BlcnBsYW5ldCIsImF1ZCI6Imh0dHA6Ly9sb2NhbGhvc3Q6ODA4MS9yZWFsbXMvbXlkZXZlbG9wZXJwbGFuZXQiLCJzdWIiOiI5YzYwY2VjNi1mMjE0LTRhZDgtYThjYS1iMGNhNjBiY2NmYWYiLCJ0eXAiOiJSZWZyZXNoIiwiYXpwIjoiYXBwbGljYXRpb24tMSIsInNpZCI6IjljMjhjZDA5LTk5ODYtNDRjNy05ZWIzLTlhZmM5ODcxOWE1NiIsInNjb3BlIjoib3BlbmlkIHJvbGVzIGJhc2ljIHdlYi1vcmlnaW5zIHByb2ZpbGUgYWNyIGVtYWlsIn0.-U0EDBfN-bsf-QGmhbfjtxUTURePkEsxWG6YMuBFD0bE_XrHouvXNg3elhVgdMyX1OtEXD0z-U_Q0M_AnwYJ2A","token_type":"Bearer","id_token":"eyJhbGciOiJSUzI1NiIsInR5cCIgOiAiSldUIiwia2lkIiA6ICJNc1BjTDlicHlkbU1oOVoyQXdLSXZLVTV2RlZDa1FjUUJwb2Uzd0VSUlBNIn0.eyJleHAiOjE3NDUwNTQ4MTYsImlhdCI6MTc0NTA1NDUxNiwiYXV0aF90aW1lIjoxNzQ1MDUxNzk1LCJqdGkiOiJlYzAyMWYzNS0yMTRlLTQ5OTEtODU4Yi0wNzI3OWMzMThlODEiLCJpc3MiOiJodHRwOi8vbG9jYWxob3N0OjgwODEvcmVhbG1zL215ZGV2ZWxvcGVycGxhbmV0IiwiYXVkIjoiYXBwbGljYXRpb24tMSIsInN1YiI6IjljNjBjZWM2LWYyMTQtNGFkOC1hOGNhLWIwY2E2MGJjY2ZhZiIsInR5cCI6IklEIiwiYXpwIjoiYXBwbGljYXRpb24tMSIsInNpZCI6IjljMjhjZDA5LTk5ODYtNDRjNy05ZWIzLTlhZmM5ODcxOWE1NiIsImF0X2hhc2giOiI5RkZxRVBnUE5KNHBoVGlZSjRLaUNnIiwiYWNyIjoiMCIsImVtYWlsX3ZlcmlmaWVkIjpmYWxzZSwibmFtZSI6Ikd1bnRlciBNeWRldmVsb3BlcnBsYW5ldCIsInByZWZlcnJlZF91c2VybmFtZSI6Imd1bnRlciIsImdpdmVuX25hbWUiOiJHdW50ZXIiLCJmYW1pbHlfbmFtZSI6Ik15ZGV2ZWxvcGVycGxhbmV0IiwiZW1haWwiOiJhLmFAZXhhbXBsZS5jb20ifQ.Jimi-F36M2ewahdxcQEVp3Xtd2GKPUtDGIcEPRkqExUy4ZQx3Z6CPjis7uLa1uGvnhZj8rPplXGazQ5SyPZaaym4C-zL38650fsHVvtUd8kP9RXerQs_qLGJwoRzNuJ9eazWSP6dgVSPtdRn9gH9Xq2u1rdNDTxcRmTL_XRoOwZfShcZwd2MWIjADjuY03oaxOcXZQWMjUWKhrArSLPrvO0OyG4HSRVEPCqzz8q9CKflTQkIMFaAxBIvnBBrQvBL221dHEQ8OHX6FYABfmcerrfJLxNjzsuMsI5Xr1tMezhLq4iBSyjJZ-EKAflj_ik-Tt6I8sbMzpn4lPbwEcJ19A","not-before-policy":0,"session_state":"9c28cd09-9986-44c7-9eb3-9afc98719a56","scope":"openid profile email"}
Invoke the GET endpoint using the access token from above. The response is successful. It might be that the token is already invalid again if you were not fast enough. Normally, this interaction will be executed by means of a web frontend library.
$ curl -i http://localhost:8080/api/hello-get -H "Authorization: Bearer eyJhbGciOiJSUzI1NiIsInR5cCIgOiAiSldUIiwia2lkIiA6ICJNc1BjTDlicHlkbU1oOVoyQXdLSXZLVTV2RlZDa1FjUUJwb2Uzd0VSUlBNIn0.eyJleHAiOjE3NDUwNTQ4MTYsImlhdCI6MTc0NTA1NDUxNiwiYXV0aF90aW1lIjoxNzQ1MDUxNzk1LCJqdGkiOiJkYjJiNDdmMS0wODNhLTRkMWUtYWQ4Ny1iN2FlNjEzYjYxMzYiLCJpc3MiOiJodHRwOi8vbG9jYWxob3N0OjgwODEvcmVhbG1zL215ZGV2ZWxvcGVycGxhbmV0IiwiYXVkIjoiYWNjb3VudCIsInN1YiI6IjljNjBjZWM2LWYyMTQtNGFkOC1hOGNhLWIwY2E2MGJjY2ZhZiIsInR5cCI6IkJlYXJlciIsImF6cCI6ImFwcGxpY2F0aW9uLTEiLCJzaWQiOiI5YzI4Y2QwOS05OTg2LTQ0YzctOWViMy05YWZjOTg3MTlhNTYiLCJhY3IiOiIwIiwiYWxsb3dlZC1vcmlnaW5zIjpbImh0dHA6Ly9sb2NhbGhvc3Q6ODA4MCJdLCJyZWFsbV9hY2Nlc3MiOnsicm9sZXMiOlsib2ZmbGluZV9hY2Nlc3MiLCJkZWZhdWx0LXJvbGVzLW15ZGV2ZWxvcGVycGxhbmV0IiwidW1hX2F1dGhvcml6YXRpb24iXX0sInJlc291cmNlX2FjY2VzcyI6eyJhY2NvdW50Ijp7InJvbGVzIjpbIm1hbmFnZS1hY2NvdW50IiwibWFuYWdlLWFjY291bnQtbGlua3MiLCJ2aWV3LXByb2ZpbGUiXX19LCJzY29wZSI6Im9wZW5pZCBwcm9maWxlIGVtYWlsIiwiZW1haWxfdmVyaWZpZWQiOmZhbHNlLCJuYW1lIjoiR3VudGVyIE15ZGV2ZWxvcGVycGxhbmV0IiwicHJlZmVycmVkX3VzZXJuYW1lIjoiZ3VudGVyIiwiZ2l2ZW5fbmFtZSI6Ikd1bnRlciIsImZhbWlseV9uYW1lIjoiTXlkZXZlbG9wZXJwbGFuZXQiLCJlbWFpbCI6ImEuYUBleGFtcGxlLmNvbSJ9.QAOObEnJxmfJ5E4Klxjm6q5Uo49Gxk5FXjXxWXUBCP2fiNpczsS5266PxrmyReoBXYTGMZj3LphO6t4pwAb4SC12aH0woArlcmG80gx_F78DoHmXVkfXnkVlaQphf9nSoTwSM2nVENSFkKSnlNSe8SPsXPnfRMK7JMNhlDRbf_0AoeoOFZUupxqruUjEyzDbTCXYjS4uiYGLLK-9twdkZU5aT2FdfmWAo7SoCRVbjLABVbykX_9l4VZLWDdTh876lpaMuR4RJ9orwVRJFkZHLo-1F0gsEYsF-Kh9yHkXmgYDPzC3dSrWi90F_pNa7RbLz0qPGyAMxo50jXmTgGKiJA"
HTTP/1.1 200
X-Content-Type-Options: nosniff
X-XSS-Protection: 0
Cache-Control: no-cache, no-store, max-age=0, must-revalidate
Pragma: no-cache
Expires: 0
X-Frame-Options: DENY
Content-Type: text/plain;charset=UTF-8
Content-Length: 12
Date: Sat, 19 Apr 2025 09:22:29 GMT

Hello World!
You can also run the integration test, which is identical to the one for Default Spring Security.
OIDC Request Authorization
In the previous examples, no roles are actually used. Most of the time, you will need multiple roles in your application. Let's see how you can add custom authorization to the requests.
Add the following bean to class SecurityConfig in package config. This configures the requests to be authenticated only, and the JWT is processed with some defaults. If you do not define this bean, then a default SecurityFilterChain exists. That is the one that has been used up until now. It is not necessary to use the @EnableWebSecurity annotation, this is added by default by Spring Boot.
@Bean
SecurityFilterChain appSecurity(HttpSecurity http)
		throws Exception {
	http
			.authorizeHttpRequests((authorize) -> authorize
					.anyRequest().authenticated()
			)
			.oauth2ResourceServer((oauth2) -> oauth2
					.jwt(Customizer.withDefaults())
			);
	return http.build();
}
In order to add authorization to the GET requests for role hello:read, you add a requestMatcher.
http
		.authorizeHttpRequests((authorize) -> authorize
    		.requestMatchers(HttpMethod.GET, "/api/**").hasRole("hello:read")
			.anyRequest().authenticated()
		)
Run the integration test and you will notice that the testHelloGet test fails and the testHelloPost succeeds. An HTTP Forbidden is returned.
java.lang.AssertionError: Status expected:<200> but was:<403>
Expected :200
Actual   :403
Add the annotation @WithMockUser to the test with roles hello:read. The test is now successful because a user is being mocked.
@Test
@WithMockUser(roles = {"hello:read"})
void testHelloGet() throws Exception {
    mockMvc.perform(get("/api/hello-get"))
            .andExpect(status().isOk())
            .andExpect(content().string("Hello World!"));
}
Add the following requestMatcher after the GET requestMatcher. You can chain many requestMatchers, but do note that they are evaluated in sequence, just like it would be if-statements. The GET requests still need role hello:read, while all other requests now need role hello:write.
http
		.authorizeHttpRequests((authorize) -> authorize
    		.requestMatchers(HttpMethod.GET, "/api/**").hasRole("hello:read")
            .requestMatchers("/api/**").hasRole("hello:write")
			.anyRequest().authenticated()
		)
Run the integration test and now test testHelloPost fails.
Move the class level annotation @WithMockUser to the method testHelloGet and add @WithMockUser with role hello:write to method testHelloPost. The test is now successful.
@Test
@WithMockUser(roles = {"hello:write"})
void testHelloPost() throws Exception {
    mockMvc.perform(post("/api/hello-post")
                    .with(csrf())
                    .contentType(MediaType.APPLICATION_JSON)
                    .content("{\"content\":\"this is a message\"}"))
            .andExpect(status().isOk())
            .andExpect(content().string("this is a message"));
}
Does this work out of the box with Keycloak? Let's find out.
First, the roles need to be configured in Keycloak. If you do not want to configure this manually, you can start a preconfigured compose environment ( do not forget to regenerate the Client Secret!)
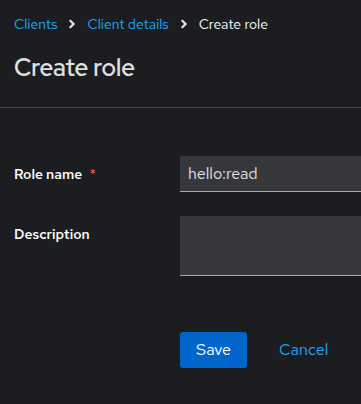
Navigate to the Keycloak administration console. Select the mydeveloperclient realm, click Clients in the left menu, and select application-1. Select tab Roles and add roles hello:read and hello:write.
Navigate to user gunter and assign the role hello:read in the tab Role mapping.

If you try to invoke the GET request via curl like you did before, you will notice that you are not allowed to access the resource. Spring Security uses a default JwtAuthenticationConverter and this class converts the scopes received in the access token (being a JWT) into authorities in Spring. Take a look at the JWT first.
"resource_access": {
    "application-1": {
      "roles": [
        "hello:read"
      ]
    },
    "account": {
      "roles": [
        "manage-account",
        "manage-account-links",
        "view-profile"
      ]
    }
  },
  "scope": "openid profile email",
You do not want to convert the scopes into authorities, but you want the roles to be converted into authorities. Therefore, you create a custom converter. Do note that roles are prefixed with ROLE_ in authorities, and scopes are prefixed with SCOPE_. Also note that in requestMatcher, hasRole("hello:read") has been used without the prefix. If you had used hasAuthority, you needed to add the prefix.
public class KeycloakResourceAccessRolesConverter implements Converter<Jwt, Collection<GrantedAuthority>> {
    private static final String CLAIM_RESOURCE_ACCESS = "resource_access";
    private static final String CLAIM_ROLES = "roles";
    private static final String PREFIX = "ROLE_"; // Spring Security expects this prefix

    @Override
    public Collection<GrantedAuthority> convert(Jwt jwt) {
        Collection<GrantedAuthority> authorities = new ArrayList<>();

        Map<String, Object> resourceAccess = jwt.getClaim(CLAIM_RESOURCE_ACCESS);
        if (resourceAccess != null) {
            resourceAccess.forEach((resource, value) -> {
                Map<String, Object> resourceMap = (Map<String, Object>) value;
                Collection<String> roles = (Collection<String>) resourceMap.get(CLAIM_ROLES);
                if (roles != null) {
                    roles.forEach(role -> authorities.add(
                        new SimpleGrantedAuthority(PREFIX + role)
                    ));
                }
            });
        }
        return authorities;
    }
}
Define a bean in SecurityConfig to enforce Spring to use this custom converter.
@Bean
public JwtAuthenticationConverter jwtAuthenticationConverter() {
	JwtAuthenticationConverter converter = new JwtAuthenticationConverter();
	converter.setJwtGrantedAuthoritiesConverter(new KeycloakResourceAccessRolesConverter());
	return converter;
}
Test the GET endpoint; a success response is returned.
$ curl -i http://localhost:8080/api/hello-get
-H "Authorization: Bearer <access token>"
HTTP/1.1 200
X-Content-Type-Options: nosniff
X-XSS-Protection: 0
Cache-Control: no-cache, no-store, max-age=0, must-revalidate
Pragma: no-cache
Expires: 0
X-Frame-Options: DENY
Content-Type: text/plain;charset=UTF-8
Content-Length: 12
Date: Sun, 20 Apr 2025 08:08:29 GMT

Hello World!
Test the POST endpoint, an HTTP Forbidden is returned, which is correct because user gunter does not have the hello:write role.
$ curl -i -X POST http://localhost:8080/api/hello-post -H "Content-Type: application/json" -d '{"content":"this is a message from the world"}' -H "Authorization: Bearer <access token>"
HTTP/1.1 403
WWW-Authenticate: Bearer error="insufficient_scope", error_description="The request requires higher privileges than provided by the access token.", error_uri="https://tools.ietf.org/html/rfc6750#section-3.1"
X-Content-Type-Options: nosniff
X-XSS-Protection: 0
Cache-Control: no-cache, no-store, max-age=0, must-revalidate
Pragma: no-cache
Expires: 0
X-Frame-Options: DENY
Content-Length: 0
Date: Sun, 20 Apr 2025 08:08:39 GMT
OIDC Method Authorization
Spring Security supports not only request authorization but also method authorization. When do you need to use method authorization?
- If you want to secure non-HTTP layers. In this case, you can annotate the service layer with e.g.
PreAuthorize("hasRole('hello:read'). - To ensure that a user is not able to access another user's data. This can be achieved with e.g.
@PostAuthorize("returnObject.body.owner == authentication.name").
Let's see how the PostAuthorize works.
Create a new GET endpoint hello-gunter-get in the controller.
@GetMapping("hello-gunter-get")
String helloGunterGet(Authentication authentication) {
    return "Hello Gunter!";
}
Create two new tests, one with user Gunter, who should be able to access the endpoint, and one with user John, who should not be able to access the endpoint.
@Test
@WithMockUser(username = "gunter", roles = {"hello:read"})
void testHelloGunterGet() throws Exception {
    mockMvc.perform(get("/api/hello-gunter-get"))
            .andExpect(status().isOk())
            .andExpect(content().string("Hello Gunter!"));
}

@Test
@WithMockUser(username = "John", roles = {"hello:read"})
void testHelloGunterForbidden() throws Exception {
    mockMvc.perform(get("/api/hello-gunter-get"))
            .andExpect(status().isForbidden());
}
Run the tests, the second test fails because an HTTP OK is returned.
java.lang.AssertionError: Status expected:<403> but was:<200>
Expected :403
Actual   :200
Add the class level annotation @EnabledMethodSecurity to SecurityConfig.
@EnableMethodSecurity
public class SecurityConfig {
...
}
Add an @PostAuthorize annotation to the method in the controller.
@GetMapping("hello-gunter-get")
@PostAuthorize("returnObject.toLowerCase().contains(@keycloakSecurity.preferredUsername(authentication))")
String helloGunterGet(Authentication authentication) {
    return "Hello Gunter!";
}
So, what does this mean? The returnObject is a special object in Spring. It allows you to intercept the return object and perform checks on it. In this case, you want to check whether the preferredUsername from the JWT is contained in the return object. If it is, the user is allowed to access the method; otherwise, the user is not.
The use case for this is the following. Assume that user B is trying to access user A's data. In the query to the database, you take into account user A's ID. The only response you can return is an HTTP Not Found. But you actually want to return an HTTP Forbidden in this case. This is where you can use a PostAuthorize.
In the example, you wanted to verify the username of the user. Keycloak returns the username in the JWT as preferred_username. This is not automatically resolved by Spring. Therefore, a KeycloakSecurity class is added which extracts the preferred_username from the JWT.
@Component("keycloakSecurity")
public class KeycloakSecurity {
    public String preferredUsername(Authentication authentication) {
        Object principal = authentication.getPrincipal();
        if (principal instanceof DefaultOidcUser oidcUser) {
            return oidcUser.getClaimAsString("preferred_username");
        }
        // handle other principal types if needed
        return null;
    }
}
For the tests, you cannot use @WithMockUser anymore. Instead, you need to use oidcLogin and set the necessary parameters. In order to be able to use this, you need to add the spring-security-oauth2-client dependency to the pom.
<dependency>
	<groupId>org.springframework.security</groupId>
	<artifactId>spring-security-oauth2-client</artifactId>
	<scope>test</scope>
</dependency>@Test
void testHelloGunterGet() throws Exception {
mockMvc.perform(get("/api/hello-gunter-get")
.with(oidcLogin()
.idToken(token -> token.claim("preferred_username", "gunter"))
.authorities(new SimpleGrantedAuthority("ROLE_hello:read"))))
.andExpect(status().isOk())
.andExpect(content().string("Hello Gunter!"));
}
@Test
void testHelloGunterForbidden() throws Exception {
mockMvc.perform(get("/api/hello-gunter-get")
.with(oidcLogin()
.idToken(token -> token.claim("preferred_username", "john"))
.authorities(new SimpleGrantedAuthority("ROLE_hello:read"))))
.andExpect(status().isForbidden());
}
Method authorization looks quite complex. Another solution is to check the user's ID before accessing the database record and return the proper response. This seems to be a simpler solution.
Conclusion
In this blog, we learned some basics of Spring Security. The goal was to develop and test OpenID Connect in combination with Keycloak. With this information, you should be able to add authentication and authorization to your application.
Published at DZone with permission of Gunter Rotsaert. See the original article here.
Opinions expressed by DZone contributors are their own.
Comments