

Send Message to TIBCO EMS From JMS Connector in Mule 4.x
Let's look at a tutorial that explains how to send a message to the TIBCO EMS from the JMS Connector in Mule 4.x.
 ·
·
Join the DZone community and get the full member experience.
Join For FreePrerequisites
- Anypoint Studio — Enterprise Edition.
- Access to TIBCO EMS Server.
- To establish connection to TIBCO EMS server with the help of JMS connector, for this will need configuration parameters and required JAR files.
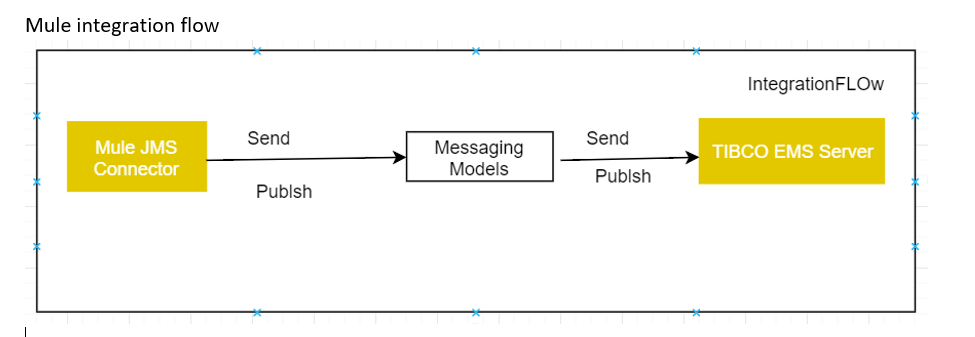
Mule Settings and Configurations
1. Need to get the following required JMS jars from the Message broker (TIBCO EMS):
- jms-2.0.jar
- tibcrypt.jar
- tibjms.jar
- tibjmsadmin.jar
Will import those external jars into respective project as per guidelines like the following location:
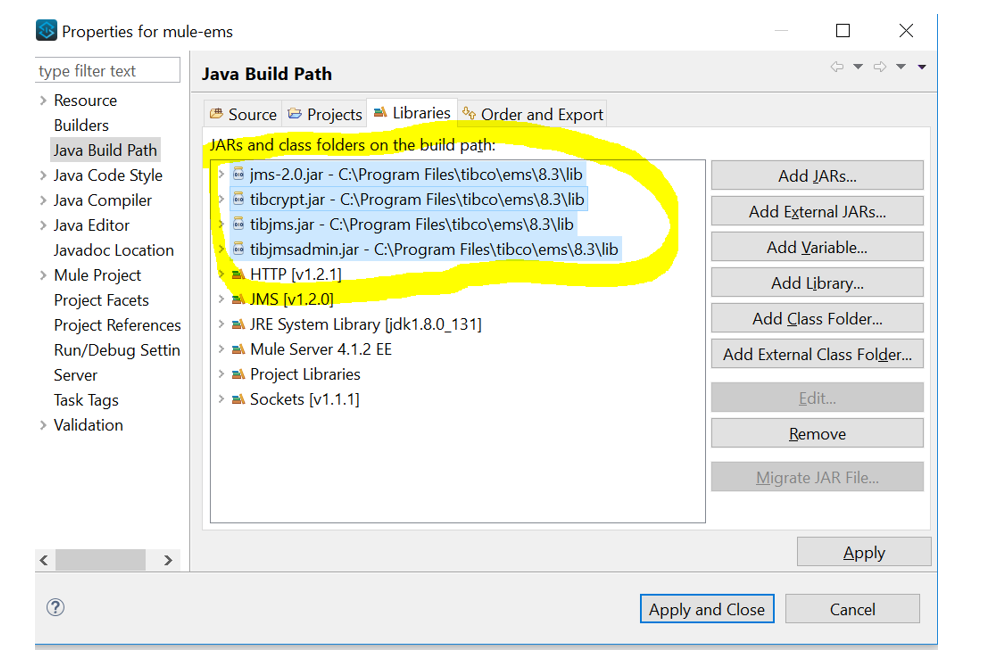
Then, click on the Apply and Close buttons.
As per the above step, we can import all the required shared libraries into the respective project, which are useful for establishing the connection to EMS.
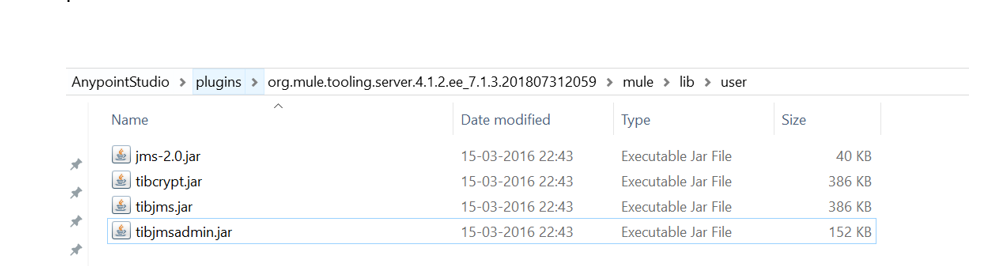
2. After that, place the above jars in anypoint studio tooling. Servers like the path:
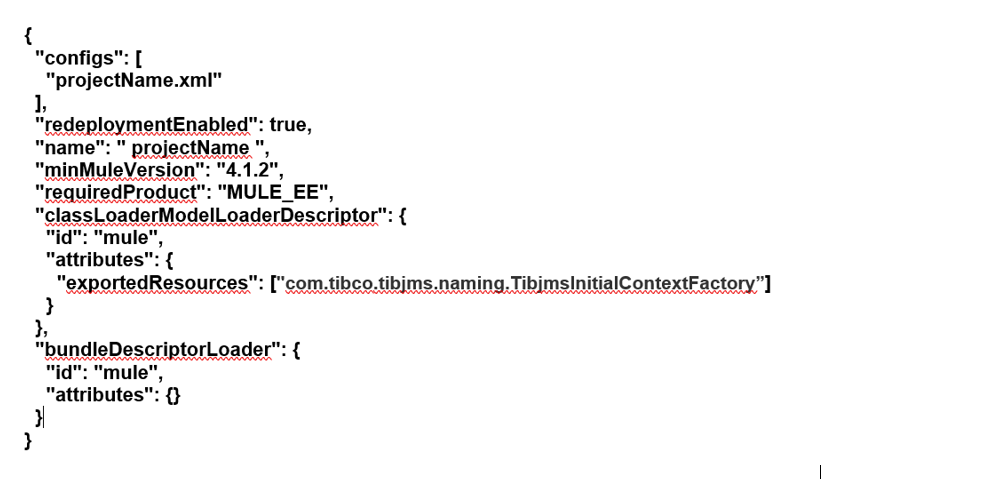
3. As per Mule 4, applications include a mule-artifact.json file in META-INF/mule-artifact/. This describes your app, configuration settings, the required Mule version, and the class loader configuration for adding external jars in the server.
Messaging Channel (TIBCO EMS) Configurations
1. In this step, we are doing configurations and settings in the messaging server level like starting the server, establishing the proper connections, and creating the messaging models.
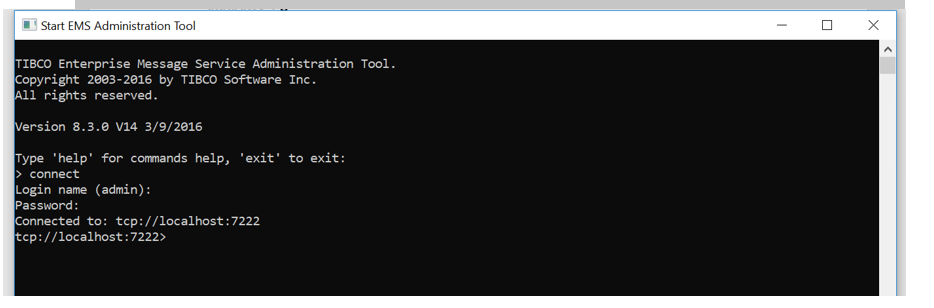
The above step stared server and established connections with respective configuration parameters. The messaging server always runs on TCP protocol in the single network layer.
Then, we will use proper EMS server URL. Here is this — tcp://host:port — for this example is below:
Tcp://localhost:7222 those are default values while used in installation.
Login name: admin
Password: admin
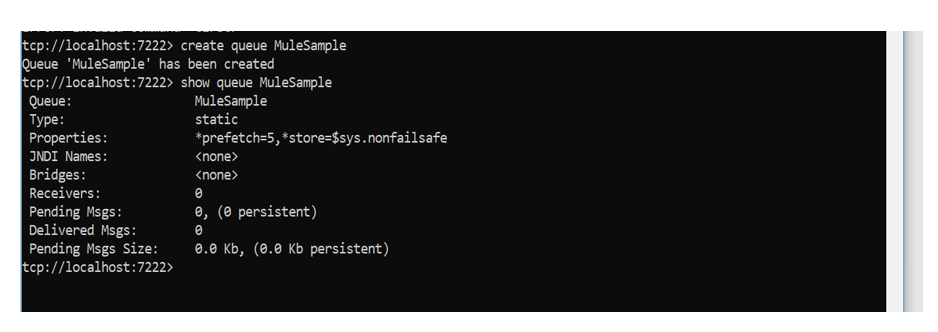
2. In this, we are creating destinations like queue/Topic
Here, I am going to create a MuleSample Queue with default settings and permissions. This queue is a static queue.
Example Use Case in AnypointStudio
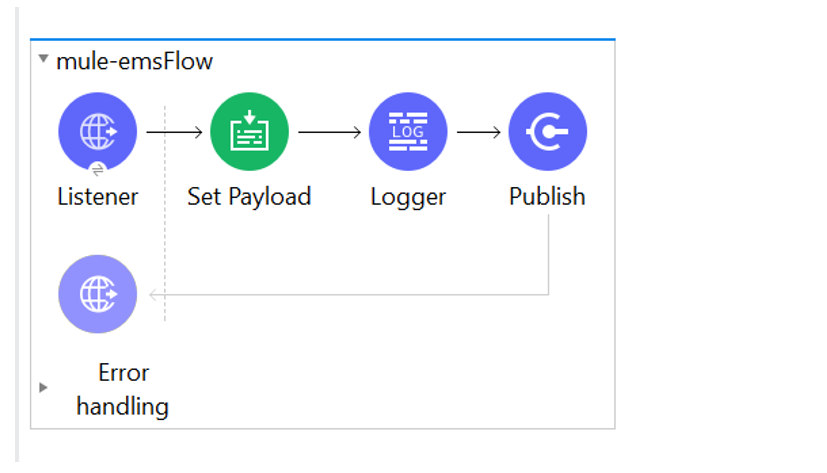
Sending a Message to EMS Flow
In this example, we are pushing a sample message to the EMS server from the Web browser with the help of Http connector and JMS connector in Mule 4.x version.
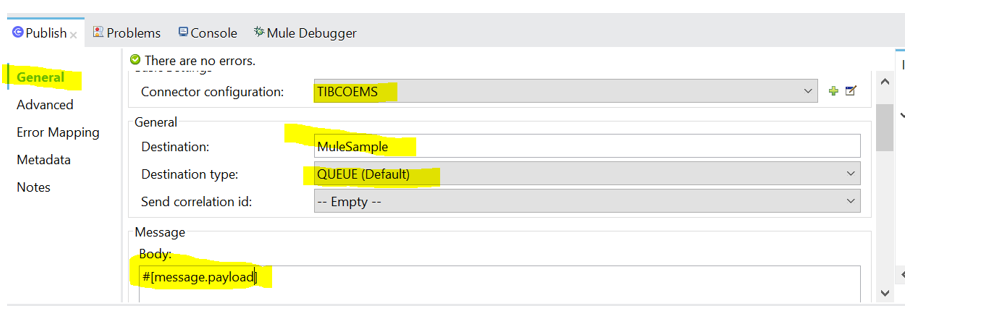
JMS Publisher Connector Configuration
It will give configuration, destination types, destination name, and actual request payload components in the General tab. For this, selecting destination type is Queue type, destination name is MuleSample (which we have created in EMS server), and payload is the actual business request, which we are getting from the web. browser.
After that, we need to establish a connection with EMS server along with configuration parameters which are provided by Messaging channel. For this please refer below steps:
1. Click on Connector configuration tab
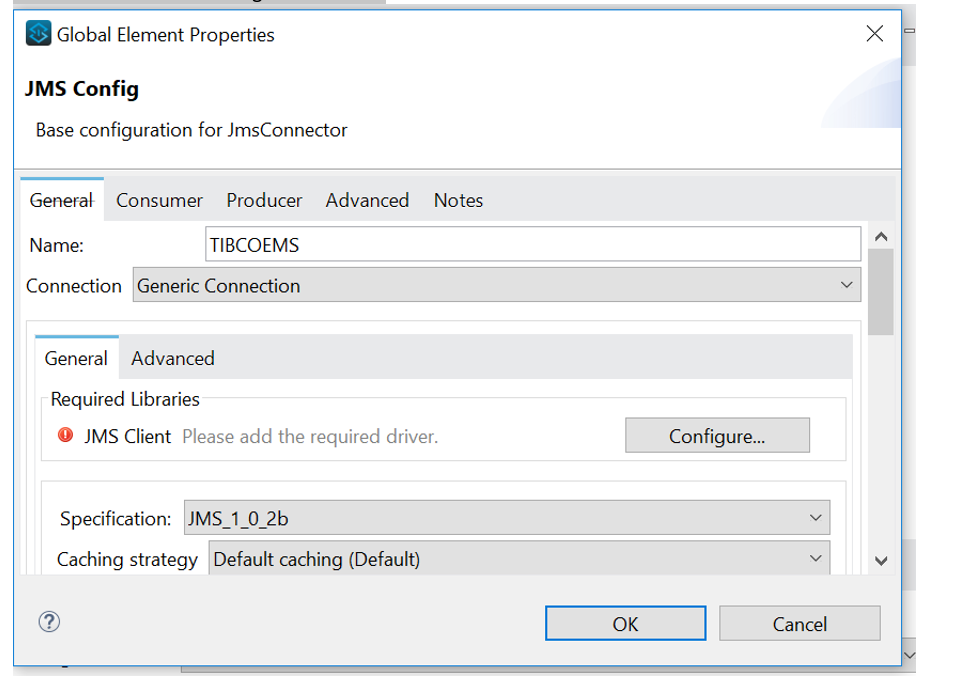
2. Give proper naming convention for connection name. For example:

3. Click on the connection tab and select Generic Connection:

4. Configure the required JMS driver:

5. Provide the proper JNDI configuration parameters like the following:
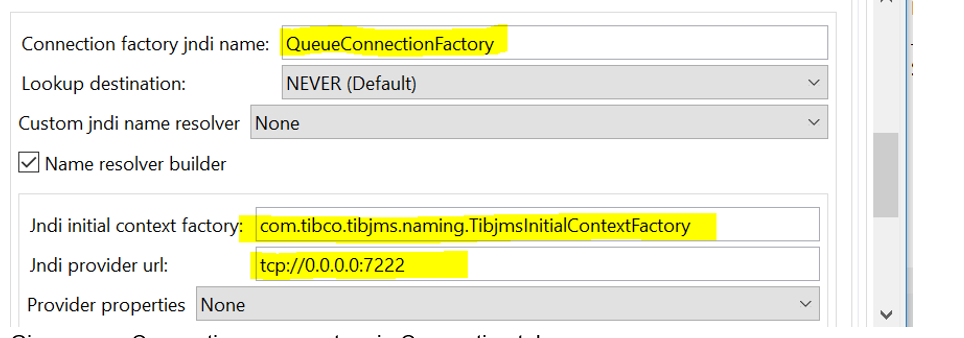
6. Give proper connections parameters in the connection tab:

Then, click on the OK button.
Now we have established a proper connection with TIBCO EMS server. Once we send the sample message/request from the Web browser, that message will send to the TIBCO EMS server with the help of destination. Meanwhile, we will keep the build/run state of the respective Mule project.
Opinions expressed by DZone contributors are their own.
Comments