Spring Boot, Apache Camel, and Swagger UI
Learn how to integrate the popular Spring Boot framework and Swagger UI library using the open source and flexible integration tool, Camel.
Join the DZone community and get the full member experience.
Join For Freecompanies are using lots of systems which have to talk with each other. therefore it's a good idea to use something to integrate these systems. such an application integration can be done by an enterprise service bus or even with an integration framework like apache camel. i highly recommend you use one of these and don't program it on your own by using lots of apis. please don't do this!
i'm a big fan of lightweight integration and flexibility so it's not surprising that apache camel is my tool of choice. apache camel can be used in standalone mode by using a jar containing the camel routes or as part of a runtime like spring boot or wildfly/wildfly swarm, for example. i decided to use spring boot as runtime because it is widely used and comes with a lot of useful things, very good documentation, and so on. in addition to that, i'm using swagger ui to get a beautiful api documentation which makes consuming rest apis much easier.
this blog post describes how to combine these technologies with each other. in case you just want to use the code, here's the link to my github repository.
create a spring boot and apache camel project
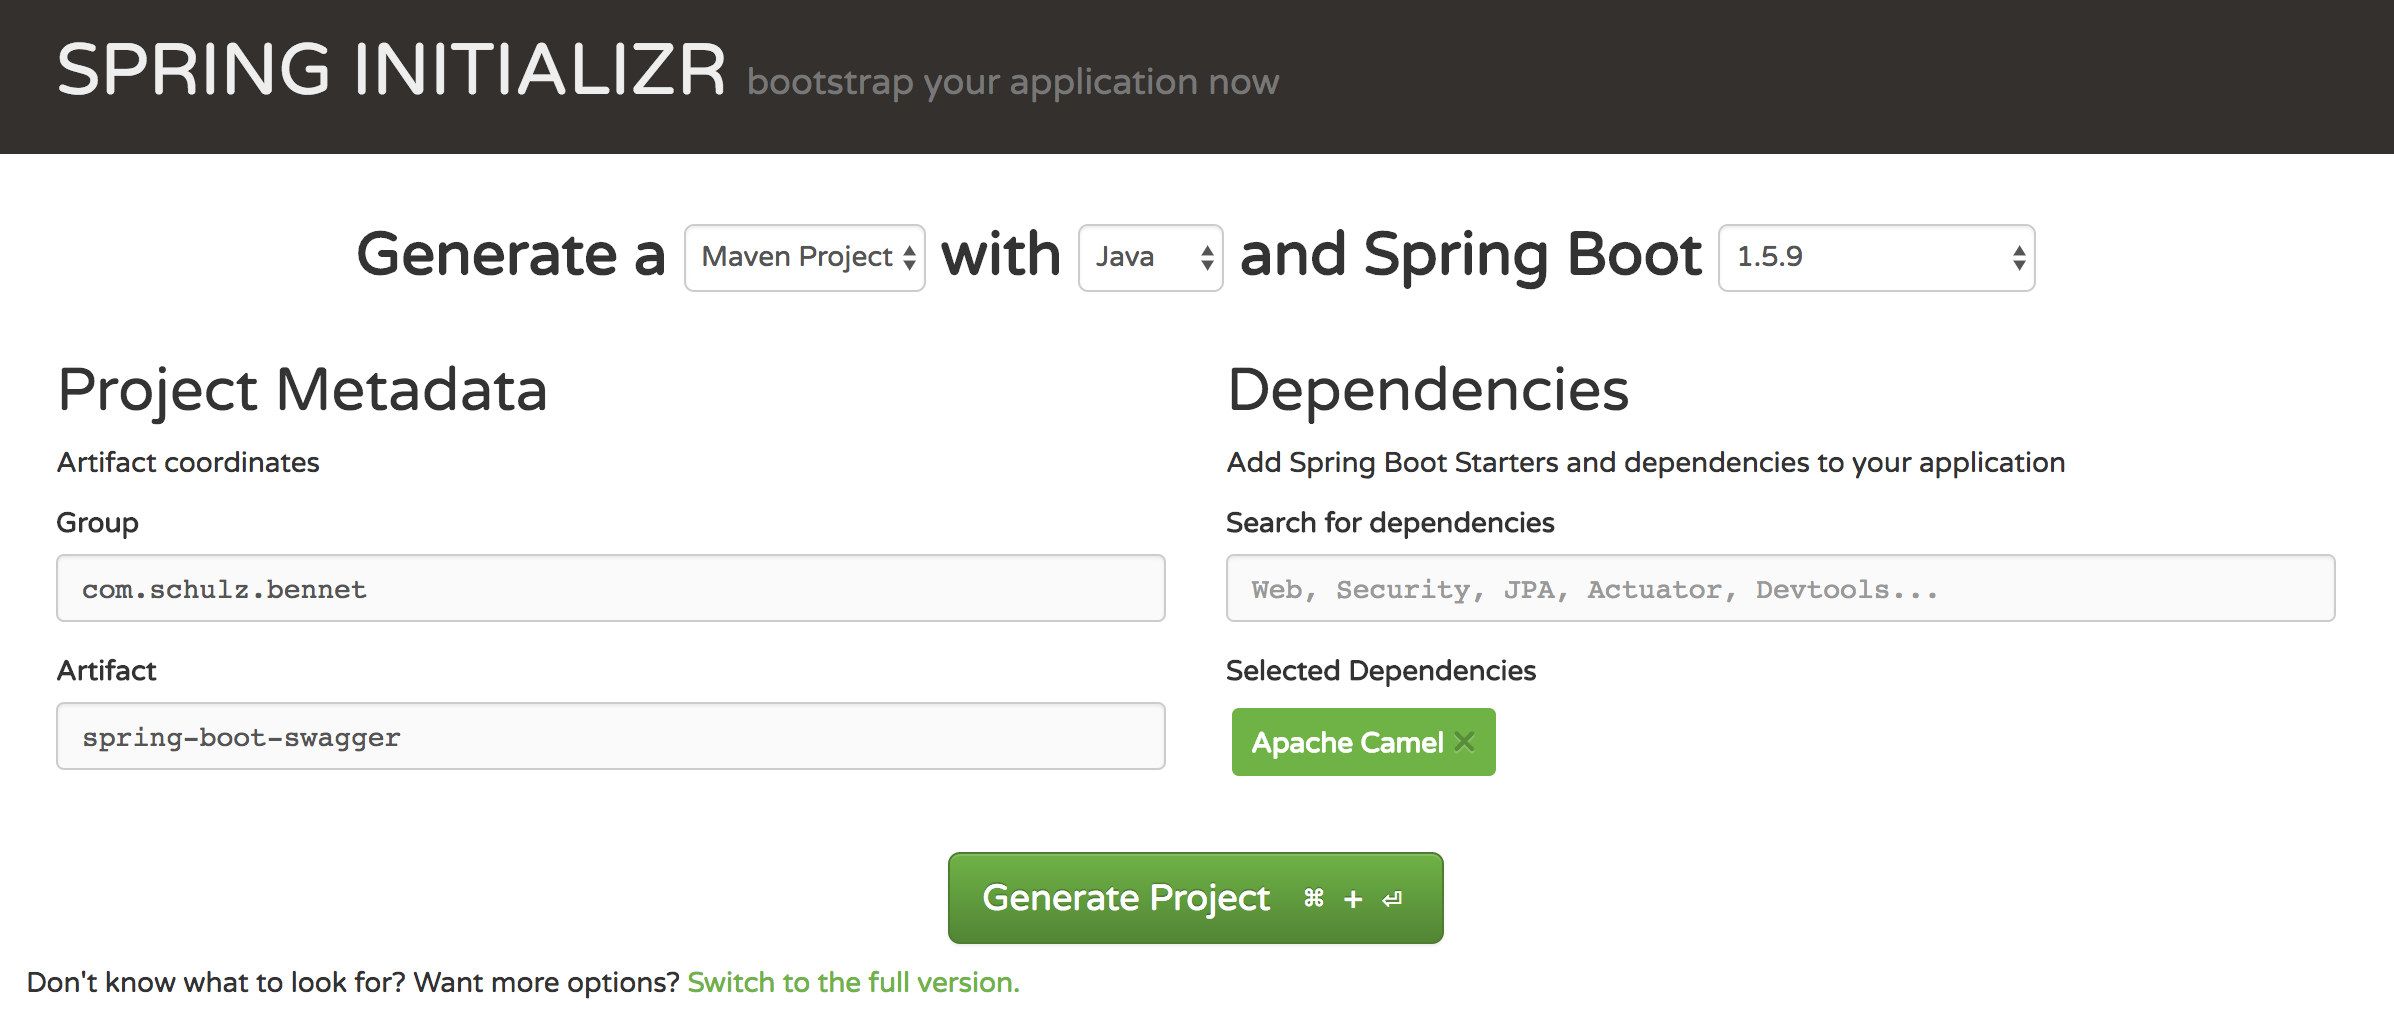
first, we have to create a spring boot project containing the apache camel dependency first. this can easily be done by using the spring initializr which is available at https://start.spring.io/
you just change the group and artifact to the names you like and add apache camel as a spring boot starters dependency. after that, you have to click on generate project and your project is up and running.
integrate swagger ui in spring boot
now we can add the swagger ui files to our spring boot project. this can be done by downloading the swagger ui sources from github .
note: i'm using swagger ui 2.2.8 instead of the latest version because the camel component doesn't support the new api specification of swagger 3.x for now.
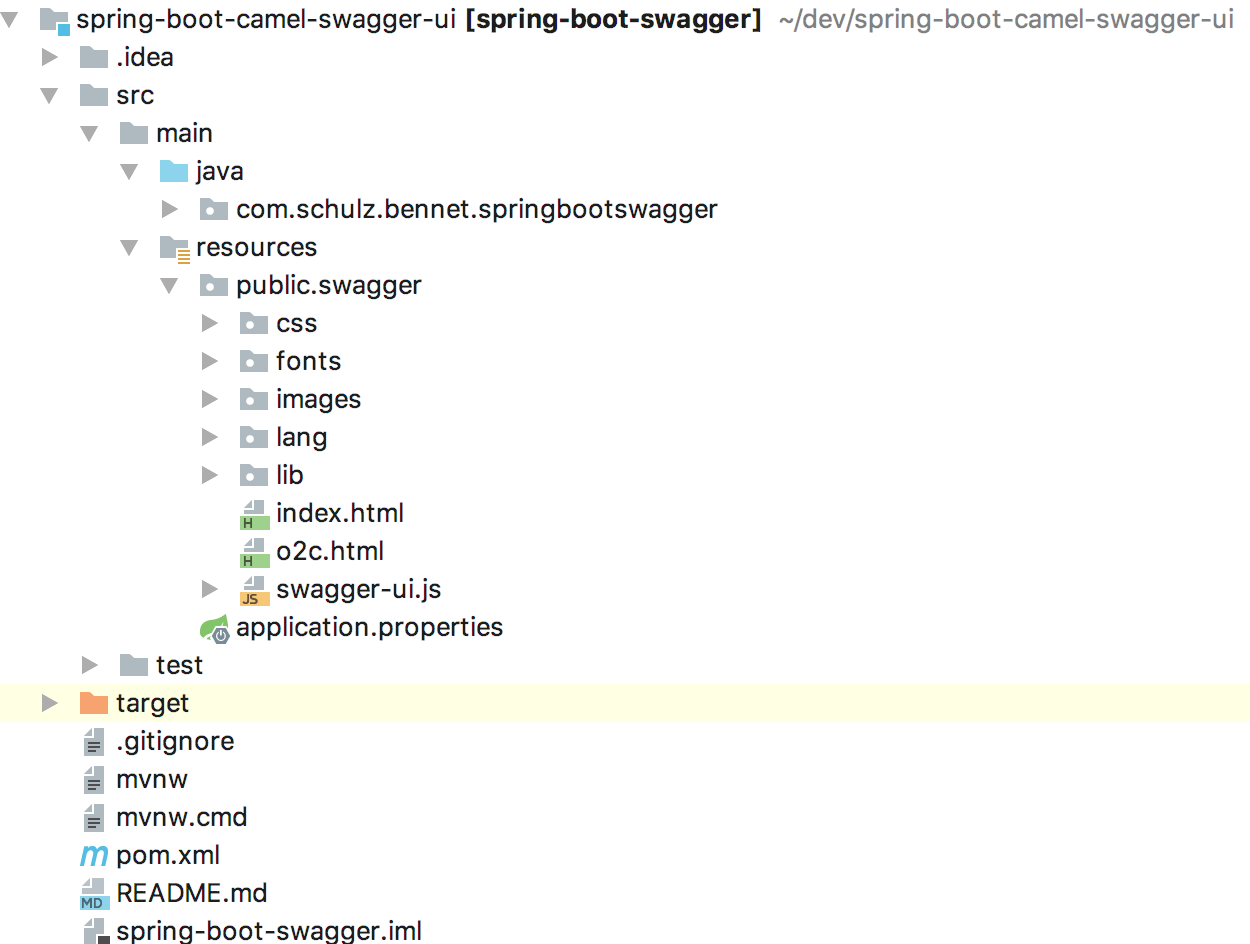
after that, we have to create a new folder at
src/main/resources
which have to be named:
static
,
public
or
resources
to serve our static swagger ui content via spring boot. now we simply have to add the
dist
folder of swagger ui to this folder to make swagger ui available in our project.
after that, swagger ui is available at: http://localhost:8080/swagger/index.html
add a camel route
in the next step, we have to add a simple camel route to the spring boot project. to do this, we have to add a camel servlet first.
package com.schulz.bennet.springbootswagger;

import org.apache.camel.component.servlet.camelhttptransportservlet;
import org.apache.camel.component.swagger.defaultcamelswaggerservlet;
import org.springframework.boot.springapplication;
import org.springframework.boot.autoconfigure.springbootapplication;
import org.springframework.boot.web.servlet.servletregistrationbean;
import org.springframework.context.annotation.bean;

import java.util.hashmap;
import java.util.map;

@springbootapplication
public class springbootswaggerapplication {

    private static final string camel_url_mapping = "/api/*";
    private static final string camel_servlet_name = "camelservlet";

    public static void main(string[] args) {
        springapplication.run(springbootswaggerapplication.class, args);
    }

    @bean
    public servletregistrationbean servletregistrationbean() {
        servletregistrationbean registration =
                new servletregistrationbean(new camelhttptransportservlet(), camel_url_mapping);
        registration.setname(camel_servlet_name);
        return registration;
    }
}
this snippet adds a servlet mapping which will be the prefix of all camel routes we will add later. after that, all camel routes will be available at localhost:8080/api/*. now its time to add the route itself:
package com.schulz.bennet.springbootswagger;

import org.apache.camel.builder.routebuilder;
import org.apache.camel.model.rest.restbindingmode;
import org.springframework.stereotype.component;

@component
public class personroute extends routebuilder {

    @override
    public void configure() {
        restconfiguration().component("servlet").bindingmode(restbindingmode.xml);

        rest("/person").get().outtype(person.class)
                .to("direct:talk");
        from("direct:talk")
                .process(exchange -> {
                    person p = new person();
                    p.setfirstname("bennet");
                    p.setlastname("schulz");
                    exchange.getin().setbody(p);
                });
    }
}
this route adds a person rest uri which can be used by http get only and returns a json response of my person pojo class:
package com.schulz.bennet.springbootswagger;

public class person {

    private string firstname;
    private string lastname;

    public string getfirstname() {
        return firstname;
    }

    public void setfirstname(string firstname) {
        this.firstname = firstname;
    }

    public string getlastname() {
        return lastname;
    }

    public void setlastname(string lastname) {
        this.lastname = lastname;
    }
}
after these steps, the person respone is available at: http://localhost:8080/api/person
combining swagger and camel routes
after adding the rest api, it's time to combine camel and swagger ui with each other. this can be done by changing the url in the swagger
index.html
from the sample petstore to
/api-doc/camel-1
:
<!-- some basic translations -->
  <!-- <script src='lang/translator.js' type='text/javascript'></script> -->
  <!-- <script src='lang/ru.js' type='text/javascript'></script> -->
  <!-- <script src='lang/en.js' type='text/javascript'></script> -->

  <script type="text/javascript">
    $(function () {
      var url = window.location.search.match(/url=([^&]+)/);
      if (url && url.length > 1) {
        url = decodeuricomponent(url[1]);
      } else {
          url = "/api-doc/camel-1";
      }
      hljs.configure({
        highlightsizethreshold: 5000
      });
      // pre load translate...
      if(window.swaggertranslator) {
        window.swaggertranslator.translate();
      }
now we have to add a servlet mapping for swagger to use the camel route urls:
package com.schulz.bennet.springbootswagger;

import org.apache.camel.component.servlet.camelhttptransportservlet;
import org.apache.camel.component.swagger.defaultcamelswaggerservlet;
import org.springframework.boot.springapplication;
import org.springframework.boot.autoconfigure.springbootapplication;
import org.springframework.boot.web.servlet.servletregistrationbean;
import org.springframework.context.annotation.bean;

import java.util.hashmap;
import java.util.map;

@springbootapplication
public class springbootswaggerapplication {

    private static final string camel_url_mapping = "/api/*";
    private static final string camel_servlet_name = "camelservlet";

    public static void main(string[] args) {
        springapplication.run(springbootswaggerapplication.class, args);
    }

    @bean
    public servletregistrationbean servletregistrationbean() {
        servletregistrationbean registration =
                new servletregistrationbean(new camelhttptransportservlet(), camel_url_mapping);
        registration.setname(camel_servlet_name);
        return registration;
    }

    @bean
    public servletregistrationbean swaggerservlet() {
        servletregistrationbean swagger = new servletregistrationbean(new defaultcamelswaggerservlet(), "/api-doc/*");
        map<string, string> params = new hashmap<>();
        params.put("base.path", "api");
        params.put("api.title", "my api title");
        params.put("api.description", "my api description");
        params.put("api.termsofserviceurl", "termsofserviceurl");
        params.put("api.license", "license");
        params.put("api.licenseurl", "licenseurl");
        swagger.setinitparameters(params);
        return swagger;
    }
}
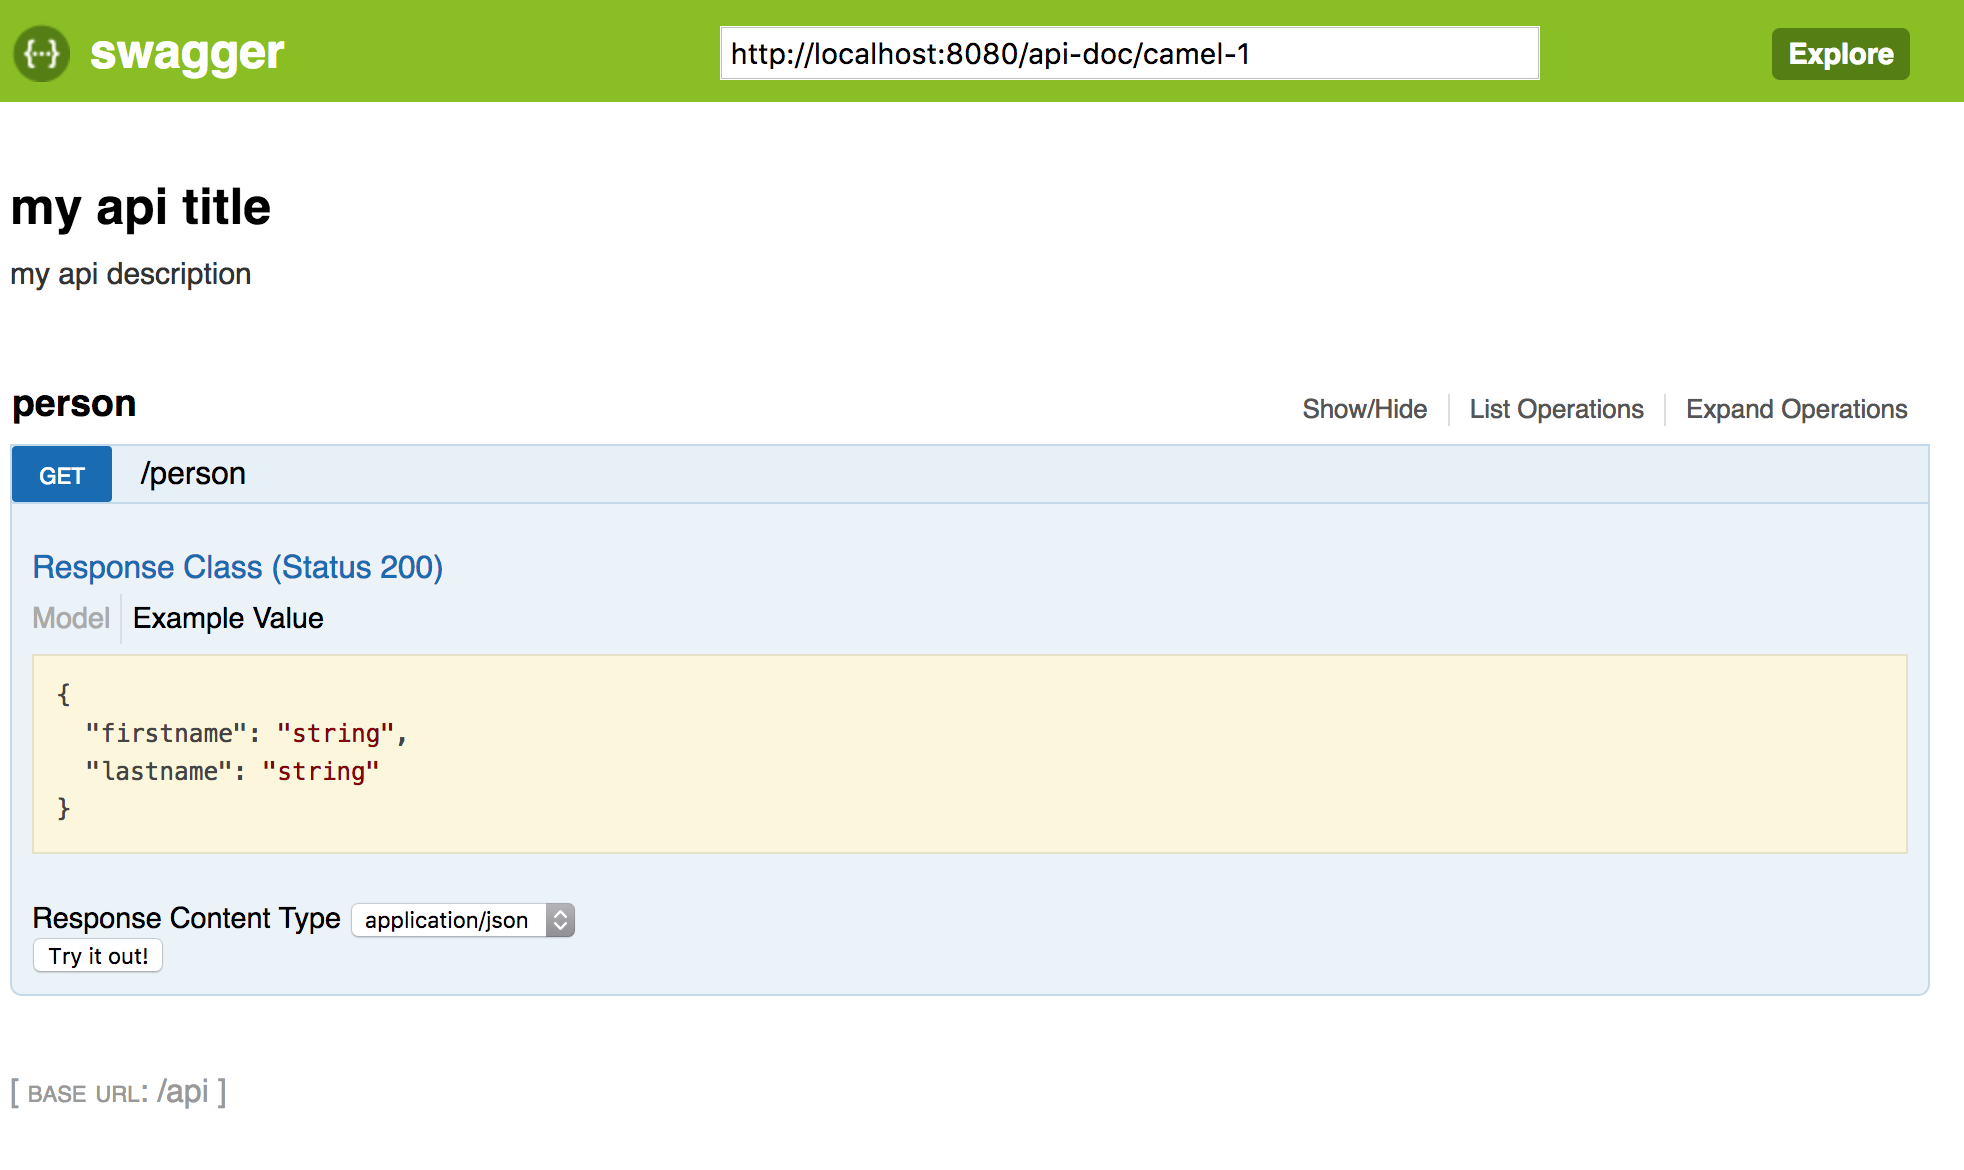
after that, swagger ui will use the camel rest api instead of the sample petstore. it's important to change the
base.path
of the servlet to
api
because our rest apis have
/api/
as a prefix. these steps let swagger ui show a beautiful documentation of our camel rest apis.
have fun with it!
bye,
bennet
Published at DZone with permission of Bennet Schulz, DZone MVB. See the original article here.
Opinions expressed by DZone contributors are their own.


Comments