Spring Cloud Config With the Mule ESB
Where do Mules live? In the cloud, obviously. So, read on to learn how to send your Mule to the cloud with Spring Cloud Config!
Join the DZone community and get the full member experience.
Join For FreeAbstract
A guide for integrating the Mule Spring Cloud connector with the Spring Cloud Config configuration repository.

Summary
As we start pushing out our Mule runtime instances as container-based solutions into the cloud, we look for more creative ways to bind our microservice-based solutions to potentially changing endpoint locations.
Spring Cloud configuration offers us a simple and secure solution for deriving our endpoint properties at startup, using a Git repository.
When an endpoint change is needed, the change can be applied to the Git repository which Mule microservices will read at startup, obviating the need to redeploy the service.
Architecture
Abstracted parameters drive endpoint configuration and Mule supports several ways of working with properties, the most common approach being name/value pairs in YAML or Property Files.
Other approaches can make use of setting properties in system environment variables and passing through the -D parameter into the JVM.
EXPORT resource-uri=https://resource.hots.io:8082
  or
... -Dresource-uri=https://resource.hots.io:8082
While all these approaches are all suitable for configuring Mule properties, in a dynamic microservices environment we prefer an approach with less friction and minimal reconfiguration.
Spring Cloud Config provides just that, a server and client-side support for externalized configuration in a distributed system. With the Config Server, you have a central place to manage external properties for applications across all environments.
When Spring Cloud Config is used together with the Mule Spring Cloud Connector, it allows us to abstract our properties to a Git repository where our Mule application can read and apply them at startup.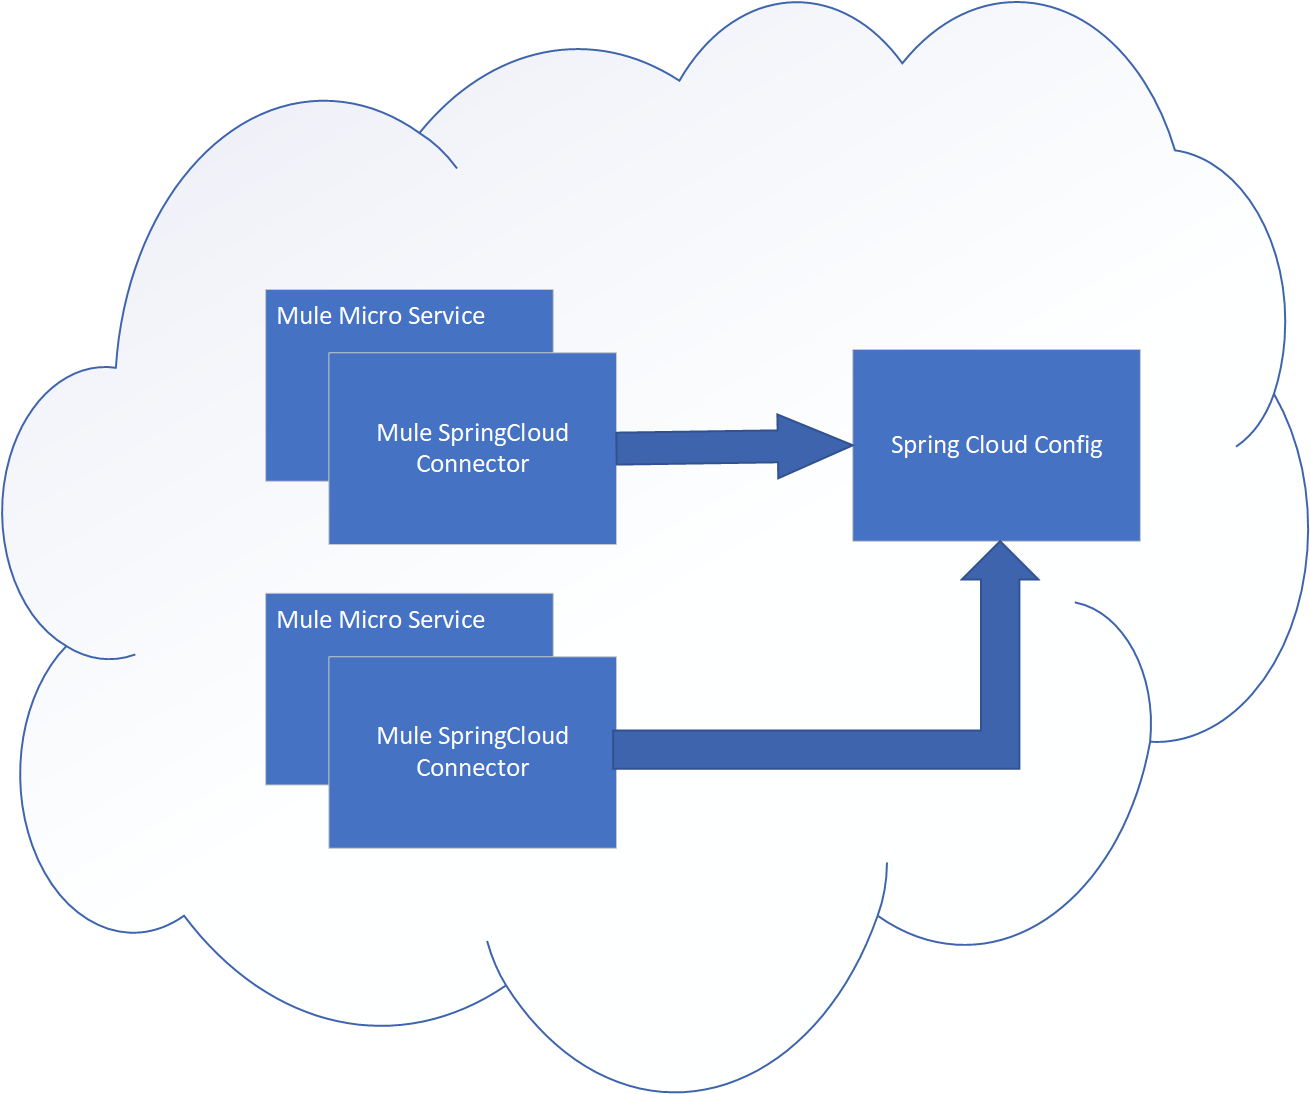
NOTE: Properties imported into the Mule runtime environment from Spring Cloud config will be available when transports are initialized.
Adding the Spring Cloud Connector to Mule
With the overview out of the way, let's begin with the configuration of the Mule Spring Cloud connector and create a demo application to show how all of the pieces fit together. The connector will plug into Mule Anypoint Studio and deploy with the runtime solution. It will provide our interface to the Spring Cloud Config Server.
First, we'll clone the git repository containing the Mule Spring Cloud connector, build the connector, and install it into AnypointStudio.
Building a Standalone Spring Cloud Connector Instance
Start by cloning the Mule Spring Cloud connector instance:
Change into the source folder.
Build and install the connector.
git clone https://github.com/mulesoft-labs/spring-cloud-config-connector.git
cd spring-cloud-config-connector
mvn clean install -Ddevkit.studio.package.skip=false
Import the connector into Mule.
When the build has completed you'll find a file called UpdateSite.zip in the target folder. In AnypointStudio select Menu options: Help->Install New Software.
Press the Add... Button
Choose and name and the location of *UpdateSite.zip*
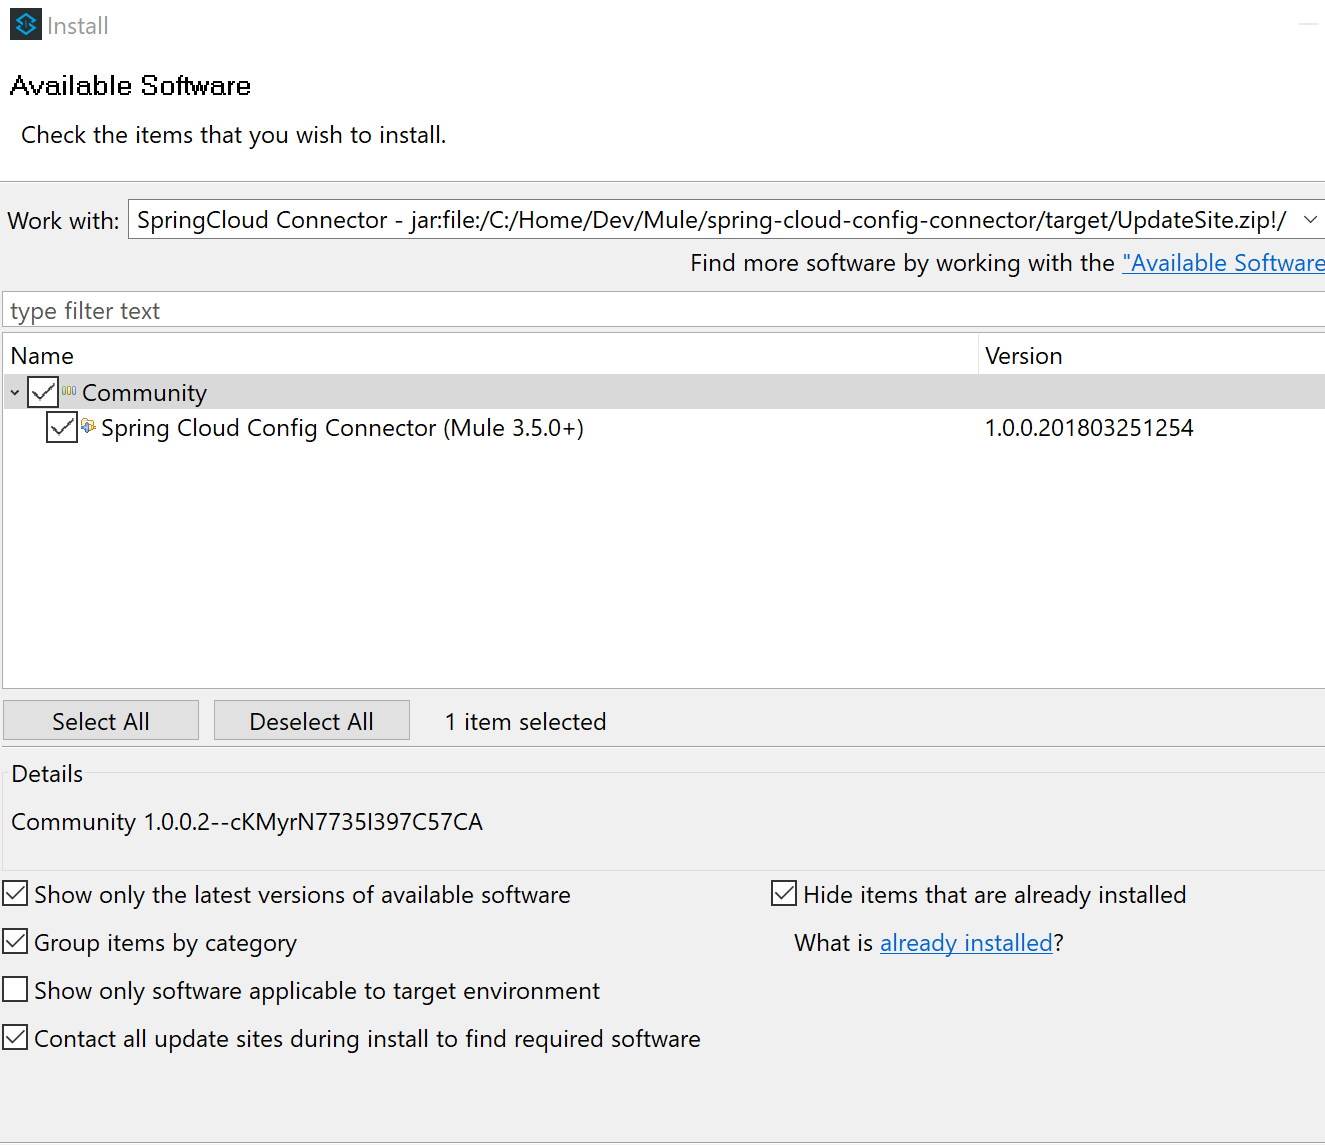
Complete the installation of the connector.
Creating a Sample Mule Project
We'll begin our Mule project configuration by adding the Spring Cloud Config connector to the Global settings.
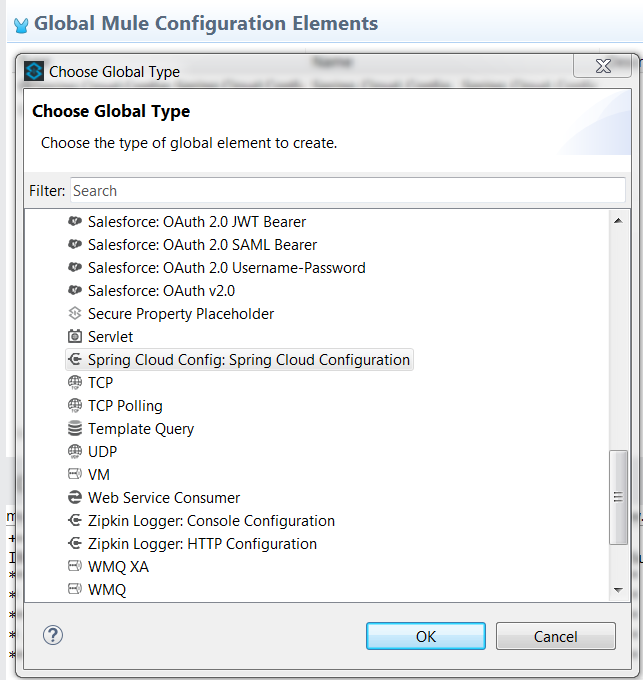
Select the Spring Cloud Config connector from the undef Connector Configuration and select the Ok button. This adds the settings to the Globals display.
Edit the Spring Cloud Config settings to enter the application name, URL, and Profile. These values correspond to the name of the property file you create later for the Git repository configuration. The Application Name will match the first part of the property file naming convention, the Profile will match with the second part of the naming convention. Together, the two will be matched.
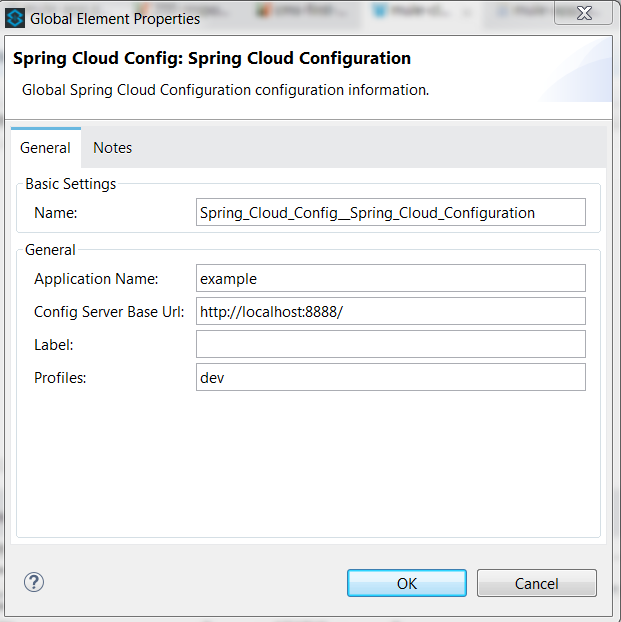
With the Global configurations complete, we move on to the configuration of the Mule Flow.
The Mule implementation demonstrates a simple flow consisting of the following:
An HTTP endpoint to trigger the initiation of the flow.
A logger statement to display fetched property.
<spring-cloud-config:config
  name="Spring_Cloud_Config__Spring_Cloud_Configuration"
  applicationName="example"
  profiles="dev"
  doc:name="Spring Cloud Config: Spring Cloud Configuration"/>

  <http:listener-config name="HTTP_Listener_Configuration"
   host="0.0.0.0" port="${mule.http.port}"
   doc:name="HTTP Listener Configuration"/>


  <flow name="mule-cloud-configFlow">
    <http:listener config-ref="HTTP_Listener_Configuration"
    path="/foo" doc:name="HTTP"/>

    <-- Debug to output properties
        <spring-cloud-config:dump-configuration
         config-ref="Spring_Cloud_Config__Spring_Cloud_Configuration"
         doc:name="Spring Cloud Config"/>
     -->

     <logger message="Property: ActiveMQ URI = ${activemq.url}"
      level="INFO" doc:name="Logger"/>

  </flow>
With the Mule flow complete, we move on to the creation of the Spring Boot component.
Creating the SpringConfig Server
The SpringConfig Server will be a simple Spring Boot project which will look for property dependencies in a Git repository. Let's start by creating the Git repository by adding a property file and committing the changes.
Creating the Git Repository for properties:
cd \home\Dev
mkdir git-localconfig-repo
cd git-localconfig-repo

# Initialize the Git repository
git init
Using your favorite editor, create a property file with the following sample properties:
# Git Repository location is \home\Dev\git-localconfig-repo

# Use your favorite editor to create the property file below, im going to cheat and use cat in my git bash shell
cat > example-dev.properties
################################
#  ActimeMQ server properties  #
################################
activemq.url=tcp://localhost:61616

################################
# HTTP Properties              #
################################
mule.http.port=8083
^D
The property file name *example-dev.properties* is significant. The first part example equates to application name which you added earlier in the Mule global property configuration for SpringConfig, the values after the dash (dev) represent the profile names for the properties, which can be a comma-separated list of profiles to be read from the repository. Each Profile will match to a corresponding Property file in Git.
Now that we have a property file in a local Git repository, we'll commit the changes and move on to creating the SpringConfig Server.
NOTE: To create our Spring Boot Cloud Config Server project, start at http://start.spring.io/.
Create a SpringBoot Project
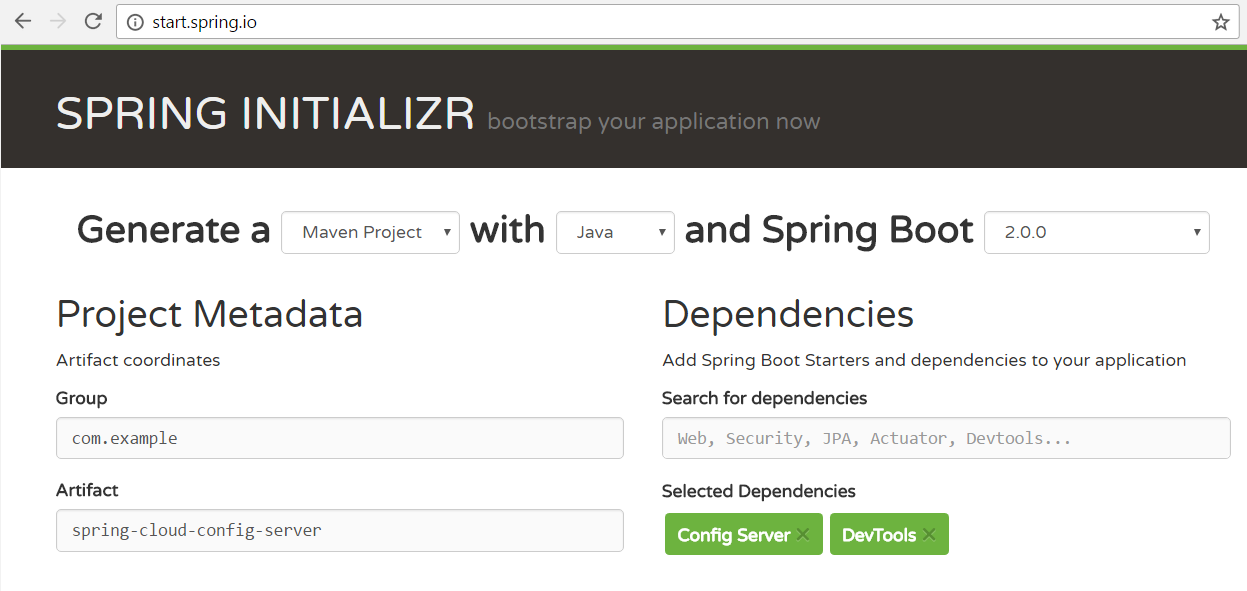
With the SpringConfig Server created we'll add the necessary pieces to create the server and bind it to our Git properties.
SpringConfig Server settings:
Enable the server with
@EnableConfigServer.Define the server property configuration:
@EnableConfigServer
@SpringBootApplication
public class Spring CloudConfigServerApplication {

  public static void main(String[] args) {
    SpringApplication.run(Spring CloudConfigServerApplication.class, args);
  }
}
Property file configuration:
# application.properties
spring.application.name=spring-cloud-config-server

# Default port for Spring Cloud Config Server
server.port=8888

# Define the location of our Git repo
spring.cloud.config.server.git.uri=file:///Home/Dev/git-localconfig-repo/
Now the changes are in place for the SpringConfig Server, let's start it up and access the property settings from our Mule application
Start our SpringConfig Server with Maven:
mvn spring-boot:runNext, start the Mule flow and trigger the flow to review the results of the SpringConfig Server integration.
Notice that the HTTP Flow starter will derive its property setting from the Spring Cloud Config Server, initiate the Flow and the Logger statement will print the property value obtained for the ActiveMQ server.
I hope you enjoyed this article as much as I have enjoyed writing it and look forward to your feedback.
Opinions expressed by DZone contributors are their own.

Comments