Spring MVC Example for User Registration and Login
This article is a step-by-step guide for setting up a User Registration and Login using a few web dev languages and databases.
Join the DZone community and get the full member experience.
Join For FreeThis article is a step by step guide for User Registration and Login using the below tools and technologies.
1. Spring Framework (Core, MVC & JDBC)
2. Java 1.8
3. Maven 3.3.9
4. Eclipse IDE (Mars2)
5. MySQL 5.1
Step 1: Create a Maven Project
Using Eclipse IDE, create a Maven Project by selecting Web Archetype.
Step 2: Update Pom.xml
Update your maven dependencies.
<project xmlns="http://maven.apache.org/POM/4.0.0" xmlns:xsi="http://www.w3.org/2001/XMLSchema-instance" xsi:schemaLocation="http://maven.apache.org/POM/4.0.0 http://maven.apache.org/maven-v4_0_0.xsd">
    <modelVersion>4.0.0</modelVersion>
    <groupId>jbr</groupId>
    <artifactId>SpringMvcUser</artifactId>
    <packaging>war</packaging>
    <version>0.1</version>
    <name>SpringMvcUser Maven Webapp</name>
    <url>http://maven.apache.org</url>
    <properties>
        <project.build.sourceEncoding>UTF-8</project.build.sourceEncoding>
        <spring.version>4.3.2.RELEASE</spring.version>
        <junit.version>4.12</junit.version>
        <servlet.version>3.1.0</servlet.version>
        <servlet.version>3.0.1</servlet.version>
        <mysql.connector.version>5.1.9</mysql.connector.version>
    </properties>
    <dependencies>
        <!-- Junit -->
        <dependency>
            <groupId>junit</groupId>
            <artifactId>junit</artifactId>
            <version>${junit.version}</version>
            <scope>test</scope>
        </dependency>
        <!--Servlet-Api -->
        <dependency>
            <groupId>javax.servlet</groupId>
            <artifactId>javax.servlet-api</artifactId>
            <version>${servlet.version}</version>
        </dependency>
        <!-- Spring Framework -->
        <dependency>
            <groupId>org.springframework</groupId>
            <artifactId>spring-core</artifactId>
            <version>${spring.version}</version>
        </dependency>
        <dependency>
            <groupId>org.springframework</groupId>
            <artifactId>spring-beans</artifactId>
            <version>${spring.version}</version>
        </dependency>
        <dependency>
            <groupId>org.springframework</groupId>
            <artifactId>spring-context</artifactId>
            <version>${spring.version}</version>
        </dependency>
        <dependency>
            <groupId>org.springframework</groupId>
            <artifactId>spring-jdbc</artifactId>
            <version>${spring.version}</version>
        </dependency>
        <dependency>
            <groupId>org.springframework</groupId>
            <artifactId>spring-test</artifactId>
            <version>${spring.version}</version>
            <scope>test</scope>
        </dependency>
        <dependency>
            <groupId>org.springframework</groupId>
            <artifactId>spring-webmvc</artifactId>
            <version>${spring.version}</version>
        </dependency>
        <!-- Servlet API -->
        <dependency>
            <groupId>javax.servlet</groupId>
            <artifactId>javax.servlet-api</artifactId>
            <version>${servlet.version}</version>
        </dependency>
        <!-- MySQL database driver -->
        <dependency>
            <groupId>mysql</groupId>
            <artifactId>mysql-connector-java</artifactId>
            <version>${mysql.connector.version}</version>
        </dependency>
    </dependencies>
    <build>
        <finalName>SpringMvcUser</finalName>
    </build>
</project>
Step 3: Update web.xml
Update the web.xml under src/main/webapp/WEB-INF as shown below:
<?xml version="1.0" encoding="UTF-8"?>
<web-app xmlns:xsi="http://www.w3.org/2001/XMLSchema-instance" xmlns="http://java.sun.com/xml/ns/javaee" xsi:schemaLocation="http://java.sun.com/xml/ns/javaee http://java.sun.com/xml/ns/javaee/web-app_3_0.xsd" version="3.0">
    <display-name>Archetype Created Web Application</display-name>
    <welcome-file-list>
        <welcome-file>home.jsp</welcome-file>
    </welcome-file-list>
    <servlet>
        <servlet-name>spring-mvc</servlet-name>
        <servlet-class>org.springframework.web.servlet.DispatcherServlet</servlet-class>
        <load-on-startup>1</load-on-startup>
    </servlet>
    <servlet-mapping>
        <servlet-name>spring-mvc</servlet-name>
        <url-pattern>/</url-pattern>
    </servlet-mapping>
</web-app>DispatcherServletis the root Servlet for any Servlet defined in your application. It will redirect the request made to the application to the appropriate controller based on the URL.spring-mvcis the name of the root servlet and Spring container will look for the configuration with this name. So next step is to create a spring configuration with spring-mvc-servlet.xml.
Step 4: Create spring-mvc-servlet.xml
Create spring-mvc-servlet.xml under the src/main/webapp/WEB-INF folder and define the beans.
<?xml version="1.0" encoding="UTF-8"?>
<beans xmlns="http://www.springframework.org/schema/beans" xmlns:context="http://www.springframework.org/schema/context" xmlns:xsi="http://www.w3.org/2001/XMLSchema-instance" xsi:schemaLocation=" http://www.springframework.org/schema/beans  http://www.springframework.org/schema/beans/spring-beans-3.0.xsd http://www.springframework.org/schema/context  http://www.springframework.org/schema/context/spring-context-3.0.xsd">
    <import resource="classpath:jbr/config/user-beans.xml" />
    <context:component-scan base-package="jbr.springmvc" />
    <context:annotation-config />
    <bean class="org.springframework.web.servlet.view.InternalResourceViewResolver">
        <property name="prefix" value="/jsp/" />
        <property name="suffix" value=".jsp" />
    </bean>
</beans>
Step 5: Create Controllers
Create Separate Controllers for User Registration and Login as below.
Create a package jbr.springmvc.controller
RegistrationController.java
package jbr.springmvc.controller;

import javax.servlet.http.HttpServletRequest;
import javax.servlet.http.HttpServletResponse;

import org.springframework.beans.factory.annotation.Autowired;
import org.springframework.stereotype.Controller;
import org.springframework.web.bind.annotation.ModelAttribute;
import org.springframework.web.bind.annotation.RequestMapping;
import org.springframework.web.bind.annotation.RequestMethod;
import org.springframework.web.servlet.ModelAndView;

import jbr.springmvc.model.User;
import jbr.springmvc.service.UserService;

@Controller
public class RegistrationController {
  @Autowired
  public UserService userService;

  @RequestMapping(value = "/register", method = RequestMethod.GET)
  public ModelAndView showRegister(HttpServletRequest request, HttpServletResponse response) {
    ModelAndView mav = new ModelAndView("register");
    mav.addObject("user", new User());

    return mav;
  }

  @RequestMapping(value = "/registerProcess", method = RequestMethod.POST)
  public ModelAndView addUser(HttpServletRequest request, HttpServletResponse response,
  @ModelAttribute("user") User user) {

  userService.register(user);

  return new ModelAndView("welcome", "firstname", user.getFirstname());
  }
}
LoginController.java
package jbr.springmvc.controller;

import javax.servlet.http.HttpServletRequest;
import javax.servlet.http.HttpServletResponse;

import org.springframework.beans.factory.annotation.Autowired;
import org.springframework.stereotype.Controller;
import org.springframework.web.bind.annotation.ModelAttribute;
import org.springframework.web.bind.annotation.RequestMapping;
import org.springframework.web.bind.annotation.RequestMethod;
import org.springframework.web.servlet.ModelAndView;

import jbr.springmvc.model.Login;
import jbr.springmvc.model.User;
import jbr.springmvc.service.UserService;

@Controller
public class LoginController {

  @Autowired
  UserService userService;

  @RequestMapping(value = "/login", method = RequestMethod.GET)
  public ModelAndView showLogin(HttpServletRequest request, HttpServletResponse response) {
    ModelAndView mav = new ModelAndView("login");
    mav.addObject("login", new Login());

    return mav;
  }

  @RequestMapping(value = "/loginProcess", method = RequestMethod.POST)
  public ModelAndView loginProcess(HttpServletRequest request, HttpServletResponse response,
  @ModelAttribute("login") Login login) {
    ModelAndView mav = null;

    User user = userService.validateUser(login);

    if (null != user) {
    mav = new ModelAndView("welcome");
    mav.addObject("firstname", user.getFirstname());
    } else {
    mav = new ModelAndView("login");
    mav.addObject("message", "Username or Password is wrong!!");
    }

    return mav;
  }

}
Step 5: Create POJO Classes
Create a package: jbr.springmvc.model
Login.java
package jbr.springmvc.model;

public class Login {

  private String username;
  private String password;

  public String getUsername() {
  return username;
  }

  public void setUsername(String username) {
  this.username = username;
  }

  public String getPassword() {
  return password;
  }

  public void setPassword(String password) {
  this.password = password;
  }

}
User.java
package jbr.springmvc.model;

public class User {

  private String username;
  private String password;
  private String firstname;
  private String lastname;
  private String email;
  private String address;
  private int phone;

  public String getUsername() {
  return username;
  }

  public void setUsername(String username) {
  this.username = username;
  }

  public String getPassword() {
  return password;
  }

  public void setPassword(String password) {
  this.password = password;
  }

  public String getFirstname() {
  return firstname;
  }

  public void setFirstname(String firstname) {
  this.firstname = firstname;
  }

  public String getLastname() {
  return lastname;
  }

  public void setLastname(String lastname) {
  this.lastname = lastname;
  }

  public String getEmail() {
  return email;
  }

  public void setEmail(String email) {
  this.email = email;
  }

  public String getAddress() {
  return address;
  }

  public void setAddress(String address) {
  this.address = address;
  }

  public int getPhone() {
  return phone;
  }

  public void setPhone(int phone) {
  this.phone = phone;
  }
}
Note: If you wanted to add any new logic, you can add another layer called service and access the DAO layer.
Step 6: Create DAO Classes
Create an interface/classes for accessing the MySQL Database.
Create a package: jbr.springmvc.dao
UserDao.java
package jbr.springmvc.dao;

import jbr.springmvc.model.Login;
import jbr.springmvc.model.User;

public interface UserDao {

  void register(User user);

  User validateUser(Login login);
}
UserDaoImpl.java
package jbr.springmvc.dao;

import java.sql.ResultSet;
import java.sql.SQLException;
import java.util.List;

import javax.sql.DataSource;

import org.springframework.beans.factory.annotation.Autowired;
import org.springframework.jdbc.core.JdbcTemplate;
import org.springframework.jdbc.core.RowMapper;

import jbr.springmvc.model.Login;
import jbr.springmvc.model.User;

public class UserDaoImpl implements UserDao {

  @Autowired
  DataSource datasource;

  @Autowired
  JdbcTemplate jdbcTemplate;

  public void register(User user) {

    String sql = "insert into users values(?,?,?,?,?,?,?)";

    jdbcTemplate.update(sql, new Object[] { user.getUsername(), user.getPassword(), user.getFirstname(),
    user.getLastname(), user.getEmail(), user.getAddress(), user.getPhone() });
    }

    public User validateUser(Login login) {

    String sql = "select * from users where username='" + login.getUsername() + "' and password='" + login.getPassword()
    + "'";

    List<User> users = jdbcTemplate.query(sql, new UserMapper());

    return users.size() > 0 ? users.get(0) : null;
    }

  }

  class UserMapper implements RowMapper<User> {

  public User mapRow(ResultSet rs, int arg1) throws SQLException {
    User user = new User();

    user.setUsername(rs.getString("username"));
    user.setPassword(rs.getString("password"));
    user.setFirstname(rs.getString("firstname"));
    user.setLastname(rs.getString("lastname"));
    user.setEmail(rs.getString("email"));
    user.setAddress(rs.getString("address"));
    user.setPhone(rs.getInt("phone"));

    return user;
  }
}
Step 7: Create Spring Beans Configuration
Under resources , create a new xml bean configuration user-beans.xml to define the beans we created.
<?xml version="1.0" encoding="UTF-8"?>
<beans xmlns="http://www.springframework.org/schema/beans" xmlns:context="http://www.springframework.org/schema/context" xmlns:xsi="http://www.w3.org/2001/XMLSchema-instance" xsi:schemaLocation=" http://www.springframework.org/schema/beans  http://www.springframework.org/schema/beans/spring-beans-3.0.xsd http://www.springframework.org/schema/context  http://www.springframework.org/schema/context/spring-context-3.0.xsd">
    <context:component-scan base-package="jbr.springmvc" />
    <context:annotation-config />
    <bean id="userService" class="jbr.springmvc.service.UserServiceImpl" />
    <bean id="userDao" class="jbr.springmvc.dao.UserDaoImpl" />
    <bean id="jdbcTemplate" class="org.springframework.jdbc.core.JdbcTemplate">
        <property name="dataSource" ref="datasource" />
    </bean>
    <bean id="datasource" class="org.springframework.jdbc.datasource.DriverManagerDataSource">
        <property name="driverClassName" value="com.mysql.jdbc.Driver" />
        <property name="url" value="jdbc:mysql://localhost:3306/myusers" />
        <property name="username" value="root" />
        <property name="password" value="root" />
    </bean>
</beans>
Step 8: Create Tables in MySQL
CREATE DATABASE
  IF NOT EXISTS myusers;USE
    DROP TABLE
    DROP TABLE IF EXISTS `myusers`.`users`;CREATE TABLE `myusers`.`users`
                 (
                              `username`  VARCHAR(45) NOT NULL,
                              `password`  VARCHAR(45) NULL,
                              `firstname` VARCHAR(45) NOT NULL,
                              `lastname`  VARCHAR(45) NULL,
                              `email`     VARCHAR(45) NULL,
                              `address`   VARCHAR(45) NULL,
                              `phone`     INT NULL,
                              PRIMARY KEY (`username`)
                 )
Step 9: Create Views
Under the /src/main/webapp folder, create a home.jsp which we defined as 'welcome-file' in web.xml.
home.jsp
<%@ page language="java" contentType="text/html; charset=ISO-8859-1" pageEncoding="ISO-8859-1" %>
    <!DOCTYPE html PUBLIC "-//W3C//DTD HTML 4.01 Transitional//EN" "http://www.w3.org/TR/html4/loose.dtd">
    <html>

    <head>
        <meta http-equiv="Content-Type" content="text/html; charset=ISO-8859-1">
        <title>Welcome</title>
    </head>

    <body>
        <table align="center">
            <tr>
                <td><a href="login">Login</a>
                </td>
                <td><a href="register">Register</a>
                </td>
            </tr>
        </table>
    </body>

    </html>
Under /src/main/webapp/jsp create:
register.jsp
<%@ taglib prefix="form" uri="http://www.springframework.org/tags/form" %>

    <%@ page language="java" contentType="text/html; charset=ISO-8859-1" pageEncoding="ISO-8859-1" %>
        <html>

        <head>
            <meta http-equiv="Content-Type" content="text/html; charset=ISO-8859-1">
            <title>Registration</title>
        </head>

        <body>
            <form:form id="regForm" modelAttribute="user" action="registerProcess" method="post">

                <table align="center">
                    <tr>
                        <td>
                            <form:label path="username">Username</form:label>
                        </td>
                        <td>
                            <form:input path="username" name="username" id="username" />
                        </td>
                    </tr>
                    <tr>
                        <td>
                            <form:label path="password">Password</form:label>
                        </td>
                        <td>
                            <form:password path="password" name="password" id="password" />
                        </td>
                    </tr>
                    <tr>
                        <td>
                            <form:label path="firstname">FirstName</form:label>
                        </td>
                        <td>
                            <form:input path="firstname" name="firstname" id="firstname" />
                        </td>
                    </tr>
                    <tr>
                        <td>
                            <form:label path="lastname">LastName</form:label>
                        </td>
                        <td>
                            <form:input path="lastname" name="lastname" id="lastname" />
                        </td>
                    </tr>
                    <tr>
                        <td>
                            <form:label path="email">Email</form:label>
                        </td>
                        <td>
                            <form:input path="email" name="email" id="email" />
                        </td>
                    </tr>
                    <tr>
                        <td>
                            <form:label path="address">Address</form:label>
                        </td>
                        <td>
                            <form:input path="address" name="address" id="address" />
                        </td>
                    </tr>
                    <tr>
                        <td>
                            <form:label path="phone">Phone</form:label>
                        </td>
                        <td>
                            <form:input path="phone" name="phone" id="phone" />
                        </td>
                    </tr>

                    <tr>
                        <td></td>
                        <td>
                            <form:button id="register" name="register">Register</form:button>
                        </td>
                    </tr>
                    <tr></tr>
                    <tr>
                        <td></td>
                        <td><a href="home.jsp">Home</a>
                        </td>
                    </tr>
                </table>
            </form:form>

        </body>

        </html>
login.jsp
<%@ taglib prefix="form" uri="http://www.springframework.org/tags/form" %>
    <%@ page language="java" contentType="text/html; charset=ISO-8859-1" pageEncoding="ISO-8859-1" %>
        <!DOCTYPE html PUBLIC "-//W3C//DTD HTML 4.01 Transitional//EN" "http://www.w3.org/TR/html4/loose.dtd">
        <html>

        <head>
            <meta http-equiv="Content-Type" content="text/html; charset=ISO-8859-1">
            <title>Login</title>
        </head>

        <body>

            <form:form id="loginForm" modelAttribute="login" action="loginProcess" method="post">
                <table align="center">
                    <tr>
                        <td>
                            <form:label path="username">Username: </form:label>
                        </td>
                        <td>
                            <form:input path="username" name="username" id="username" />
                        </td>
                    </tr>
                    <tr>
                        <td>
                            <form:label path="password">Password:</form:label>
                        </td>
                        <td>
                            <form:password path="password" name="password" id="password" />
                        </td>
                    </tr>
                    <tr>
                        <td></td>
                        <td align="left">
                            <form:button id="login" name="login">Login</form:button>
                        </td>
                    </tr>

                    <tr></tr>
                    <tr>
                        <td></td>
                        <td><a href="home.jsp">Home</a>
                        </td>
                    </tr>
                </table>
            </form:form>
            <table align="center">
                <tr>
                    <td style="font-style: italic; color: red;">${message}</td>
                </tr>
            </table>

        </body>

        </html>
welcome.jsp
<%@ page language="java" contentType="text/html; charset=ISO-8859-1" pageEncoding="ISO-8859-1" %>
    <!DOCTYPE html PUBLIC "-//W3C//DTD HTML 4.01 Transitional//EN" "http://www.w3.org/TR/html4/loose.dtd">
    <html>

    <head>
        <meta http-equiv="Content-Type" content="text/html; charset=ISO-8859-1">
        <title>Welcome</title>
    </head>

    <body>
        <table>
            <tr>
                <td>Welcome ${firstname}</td>
            </tr>
            <tr>
            </tr>
            <tr>
            </tr>
            <tr>
                <td><a href="home.jsp">Home</a>
                </td>
            </tr>
        </table>
    </body>

    </html>
Step 10: Run the Application
Right-click the application and Maven->clean.
Right-click the application and Maven->install.
Right-click the application and Run As->Run on Server->Run using Tomcat.
You will see the below outputs.
Home Page:

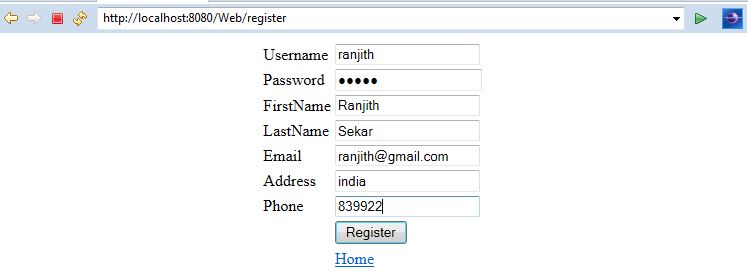
User Registration:
User Registration Success:

Login:

Login Success:
Summary
This tutorial helps to create a Maven Project for a Spring MVC and develop a small application for User Registration and Login.
Download the code from my git repo:
Opinions expressed by DZone contributors are their own.
Comments