Spring Security 4: JDBC Authentication and Authorization in MySQL
I am going to explain how to use Spring Security in a Spring MVC Application to authenticate and authorize users against user details stored in a MySQL Database.
Join the DZone community and get the full member experience.
Join For FreeIn one of my articles, I explained with a simple example how to secure a Spring MVC application using Spring Security and with Spring Boot for setup. I am going to extend the same example to now use JDBC Authentication and also provide Authorization. To be more specific, in this article I am going to explain how to use Spring Security in a Spring MVC Application to authenticate and authorize users against user details stored in a MySQL Database.
I am not going to start from scratch this time, in stead use the existing example from my previous spring security tutorial and modify it to make it fit to our current scenario. So, you can have a look at the article real quick and come back here.
1. First of all download the existing application from here.
2. Import project to eclipse using the Import wizard.
3. Run the following statements in mysql server. This sets up the user table and the user_roles table for us with some initial data to start with.4. Let us get back to our application now. First thing to do is to modify pom.xml file to include spring-jdbc and mysql-connector
CREATE  TABLE users (
  username VARCHAR(45) NOT NULL ,
  password VARCHAR(45) NOT NULL ,
  enabled TINYINT NOT NULL DEFAULT 1 ,
  PRIMARY KEY (username));

CREATE TABLE user_roles (
  user_role_id int(11) NOT NULL AUTO_INCREMENT,
  username varchar(45) NOT NULL,
  role varchar(45) NOT NULL,
  PRIMARY KEY (user_role_id),
  UNIQUE KEY uni_username_role (role,username),
  KEY fk_username_idx (username),
  CONSTRAINT fk_username FOREIGN KEY (username) REFERENCES users (username));

INSERT INTO users(username,password,enabled)
VALUES ('priya','priya', true);
INSERT INTO users(username,password,enabled)
VALUES ('naveen','naveen', true);

INSERT INTO user_roles (username, role)
VALUES ('priya', 'ROLE_USER');
INSERT INTO user_roles (username, role)
VALUES ('priya', 'ROLE_ADMIN');
INSERT INTO user_roles (username, role)
VALUES ('naveen', 'ROLE_USER');
Heads Up!
Do not ever use plain text for passwords. The right way to do this is to use password encryption.You can find the link to an updated and detailed tutorial below,
Spring Security JDBC Authentication with Password Encryption
4. Let us get back to our application now. First thing to do is to modify pom.xml file to include spring-jdbc and mysql-connector
pom.xml
<?xml version="1.0" encoding="UTF-8"?>
<project xmlns="http://maven.apache.org/POM/4.0.0" xmlns:xsi="http://www.w3.org/2001/XMLSchema-instance"
    xsi:schemaLocation="http://maven.apache.org/POM/4.0.0 http://maven.apache.org/xsd/maven-4.0.0.xsd">
    <modelVersion>4.0.0</modelVersion>
    <groupId>org.programmingfree</groupId>
    <artifactId>pf-securing-web-jdbc</artifactId>
    <version>0.1.0</version>
 <packaging>war</packaging>
    <parent>
        <groupId>org.springframework.boot</groupId>
        <artifactId>spring-boot-starter-parent</artifactId>
        <version>1.2.2.RELEASE</version>
    </parent>

    <dependencies>
        <dependency>
      <groupId>org.apache.tomcat.embed</groupId>
      <artifactId>tomcat-embed-jasper</artifactId>
      <scope>provided</scope>
  </dependency>
  <dependency>
      <groupId>javax.servlet</groupId>
      <artifactId>jstl</artifactId>
  </dependency>
  <!-- tag::web[] -->
  <dependency>
            <groupId>org.springframework.boot</groupId>
            <artifactId>spring-boot-starter-web</artifactId>
        </dependency>
  <!-- end::web[] -->
        <!-- tag::security[] -->
        <dependency>
            <groupId>org.springframework.boot</groupId>
            <artifactId>spring-boot-starter-security</artifactId>
        </dependency>
        <!-- end::security[] -->

        <!-- JDBC -->
        <dependency>
            <groupId>org.springframework</groupId>
            <artifactId>spring-jdbc</artifactId>
            </dependency>

        <!-- MySQL -->
        <dependency>
            <groupId>mysql</groupId>
            <artifactId>mysql-connector-java</artifactId>
        </dependency>
    </dependencies>


    <build>
        <plugins>
            <plugin>
                <groupId>org.springframework.boot</groupId>
                <artifactId>spring-boot-maven-plugin</artifactId>
            </plugin>
        </plugins>
    </build>
</project>
5. Now we have to provide a definition to the mysql datasource in our MvcConfig class which has all necessary information to connect to the database we created before.
MvcConfig.java
package hello;

import org.springframework.context.annotation.Bean;
import org.springframework.context.annotation.Configuration;
import org.springframework.jdbc.datasource.DriverManagerDataSource;
import org.springframework.web.servlet.config.annotation.ViewControllerRegistry;
import org.springframework.web.servlet.config.annotation.WebMvcConfigurerAdapter;
import org.springframework.web.servlet.view.InternalResourceViewResolver;

@Configuration
public class MvcConfig extends WebMvcConfigurerAdapter {

    @Override
    public void addViewControllers(ViewControllerRegistry registry) {
        registry.addViewController("/home").setViewName("home");
        registry.addViewController("/").setViewName("home");
        registry.addViewController("/hello").setViewName("hello");
        registry.addViewController("/login").setViewName("login");
        registry.addViewController("/403").setViewName("403");
    }

    @Bean(name = "dataSource")
 public DriverManagerDataSource dataSource() {
     DriverManagerDataSource driverManagerDataSource = new DriverManagerDataSource();
     driverManagerDataSource.setDriverClassName("com.mysql.jdbc.Driver");
     driverManagerDataSource.setUrl("jdbc:mysql://localhost:3306/userbase");
     driverManagerDataSource.setUsername("root");
     driverManagerDataSource.setPassword("root");
     return driverManagerDataSource;
 }

    @Bean
 public InternalResourceViewResolver viewResolver() {
  InternalResourceViewResolver resolver = new InternalResourceViewResolver();
  resolver.setPrefix("/WEB-INF/jsp/");
  resolver.setSuffix(".jsp");
  return resolver;
 }
}
Note that I have added one more line to addViewControllers method to register a view for "403" (access denied) page. This page will be displayed whenever an user tries to access a page he/she is not authorized to.
6. Next we have to modify the security configuration class to use the jdbc datasource we have defined for authenticating and authorize users.
WebSecurityConfig.java
package hello;

import javax.sql.DataSource;

import org.springframework.beans.factory.annotation.Autowired;
import org.springframework.context.annotation.Configuration;
import org.springframework.security.config.annotation.authentication.builders.AuthenticationManagerBuilder;
import org.springframework.security.config.annotation.web.builders.HttpSecurity;
import org.springframework.security.config.annotation.web.configuration.WebSecurityConfigurerAdapter;
import org.springframework.security.config.annotation.web.servlet.configuration.EnableWebMvcSecurity;

@Configuration
@EnableWebMvcSecurity
public class WebSecurityConfig extends WebSecurityConfigurerAdapter {

 @Autowired
 DataSource dataSource;

 @Autowired
 public void configAuthentication(AuthenticationManagerBuilder auth) throws Exception {

   auth.jdbcAuthentication().dataSource(dataSource)
  .usersByUsernameQuery(
   "select username,password, enabled from users where username=?")
  .authoritiesByUsernameQuery(
   "select username, role from user_roles where username=?");
 }

 @Override
 protected void configure(HttpSecurity http) throws Exception {

   http.authorizeRequests()
  .antMatchers("/hello").access("hasRole('ROLE_ADMIN')")
  .anyRequest().permitAll()
  .and()
    .formLogin().loginPage("/login")
    .usernameParameter("username").passwordParameter("password")
  .and()
    .logout().logoutSuccessUrl("/login?logout")
   .and()
   .exceptionHandling().accessDeniedPage("/403")
  .and()
    .csrf();
 }

}
In Summary
First we declare a datasource object annotated with @Autowired. This will look for Datasource definition in all classes under the same package. In this example we have it defined in MvcConfig.java
Next we set up two queries for AuthenticationManagerBuilder. One for authentication in usersByUsernameQuery and the other for authorization in authoritiesByUserNameQuery.
Finally we configure HttpSecurity to define what pages must be secured, authorized, not authorized, not secured, login page, logout page, access denied page, etc. One important thing to notice here is the order of configuration. Configuration that is specific to certain pages or urls must be placed first than configurations that are common among most urls.
403.jsp
7. Finally, write a jsp page to be displayed whenever access is denied to an user.
<%@ page language="java" contentType="text/html; charset=UTF-8"
 pageEncoding="UTF-8"%>
<!DOCTYPE html>
<html>
<head>
<title>Access Denied - ProgrammingFree</title>
</head>
<body>
<h1>You do not have permission to access this page!
</h1>
<form action="/logout" method="post">
          <input type="submit" value="Sign in as different user" />
          <input type="hidden" name="${_csrf.parameterName}" value="${_csrf.token}" />
</form>
</body>
</html>
That is all!
Running the Application
To run the application, run as Maven Build,
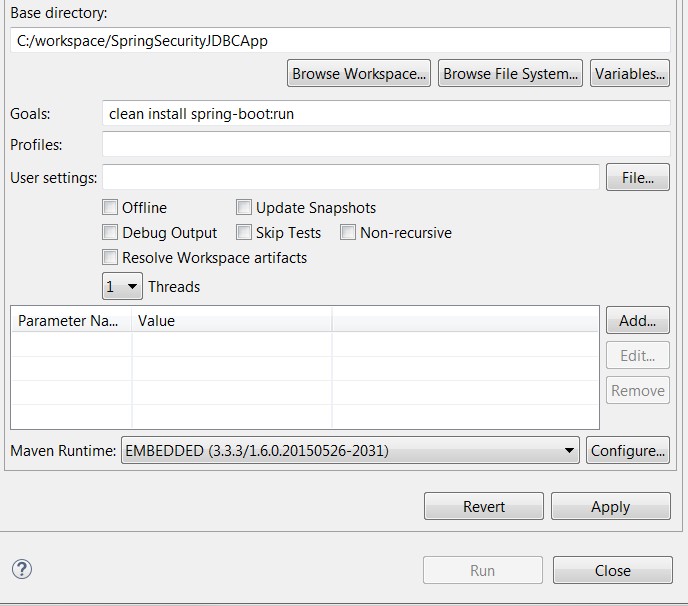
Once embedded tomcat in the application starts, Open localhost:8080
 Welcome Page
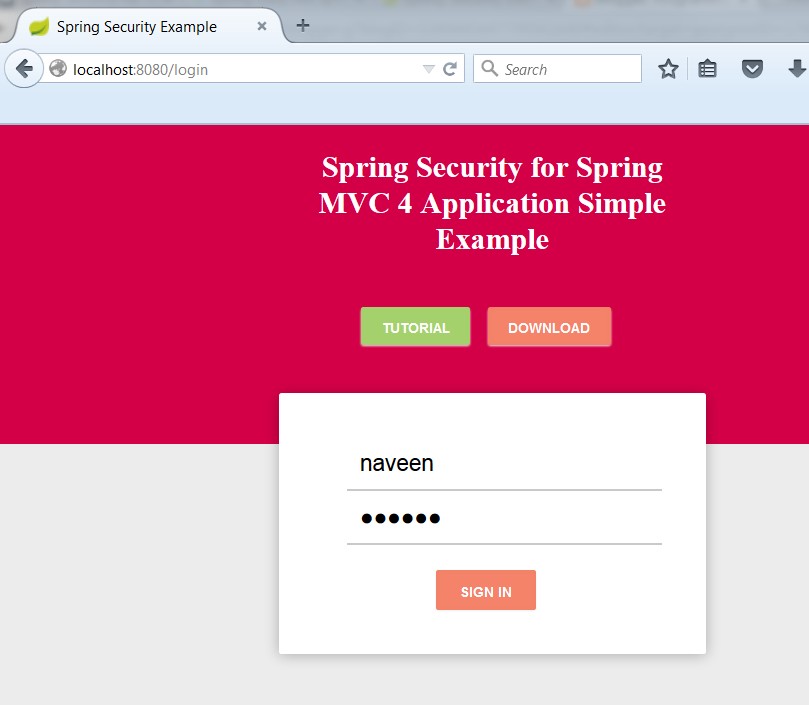
Click on the link to see greeting page, you will be redirected to login page,

Login Page
Only admin users are authorized to see the greeting. Login as a Non- Admin user and try to access the greeting page:

Access Denied Page
Logout and sign in as an ADMIN User, then you must be able to access the greeting page,

Greeting Page

How to run the Demo Project
There is one better way of implementing Spring Security which is using Spring Data JPA. You can read the step-by-step guide on the same here.
Published at DZone with permission of Priyadarshini Balachandran. See the original article here.
Opinions expressed by DZone contributors are their own.
Comments