

Step-by-Step Instructions To Extend C: Drive on Windows 10
Looking to increase your C: drive space on Windows 10? Read this article to learn how, both with and without the use of software.
Join the DZone community and get the full member experience.
Join For FreeWhen the C: drive runs out of space, it turns red and your system constantly sends messages for insufficient disk space on the local disk (C:). To get rid of it, it is suggested to increase the C: drive partition size on Windows 10.
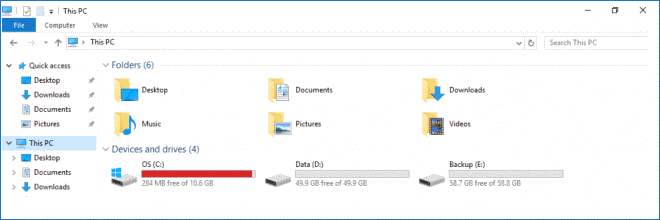
There are multiple ways through which you can extend C: drive with and without using software. So, without further ado, let’s discuss the steps in detail:
Three Ways To Extend C: Drive on Windows 10
We’ll be extending the volume of C: drive using the Disk Management tool Diskpart command utility third-party applications like EaseUS Partition Master.
Increase C: Drive via Disk Management Tool
For people who may be unaware, Windows comes with a built-in utility known as Disk Management that provides a dedicated extend volume feature. This feature helps to increase partition size by adding unallocated disk space. However, the only limitation is that not all the partitions can be extended using this method. For example, unallocated space can only be added to the adjacent partition. Hence, if there’s an adjacent unallocated space behind C: drive, then you can effectively use the Disk Management tool on Windows 10 to extend it.
How To Extend C: Drive Using Windows Disk Management Tool:
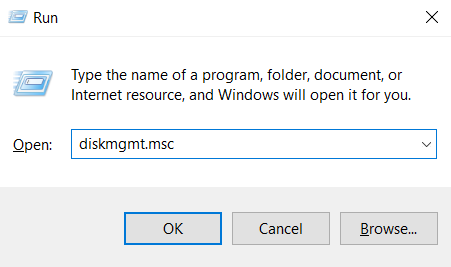
Step 1. Launch Run window. Simply press the shortcut keys Windows + R to launch the dialogue box and type diskmgmt.msc and hit the OK button!
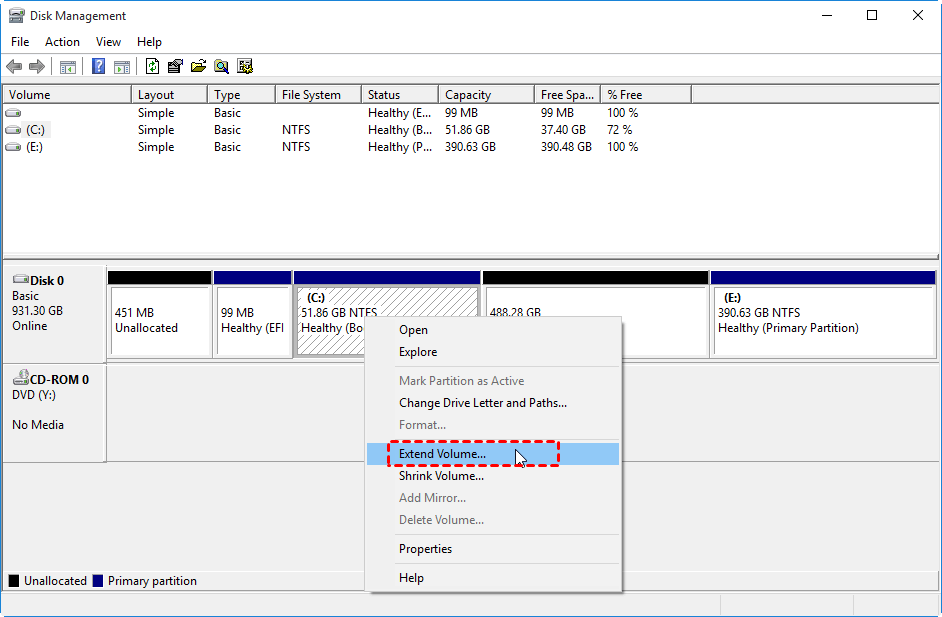
Step 2. As soon as you press the OK button, you’ll be greeted with the Disk Management utility.
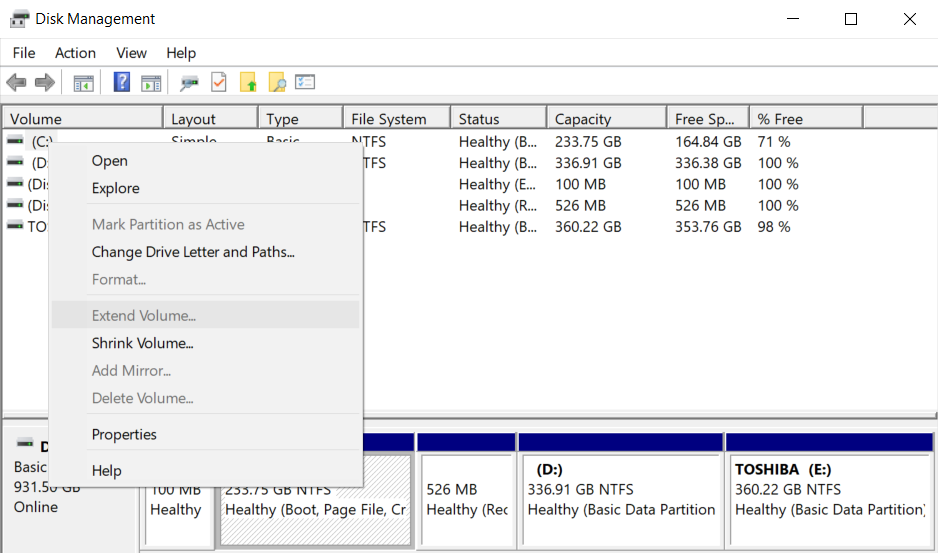
Step 3. Now simply navigate to the C: drive you wish to increase and right-click on it to choose the option Extend Volume.
Step 4. Simply follow the on-screen instructions that appear and complete the operation to extend C: drive on Windows 10.
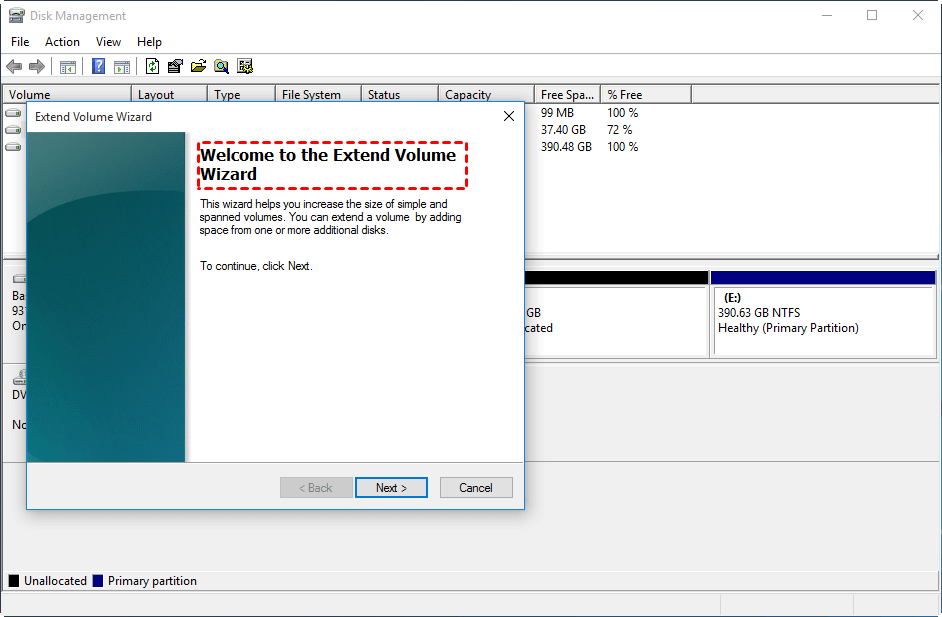
Remember: In case the unallocated space is not adjacent to the D Drive, you will observe the ‘Extend Volume’ button to be greyed out and you cannot click on it.
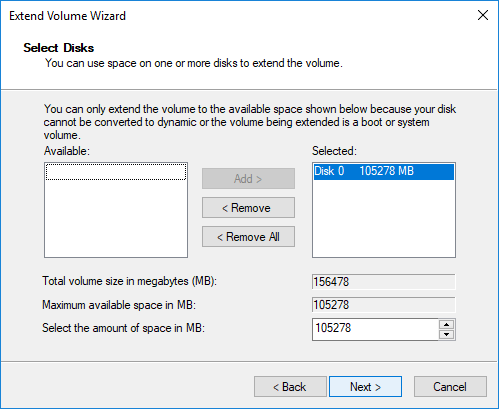
Step 5. Click the Next button and set the amount of disk space you would like to add to the C: drive. After fulfilling the requirements, click the Next button!
Complete the process by clicking the Finish button and you’ll return to the Disk Management tool where you can observe the extended C: drive.
Points To Remember:
- Extend Volume option is supported for NTFS & FAT32 Partition only.
- It’s important to have unallocated space next to the partition (on the right side) you wish to extend.
Increase C: Drive on Windows 10 Using Diskpart Utility
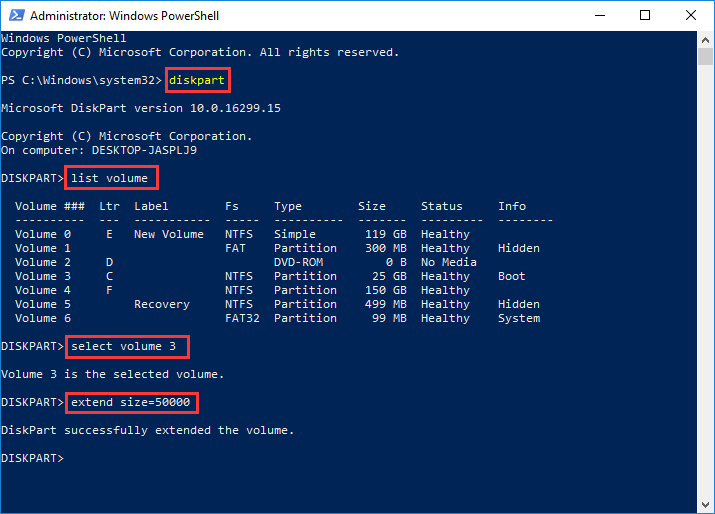
Apart from the Windows Disk Management utility, you can also try using the Diskpart command-line program, which is responsible for managing disks and partitions via commands. If you are all set to extend C: drive on Windows 10 via diskpart command, follow the instructions mentioned below:
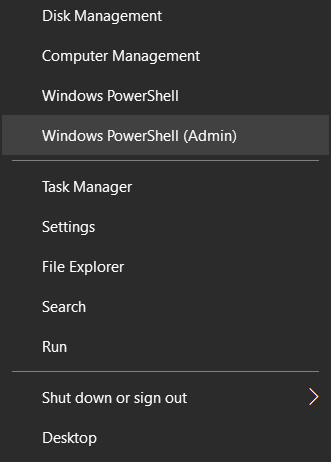
STEP 1 = Navigate to the Start button and right-click on it to select Windows PowerShell (Admin).
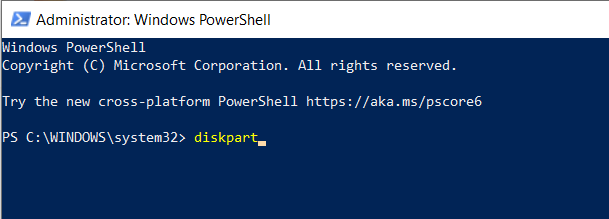
STEP 2 = As soon as the command line utility appears, simply type Diskpart and hit the Enter button!
STEP 3 = After this, you need to execute a series of command lines. Carefully copy and paste the following:
List Volume
Select volume * (In place of * you need to add the volume number of C: drive)
Extend size = abcd (You need to replace abcd with the disk size in MB you would like to add to C: drive)
Points To Remember:
- The partition you are about to increase using this method should be in the NTFS file system.
- Make sure there’s contiguous unallocated space next to the partition you are extending.
- Users who are not familiar with how to use PowerShell should skip it. Making any mistake while using PowerShell can lead to data loss.
- We highly recommend users take the help of a professional backup & cloud storage service like Right Backup to securely store all kinds of files/folders at a secure location.
Extend C: Drive Using EaseUS Partition Master
Novice users who have no idea about handling Disk Management utility or PowerShell program should definitely switch to a third-party utility like EaseUS Partition Master. It is a leading hard disk partition management solution in the market that helps users to extend C: drive without formatting and perform a variety of functions.
Using EaseUS Partition Master you can easily do the following tasks:
- Extend partitions.
- Resize partitions.
- Move partitions.
- Copy partition or disk.
- Make, delete or format partitions.
- Hide or unhide partitions.
- Migrate OS to SSD.
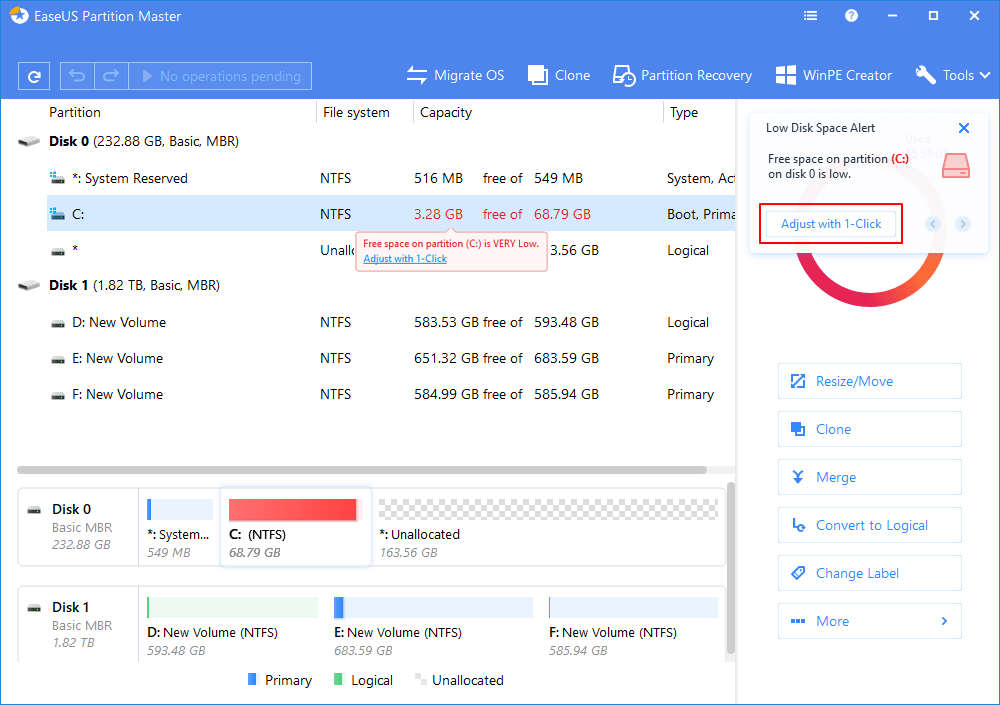
STEP 1 = The application comes with a ‘Adjust with 1-Click’ functionality that helps to extend drives when you are facing an “out of space” error message. So, as soon as your C: drive or any other disk runs out of space, it will be automatically reflected on the main dashboard of the software and you can instantly fix it by clicking the ‘Adjust with 1-Click’ feature. Helpful, right?
STEP 2 = As soon as you are done installing the product on your Windows PC, click on Adjust with 1-Click button to start extending C: drive. (Refer to the screenshot mentioned below for better understanding.)
STEP 3 = Hit the OK button to proceed with increasing C: drive on Windows 10. EaseUS Partition Master will start allocating space to the C: drive.
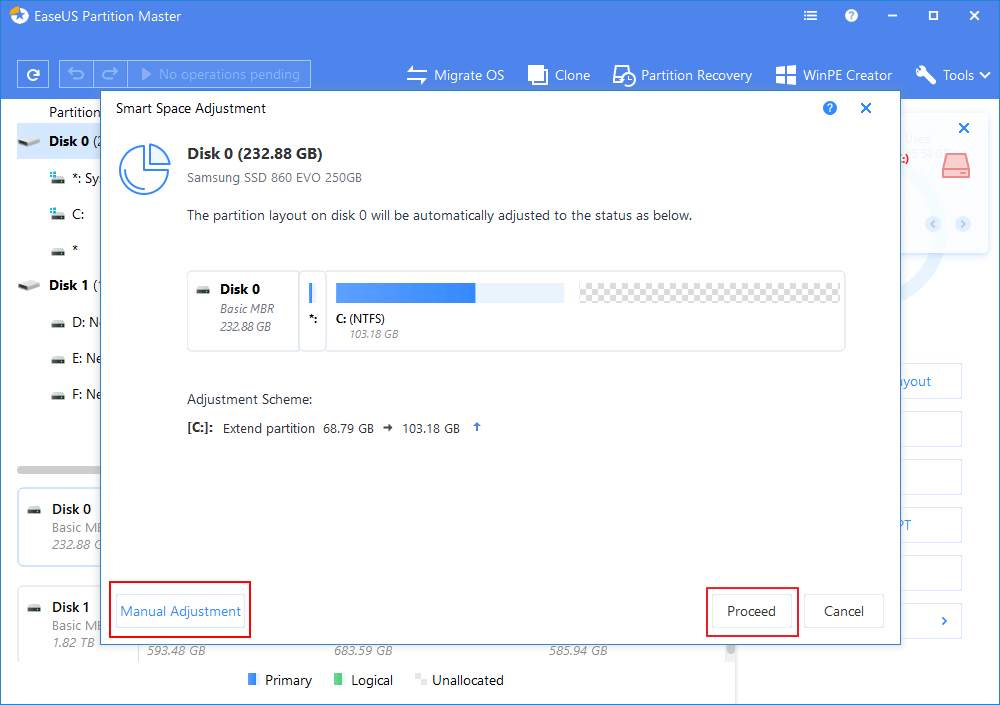
Alternatively, you have an option to manually adjust the size to extend C: drive on Windows. It looks like something this:
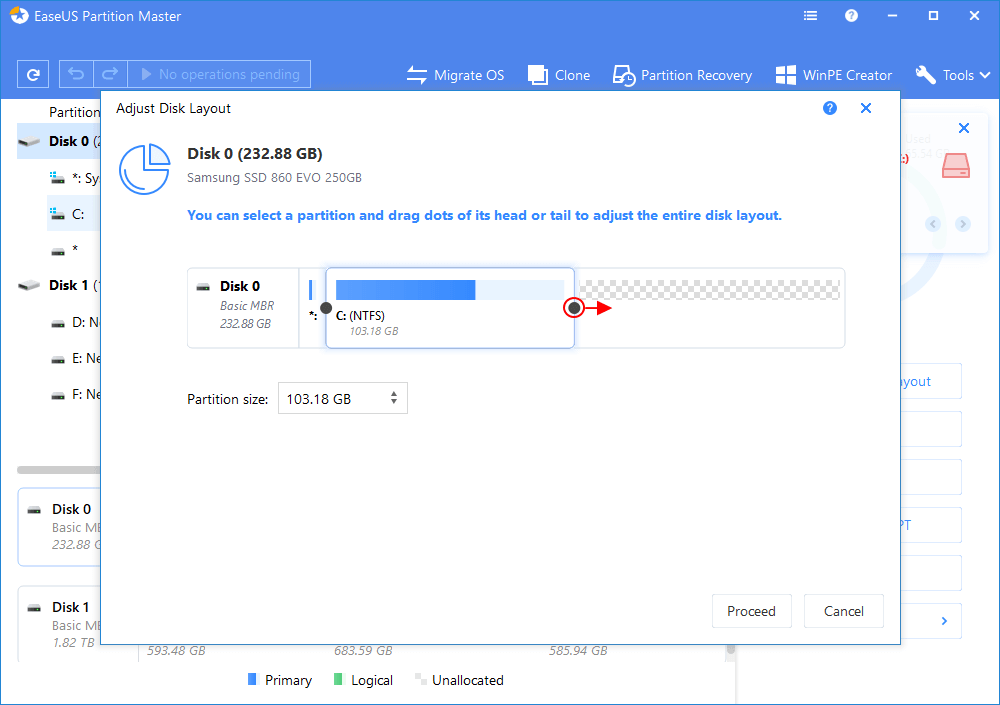
(Simply drag the black dot to the right direction according to the amount of space you wish to add to C: drive.)
STEP 4 = Once you are satisfied, you can hit the OK button to proceed!
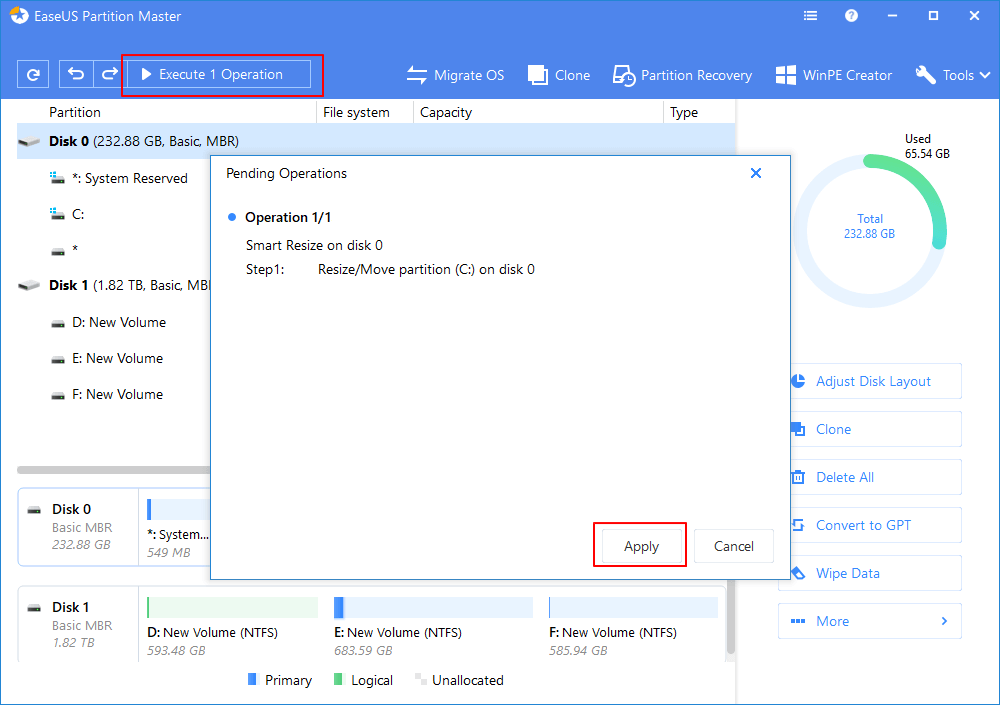
STEP 5 = Additionally, you need to hit the Execute Operation button to confirm the pending operation(s). Click on Apply button to initiate the process!
To know more about how to use this utility to increase C: drive on Windows 10, follow this comprehensive guide on How To Extend C: drive In Windows 10 Without Formatting With EaseUS Partition Master.
Bottom Line
If you ask us, we personally recommend using a professional hard disk management utility like EaseUS Partition Master or AOMEI Partition Assistant Standard to flexibly extend C: drive on Windows 10 without formatting. Both of the utilities are leading the market at the moment and give users full control over handling disk space and partitions.
Opinions expressed by DZone contributors are their own.
Comments