Change Column in Syncfusion TreeGrid Angular
Learn about Syncfusion Angular UI and how to change column style in Syncfusion Angular TreeGrid.
Join the DZone community and get the full member experience.
Join For FreeSyncfusion Angular can help develop angular applications faster with many featured components that look like TreeGrid.
According to the documentation, "Syncfusion Angular UI (Essential JS 2) is a collection of modern TypeScript based true Angular Components. It has support for Ahead Of Time (AOT) compilation and Tree-Shaking. All the components are developed from the ground up to be lightweight, responsive, modular, and touch-friendly".
In this article, learn how to change column style in Syncfusion Angular TreeGrid ("Current column Data-Type (Text/Num/Date/Boolean/DropDownList"), Default-Value (of current DataType), Font-size, Font-color, Background-color, Alignment, Text-wrap, Minimum-Column-Width (when screen shrinked.)")
Firstly, we create an angular project and add Syncfusion to the project using the getting started guide. For this example, I will use stackblitz.com and you can also start with some examples from documentation like this.
In this project, we will change the column (Name, Type, background-color, font-color, Alignment, Text-wrap). To add a context menu to our project, in appcomponent.ts add the code below:
export class AppComponent {
    public data: Object[] = [];
    public contextMenuItems: Object;

  	ngOnInit(): void {
        this.data = sortData;
        this.contextMenuItems = [
            { text: "EditCol ", target: ".e-headercontent", id: "editCol" },];
    }
}
In app.component.html we change <ejs-treegrid ... > code below
  <ejs-treegrid
    #treegrid
    [dataSource]="data"
    allowPaging="true"
    childMapping="subtasks"
    height="350"
    [treeColumnIndex]="0"

    [contextMenuItems]="contextMenuItems"
    (contextMenuOpen)="contextMenuOpen($event)"
    (contextMenuClick)="contextMenuClick($event)"
    [columns]="treeColumns"
    >
We need to add "DialogModule" to app.module.ts in the project, which you can import from '@syncfusion/ej2-angular-popups'. After that, we create variable ejDialog in app.component.ts.
@ViewChild("ejDialog") ejDialog: DialogComponent;For showing dialog we use "this.ejDialog.show();" and for hiding we use "this.ejDialog.hide();"
Here we have an ejs-dialog tag for showing the dialog
 <ejs-dialog
      id="dialog"
      #ejDialog
      [animationSettings]="animationSettings"
      header="Edit Column"
      [target]="targetElement"
      width="300px"
      [showCloseIcon]="showCloseIcon"
    >
      <ng-template #content>
        <form id="template_driven" #userForm="ngForm" novalidate>
          <div class="form-group" style="padding-top: 11px;">
            <div class="e-float-input">
              <input
                type="text"
                name="ColName"
                required
                [(ngModel)]="ColName"
                #ColumnName="ngModel"
              />
              <span class="e-float-line"></span>
              <label class="e-float-text e-label-top" for="name">Name</label>
              <div
                *ngIf="ColumnName.invalid && (ColumnName.dirty || ColumnName.touched)"
              >
                <div class="e-error" *ngIf="ColumnName.errors.required">
                  * Enter Column name
                </div>
              </div>
            </div>
          </div>

          <div class="form-group" style="padding-top: 11px;">
            <div class="e-float-input">
              <ejs-dropdownlist

                id="coltypeid"
                [dataSource]="d2data"
                [fields]="fields"
                placeholder="Type"
                name="ColType"
                [(ngModel)]="ColType"
              ></ejs-dropdownlist>
              </div>
          </div>

          <div class="form-group" style="padding-top: 11px;">
            <div style="display: flex; justify-content: space-between;">
              <span class="e-float-text e-label-top"
                >Choose new Font-color</span
              >

              <input
                ejs-colorpicker
                type="color"
                id="element"
                value="#FFFFFF"
                (change)="changeFontColor($event)"
                id="colorpicker"
              />
            </div>
          </div>
          <div class="form-group" style="padding-top: 11px;">
            <div style="display: flex; justify-content: space-between;">
              <span class="e-float-text e-label-top"
                >Choose new Background-color</span
              >

              <input
                ejs-colorpicker
                type="color"
                id="element"
                value="#FFFFFF"
                (change)="changeBackground($event)"
                id="colorpicker"
              />
            </div>
          </div>
          <div class="form-group" style="padding-top: 11px;">
            <div class="e-float-input">
              <ejs-dropdownlist
                #dropdown2
                id="element"
                [dataSource]="d3data"
                [fields]="fields"
                name="ColAlign"
                [(ngModel)]="ColAlign"
                placeholder="Alignment"
              ></ejs-dropdownlist>
            </div>
          </div>
          <div class="form-group" style="padding-top: 11px;">
            <div style="display: flex; justify-content: space-between;">
              <span class="e-float-text e-label-top" for="email"
                >Text-wrap</span
              >

              <ejs-checkbox
                labelPosition="Before"
                [checked]="false"
                name="ColChecked"
                [(ngModel)]="ColChecked"
              ></ejs-checkbox>
            </div>
          </div>
        </form>
      </ng-template>
      <ng-template #footerTemplate>
        <div>
          <button
            id="Button1"
            class="e-control e-btn e-primary e-flat"
            (click)="saveColumn($event)"
            data-ripple="true"
          >
            <span class="e-btn-icon e-icons e-ok-icon e-icon-left"></span>Save
          </button>
          <button
            id="Button2"
            class="e-control e-btn e-flat"
            (click)="btnclick($event)"
            data-ripple="true"
          >
            <span class="e-btn-icon e-icons e-close-icon e-icon-left"></span
            >Cancel
          </button>
        </div>
      </ng-template>
    </ejs-dialog>
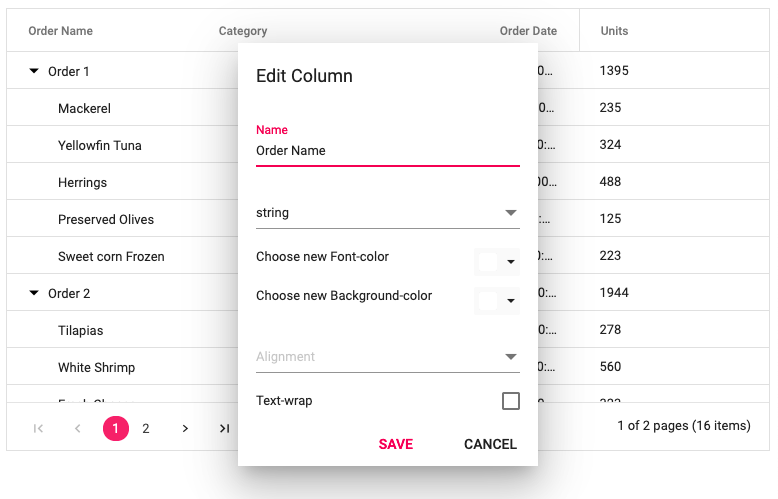
The result looks like the image below:

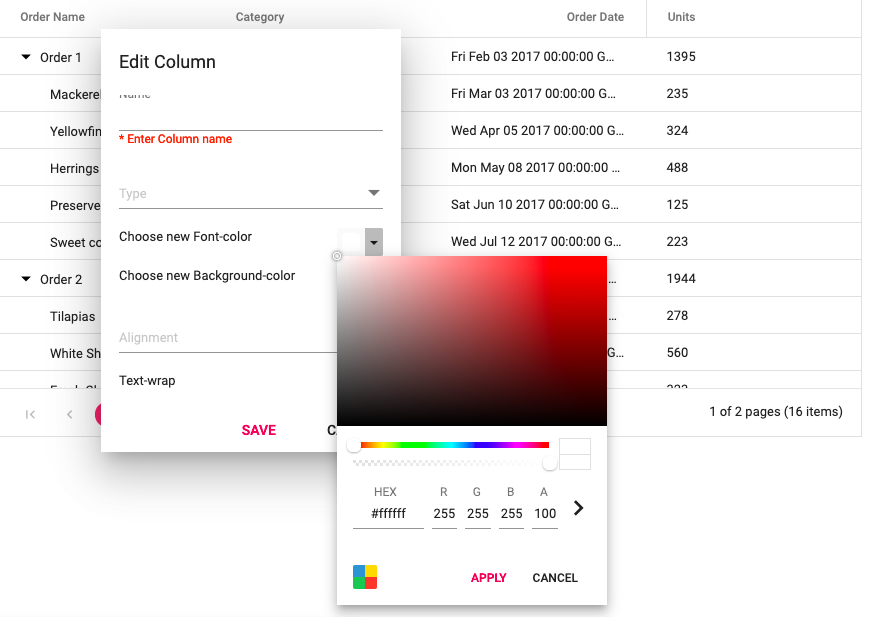
And for selecting color we use module "ColorPickerModule" from '@syncfusion/ej2-angular-inputs' also we need to add to app.module.ts.
 We create a "
saveColumn" function for saving changes in the column.
...
 public saveColumn() {
    if (this.checkNewEdit == 'edit') {
      var catched = false;


      this.treeColumns.forEach((r) => {

        if (!catched) {
          catched = true;
          var style = document.createElement('style');
          style.type = 'text/css';
          style.innerHTML = `.e-treegrid .e-headercell.cssClassaa { background-color: ${this.ColBColor};
            color:${this.ColFColor};
          }`;
          document.body.append(style);
        }

        if (r.field == this.columnField) {

          r.headerText = this.ColName;
          r.type = this.ColType;
          r.textAlign = this.ColAlign;
          r['customAttributes'] = { class: 'cssClassaa' };
        }
      });


      this.treegrid.refreshColumns();
      this.textWrap = this.ColChecked;
    }


    this.ejDialog.hide();
  }
...
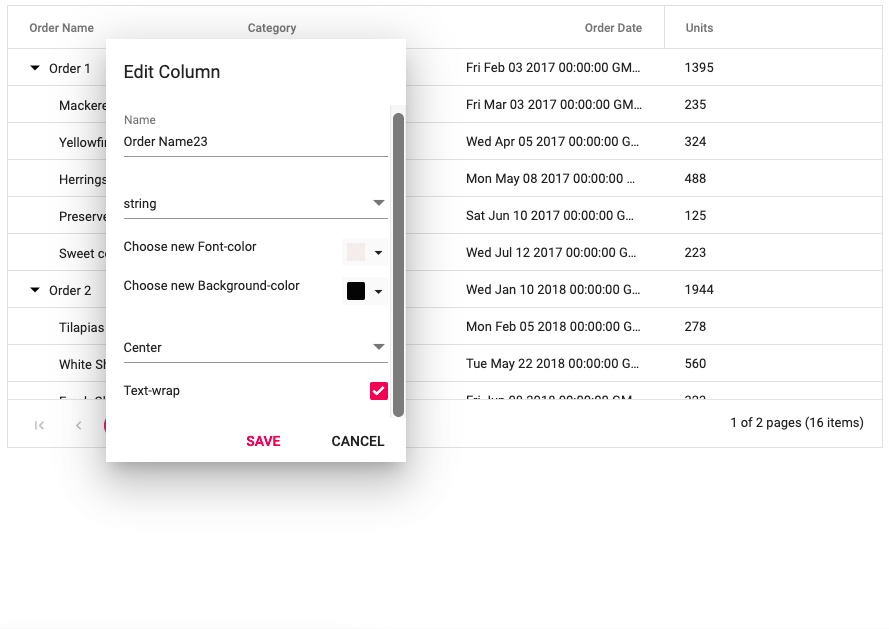
Let's change the first column:

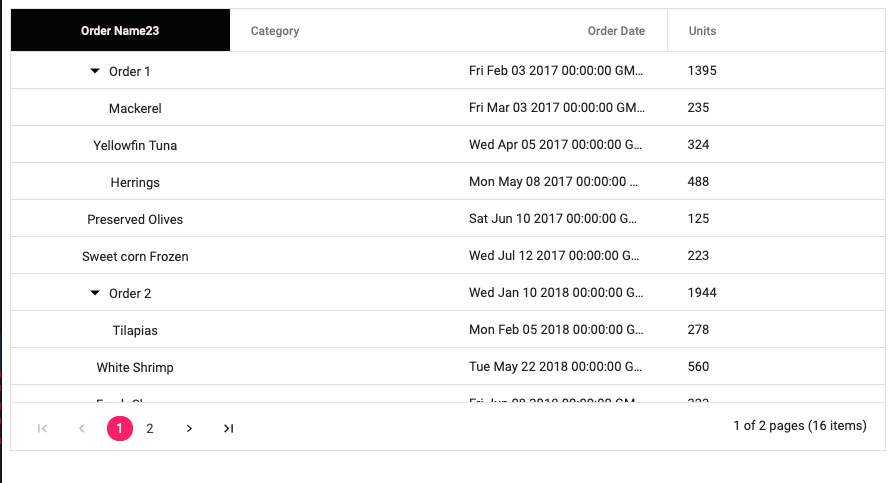
And we can see the result as below:

In this article, we saw how to change the properties of columns. Hopefully, this tutorial is useful for people who are learning Syncfusion Angular.
You can find the source code here.
Opinions expressed by DZone contributors are their own.

Comments