Three Ways To Scale Your Apps With Render
When your app is experiencing high traffic or utilization, you need to scale your service to handle that load. Learn more about scaling your app with Render.
Join the DZone community and get the full member experience.
Join For FreeWhen your app is experiencing high traffic or utilization, you need to scale your service to handle that load.
Scaling can be done either vertically or horizontally — or both! Vertical scaling means making a single resource bigger or more powerful. For example, you might add more CPU or RAM to your server. Horizontal scaling means creating multiple instances of the same service. For example, you might deploy three copies of your server instead of one and then place them all behind a load balancer that handles routing the traffic to each of them. Both types of scaling can be done manually or automatically (autoscaling).
Often, companies don’t host their apps on-premise on their own servers, opting instead to host them in the cloud. Render is a unified, full-stack development platform that makes it easy to host your apps, whether they be static sites, web services, or cron jobs. And, scaling with Render is a breeze. In this article, we’ll explore three ways to scale your apps with Render.
Option #1: Using the Render Dashboard
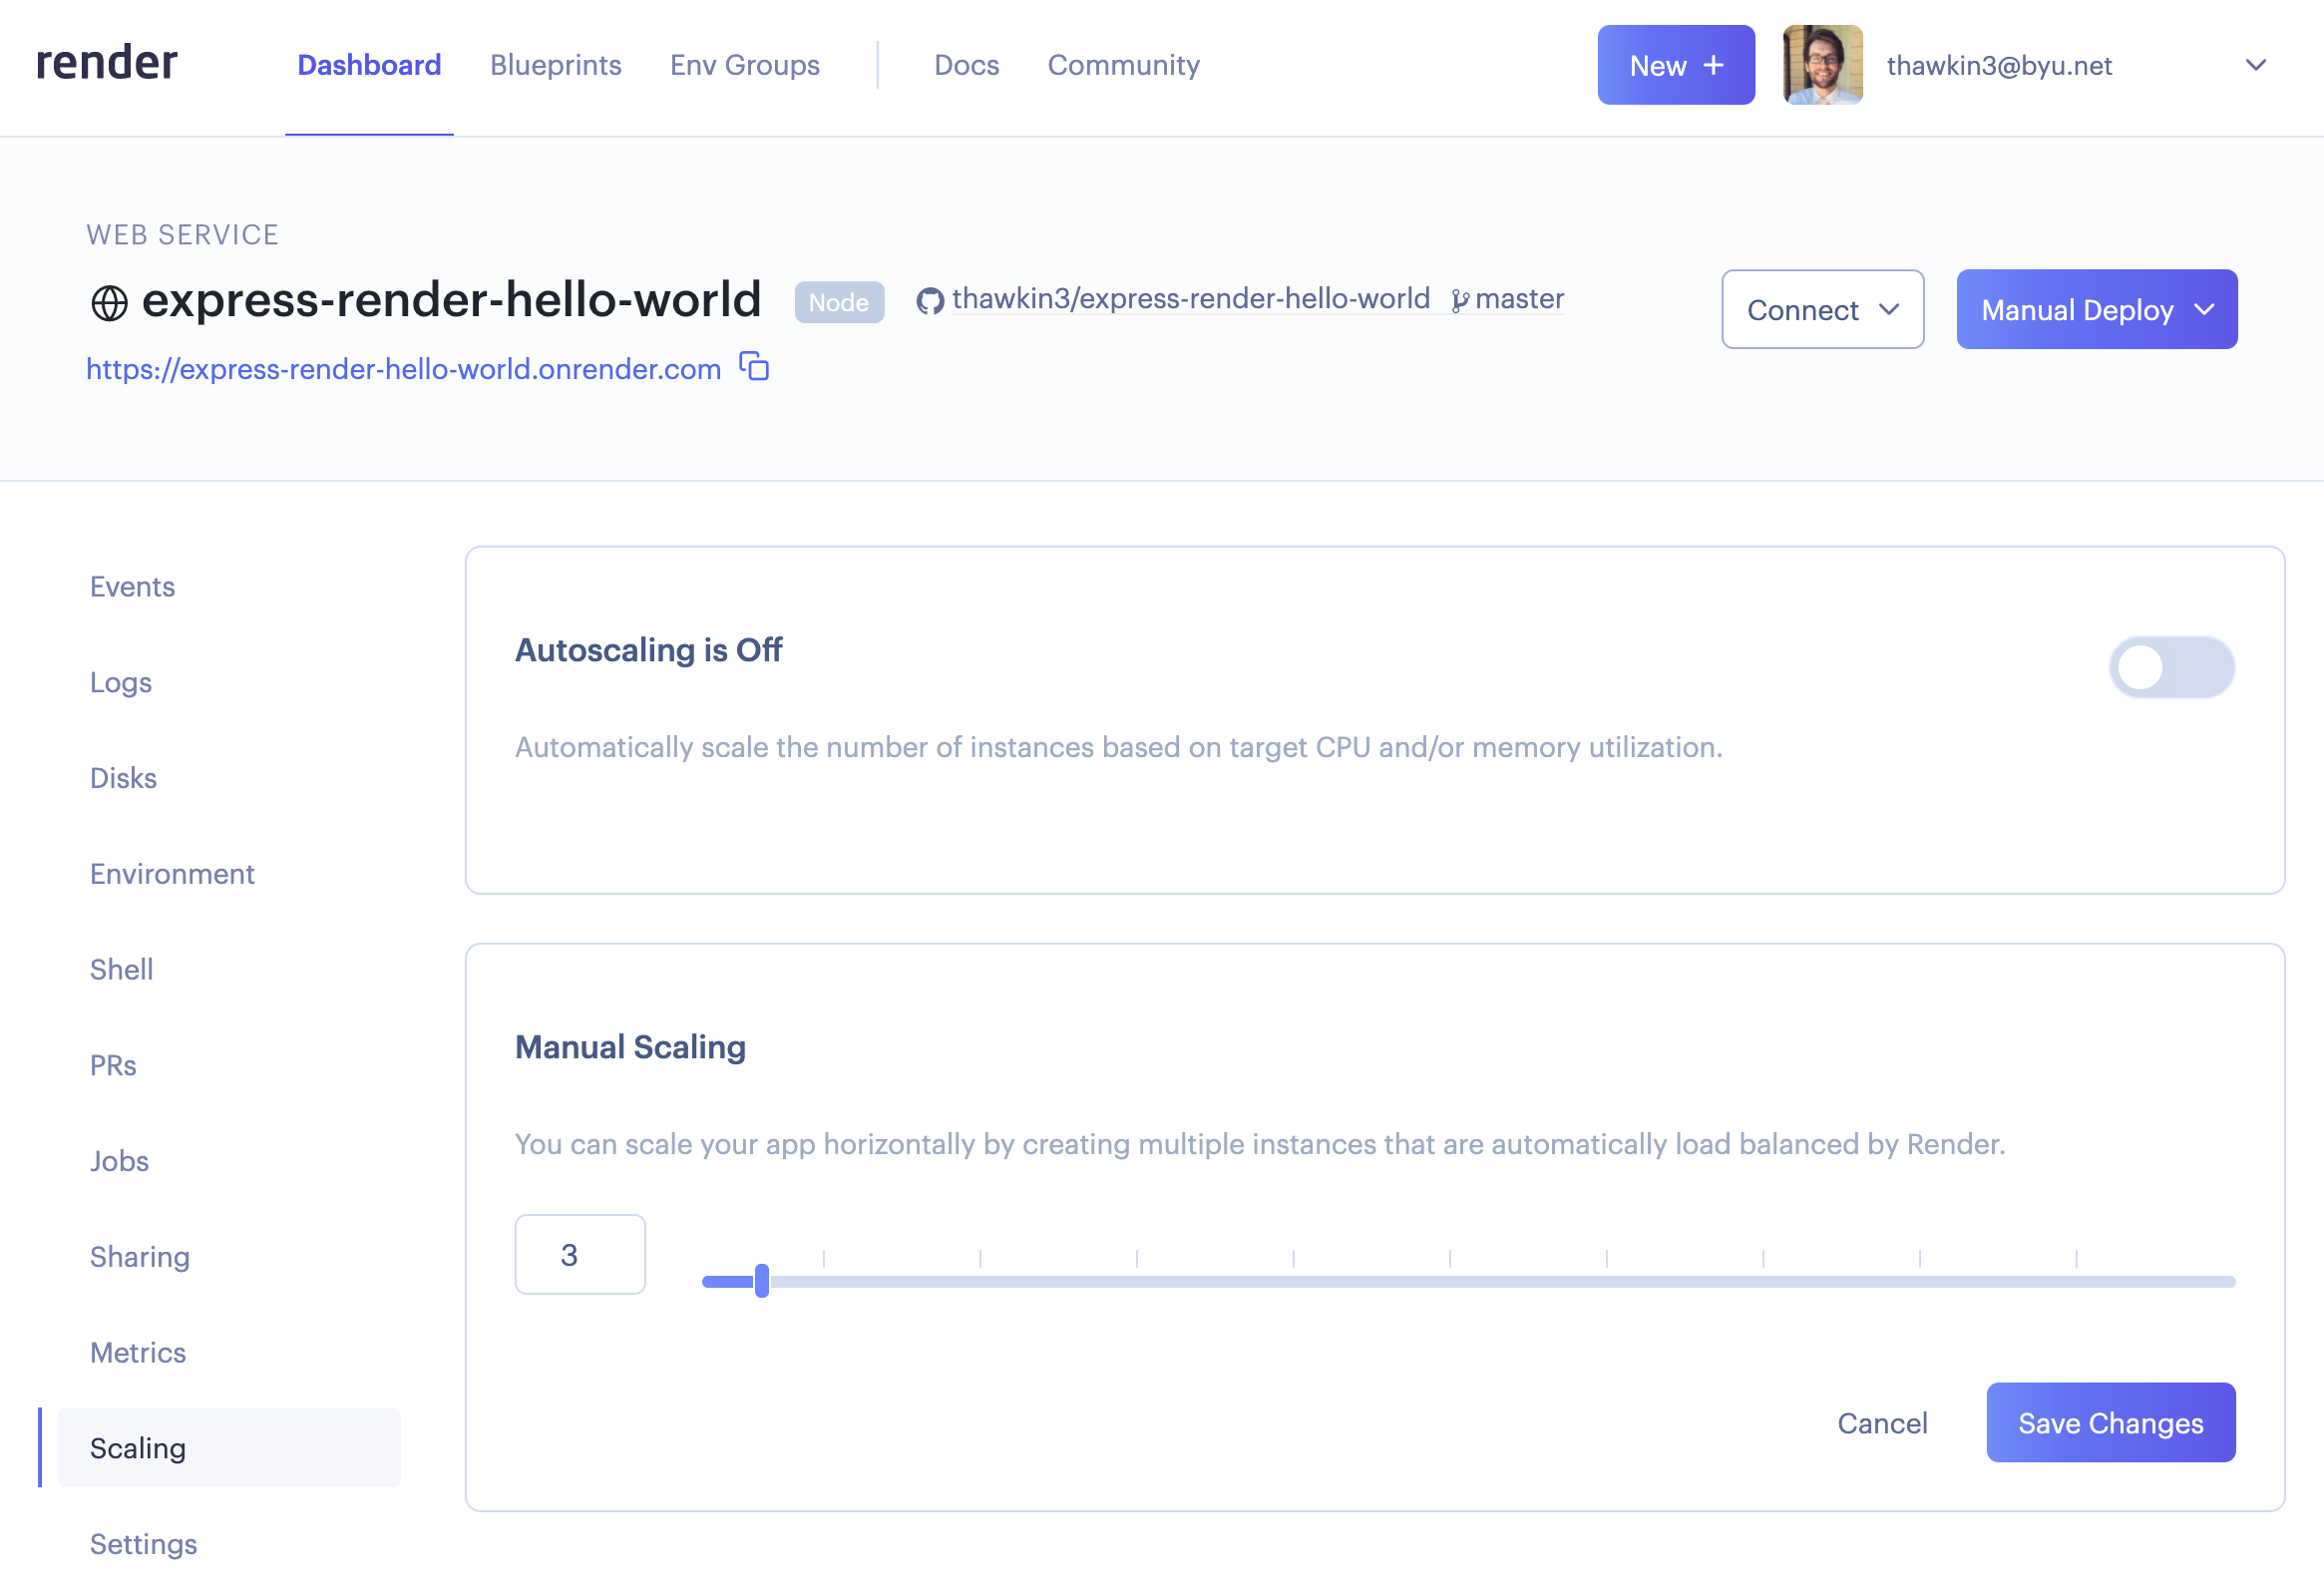
The first option is to scale your service using the Render Dashboard. Once you’ve created a web service, you can navigate to the Scaling tab to configure your scaling settings.
When autoscaling is off, you can manually scale your app up or down in the UI by specifying the number of instances. For example, you may typically only need one instance of your service, but this week you anticipate a spike in traffic due to an upcoming event. You might choose to scale your service up to three instances to handle that increased load. When the event is over, you can scale your service back down to one instance.

Manual scaling works well if you can anticipate the upcoming changes in load, but you may not always be right about how many instances you need. Guessing too high or too low may leave your service underutilized or overutilized, neither of which is ideal.
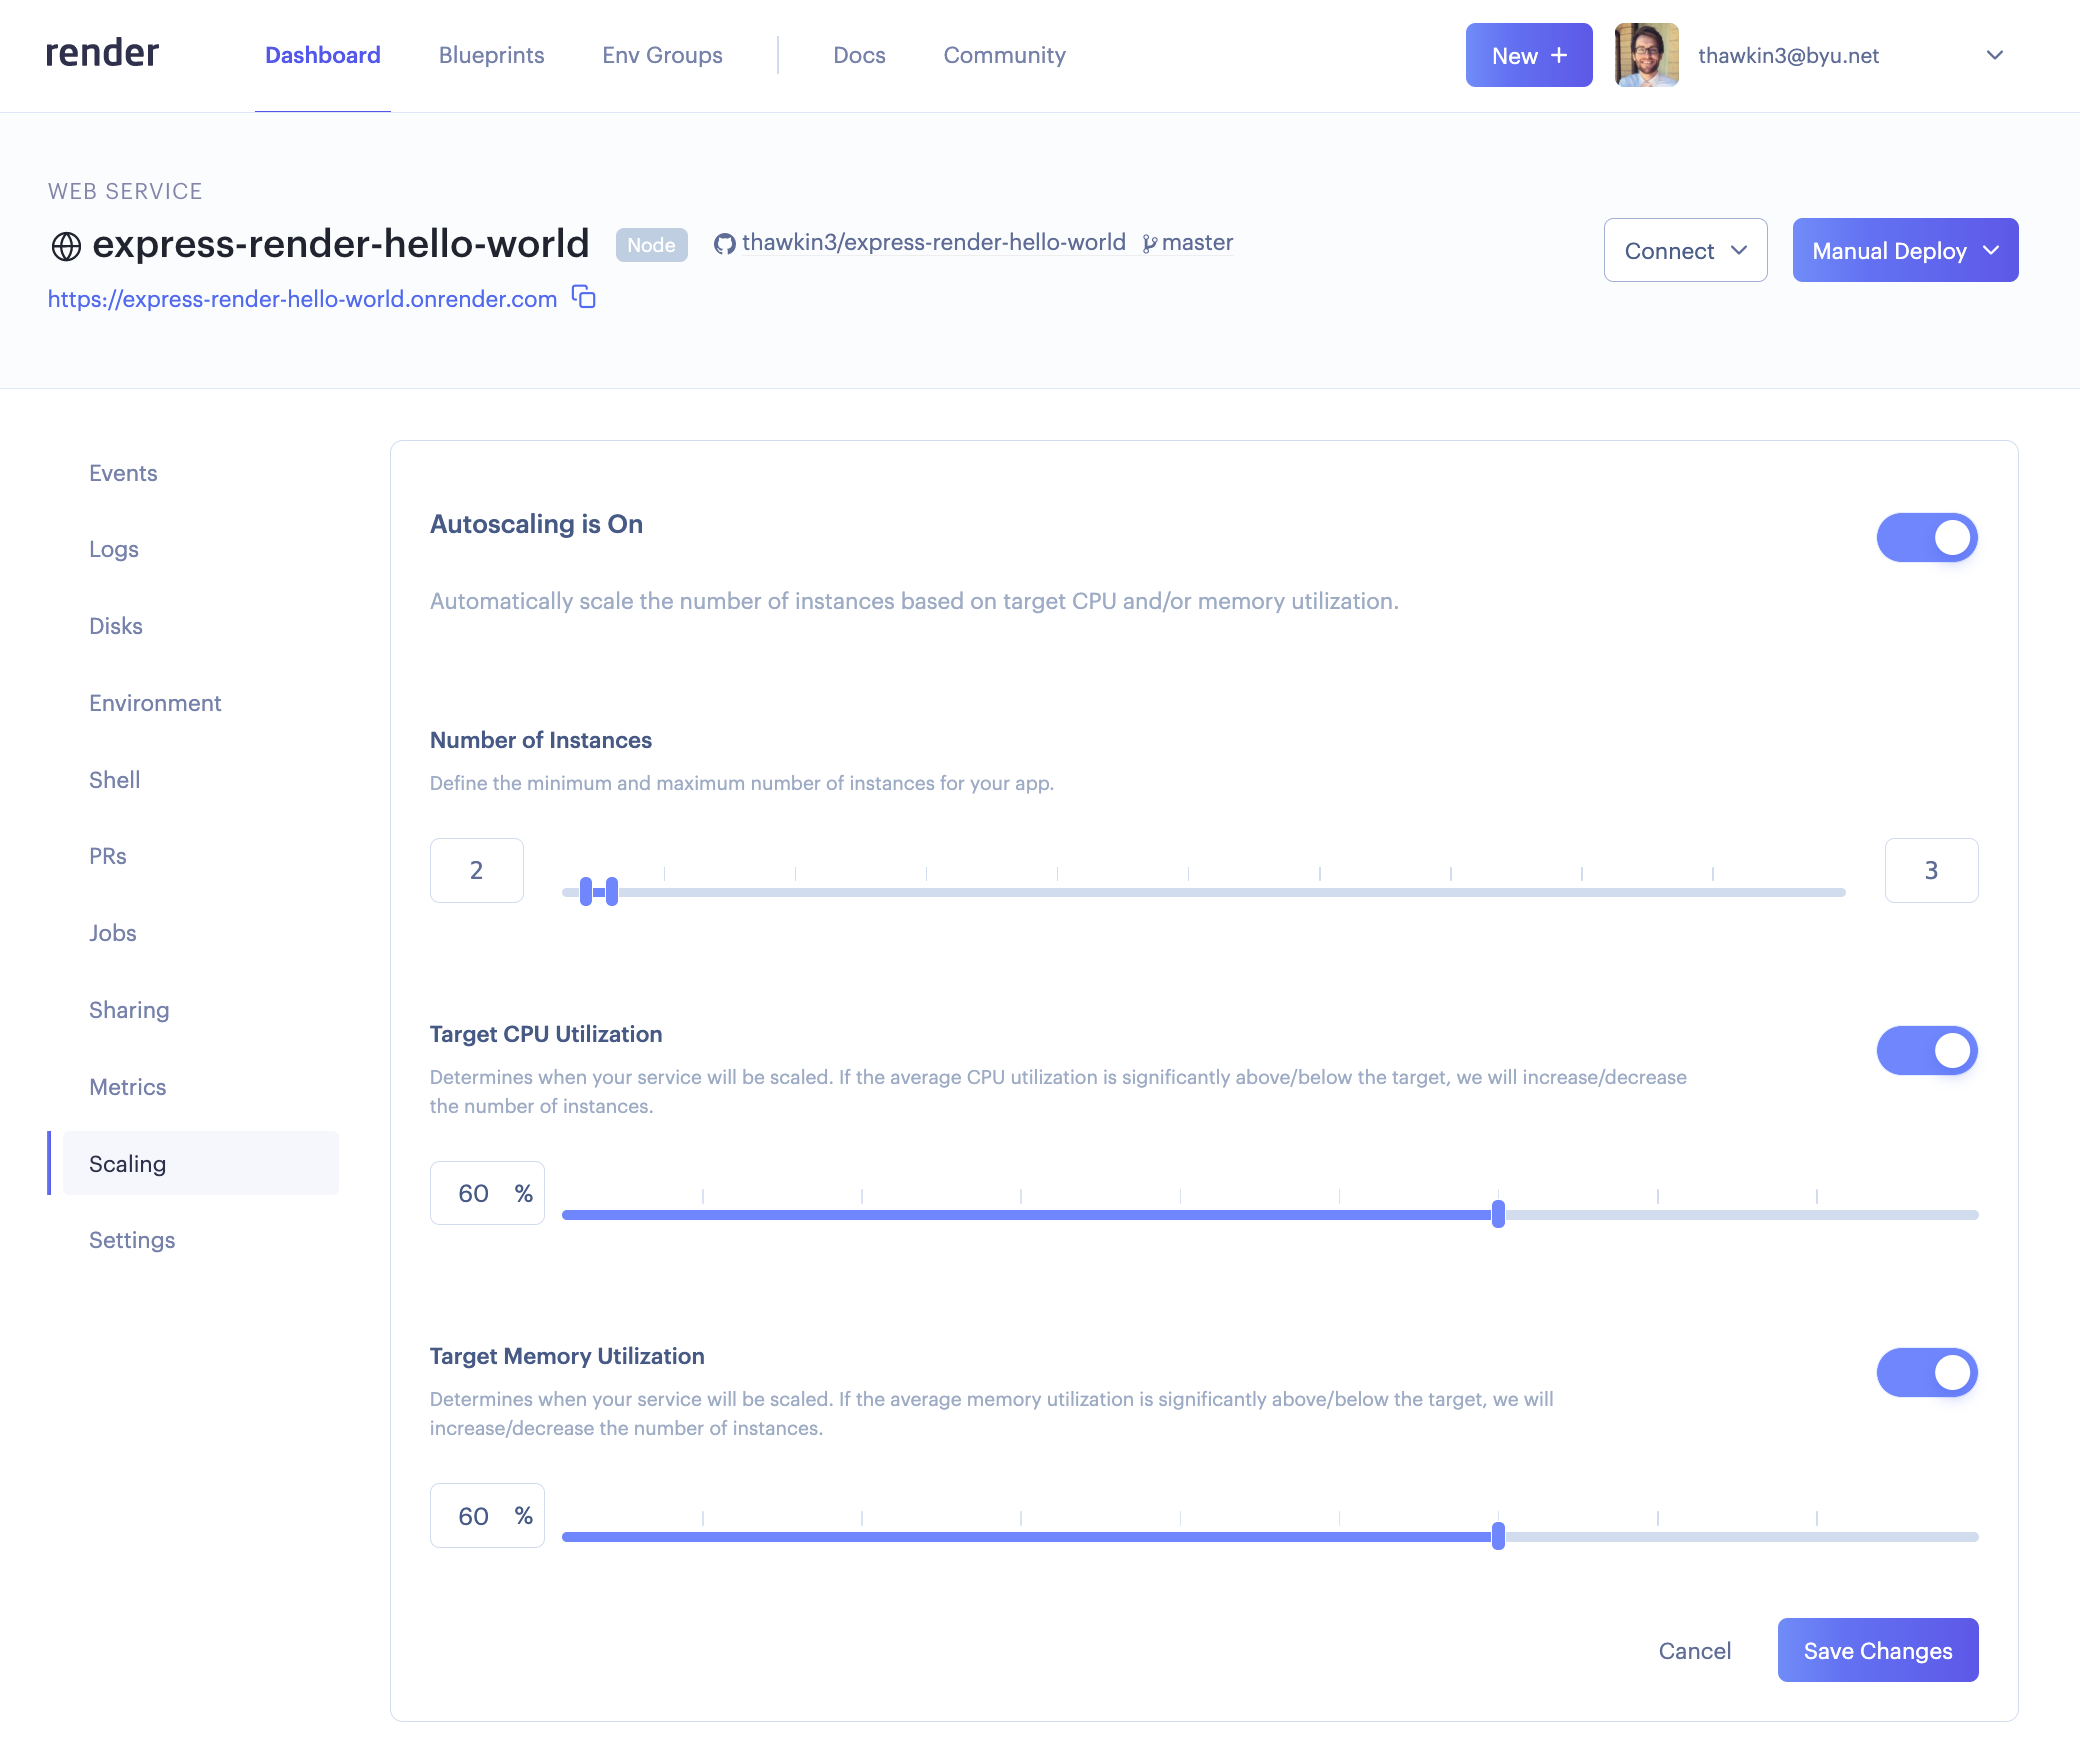
Autoscaling takes the guesswork out by automatically scaling within a range of minimum and maximum number of instances based on CPU and/or memory utilization.
In the Render Dashboard, you can enable autoscaling using the toggle switch. You can then set your minimum and maximum number of instances along with your targets for CPU and/or memory utilization. Then, based on those targets, your app will automatically scale up or down as needed. How nice!

Option #2: Using the Render API
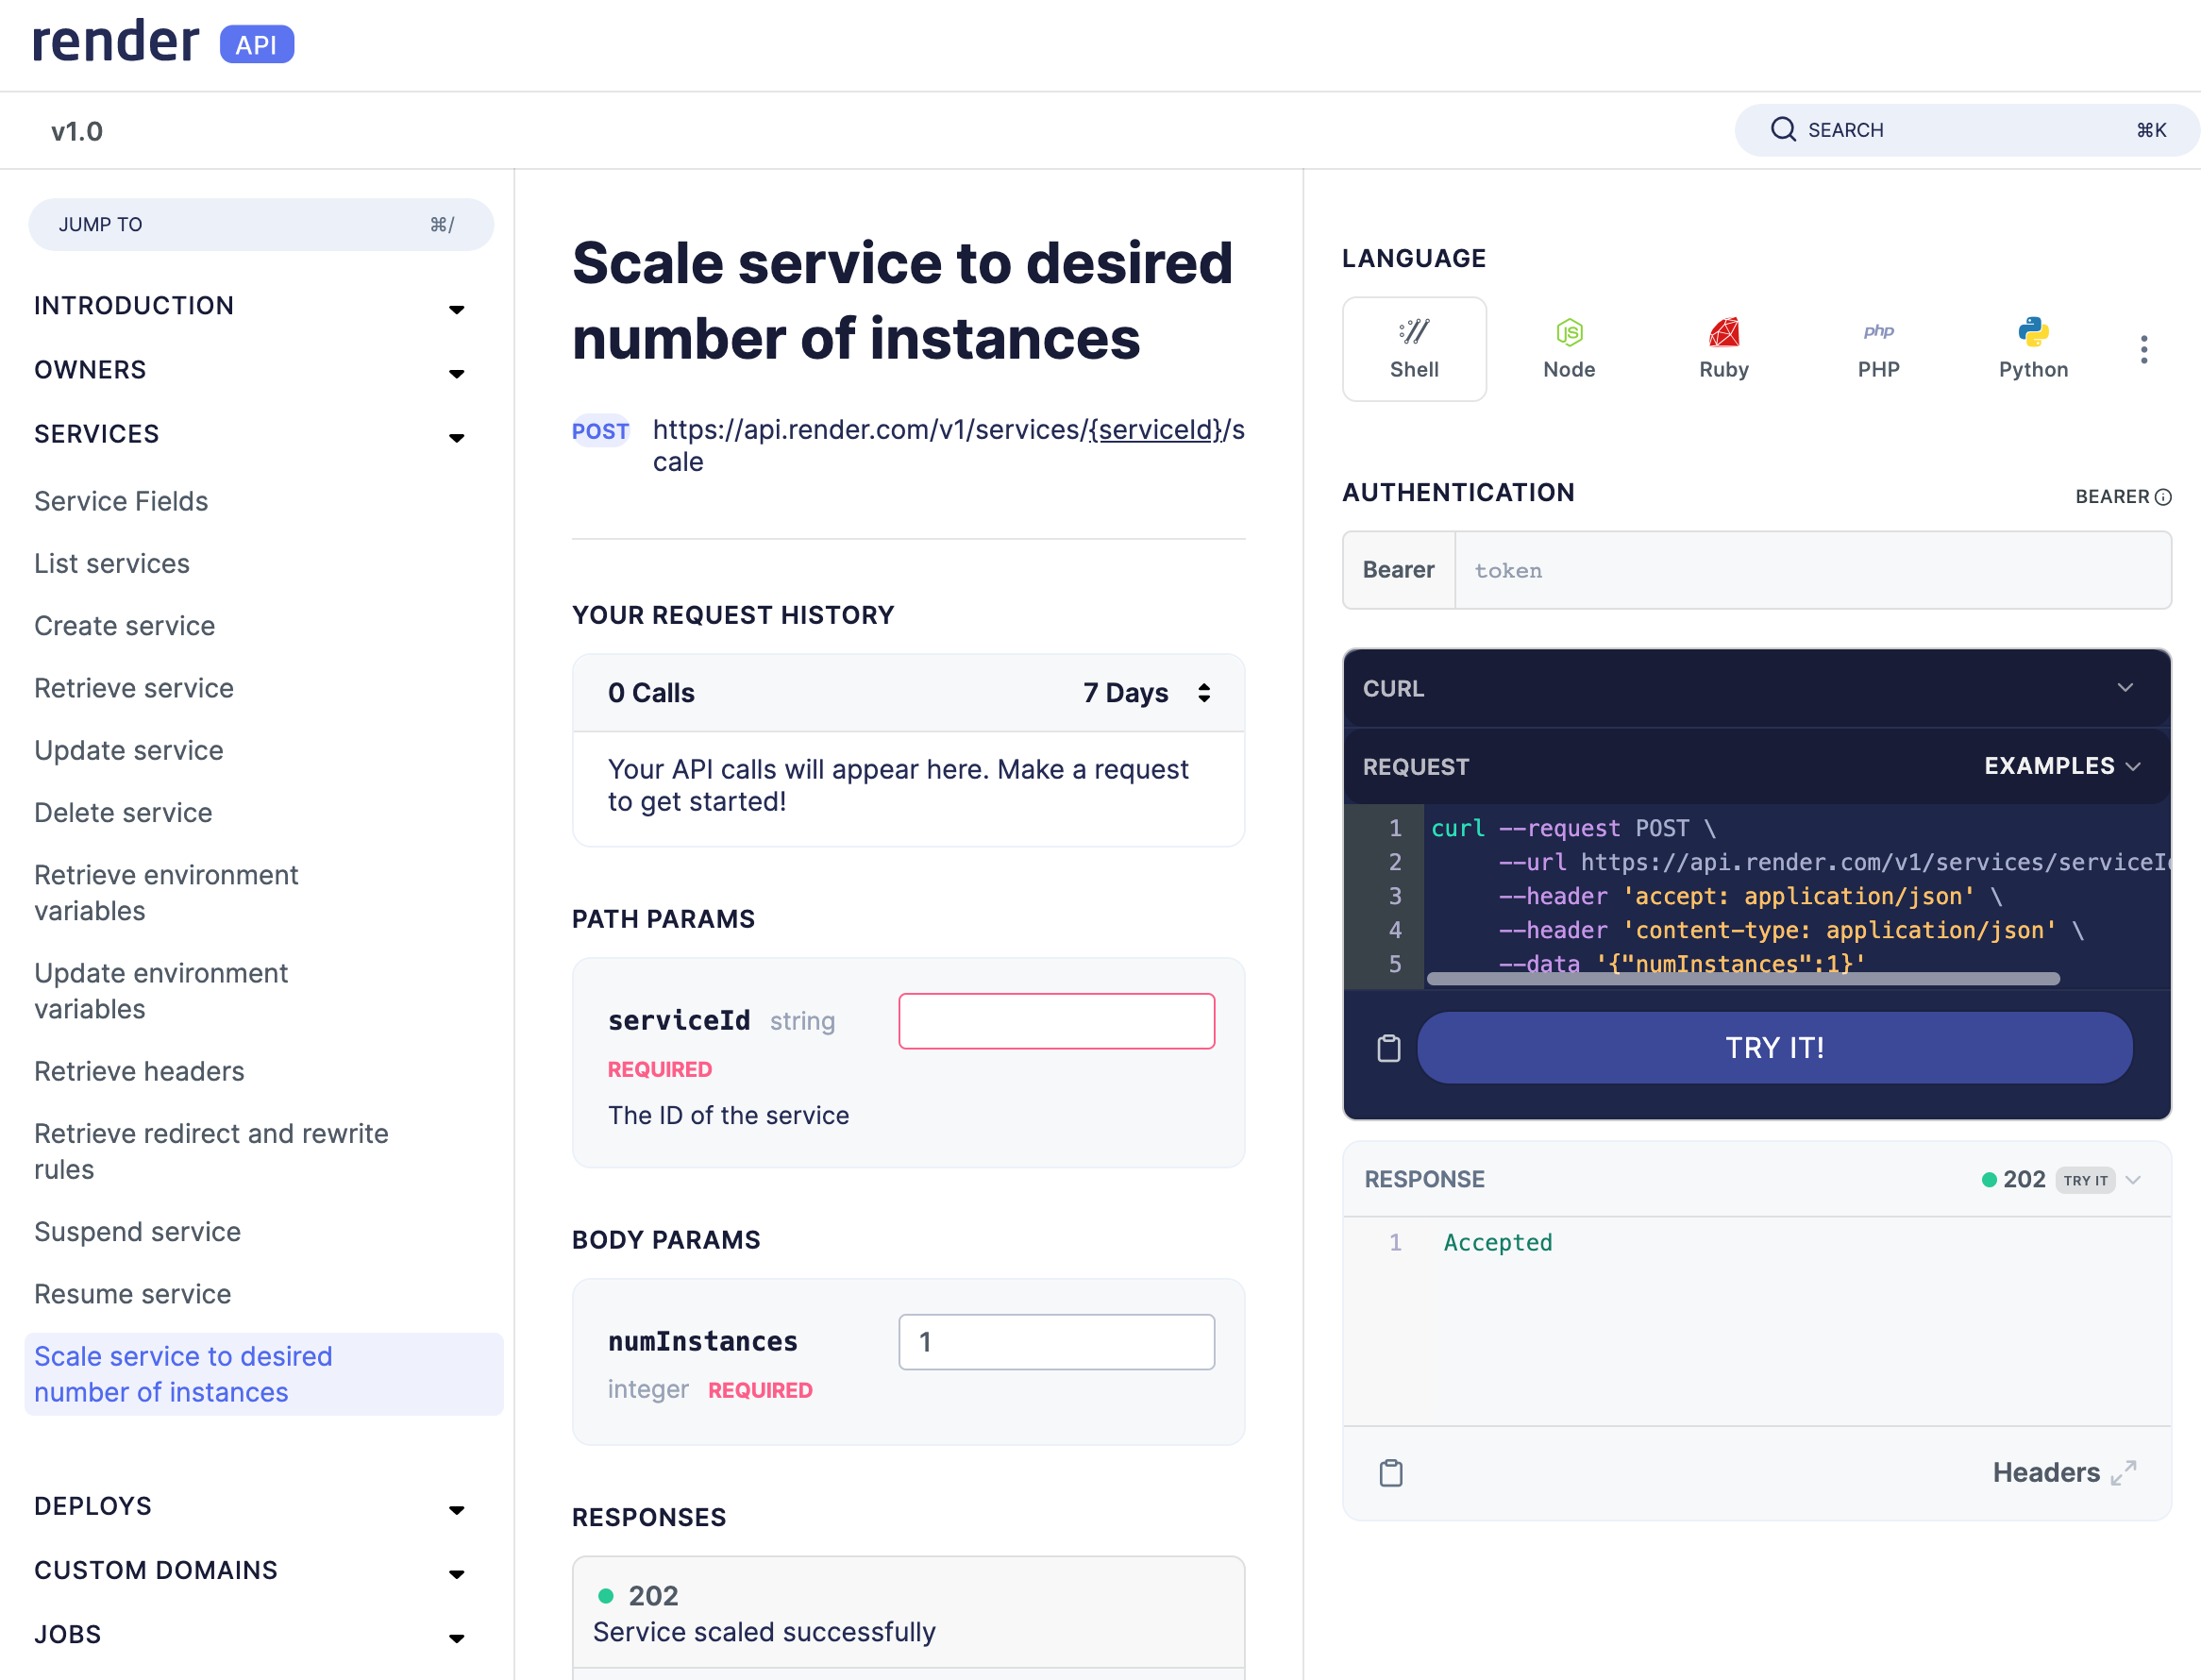
The second option for scaling your service is to use the Render API. Once you’ve generated an API token in your Account Settings, you can begin using the Render API to make requests.

One API endpoint allows you to scale your service to a specified number of instances. All you need to do is make a POST request to the endpoint, providing your API token and the serviceID and numInstances parameters like so:
curl --request POST \
 --url https://api.render.com/v1/services/{serviceId}/scale \
 --header 'accept: application/json' \
 --header 'authorization: Bearer {API_Token}' \
 --header 'content-type: application/json' \
 --data '{"numInstances":2}'
Making the API request manually is obviously a manual scaling process, but APIs are meant to be used programmatically. If you have some additional monitoring or alerting set up, you could programmatically call this API endpoint to scale your app up or down as needed, all without any human intervention. However, this might be overkill, as Render already has monitoring and autoscaling infrastructure in place to do this for you.
Option #3: Using a Blueprint Specification
The third option we’ll consider is using a Blueprint specification to scale your service. Blueprint specs are infrastructure as code (IaC) written using YAML files that contain key-value pairs for configuration. The main benefit of IaC is that it allows you to create and manage services through code rather than through a dashboard. This way, you can keep your configuration under source control, standardize your setup, and deploy new infrastructure changes with ease.
Render’s Blueprint specs provide two options for scaling your app. If you don’t want to use autoscaling, you can specify a numInstances key and a number for the value like this:
numInstances: 3
If you do want to take advantage of autoscaling in your service, you can configure the scaling property like this:
scaling:
  minInstances: 1
  maxInstances: 3
  targetMemoryPercent: 60
  targetCPUPercent: 60
These are the same options that you see in the Render Dashboard, but now rather than manually setting them in the UI, you’re writing your infrastructure as code. Neat!
Conclusion
Scaling your app with Render is easy. Whether you prefer to scale your app in the Render Dashboard, via the API, or through a Blueprint spec, Render has you covered.
Thanks for reading, and happy coding!
Published at DZone with permission of Tyler Hawkins. See the original article here.
Opinions expressed by DZone contributors are their own.

Comments