Unit Testing w/ JUnit Using Maven and IntelliJ - Pt.1
Take your first steps in using JUnit to unit test your Java code with the help of tools like Maven, a build tool, and IntelliJ IDEA, a popular IDE.
Join the DZone community and get the full member experience.
Join For FreeUnit testing is the first level of testing software where you write test code that executes a specific functionality in the code to be tested. In most cases, you as a programmer are responsible to deliver unit tested code. The objective is to check if the unit of the software, for example a public method of a class under test, behaves as expected and/or returns the expected data. Unit tests are not done on the production system but as isolated units. If the unit under test have external dependencies, such as an external data source or a Web service, the dependencies are replaced with a test implementation or a mock object created using a test framework. Unit testing is not the only type and it alone cannot handle all testing aspects. Other types of testing, such as integration and functional testing have their own roles in testing software.
In this series of posts we will focus on unit testing with JUnit – one of the most popular framework to test Java code. In this post, we will start by creating and executing a basic unit test, and then in further posts move to specific unit testing aspects.
The core JUnit framework comes in a single JAR file, which you can download, point the classpath to it, and then create and run tests. But in this post, we will learn how to perform unit testing in the real programmer’s way. We will start with Maven, and then move to IntelliJ.
Unit Testing with Maven
You’ve likely heard Maven being referred as a build tool. But, in addition to its capability to build deployable artifacts from source code, Maven provides a number of features for managing the software development life cycle. Unit testing is one such feature, which is incorporated as a test phase in the Maven build lifecycle.
Without going into Maven in depth, let’s start our first JUnit test with Maven.
- Download and install Maven if you haven’t done yet.
- Open up a command prompt (Windows) or a terminal (*uix or Mac), browse to a working directory to setup the project, and execute the following command.
mvn archetype:generate -DgroupId=guru.springframework.unittest.quickstart -DartifactId=unittest -DarchetypeArtifactId=maven-archetype-quickstart -DinteractiveMode=falseThe preceding archetype:generate command uses the maven-archetype-quickstart template to create a basic Maven project containing a pom.xml file, a App.java class, and a AppTest.java test class in the following directory structure.
└───pom.xml
└───src
    ├───main
    │   └───java
    │       └───guru
    │           └───springframework
    │               └───unittest
    │                   └───quickstart
    │                           App.java
    │
    └───test
        └───java
            └───guru
                └───springframework
                    └───unittest
                        └───quickstart
                                AppTest.java
In the directory structure above, the pom.xml file, also known as the Maven configuration file is the heart of a Maven project. It is where you define your project configurations – specifically the dependencies of your project. For example, as our project depends on JUnit, we need to declare it as a dependency in the pom.xmlfile. Although a JUnit dependency will already be present by default, we will update it to point to the latest JUnit version. This is how our final pom.xml file will look like.
pom.xml:
<project xmlns="http://maven.apache.org/POM/4.0.0" xmlns:xsi="http://www.w3.org/2001/XMLSchema-instance"
  xsi:schemaLocation="http://maven.apache.org/POM/4.0.0 http://maven.apache.org/maven-v4_0_0.xsd">
  <modelVersion>4.0.0</modelVersion>
  <groupId>guru.springframework.unittest.quickstart</groupId>
  <artifactId>unittest</artifactId>
  <packaging>jar</packaging>
  <version>1.0-SNAPSHOT</version>
  <name>unittest</name>
  <url>http://maven.apache.org</url>
  <dependencies>
    <dependency>
     <groupId>junit</groupId>
     <artifactId>junit</artifactId>
     <version>4.12</version>
     <scope>test</scope>
    </dependency>
      <dependency>
          <groupId>org.hamcrest</groupId>
          <artifactId>hamcrest-library</artifactId>
          <version>1.3</version>
          <scope>test</scope>
      </dependency>
  </dependencies>
</project>
Now that we have set up a basic Java class, a test class, and the pom.xml configuration, we can run a unit test.
- Execute the
mvn testcommand from the working directory.
This command will run the default AppTest class that Maven generated for us with the following output.
-------------------------------------------------------
 T E S T S
-------------------------------------------------------
Running guru.springframework.unittest.quickstart.AppTest
Tests run: 1, Failures: 0, Errors: 0, Skipped: 0, Time elapsed: 0.043 sec

Results :

Tests run: 1, Failures: 0, Errors: 0, Skipped: 0

[INFO] ------------------------------------------------------------------------
[INFO] BUILD SUCCESS
[INFO] ------------------------------------------------------------------------
[INFO] Total time: 8.691 s
[INFO] Finished at: 2015-06-18T20:16:34+05:30
[INFO] Final Memory: 14M/136M
[INFO] ------------------------------------------------------------------------
We have executed a JUnit test using Maven. This test passed, but hardly provides any value yet. We will next move to using the IntelliJ IDE to write and execute a more comprehensive test.
Unit Testing in IntelliJ
Using IntelliJ, you can easily create, run, and debug unit tests. Among several other unit testing frameworks, IntelliJ provides built-in support for JUnit. In IntelliJ, you can create a JUnit test class with a click and navigate quickly between test classes and their corresponding target classes to debug test errors. A very useful unit testing feature in IntelliJ is code coverage. With this feature, you can view the exact percentage of methods and even lines of code covered by unit tests in your project.
Let’s import our existing Maven project to IntelliJ and do some unit testing.
Import Maven Project to IntelliJ
If you don’t have IntelliJ installed, download and install the free Community Edition or the 30-day trial of Ultimate Edition from the official website. Once you are done, perform the following steps:
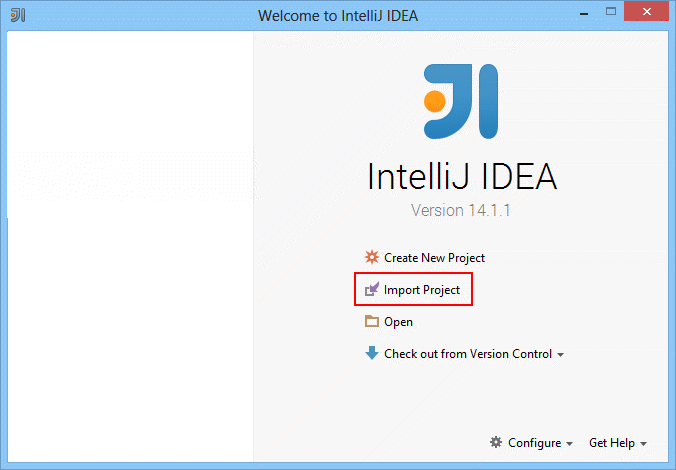
- Open IntelliJ.
- On the Welcome to IntelliJ IDEA window, click Import Project.
- In the Select File or Directory to Import dialog box, browse to the working directory of the Maven project and select the pom.xml file.

- Click the OK button.
- In the Import Project from Maven dialog box that appears, select the Import Maven projects automatically checkbox to synchronize changes between the Maven and InteliiJ projects each time thepom.xml file changes.
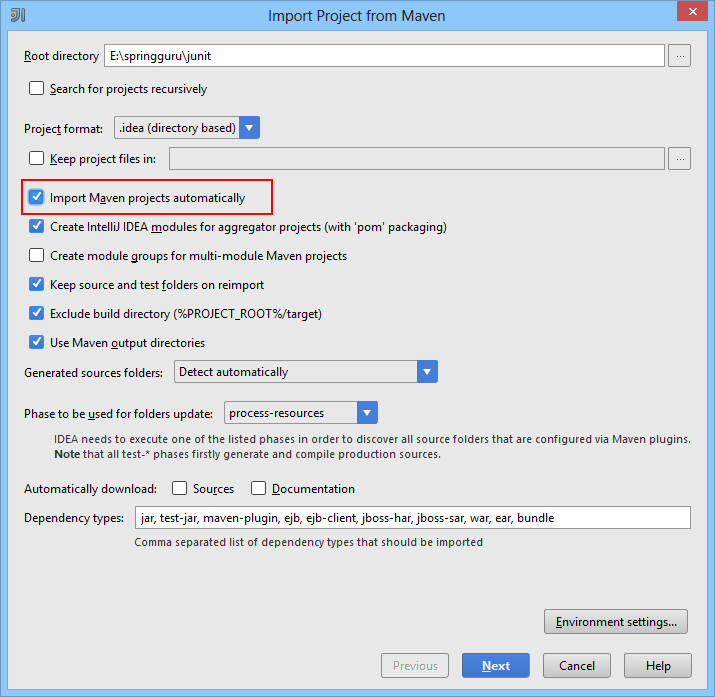
- Click the Next button through a few more dialog boxes, accepting the default settings, and finally clickFinish. The Project window of IntelliJ displays the project structure.
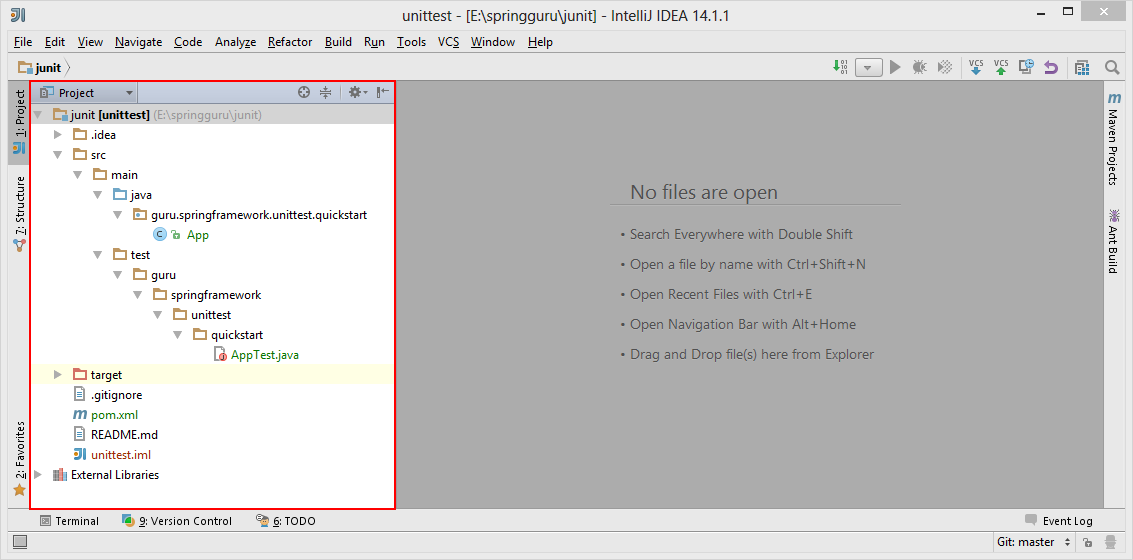
- Double click App in the Project window to open it in the code editor.
- Replace the default code of the
Appclass with this code.
app.java:
package guru.springframework.unittest.quickstart;


public class App
{
    public String concatAndConvertString(String str1, String str2){
        String concatedString=str1.concat(str2);
        return concatedString.toUpperCase();
    }
    }
In the code above we wrote a concatAndConvertString() method in the App class that accepts two String parameters. The method first concatenates the strings and converts the result to uppercase before returning it.
We will next add a test class to test the concatAndConvertString() method.
Add a Test Class
Let’s go through the steps to add a test class in IntelliJ from scratch.
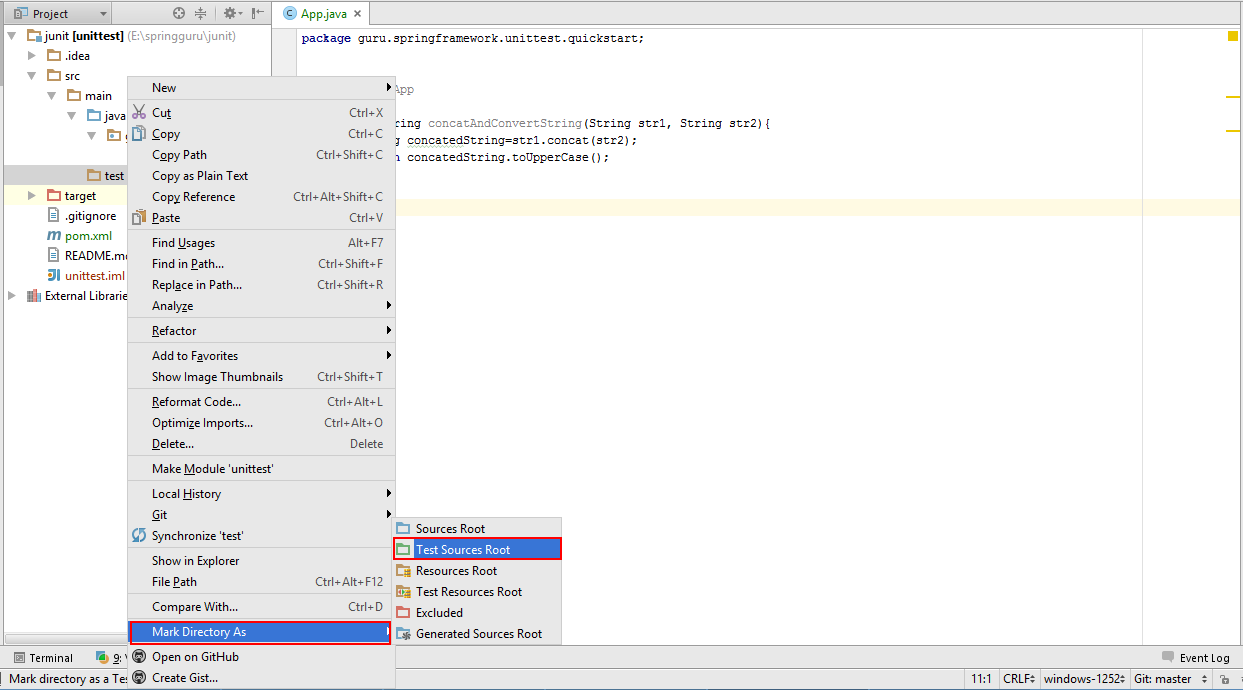
- Delete the default AppTest class from the Project window.
- In the Project window create a directory with the name test under main, We will use the test directory to keep the test code separated from the application code.
- Right-click test and select Mark Directory As→Test Sources Root.
- In the code editor where the App class is open, press
Shift+F10and select Create New Test.
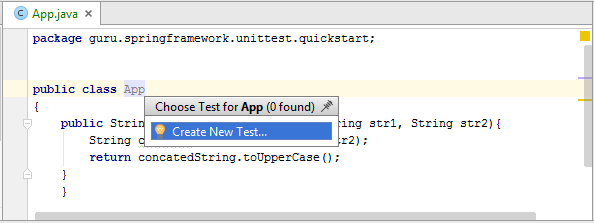
- In the Create Test dialog box that appears, select the jUnit4 radio button and the check box corresponding to the concatAndConvertString() method that we will test.
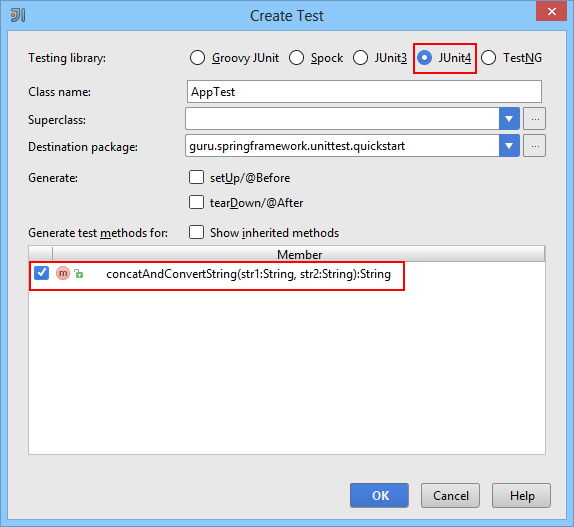
- Click the OK button. JUnit creates the AppTest class with a
testConcatAndConvertString()method decorated with the@Testannotation. This annotation tells JUnit to run the method as a test case. In the test method, we will write the code to test theconcatAndConvertString()method of App.
AppTest.Java:
package guru.springframework.unittest.quickstart;
import org.junit.Test;
import static org.junit.Assert.*;

public class AppTest {

   @Test
    public void testConcatAndConvertString() throws Exception {
       String expectedValue="HELLOWORLD";
       App app=new App();
       String actualValue=app.concatAndConvertString("Hello", "World");
       assertEquals(expectedValue, actualValue);
    }
}
In Line 12 of the example above, we called the assertEquals() method, which is one of the several JUnit assertion methods. This overloaded method checks whether two String objects are equal. If they are not, the method throws an AssertionError. In our example, we called the assertEquals() method by passing the expected string value (HELLOWORLD) as the first parameter and the actual value that the concatAndConvertString() method returns as the second parameter.
Run the Unit Test
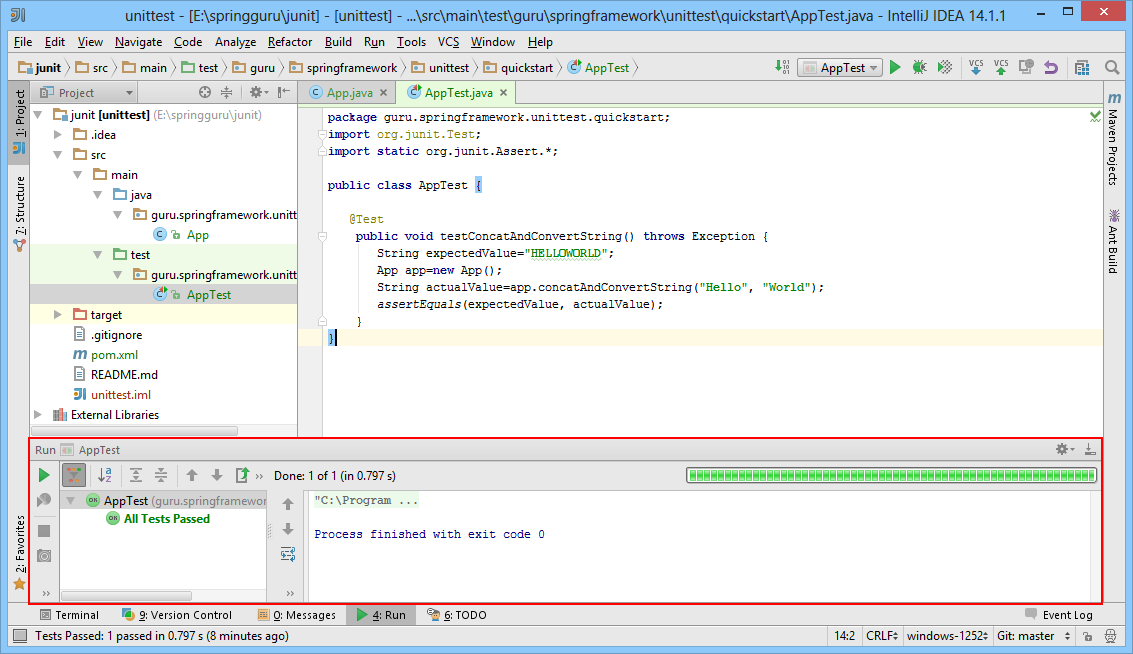
To run the test, select Run AppTest from the Run menu of IntelliJ or press Shift+F10. The Run window displays the test result. A green highlight box indicates that the test completed without any failure.
To know how test failures are reported, change the value of the expectedValuevariable to HelloWorldand press Shift+F10. The Run dialog box displays a red progress bar to indicate the test failure along with a comparison failure message.
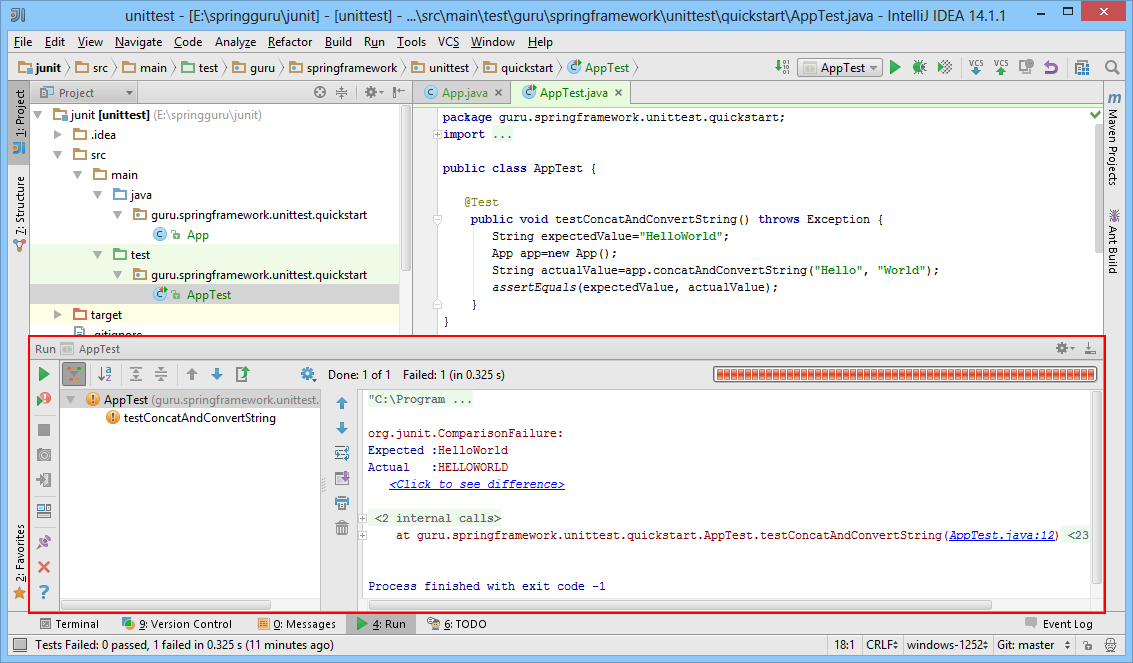
Revert the the expectedValue variable to its original value before you close IntelliJ.
Summary
At this point, if you are thinking Why not just use System.out.println() for unit testing? Then you are thinking wrong. Inserting System.out.println() for debugging into code is undesirable because it requires manually scanning the output, every time the program is run, to ensure that the code is doing what’s expected. Imagine doing this in an enterprise application having hundreds and thousands of lines of code. On the other hand, unit tests examine the code’s behavior on runtime from the client’s point of view. This provides better insight on what might happen when the software is released.
Whenever you are writing code, you should be writing unit tests too. Writing unit tests will catch programming errors and improve the quality of your code. Many professional developers advocate doing Test Driven Development (TDD), where you write your unit tests before you write the application code.
Either way if you write your unit tests before or after you write the application code, the unit tests become a valuable asset for instrumenting your code. As the code base grows, you can refactor things as needed, and have more confidence that your changes will not have unintended consequences (ie where you change one thing, and accidently break something else).
In part 2 of my tutorial series on unit testing with JUnit I’ll take a deeper look at JUnit Assertions, JUnit Annotations, and JUnit Test Suites.
Unit Testing with the Spring Framework
Testing is an integral part of Enterprise Application Development process with the Spring Framework. The architecture of the Spring Framework lends itself to modular code and easier unit testing. Spring provides testing support through the TestContext Framework that abstracts the underlying testing framework, such as JUnit and TestNG. You can use it by setting SpringJUnit4ClassRunner.class as the value for the @RunWith annotation. This tells Spring to use the test runner of TestContext instead of JUnit’s built in test runner. I’ve written a more in depth post about testing Spring applications with JUnit here.
Published at DZone with permission of John Thompson. See the original article here.
Opinions expressed by DZone contributors are their own.
Comments