Learn WebAssembly With WebAssembly Studio
Join the DZone community and get the full member experience.
Join For FreeIntroduction
As web technologies have advanced, there’s been a push to move more and more applications to the web. This has presented developers with another challenge because web browsers support only one programming language: JavaScript. As browser makers looked for ways to improve JavaScript’s performance, they came up with a great new invention: WebAssembly.
WebAssembly was first introduced in 2015, and, alongside HTML, CSS, and JS, it became the fourth language for the Web that runs natively in browsers (W3C announced on 5 December 2019 ).
What Is WebAssembly?
As mentioned, one of the biggest issues that WebAssembly aims to solve is performance. JavaScript is a great language, but it is also known as an interpreted programming language and optimizations are always difficult with interpreted languages.
WebAssembly is a way of taking code written in programming languages other than JavaScript and running that code in the browser (by Lin Clark ). Currently, C, C++, and Rust were given focus as languages that could target WebAssembly.
The WebAssembly Core Specification describes WebAssembly as a safe, portable, low-level code format designed for efficient execution and compact representation.
There are lots of websites and documents explained about WebAssembly, so in this article, I will only introduce WebAssembly through implementing an extremely simple project using WebAssembly Studio.
A Project Demo
There are many tools to convert C, C++, or Rust snippets into WebAssembly. In this demo, I will explain how to convert C snippets into WebAssembly and use them in a simple project by using the WebAssembly Studio online tool. You can also see examples for C++ and Rust.
First, you access https://webassembly.studio/ . Its interface looks like this:
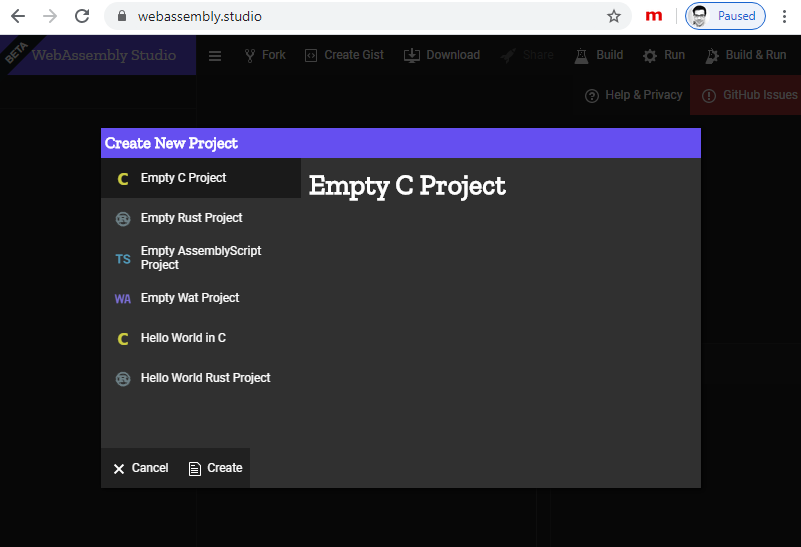
In the Create New Project view, select Empty C Project and click the Create button. We will be sent to the following window:
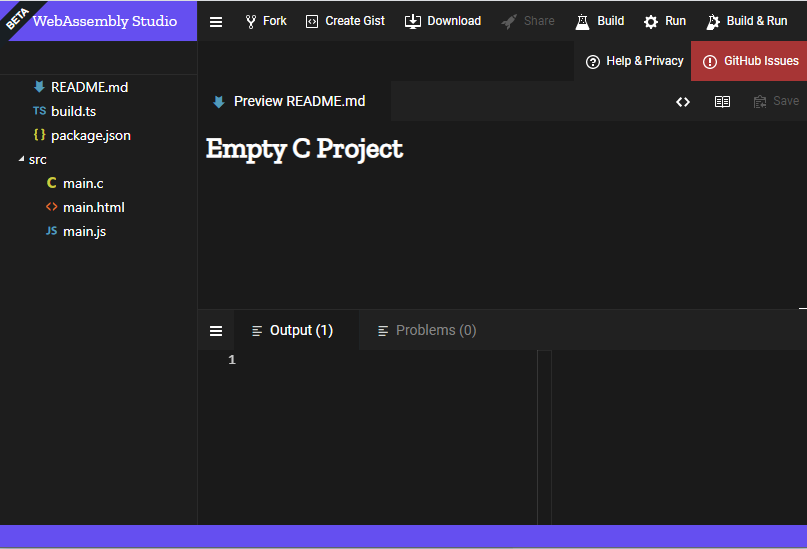
There are a lot of items in this window, however, as a beginner, we just want to focus on the following functions. (Areas of focus are highlighted with yellow borders and numbers):
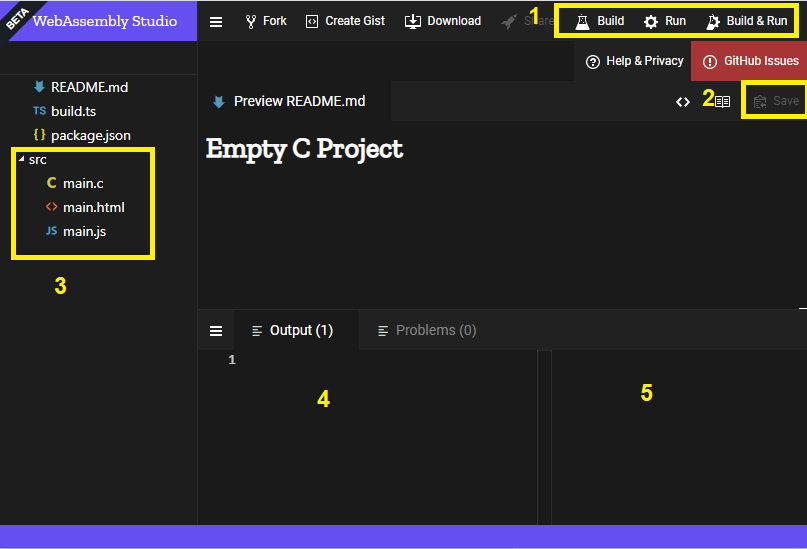
- Area 1: Build and run our project.
- Area 2: Save the content that we created.
- Area 3: Our project contains three main files: the
main.cfile contains C code, themain.htmlcontains HTML markup, and themain.jscontains JS code. - Area 4: Display the compiling process.
- Area 5: Things will be displayed in the browsers.
Next, we click the main.c in the Area 3 and look at its default content:
xxxxxxxxxx
WASM_EXPORT
int main() {
return 42;
}
Change the code so we get this:
xxxxxxxxxx
WASM_EXPORT
int add(int a, int b) {
return a + b;
}
WASM_EXPORT
int sub(int a, int b) {
return a - b;
}
We defined two functions add and sub and we also note that, these functions must be marked by WASM_EXPORT attributes. This implies that our functions will be converted into WebAssembly. Click the Save button in the Area 2.
Next, also in the Area 3, we click the main.html. Delete the existing HTML markups and replace them with the following markups:
xxxxxxxxxx
<html>
<head>
<meta charset="utf-8">
<style>
body {
background-color: rgb(255, 255, 255);
}
</style>
</head>
<body>
<h1 id="add"></h1>
<h1 id="sub"></h1>
</body>
</html>
Click the Save button in Area 2.
Finally, we click the main.js in the Area 3. We replace the statement:
xxxxxxxxxx
document.getElementById("container").textContent = instance.exports.main();
with the following statements:
document.getElementById("add").textContent = "1 + 2 = " + instance.exports.add(1,2);
document.getElementById("sub").textContent = "1 - 2 = " + instance.exports.sub(1,2);
And don't forget to click the Save button in Area 2.
Well done! So far, we can build and run our project by clicking the Build & Run button in Area 1, and we can also note things that would be displayed in Area 4 and 5:

There is a new file below our Area 3:
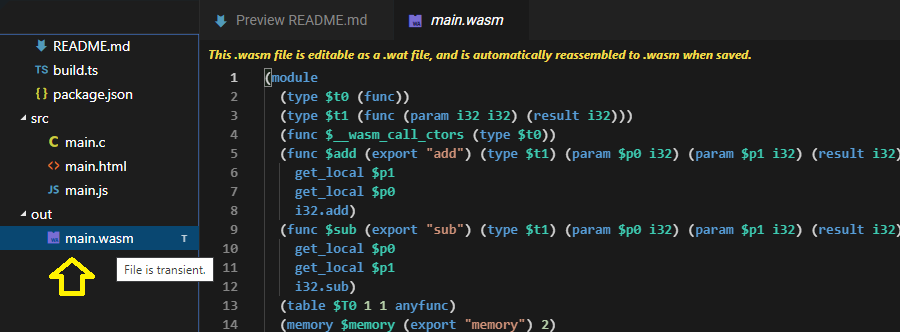
Here is the WebAssembly file, and you can see its content in the right view. We note export "add" and export "sub" , which are two of our C functions (add and sub ) are converted into WebAssembly.
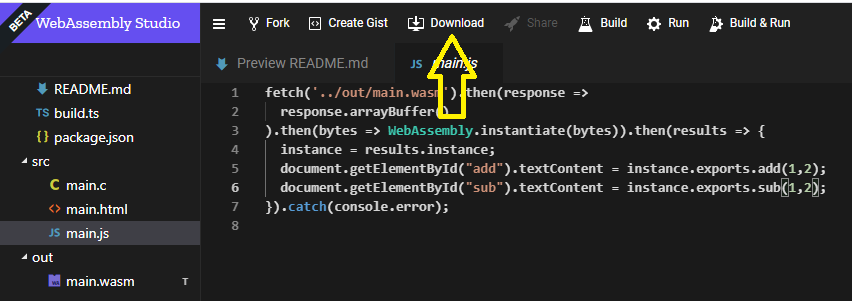
You can download and use this file in your local project by clicking the Download:
Conclusion
In this article, I introduced an online tool that will help us to learn and work with WebAssembly easily. WebAssembly is a great tool, and you can discover more about it by referring to the WebAssembly website. Happy coding!
Opinions expressed by DZone contributors are their own.

Comments