Xamarin.Forms - Custom Popup
Learn how to set up a Xamarin.Forms project to create and configure a custom popup in this tutorial.
Join the DZone community and get the full member experience.
Join For FreeIntroduction
Xamarin.Forms code runs on multiple platforms — each of which has its own filesystem. This means that reading and writing files are the most easily done tasks using native file APIs on each platform. Alternatively, embedded resources is also a simpler solution to distribute data files with an app.
 Prerequisites
Visual Studio 2017 (Windows or Mac)
Setting Up a Xamarin.Forms Project
Start by creating a new Xamarin.Forms project. You’ll learn more by going through the steps yourself.
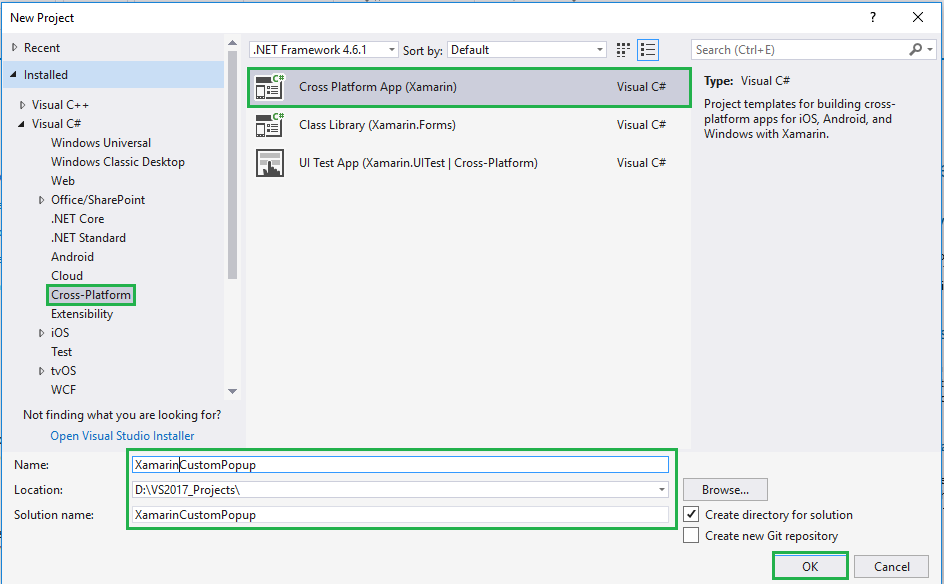
Choose the Cross-platform App project under Visual C# and "Cross-platform" in the New Project dialog.
Now, select the Blank App and Choose Portable Class Library (PCL).
You now have a basic Xamarin.Forms app. Click the Play button to try it out.
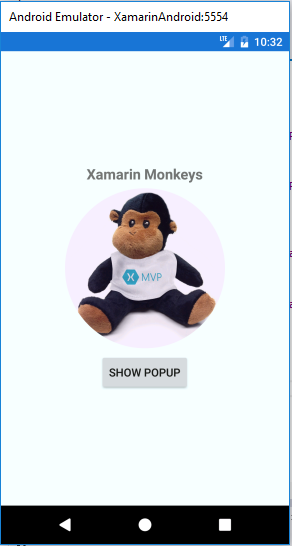
Setting Up the User Interface
Go to MainPage.xaml and write the following code.
MainPage.xaml
    <StackLayout BackgroundColor="Azure" AbsoluteLayout.LayoutBounds="0, 0, 1, 1" AbsoluteLayout.LayoutFlags="All">
                <StackLayout HorizontalOptions="CenterAndExpand" VerticalOptions="CenterAndExpand" >
                    <Label Text="Xamarin Monkeys" HorizontalOptions="Center" FontAttributes="Bold" FontSize="Medium"></Label>
                    <Image x:Name="imgMonkey" HeightRequest="200" WidthRequest="200"></Image>
                    <Button HorizontalOptions="Center" VerticalOptions="Center" Clicked="btnPopupButton_Clicked" Text="Show Popup"></Button>
                </StackLayout>
   </StackLayout>
Click the Play button to try it out.
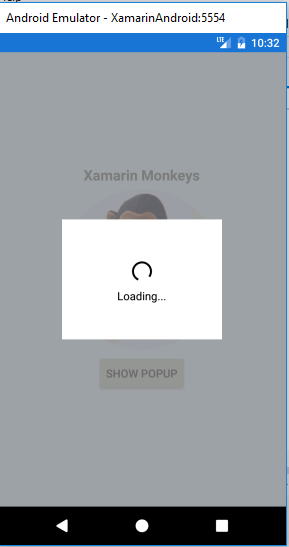
Popup - Loading
In this step, Create a custom popup using ContentView.
The custom popup is just a content view, you should hide it by default. After the click event, you can show the ContentView.
IsVisible="False" Write the following code for the popup.
MainPage.xaml
<ContentView x:Name="popupLoadingView" BackgroundColor="#C0808080" Padding="10, 0" IsVisible="false" AbsoluteLayout.LayoutBounds="0, 0, 1, 1" AbsoluteLayout.LayoutFlags="All">
                <StackLayout VerticalOptions="Center" HorizontalOptions="Center">
                    <StackLayout Orientation="Vertical" HeightRequest="150" WidthRequest="200" BackgroundColor="White">

                        <ActivityIndicator x:Name="activityIndicator" Margin="0,50,0,0" VerticalOptions="Center" HorizontalOptions="Center" Color="Black" WidthRequest="30" HeightRequest="30" ></ActivityIndicator>
                        <Label x:Name="lblLoadingText" TextColor="Black" VerticalOptions="Center" HorizontalOptions="Center" VerticalTextAlignment="Center" Text="Loading..."></Label>
                    </StackLayout>
                </StackLayout>
            </ContentView>
Now, write the button click event to show the popup.
MainPage.xaml.cs
 private void btnPopupButton_Clicked(object sender, EventArgs e)
        {
            popupImageView.IsVisible = true;
            activityIndicator.IsRunning = true;

        }
Click the Play button to try it out.
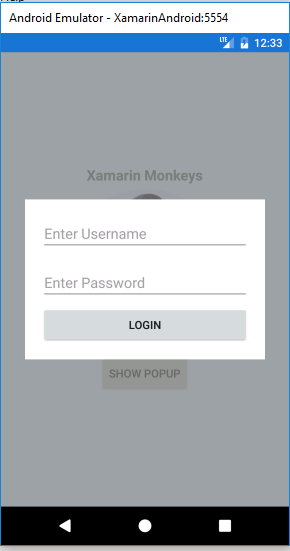
Popup - Login
In this step, to create a Login view using the popup, write the following code.
MainPage.xaml
<ContentView x:Name="popupLoginView" BackgroundColor="#C0808080" Padding="10, 0" IsVisible="false" AbsoluteLayout.LayoutBounds="0, 0, 1, 1" AbsoluteLayout.LayoutFlags="All">
                <StackLayout VerticalOptions="Center" HorizontalOptions="Center">
                    <StackLayout Orientation="Vertical" HeightRequest="200" WidthRequest="300" BackgroundColor="White">
                        <Entry Margin="20,20,20,10" Placeholder="Enter Username"></Entry>
                        <Entry Margin="20,0,20,0" Placeholder="Enter Password"></Entry>
                        <Button Margin="20,0,20,0" Text="Login"></Button>
                    </StackLayout>
                </StackLayout>
            </ContentView>
Click the Play button to try it out.
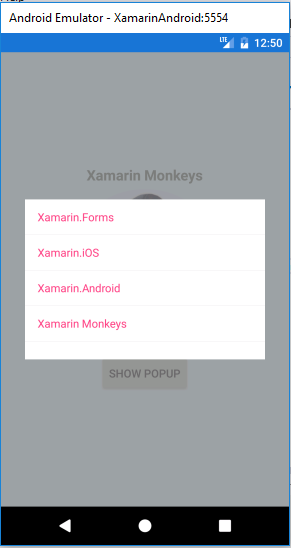
Popup - ListView
In this step, to create a Listview using the popup, and write the following code.
MainPage.xaml
<ContentView x:Name="popupListView" BackgroundColor="#C0808080" Padding="10, 0" IsVisible="false" AbsoluteLayout.LayoutBounds="0, 0, 1, 1" AbsoluteLayout.LayoutFlags="All">
                <StackLayout VerticalOptions="Center" HorizontalOptions="Center">
                    <StackLayout Orientation="Vertical" HeightRequest="200" WidthRequest="300" BackgroundColor="White">
                        <ListView x:Name="sampleList">
                        </ListView>
                    </StackLayout>
                </StackLayout>
            </ContentView>
Click the Play button to try it out.
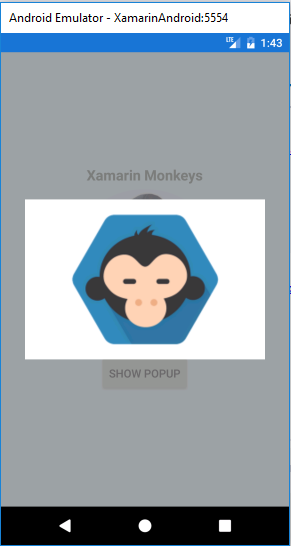
Popup - ImageView
In this step, using images in the popup, write the following code.
MainPage.xaml
<ContentView x:Name="popupImageView" BackgroundColor="#C0808080" Padding="10, 0" IsVisible="false" AbsoluteLayout.LayoutBounds="0, 0, 1, 1" AbsoluteLayout.LayoutFlags="All">
                <StackLayout VerticalOptions="Center" HorizontalOptions="Center">
                    <StackLayout Orientation="Vertical" HeightRequest="200" WidthRequest="300" BackgroundColor="White">
                        <Image WidthRequest="200" HeightRequest="200" x:Name="imgPopup"></Image>
                    </StackLayout>
                </StackLayout>
            </ContentView>
Click the Play button to try it out.

Full Code - MainPage.xaml
<?xml version="1.0" encoding="utf-8" ?>
<ContentPage xmlns="http://xamarin.com/schemas/2014/forms"
             xmlns:x="http://schemas.microsoft.com/winfx/2009/xaml"
             xmlns:local="clr-namespace:XamarinCustomPopup"
             x:Class="XamarinCustomPopup.MainPage">
    <ContentPage.Content>

        <AbsoluteLayout Padding="0" HorizontalOptions="FillAndExpand" VerticalOptions="FillAndExpand">
            <StackLayout BackgroundColor="Azure" AbsoluteLayout.LayoutBounds="0, 0, 1, 1" AbsoluteLayout.LayoutFlags="All">
                <StackLayout HorizontalOptions="CenterAndExpand" VerticalOptions="CenterAndExpand" >
                    <Label Text="Xamarin Monkeys" HorizontalOptions="Center" FontAttributes="Bold" FontSize="Medium"></Label>
                    <Image x:Name="imgMonkey" HeightRequest="200" WidthRequest="200"></Image>
                    <Button HorizontalOptions="Center" VerticalOptions="Center" Clicked="btnPopupButton_Clicked" Text="Show Popup"></Button>
                </StackLayout>
            </StackLayout>

            <!--Popup Area-->
            <ContentView x:Name="popupLoginView" BackgroundColor="#C0808080" Padding="10, 0" IsVisible="false" AbsoluteLayout.LayoutBounds="0, 0, 1, 1" AbsoluteLayout.LayoutFlags="All">
                <StackLayout VerticalOptions="Center" HorizontalOptions="Center">
                    <StackLayout Orientation="Vertical" HeightRequest="200" WidthRequest="300" BackgroundColor="White">
                        <Entry Margin="20,20,20,10" Placeholder="Enter Username"></Entry>
                        <Entry Margin="20,0,20,0" Placeholder="Enter Password"></Entry>
                        <Button Margin="20,0,20,0" Text="Login"></Button>
                    </StackLayout>
                </StackLayout>
            </ContentView>

            <ContentView x:Name="popupLoadingView" BackgroundColor="#C0808080" Padding="10, 0" IsVisible="false" AbsoluteLayout.LayoutBounds="0, 0, 1, 1" AbsoluteLayout.LayoutFlags="All">
                <StackLayout VerticalOptions="Center" HorizontalOptions="Center">
                    <StackLayout Orientation="Vertical" HeightRequest="150" WidthRequest="200" BackgroundColor="White">

                        <ActivityIndicator x:Name="activityIndicator" Margin="0,50,0,0" VerticalOptions="Center" HorizontalOptions="Center" Color="Black" WidthRequest="30" HeightRequest="30" ></ActivityIndicator>
                        <Label x:Name="lblLoadingText" TextColor="Black" VerticalOptions="Center" HorizontalOptions="Center" VerticalTextAlignment="Center" Text="Loading..."></Label>
                    </StackLayout>
                </StackLayout>
            </ContentView>

            <ContentView x:Name="popupListView" BackgroundColor="#C0808080" Padding="10, 0" IsVisible="false" AbsoluteLayout.LayoutBounds="0, 0, 1, 1" AbsoluteLayout.LayoutFlags="All">
                <StackLayout VerticalOptions="Center" HorizontalOptions="Center">
                    <StackLayout Orientation="Vertical" HeightRequest="200" WidthRequest="300" BackgroundColor="White">
                        <ListView x:Name="sampleList">
                        </ListView>
                    </StackLayout>
                </StackLayout>
            </ContentView>

            <ContentView x:Name="popupImageView" BackgroundColor="#C0808080" Padding="10, 0" IsVisible="false" AbsoluteLayout.LayoutBounds="0, 0, 1, 1" AbsoluteLayout.LayoutFlags="All">
                <StackLayout VerticalOptions="Center" HorizontalOptions="Center">
                    <StackLayout Orientation="Vertical" HeightRequest="200" WidthRequest="300" BackgroundColor="White">
                        <Image WidthRequest="200" HeightRequest="200" x:Name="imgPopup"></Image>
                    </StackLayout>
                </StackLayout>
            </ContentView>

        </AbsoluteLayout>
    </ContentPage.Content>
</ContentPage>
Full Code - MainPage.xaml.cs
using System;
using System.Collections.Generic;
using System.Linq;
using System.Text;
using System.Threading.Tasks;
using Xamarin.Forms;

namespace XamarinCustomPopup
{
    public partial class MainPage : ContentPage
    {
        public MainPage()
        {
            InitializeComponent();
            List<string> items = new List<string> { "Xamarin.Forms", "Xamarin.iOS", "Xamarin.Android","Xamarin Monkeys" };
            imgMonkey.Source = ImageSource.FromResource("XamarinCustomPopup.images.monkey-MVP.png");
            imgPopup.Source = ImageSource.FromResource("XamarinCustomPopup.images.xammonkey.png");
            sampleList.ItemsSource = items;
        }

        private void btnPopupButton_Clicked(object sender, EventArgs e)
        {
            popupImageView.IsVisible = true;
            activityIndicator.IsRunning = true;

        }

    }
}
I hope you understand how to create a custom popup in Xamarin.Forms.
Thanks for reading. Please share comments and feedback.
Opinions expressed by DZone contributors are their own.
Comments