A Guide To Automation Testing Using Selenium ChromeDriver
Selenium ChromeDriver is used to run automation tests on Chrome. Read this article to know how to install chromedriver and use it on Windows and MacOS.
Join the DZone community and get the full member experience.
Join For FreeAccording to netmarketshare, Google Chrome accounts for 67% of the browser market share. It is the choice of the majority of users and it’s popularity continues to rise. This is why, as an automation tester, it is important that you perform automated browser testing on Chrome browser.
ChromeDriver is used along with Selenium to automate tests on the Chrome browser. Using Selenium ChromeDriver, you can communicate with the Chrome browser to perform different operations like navigation from one web page to another web page, users can provide input on the web pages, javascript execution, and many more operations. In case you want to know more about what is Selenium, you can refer to this detailed article on this topic.
In this article, I will show you how to use ChromeDriver to perform Selenium test automation. I’ll go into details about the ChromeDriver, starting from download, installation and to use it on Windows and Mac.
What Is ChromeDriver In Selenium?
To perform automated browser testing on Chrome browser, ChromeDriver class, a standalone executable, is used by Selenium WebDriver to create communication of our test script with the Chrome browsers. You can create a WebDriver object for Chrome like below:
//Creating WebDriver object for Chrome browser
WebDriver driver = new ChromeDriver();
Selenium WebDriver helps our test script capabilities or power to communicate with the browser. ChromeDriver class extends the WebDriver interface. It is an implementation of the WebDriver interface which is used to control the Chrome browser running and operations on the local machine. You can refer to this Selenium Webdriver tutorial for cross browser testing to know more about how to perform Selenium testing using WebDriver.
With the help of the Selenium ChromeDriver class, we can easily interact with the Chrome browser and perform automation testing of web applications on the chrome browser.
This is the implementation for the Selenium ChromeDriver class:
org.openqa.selenium.chrome.ChromeDriver
What Are The Requirements For Selenium ChromeDriver?
Before starting to explore ChromeDriver, there are few prerequisites which should be available on your system. Please refer to them as follows.
Java/ JDK/JRE: In this guide, I’ll perform automation testing in Selenium with Java, so in order to run the tests I’d need to have Java/JDK/JRE installed in my system.
You can download and install it from the official website for Java. https://www.java.com/en/download/
I have used Java 8, JRE-1.8 for the Selenium test automation script execution.
Eclipse IDE: To write a test automation script with selenium, you’d require an editor. In this case, I have used the Eclipse IDE. It can be downloaded from the official website of Eclipse. https://www.eclipse.org/downloads/ You can use the same editor or you can use other editors as well.
Selenium: To write selenium automation test scripts, you’d require Selenium to be installed in your system. You can download it from the official website of selenium. https://selenium.dev/downloads/ . In this article, I have used selenium version 3.141.59, which is the latest stable version of selenium.
Chrome Browser: Since we’d be performing Selenium test automation on chrome browser, it is required that our system should have a chrome browser installed. It can be downloaded from https://www.google.com/intl/en_sg/chrome/. I have used google chrome Version 78.0.3904.108 for the Selenium automation script.
How Do I Download Selenium ChromeDriver?
Step 1: To download Selenium ChromeDriver, go to the official website of Selenium.
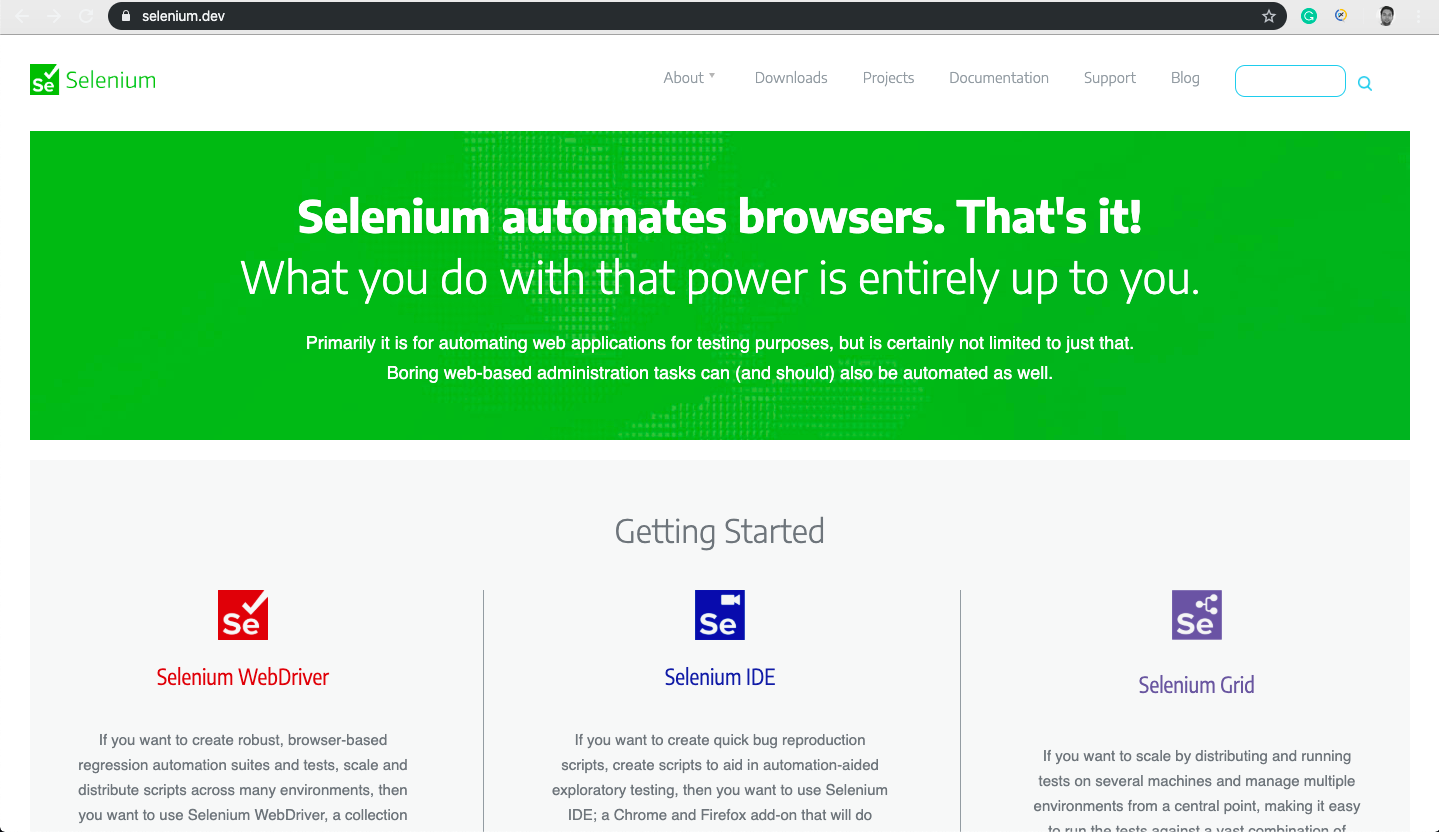
Step 2: Now click on the Downloads tab on the top right side of the home page. So that we will get redirected to the download page.
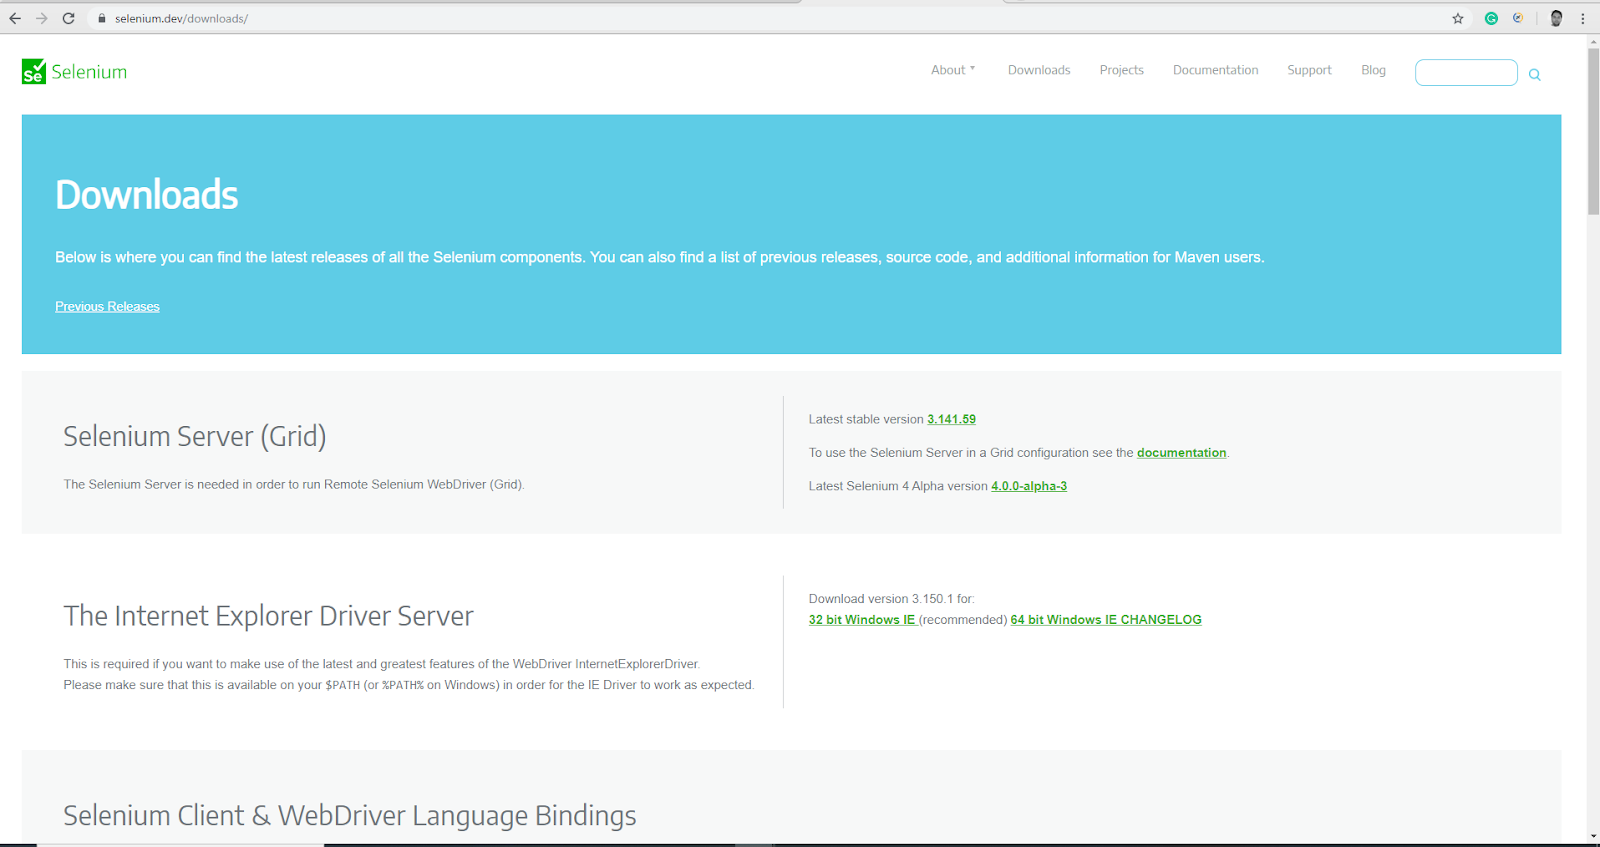
Step 3: On the Downloads page, scroll down to the Browsers section as shown in the below image.
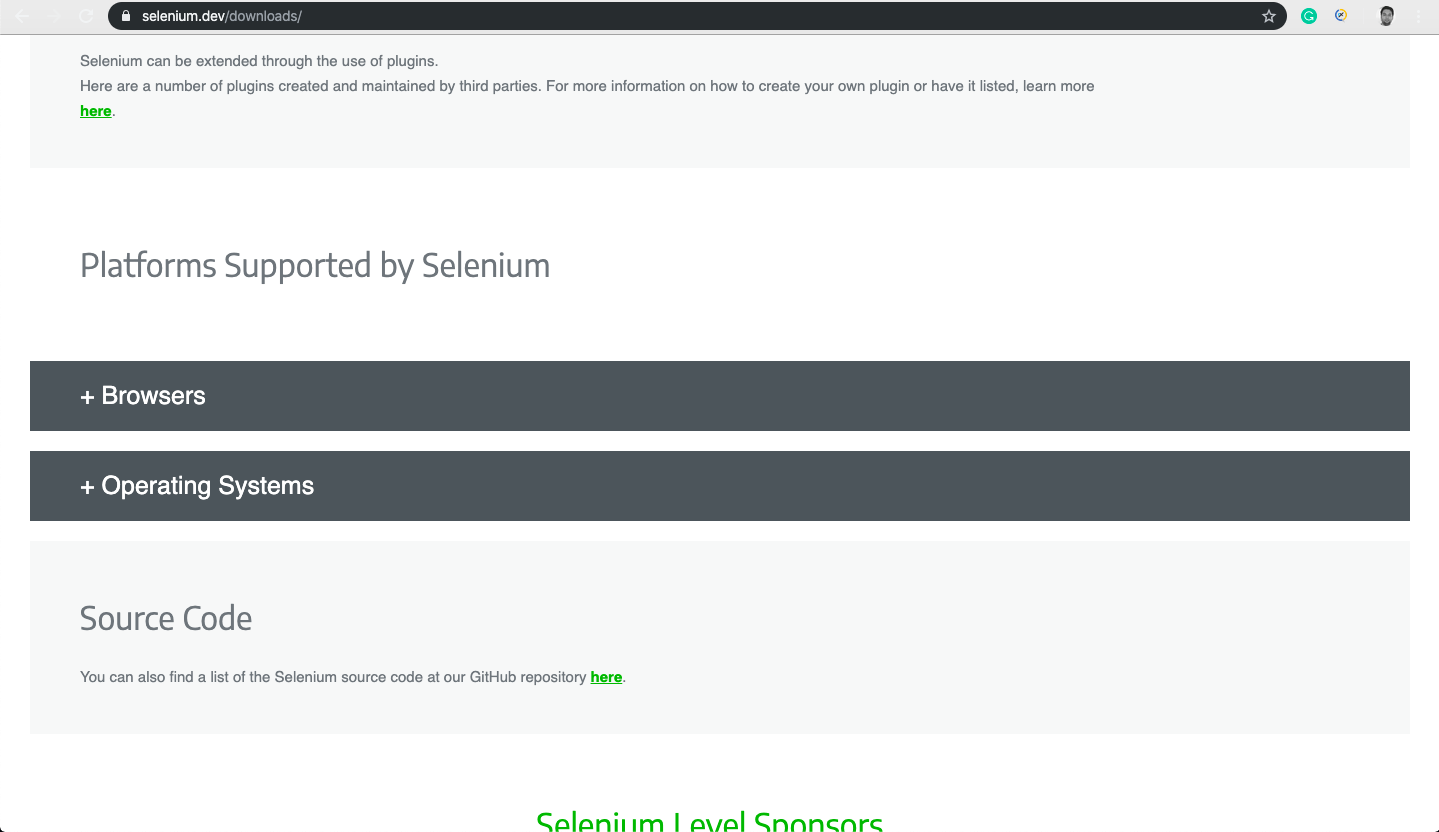
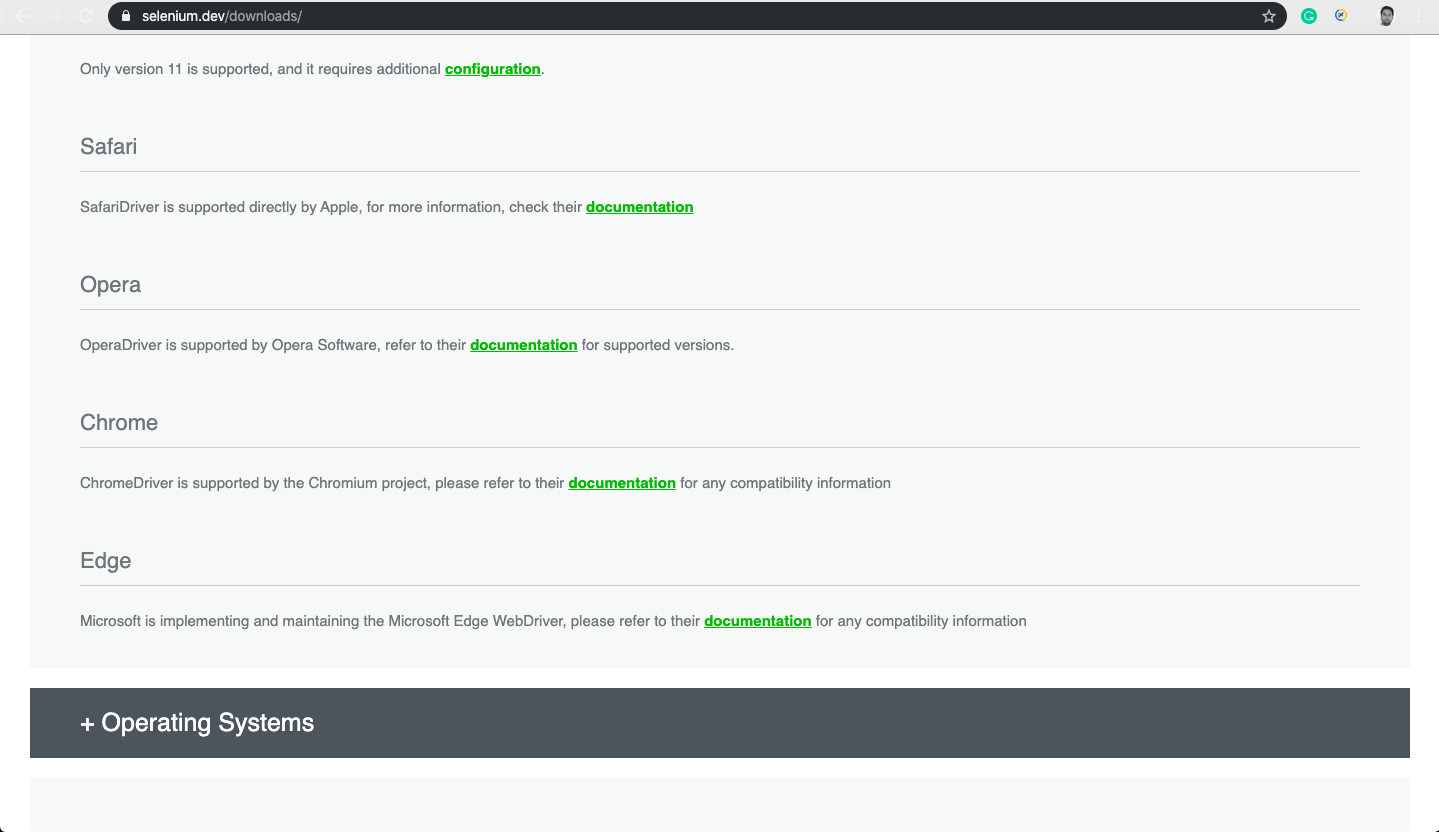
Step 4: Expand Browsers section, here you can see links for different browsers. For the Chrome browser, click on the ‘Documentation’ link under the ‘Chrome’ section.
Step 5: Once you click on the documentation for Chrome browser from the chrome section, we will be redirected to the page
(https://sites.google.com/a/chromium.org/ChromeDriver/)
from where you can download zip file for Automation testing with Selenium ChromeDriver.
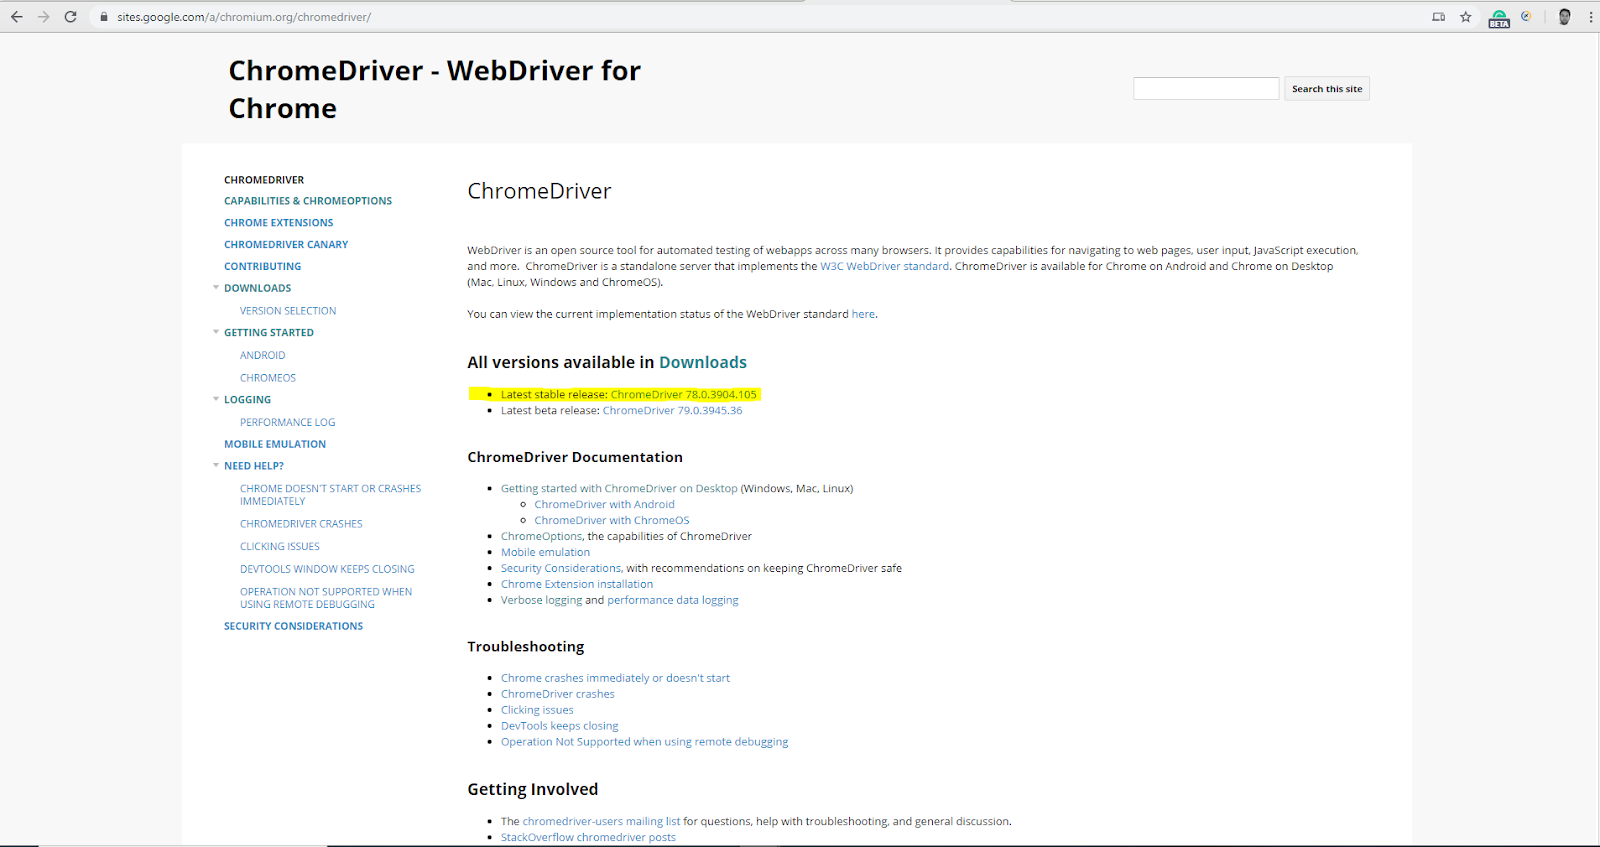
In the above screenshot, you can see two options for ChromeDriver download. As ChromeDriver 78.0.3904.105 is the latest stable version available for the download, you should download that for better results..
While downloading the ChromeDriver, you need to make sure that it is compatible with the Chrome browser version you’re using. Like ChromeDriver which I have downloaded, version 78.0.3904.105 will support all versions of Chrome browsers which start with 78.0.3904.
Step 6: Once you click on the latest stable version, it will open the following page which gives us an option to select the ChromeDriver to download for different operating systems like Linux, Mac, and Windows.
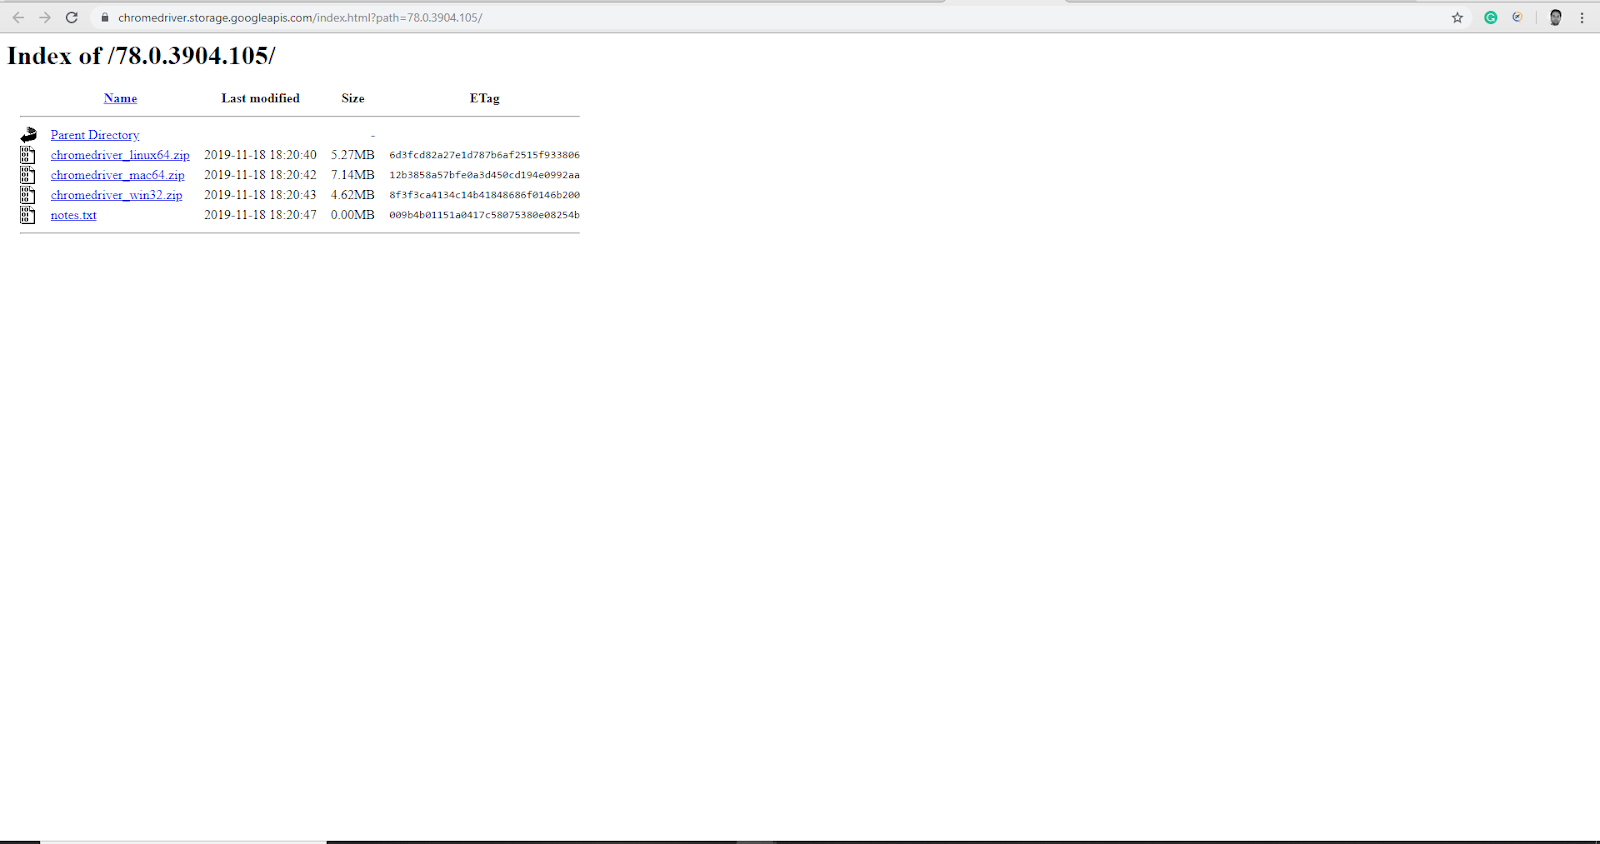
Step 7: Download Selenium ChromeDriver for your operating system. For running tests on the Windows operating system, you can download ChromeDriver for Windows, just click on it and it will download the zip file of the ChromeDriver.
Once that zip file of ChromeDriver for Windows is downloaded, you can extract the ChromeDriver.exe file from that zip file.
Similarly, ChromeDriver for macOS can be downloaded. To install ChromeDriver on the macOS, we need to download it from the official website, we need to click and download ChromeDriver_mac64.zip file.
How To Use Selenium ChromeDriver On Windows?
Now that I have downloaded ChromeDriver and have installed other prerequisites applications as well in the system, I’ll use ChromeDriver and perform Selenium test automation scripts for the login test case on LambdaTest website.
For Windows, there are two different methods for Selenium test automation with ChromeDriver.
- By using setProperty()
Using the setProperty() method from system class, I’ll provide the path of ChromeDriver from where the Selenium WebDriver can access it for Selenium test automation.
You can see the syntax for, how to set the location for the ChromeDriver.exe below:
xxxxxxxxxx
System.setProperty("WebDriver.chrome.driver", "\\path to ChromeDriver\\ChromeDriver.exe");
So, let’s take a test scenario, log in on the LambdaTest platform using setProperty().
Steps for a Test case:
i) Open the Chrome browser
ii) Navigate to the https://www.lambdatest.com/
iii) Click on the Login link from the home/landing page
iv) Identify email field and fill email id
v) Identify password field and fill password in the field
vi) Click on the Login button
vii) Assert and verify page title, URL after login
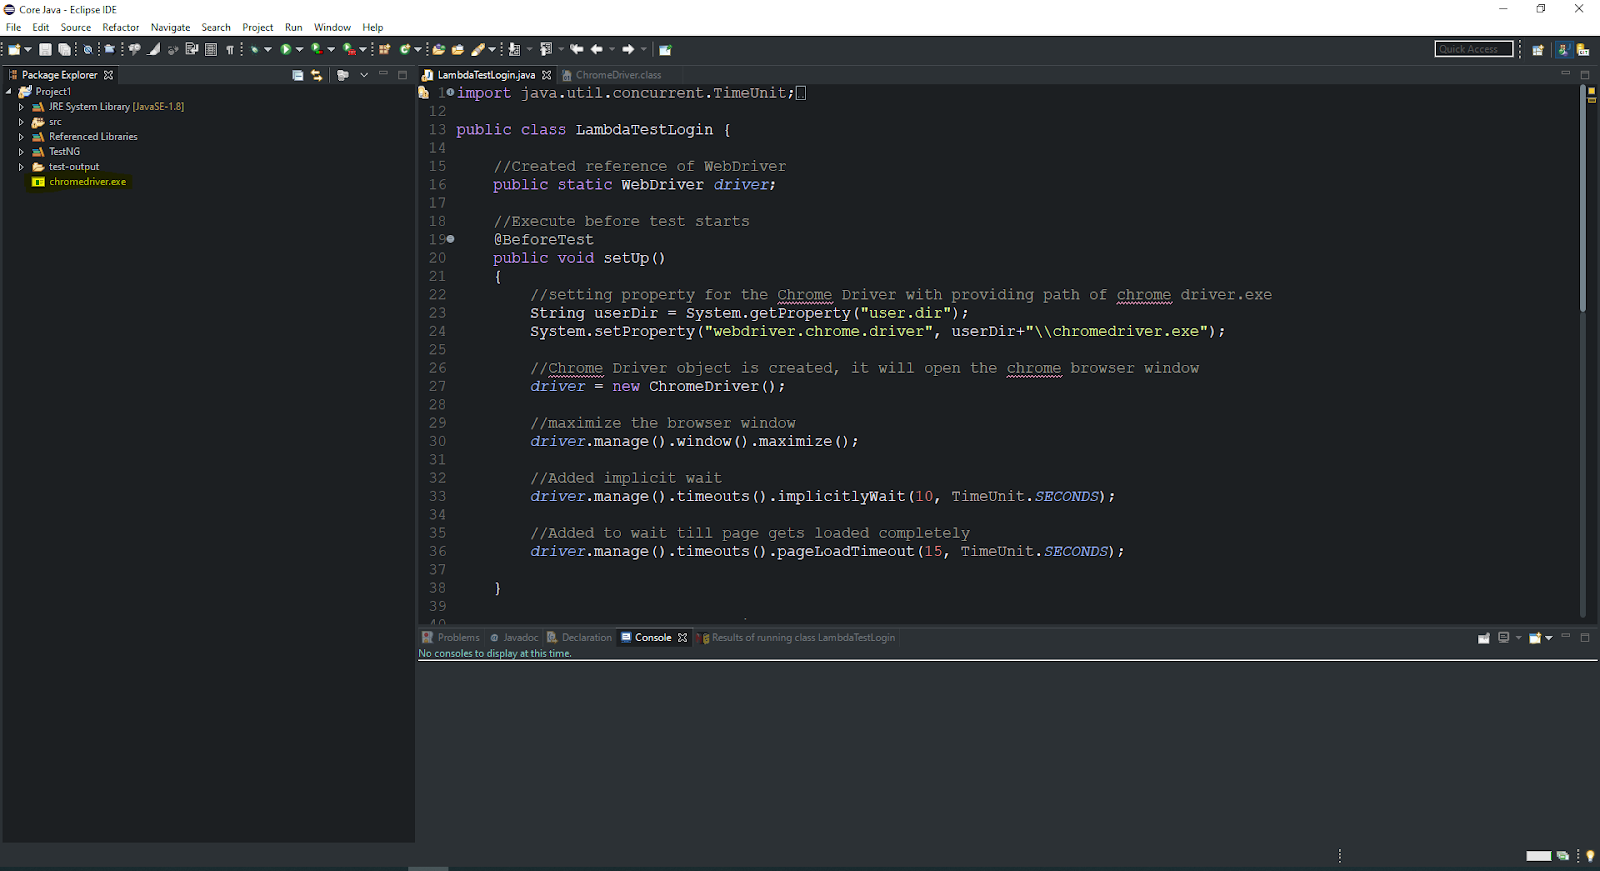
While writing the Selenium test automation script, I have stored ChromeDriver.exe in the project folder itself. I can directly access it with “user.dir” and do not require to provide some other path. You can refer to the following screenshots for the location of ChromeDriver.
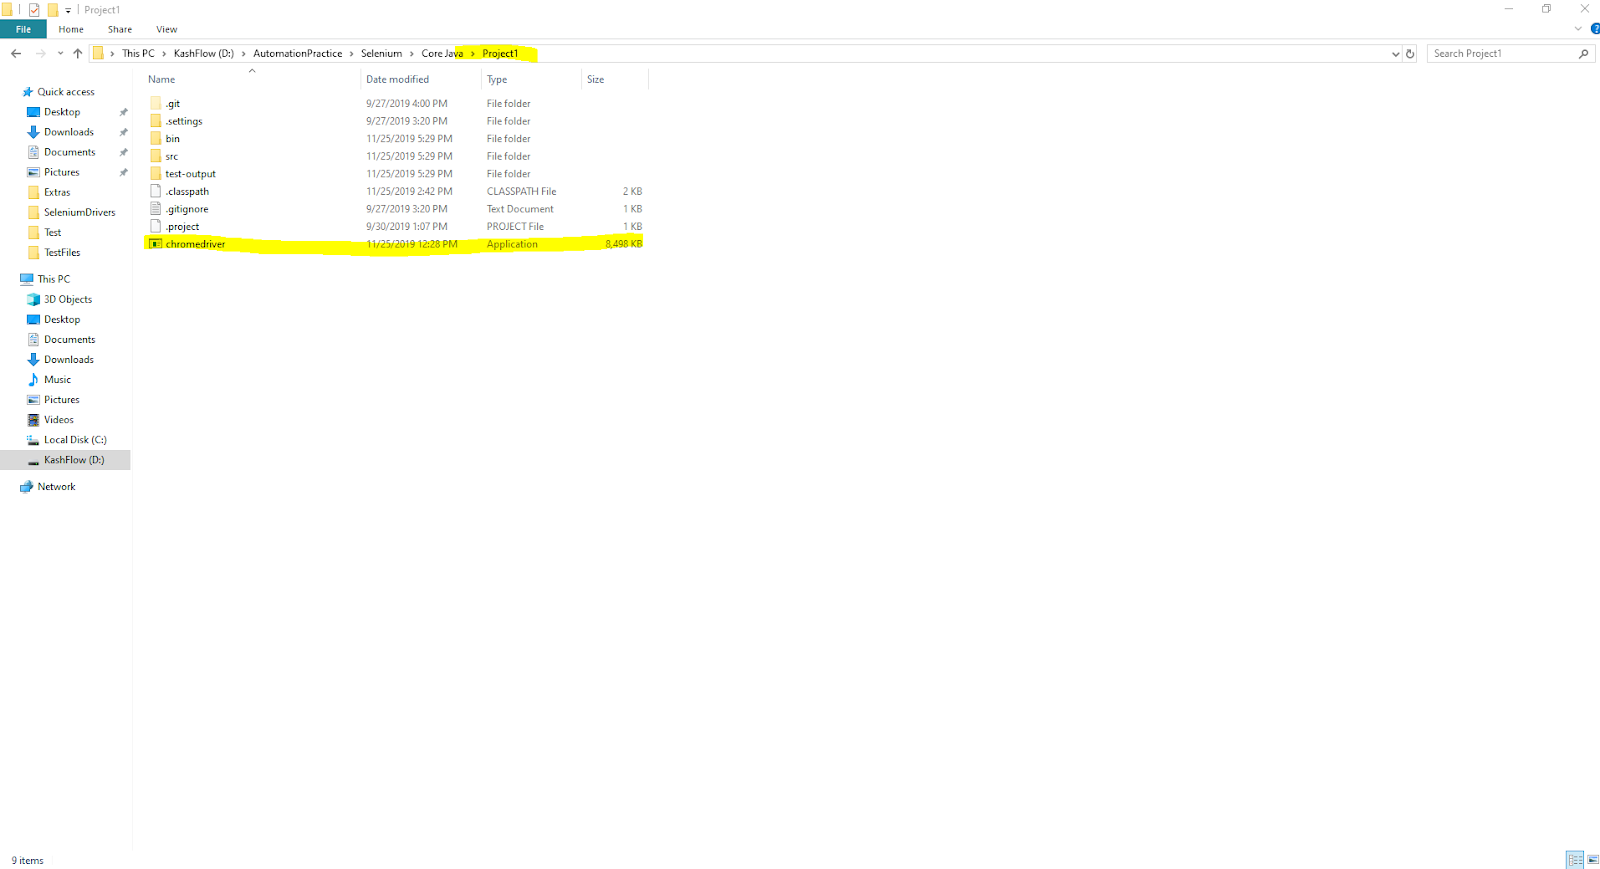
You can see the same on eclipse IDE.
It is not mandatory to store ChromeDriver.exe in the project folder, you can store it in another folder or directory as well. In that case, you will have to provide the correct path for the ChromeDriver.exe
You can find the test script for our test scenario below:
xxxxxxxxxx
import java.util.concurrent.TimeUnit;
import org.openqa.selenium.By;
import org.openqa.selenium.WebDriver;
import org.openqa.selenium.WebElement;
import org.openqa.selenium.chrome.ChromeDriver;
import org.testng.Assert;
import org.testng.annotations.AfterTest;
import org.testng.annotations.BeforeTest;
import org.testng.annotations.Test;
import net.bytebuddy.description.type.TypeDescription.Generic.OfTypeVariable.Symbolic;
public class LambdaTestLogin {
//Created reference of WebDriver
public static WebDriver driver;
//Execute before test starts
public void setUp()
{
//setting property for the Selenium ChromeDriver with providing path of chromedriver.exe
String userDir = System.getProperty("user.dir");
System.setProperty("WebDriver.chrome.driver", userDir+"\\ChromeDriver.exe");
//Selenium ChromeDriver object is created, it will open the chrome browser window
driver = new ChromeDriver();
//maximize the browser window
driver.manage().window().maximize();
//Added implicit wait
driver.manage().timeouts().implicitlyWait(10, TimeUnit.SECONDS);
//Added to wait till page gets loaded completely
driver.manage().timeouts().pageLoadTimeout(15, TimeUnit.SECONDS);
}
//Execute after test execution completes
public void tearDown()
{
//Closes all driver session
driver.quit();
}
public void login()
{
//Navigate to LambdaTest website landing page
driver.get("https://www.lambdatest.com/");
//Identify and Click on Login link present on right top side
WebElement logInLink = driver.findElement(By.xpath("//a[contains(text(),'Log in')]"));
logInLink.click();
//On login page, identify email id field and enter registered email id
WebElement emailField = driver.findElement(By.xpath("//input[@placeholder='Email']"));
emailField.sendKeys("[email protected]");
//On login page, identify user password field and enter valid password
WebElement passwordField = driver.findElement(By.xpath("//input[@placeholder='Password']"));
passwordField.sendKeys("Test@123");
//On login page, identify login button and click it
WebElement loginButton = driver.findElement(By.xpath("//button[@class='btn btn-primary btn-lg btn-block mt-3']"));
loginButton.click();
//Expected and ActualURL
String expectedURL = "https://accounts.lambdatest.com/dashboard";
String expectedPageTitle = "Welcome - LambdaTest";
String actualURL = driver.getCurrentUrl();
String actualPageTitle = driver.getTitle();
System.out.println(driver.getTitle());
System.out.println(driver.getCurrentUrl());
//Assertion and verification of expected URL and actual URL
Assert.assertEquals(actualURL, expectedURL);
//Assertion and verification of expected Page Title and actual Page Title
Assert.assertEquals(actualPageTitle, expectedPageTitle);
}
}
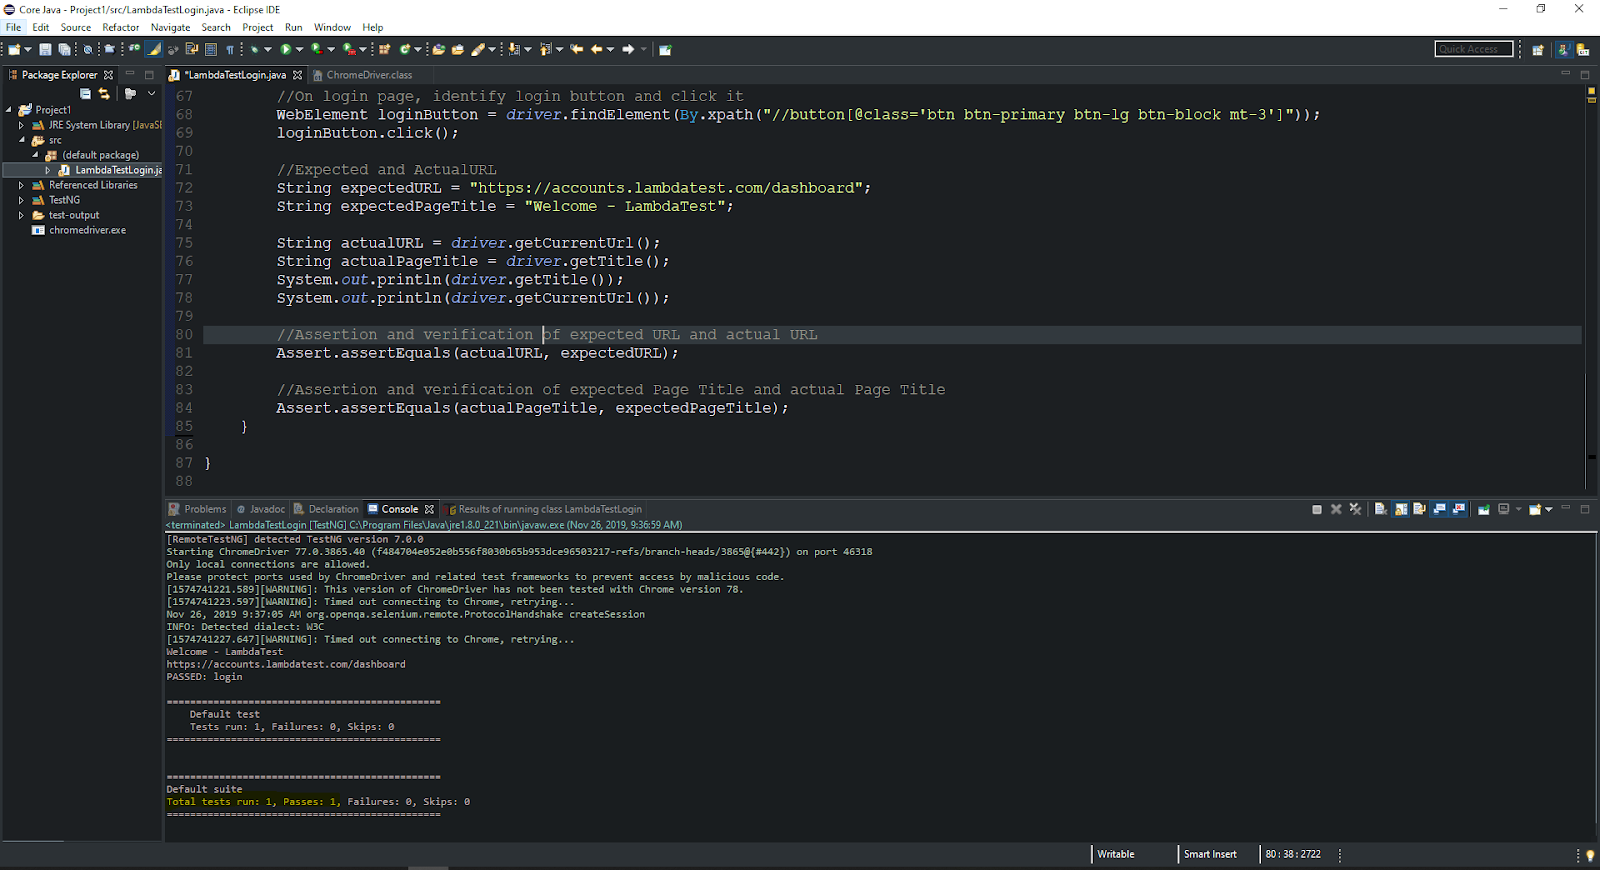
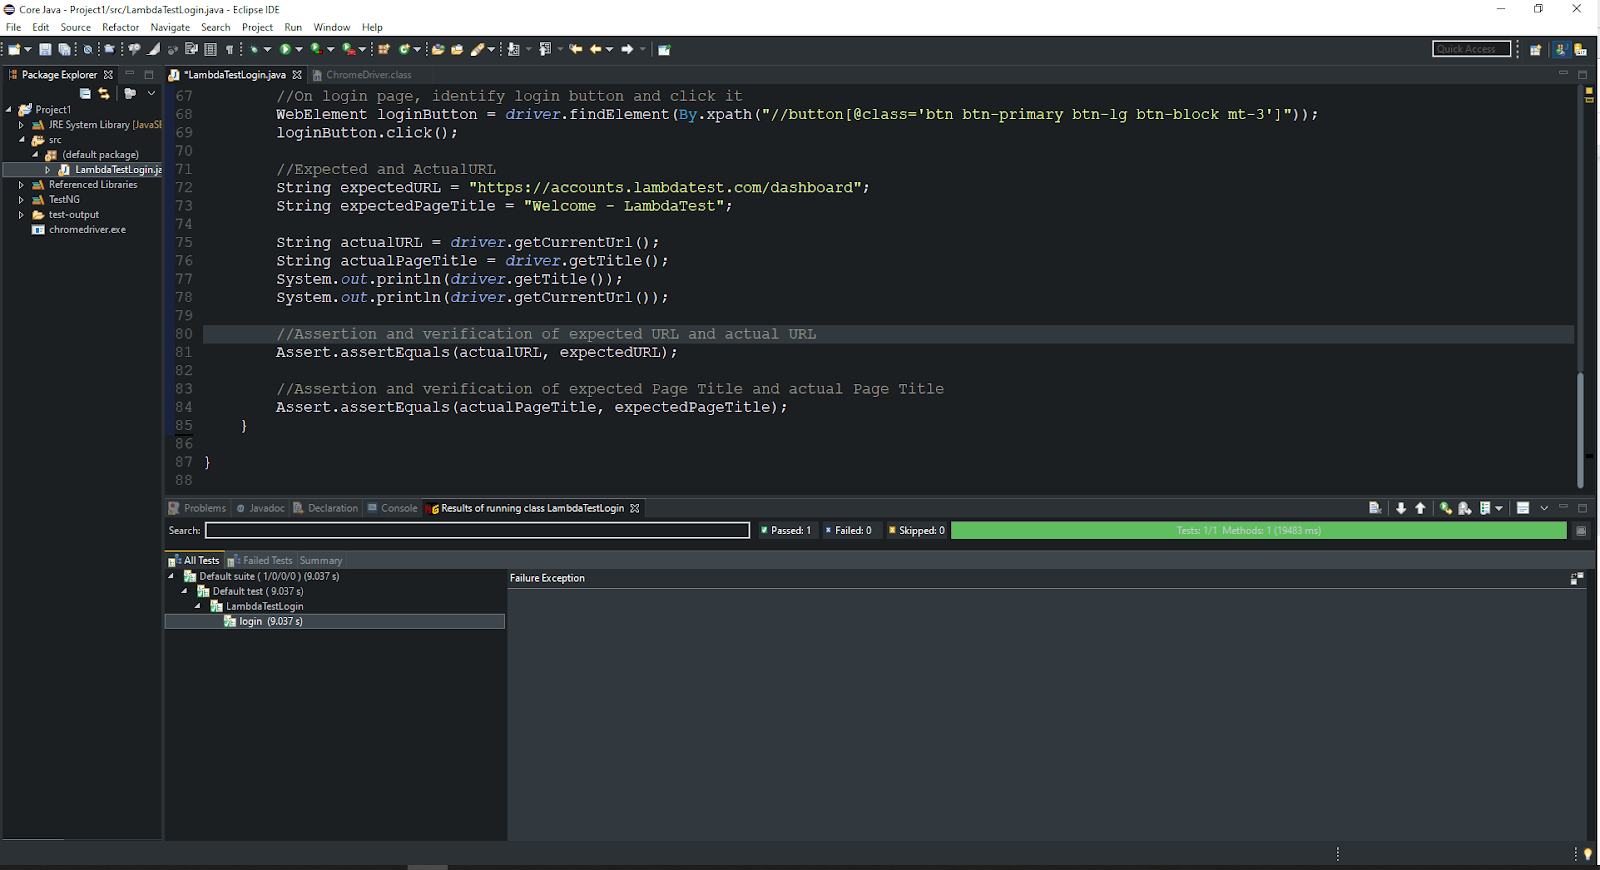
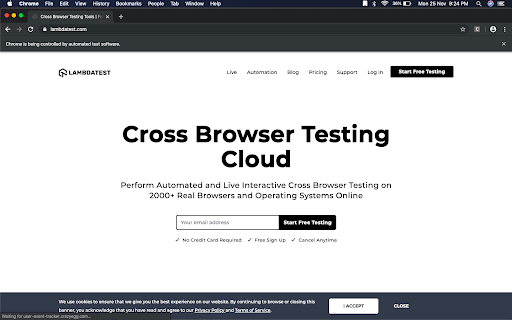
Upon executing the test script, it will open the browser and navigate to the home/landing page of the LambdaTest website as shown in the screenshot below. While executing the test script, we can see the message “Chrome is being controlled by the automated test software” which means our test script is working with ChromeDriver.

Code Explanation
1. @BeforeTest:
This section gets executed before the test execution starts. In this section of the code I have set the property and provided a ChromeDriver.exe file path and created an object to invoke the chrome browser. After that I maximize the browser window, then I invoked implicit wait and page load timeout which will avoid exceptions due to timeouts.
2. @AfterTest:
This section gets executed after the test execution is completed. After completion of the test, I closed the driver session.
3. @Test:
In this section, I perform actual tests and assertion/verification of results. Script navigates to LambdaTest home/landing page and clicks on the Login link.
Upon reaching the login page, it will find the email field and enter the email id which we provide and also it will find the password field and enter password which we have provided in the script.
Once both are entered, it will click on the Login button.
After that user login successfully, it will assert the actual URL and title with the expected URL and title which we have provided.
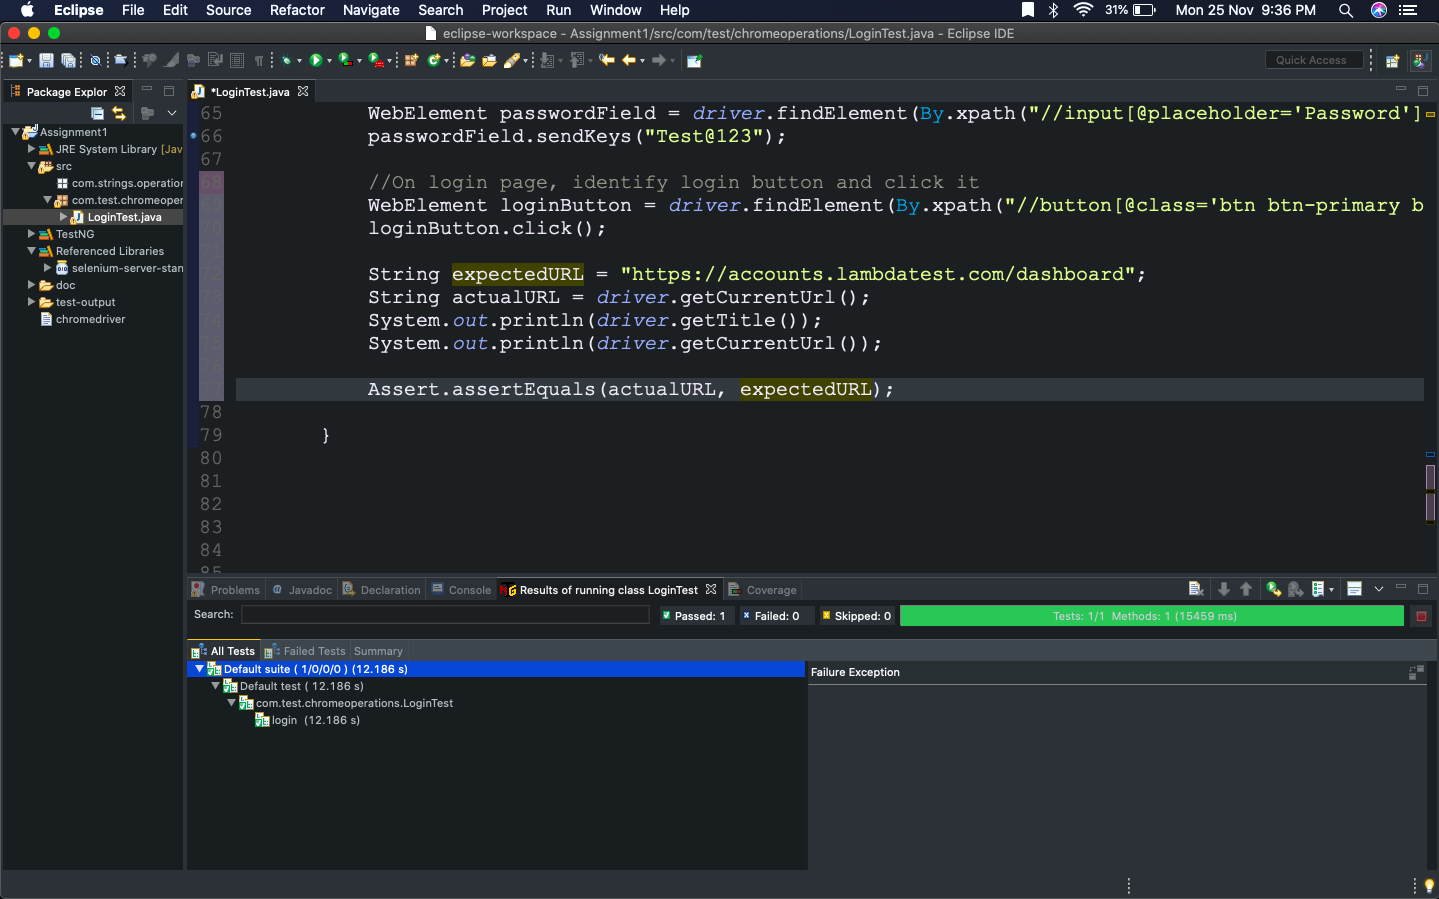
If the credentials provided are valid, then the test will pass and we can see the results as below. If credentials are wrong, then it will fail as in assertion actual and expected will not match.
The following screenshots show the result of the execution of the above test script.

b) By adding path in Environment Variable
In the above part, I showed the execution of the Selenium test automation script using ChromeDriver, by providing a path of ChromeDriver in the test script itself.
There is another way as well, where I can set the path of ChromeDriver.exe in the system environment variable itself so that I don’t need to set the path in selenium test automation script explicitly.
Let us see how you can set that path in the system environment variables.
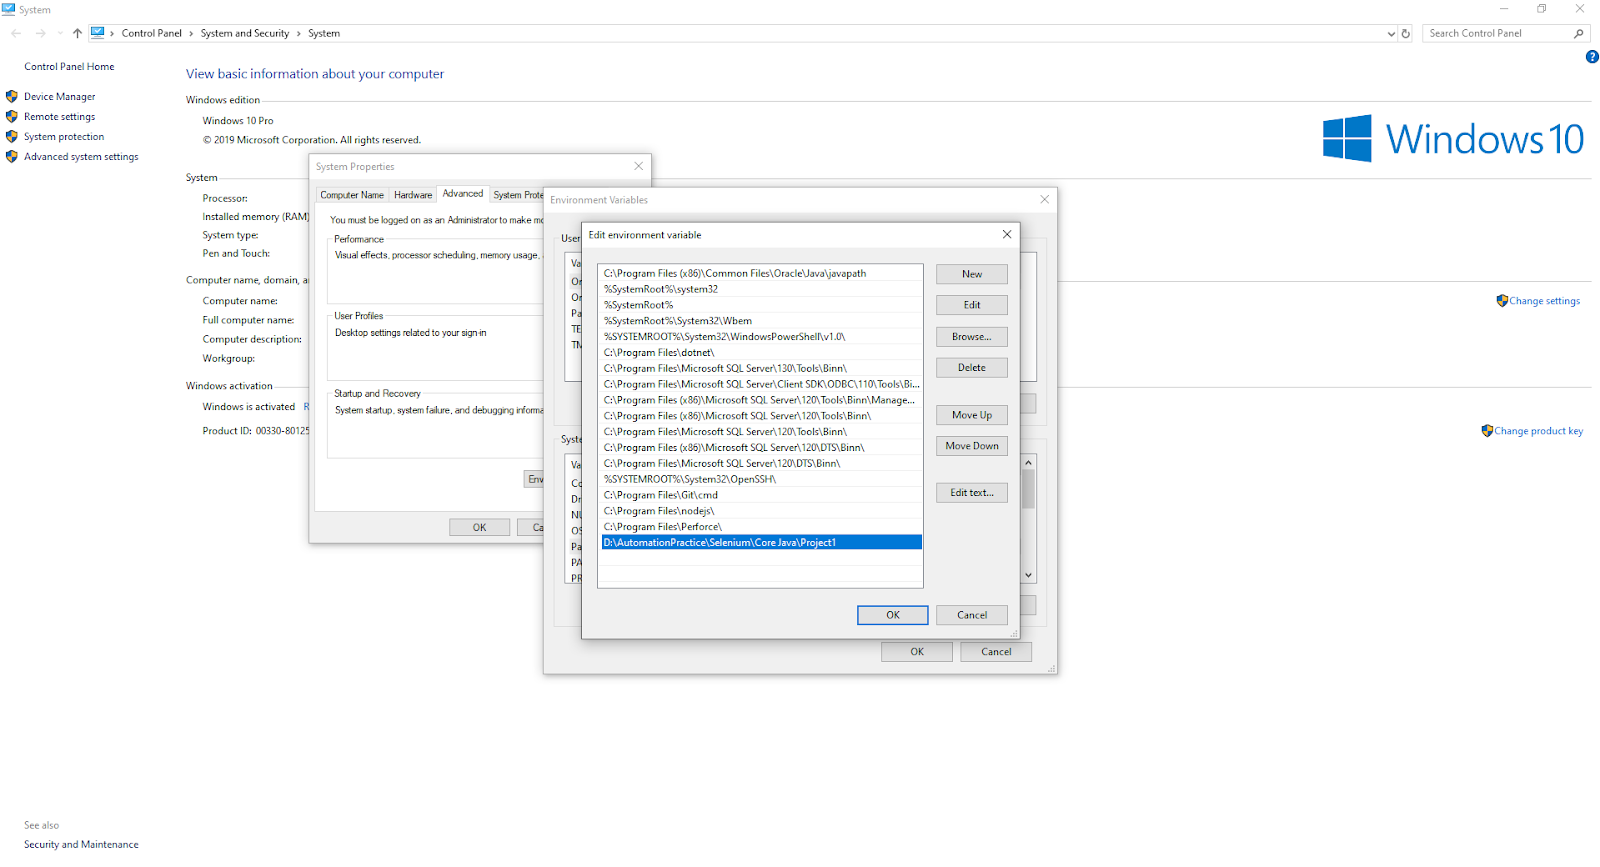
2. Copy the path of the folder in which ChromeDriver.exe. If the entire path for ChromeDriver is “D:\AutomationPractice\Selenium\Project1\ChromeDriver.exe “
Then we will consider folder path as
“D:\AutomationPractice\Selenium\Project1\”
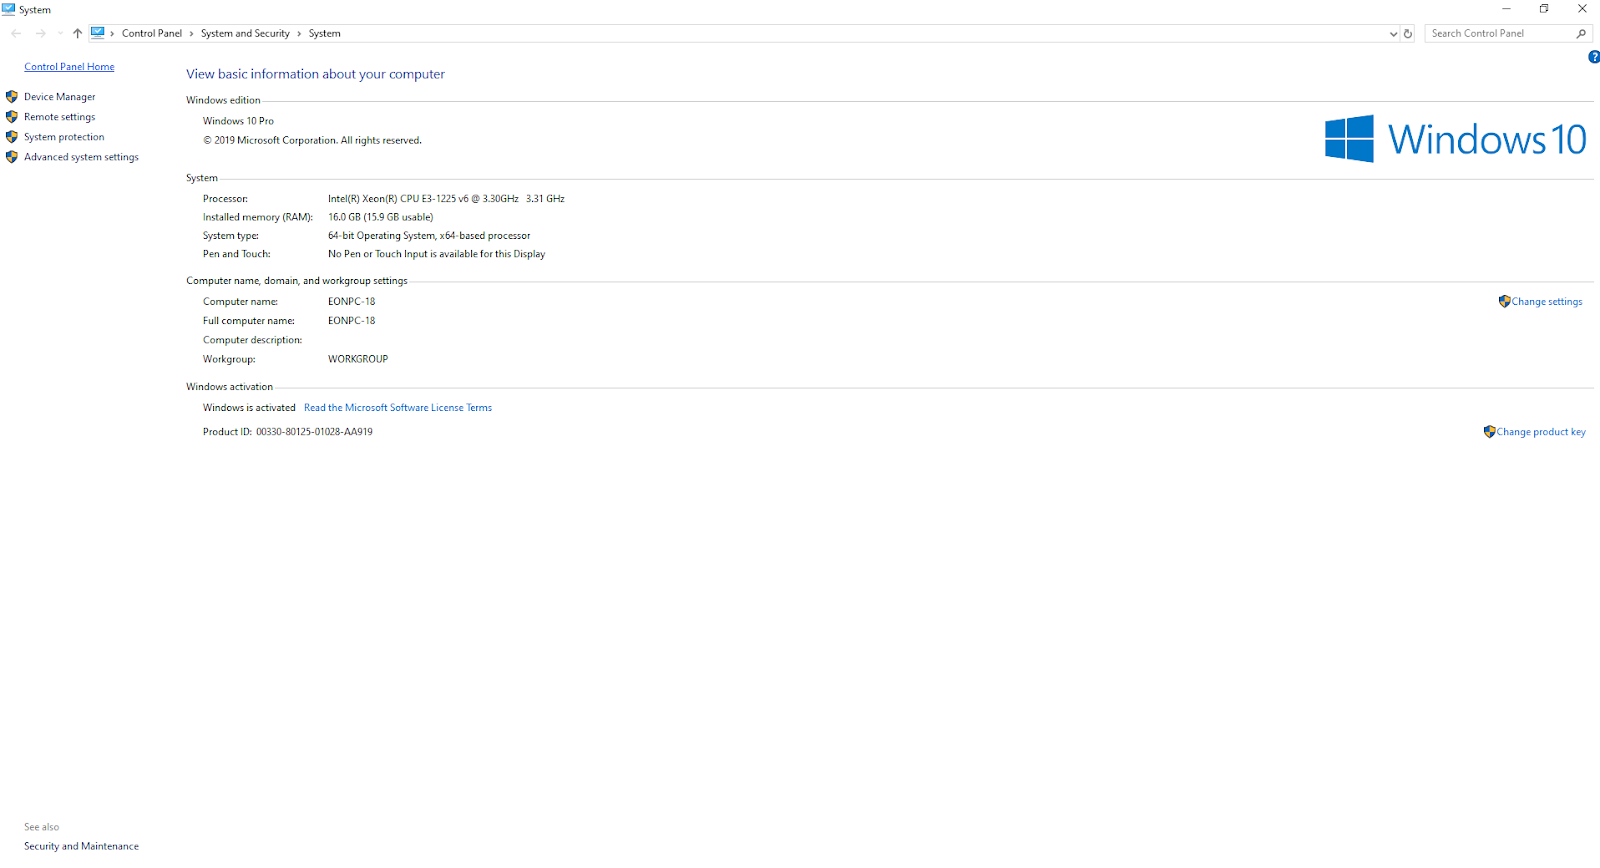
2. Now open environment variables in Windows operating system, on Windows 10 search for ‘This PC’, right click on that and go to properties. And click on Advanced System Settings.
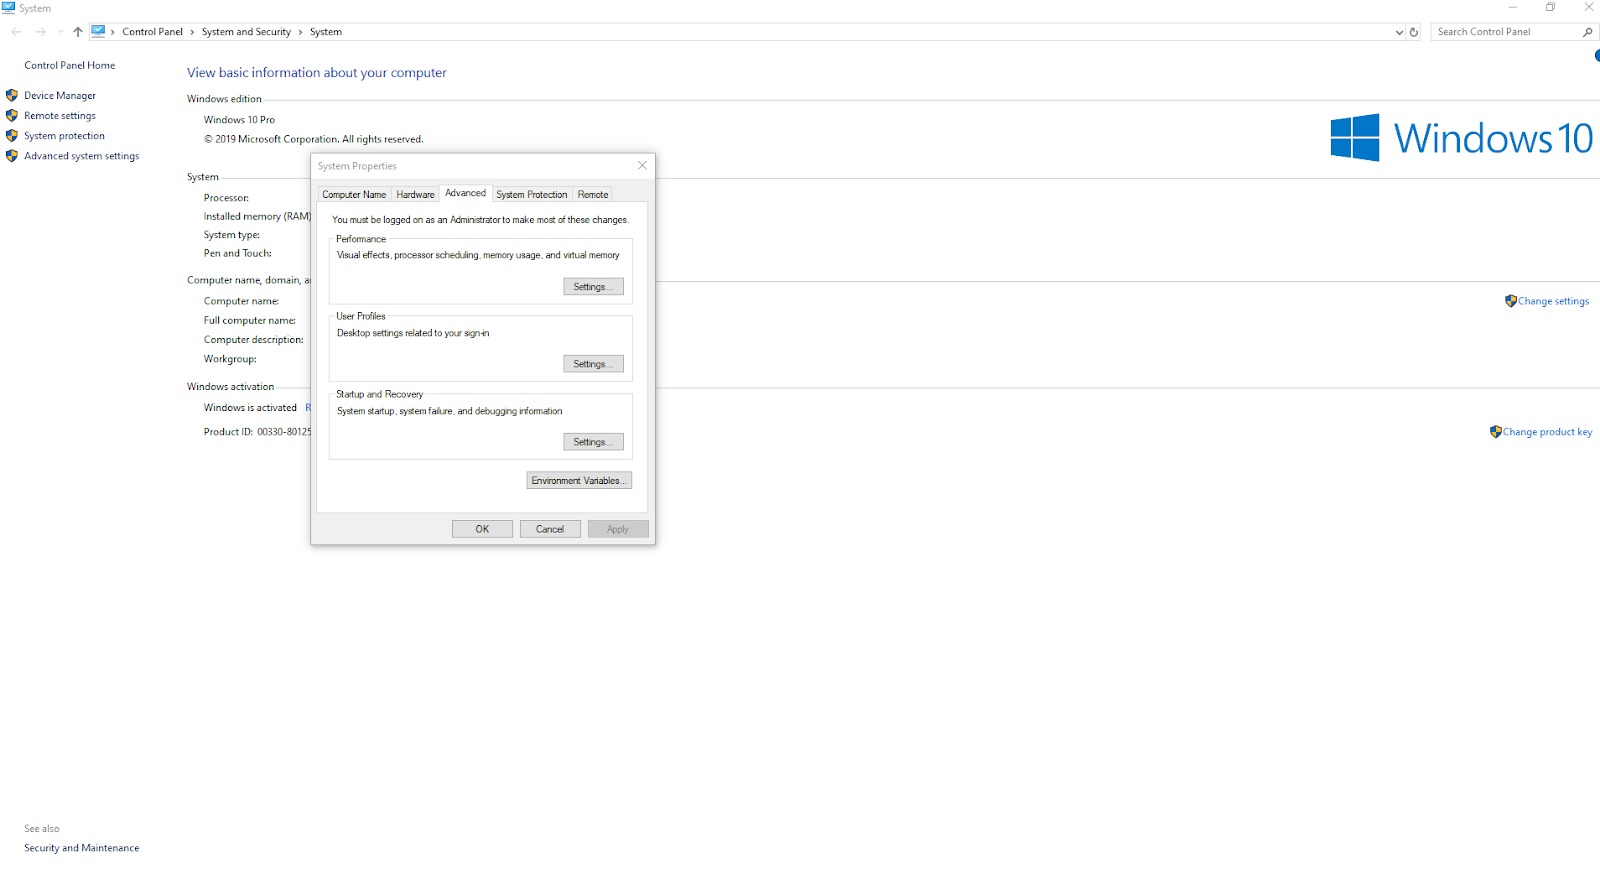
3. Click on Environment Variables and then go to System variables, select path and click edit (as shown in below screenshot)
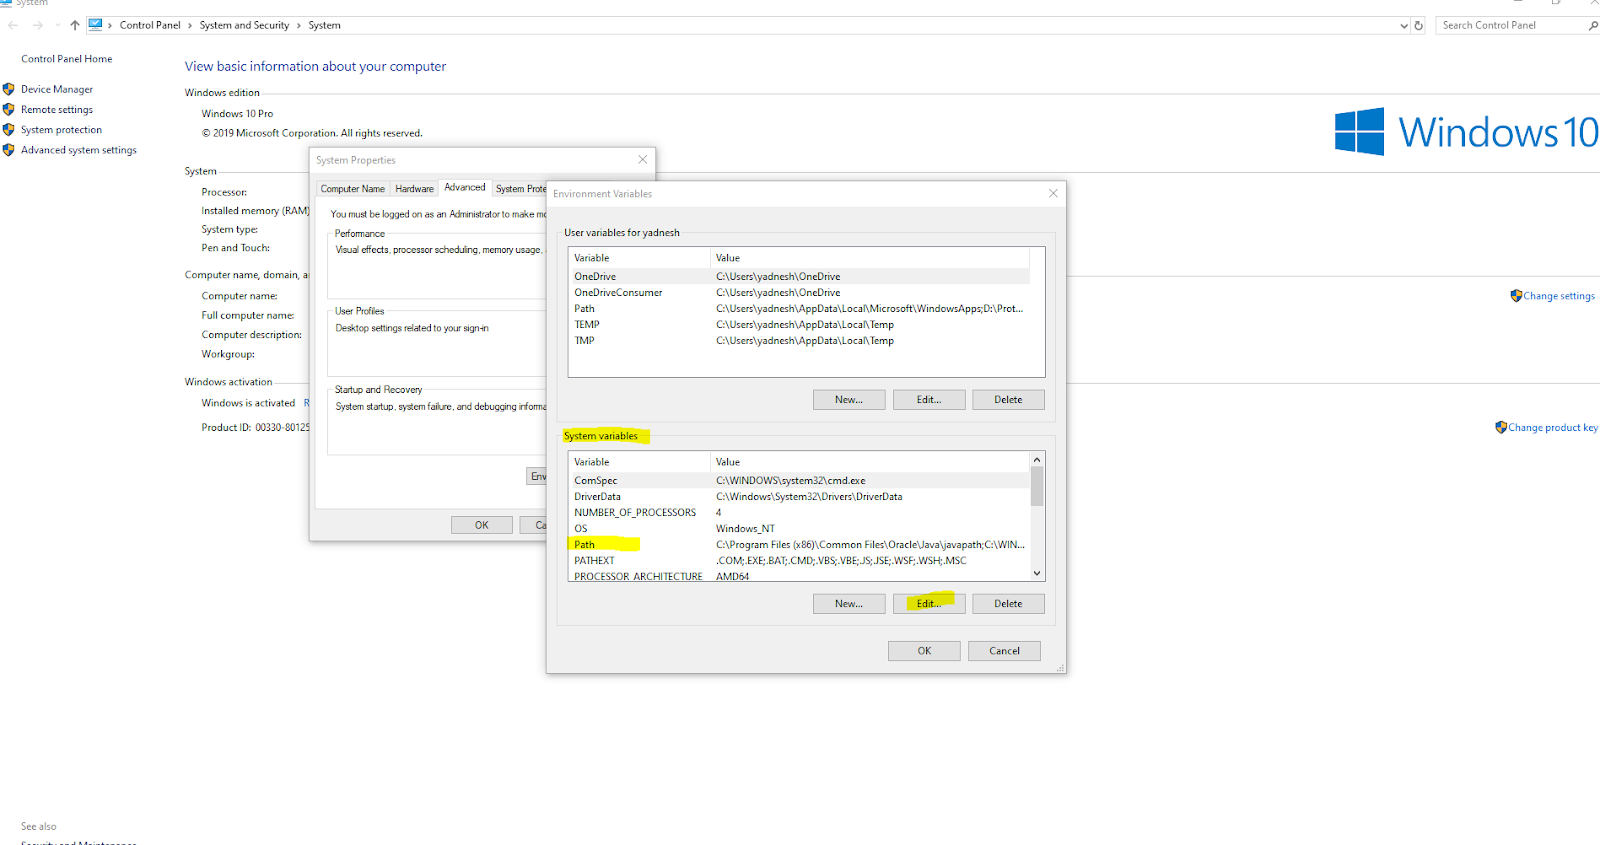
4. Click Edit and add path which we have copied in the first step and then save it by clicking ‘Ok’ and close all open windows with ok.
So I have saved the path for Selenium ChromeDriver in system variables, now we will execute our Selenium test automation script. But we will not require to set the property ChromeDriver path in the test script explicitly.
So we have made changes accordingly in the script.
xxxxxxxxxx
import java.util.concurrent.TimeUnit;
import org.openqa.selenium.By;
import org.openqa.selenium.WebDriver;
import org.openqa.selenium.WebElement;
import org.openqa.selenium.chrome.ChromeDriver;
import org.testng.Assert;
import org.testng.annotations.AfterTest;
import org.testng.annotations.BeforeTest;
import org.testng.annotations.Test;
import net.bytebuddy.description.type.TypeDescription.Generic.OfTypeVariable.Symbolic;
public class LambdaTestLogin {
//Created reference of WebDriver
public static WebDriver driver;
//Execute before test starts
public void setUp()
{
//ChromeDriver object is created, it will open the chrome browser window
driver = new ChromeDriver();
//maximize the browser window
driver.manage().window().maximize();
//Added implicit wait
driver.manage().timeouts().implicitlyWait(10, TimeUnit.SECONDS);
//Added to wait till page gets loaded completely
driver.manage().timeouts().pageLoadTimeout(15, TimeUnit.SECONDS);
}
//Execute after test execution completes
public void tearDown()
{
//Closes all driver session
driver.quit();
}
public void login()
{
//Navigate to lambdatest web site landing page
driver.get("https://www.lambdatest.com/");
//Identify and Click on Login link present on right top side
WebElement logInLink = driver.findElement(By.xpath("//a[contains(text(),'Log in')]"));
logInLink.click();
//On login page, identify email id field and enter registered email id
WebElement emailField = driver.findElement(By.xpath("//input[@placeholder='Email']"));
emailField.sendKeys("[email protected]");
//On login page, identify user password field and enter valid password
WebElement passwordField = driver.findElement(By.xpath("//input[@placeholder='Password']"));
passwordField.sendKeys("Test@123");
//On login page, identify login button and click it
WebElement loginButton = driver.findElement(By.xpath("//button[@class='btn btn-primary btn-lg btn-block mt-3']"));
loginButton.click();
//Expected URL and Title
String expectedURL = "https://accounts.lambdatest.com/dashboard";
String expectedPageTitle = "Welcome - LambdaTest";
//Actual URL and Title
String actualURL = driver.getCurrentUrl();
String actualPageTitle = driver.getTitle();
System.out.println(driver.getTitle());
System.out.println(driver.getCurrentUrl());
//Assertion and verification of expected URL and actual URL
Assert.assertEquals(actualURL, expectedURL);
//Assertion and verification of expected Page Title and actual Page Title
Assert.assertEquals(actualPageTitle, expectedPageTitle);
}
}
The following screenshot shows the result after the execution of the above test script as it shows that our Selenium test automation script is successfully passed using Selenium ChromeDriver.
How To Use Selenium ChromeDriver on Mac OS?
Now, we’ll perform test automation with Selenium ChromeDriver on Mac OS. After the zip file for Selenium ChromeDriver is downloaded, you can extract the application executable ChromeDriver file from it.
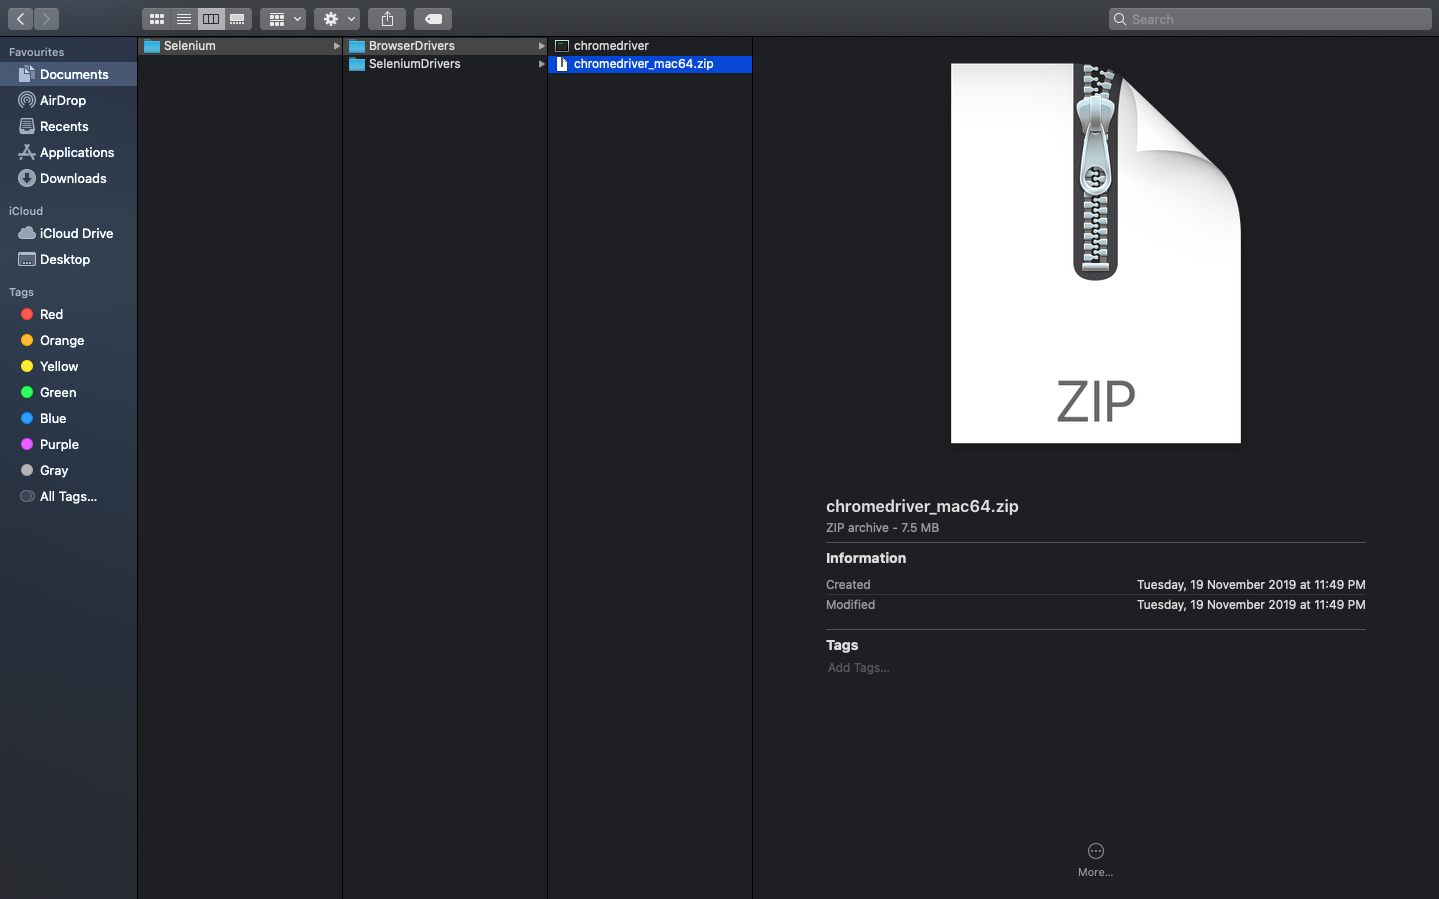
You can see the screenshot was downloaded and extracted executable ChromeDriver file from ChromeDriver zip file.
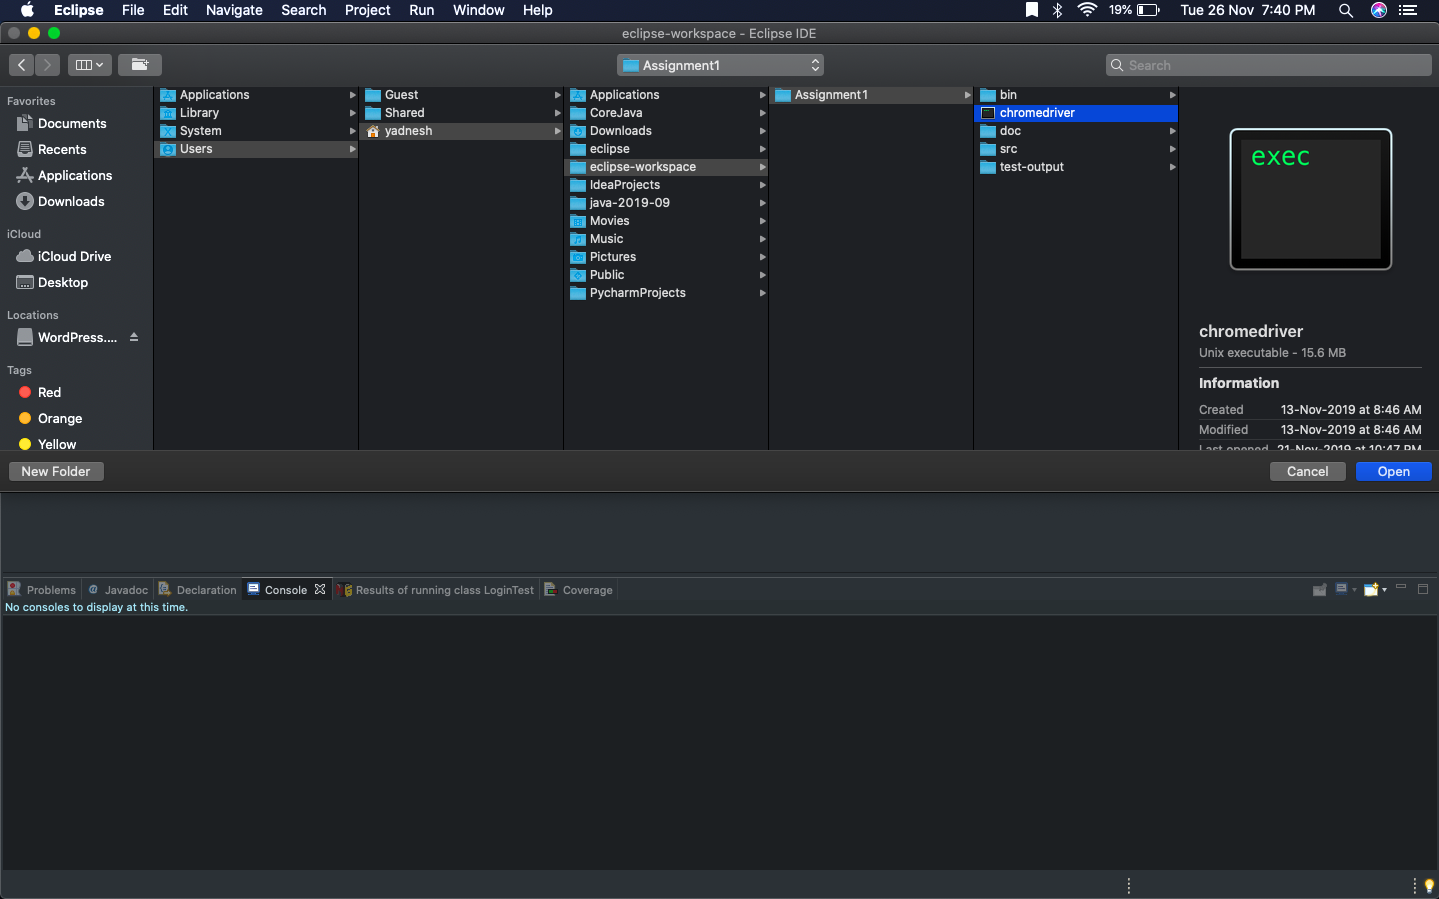
And I will store it in the eclipse project folder so that I can use that in my selenium test automation script to invoke the chrome browser.
Now we can see how we will use that to invoke chrome browser and perform the same actions as we did in earlier cases.
xxxxxxxxxx
package com.test.chromeoperations;
import java.util.concurrent.TimeUnit;
import org.openqa.selenium.By;
import org.openqa.selenium.WebDriver;
import org.openqa.selenium.WebElement;
import org.openqa.selenium.chrome.ChromeDriver;
import org.testng.Assert;
import org.testng.annotations.AfterTest;
import org.testng.annotations.BeforeTest;
import org.testng.annotations.Test;
public class LoginTest {
//Created reference of WebDriver
public static WebDriver driver;
//Execute before test starts
public void setUp()
{
//setting property for the ChromeDriver with providing path of chromedriver.exe
System.setProperty("WebDriver.chrome.driver", "ChromeDriver");
//Selenium ChromeDriver object is created, it will open the chrome browser window
driver = new ChromeDriver();
//maximize the browser window
driver.manage().window().maximize();
//Added implicit wait
driver.manage().timeouts().implicitlyWait(20, TimeUnit.SECONDS);
//Added to wait till page gets loaded completely
driver.manage().timeouts().pageLoadTimeout(30, TimeUnit.SECONDS);
}
//Execute after test execution completes
public void tearDown()
{
//Closes all driver session
driver.quit();
}
public void login()
{
//Navigate to lambdatest website landing page
driver.get("https://www.lambdatest.com/");
//Identify and Click on the Login link present on right top side
WebElement logInLink = driver.findElement(By.xpath("//a[contains(text(),'Log in')]"));
logInLink.click();
//On login page, identify email id field and enter registered email id
WebElement emailField = driver.findElement(By.xpath("//input[@placeholder='Email']"));
emailField.sendKeys("[email protected]");
//On login page, identify user password field and enter valid password
WebElement passwordField = driver.findElement(By.xpath("//input[@placeholder='Password']"));
passwordField.sendKeys("Test@123");
//On login page, identify login button and click it
WebElement loginButton = driver.findElement(By.xpath("//button[@class='btn btn-primary btn-lg btn-block mt-3']"));
loginButton.click();
//Expected URL and Title
String expectedURL = "https://accounts.lambdatest.com/dashboard";
String expectedPageTitle = "Welcome - LambdaTest";
//Actual URL and Title
String actualURL = driver.getCurrentUrl();
String actualPageTitle = driver.getTitle();
System.out.println(driver.getTitle());
System.out.println(driver.getCurrentUrl());
//Assertion and verification of expected URL and actual URL
Assert.assertEquals(actualURL, expectedURL);
//Assertion and verification of expected Page Title and actual Page Title
Assert.assertEquals(actualPageTitle, expectedPageTitle);
}
}
As we have stored ChromeDriver in the project folder, it helped us to use it from there directly while invoking the browser.
Here, we have to notice that we just have to provide only the name ChromeDriver and not with its extension. Once the browser gets invoked and navigates to the LambdaTest home/landing page. It can be seen in the following screenshot.
We can also see the message ‘Chrome is being controlled by automated test software’, which shows that session is being controlled by Selenium ChromeDriver.
The following screenshots show the successful execution of the Selenium test automation script along with the TestNG result.

Selenium ChromeDriver Using Maven Dependencies
So, in a practical scenario, while working in an organization, you use some kind of build automation tools for test automation projects. Maven is a widely used build automation tool, ChromeDriver can be used with Maven dependencies as well.
If you are not aware of maven please refer to our article on Selenium testing with Maven to start with.
While using maven, you need to change the approach. You no longer require to download ChromeDriver explicitly. In this case, you can just add a dependency for Automation testing with Selenium ChromeDriver in the pom.xml file.
And this dependency can be downloaded from the maven repository website https://mvnrepository.com/artifact/org.seleniumhq.selenium/selenium-chrome-driver
Once you go to this website, click on the Selenium WebDriver version for which you want to download Selenium ChromeDriver dependency and then copy that dependency and paste it in the pom.xml file of your project.
xxxxxxxxxx
<!-- https://mvnrepository.com/artifact/org.seleniumhq.selenium/selenium-chrome-driver -->
<dependency>
<groupId>org.seleniumhq.selenium</groupId>
<artifactId>selenium-chrome-driver</artifactId>
<version>3.141.59</version>
</dependency>
Wrapping it Up
As Google Chrome’s popularity rises, so does the need to find automated browser testing of your web application on the Chrome browser. To perform Selenium test automation, you need a ChromeDriver to access the browser.
In this blog, we’ve explored how you can download Selenium ChromeDriver and run test scripts both on Windows and Mac OS. One with, setting property explicitly in test script by providing ChromeDriver path and another one with a set system environment variable.
If you want to test on IE and edge you can refer to this article to know more about testing on IE in depth.
That’s all for now! I hope you are wiser when it comes to automation testing with Selenium ChromeDriver. Do share your views and opinions with us in the comment section below. Also, feel free to retweet this article and help us reach out to your peers.
Happy Testing!☺
Published at DZone with permission of Praveen Mishra. See the original article here.
Opinions expressed by DZone contributors are their own.
Comments