API Auto-Discovery in Mule
Learn how to use the API Auto-Discovery module in Mule to create an API and apply policies programmatically in the Anypoint Studio IDE.
Join the DZone community and get the full member experience.
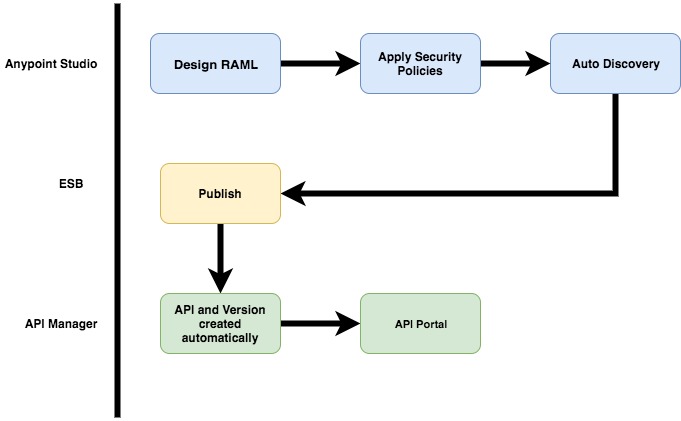
Join For FreeThe API Auto-Discovery module is a small module introduced in the enterprise version of Mule ESB by means of which one can create an API and apply policies programmatically. In this approach, everything starts in the Anypoint Studio IDE. Here is an overview of the approach:
In this tutorial, I am going to describe this approach with a simple API.
Let's Get Our Hands Dirty
The approach can be explained in terms of some standard steps:
Create a Project
Let's create a simple Mule project. In the project please add the following properties to the mule-app.properties file.
anypoint.platform.client_id=xxxxxxxxxxx
anypoint.platform.client_secret=xxxxxxxxxxx
The client_id and client_secret refer to your organization's credentials in the Anypoint Platform. By providing these environment variables, your application can communicate directly with your Anypoint Platform account. This communication happens via APIPlatformClientCoreExtension.
Define API Specification
Let's define a simple API named test-api.raml. You can use any editor of your choice to create the RAML. Here is a simple snapshot of the API:
#%RAML 1.0
title: test-api
baseUri: http://www.example.com
traits:
  client-id-required:
    queryParameters:
      client_id:
        type: string
      client_secret:
        type: string
/users:
  is: [client-id-required]
  get:
    responses:
      200:
        body:
          application/json:
            example: |
              [{"name":"anupam","age": 30},
               {"name":"max","age": 33}]
Note that I have applied a client-id-required security policy.
Implement the API
Let's implement the API. The implementation logic is very simple without any exaggeration.

The most important thing is the declaration of the API Auto-Discovery global configuration, as shown below:

Note that I have checked the "automatically create API" button. It means that if the API does not exist in the API Manager of the Anypoint Platform, the auto-discovery module will create the specific API (name and version defined). Also note that in the Flow Name field I am referring to the mainFlow which contains the APIKit router.
Publish the Application
Once implementation is done, publish the application in the Mule Runtime. I am using a hybrid infrastructure of the Anypoint Platform where the API Manager resides in the cloud and the runtime is in my local machine.
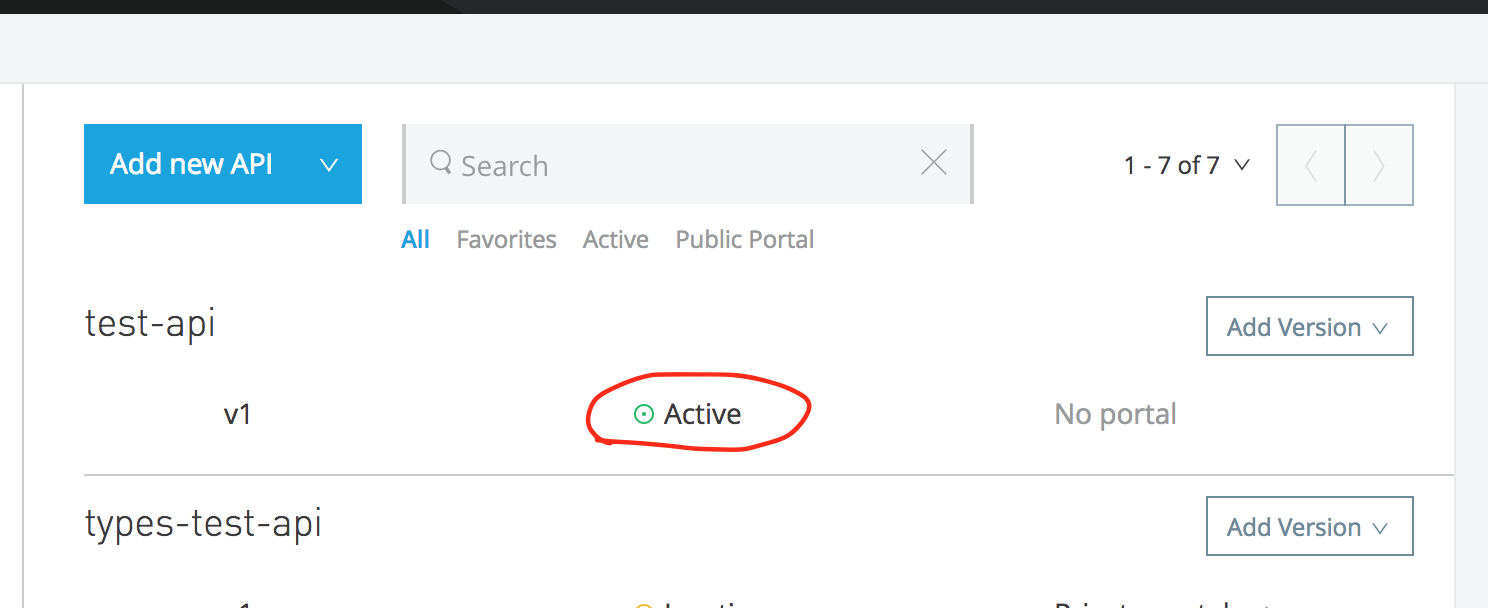
Now the magic starts. Upon successful deployment, you can see that the API is automatically published in the API Manager, and it's managed (you can check the status as active).
The API Auto-Discovery module configures it as Basic Endpoint, as shown below:
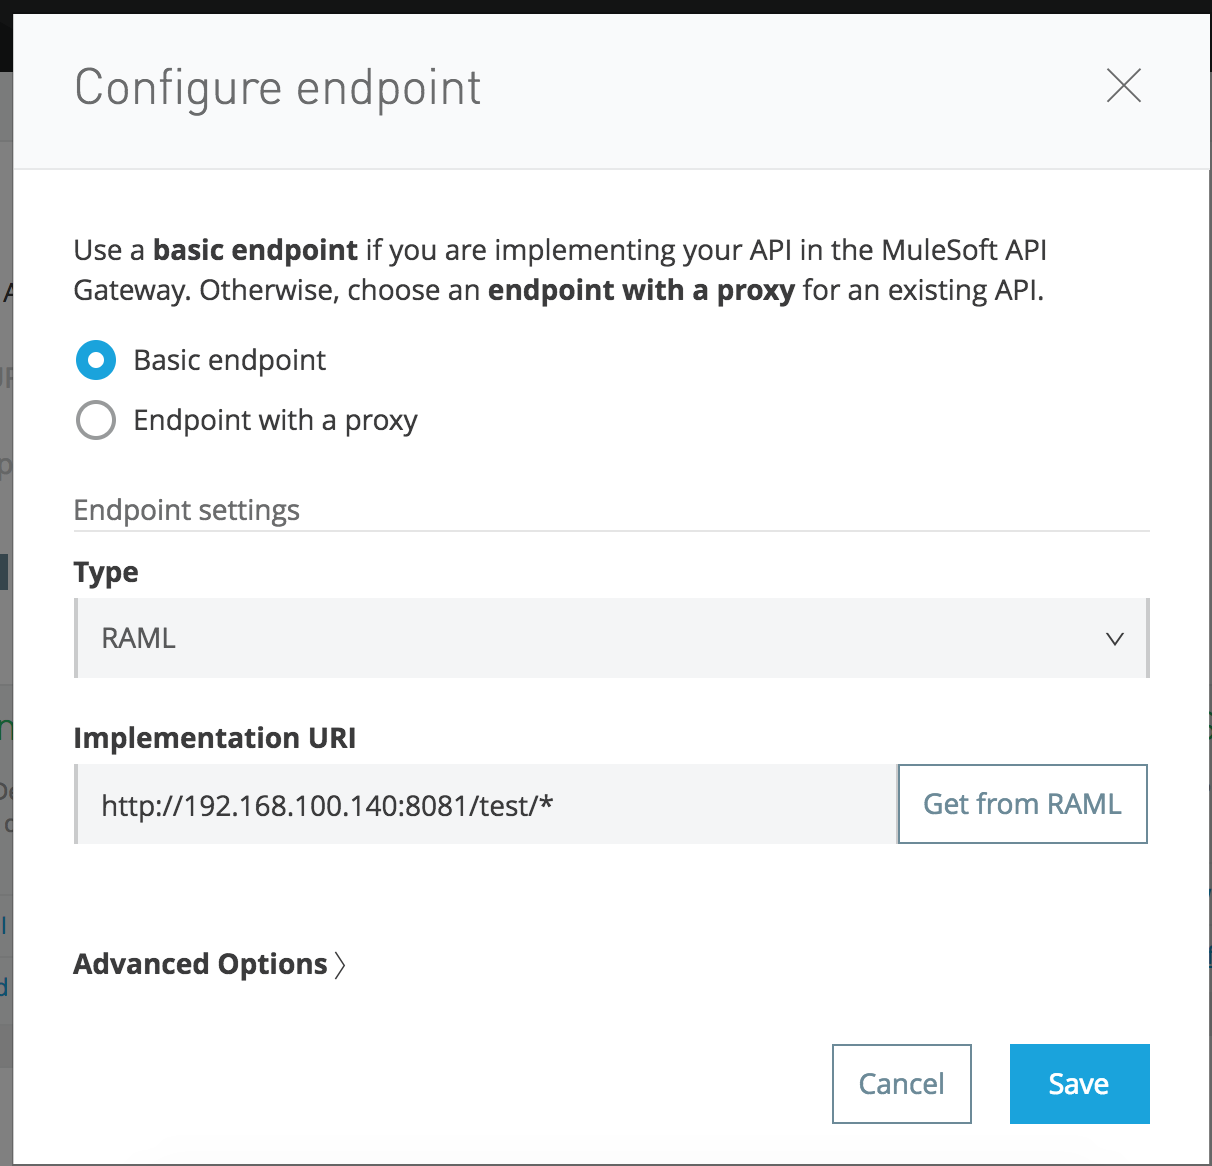
At this stage, our application is up and running and our API is managed.
Test
Now let's try to access a resource of our API: http://localhost:8081/gw/users.
You will get an error message saying that it needs the client_id and client_secret as query parameters. Now create an API Portal and make Request API Access. On successful registration of a client, you will be provided with the client_id and client_secret. Send these values as query params in the request and you will get the response.
Conclusion
In this article, I have shown how to use the API Auto-Discovery module of Mule. In the next part of the article, I am going to cover some internals of API Auto-Discovery.
Opinions expressed by DZone contributors are their own.
Comments