

Automating a Web Form With Playwright MCP and MySQL MCP
Learn how to automate form filling using Playwright MCP and MySQL MCP by fetching real-time data from a database with minimal scripting.
 CORE
·
CORE
·
Join the DZone community and get the full member experience.
Join For FreeCombining browser automation with database interactions opens up powerful possibilities. Imagine fetching user data from a database and using it to populate a web form automatically — no manual scripting required.
With Playwright MCP (Model Context Protocol) and MySQL MCP, you can achieve this seamlessly. In this blog, I’ll walk you through how to integrate these tools to fetch data from a MySQL database and use it to fill in the checkout in the Web Form. By the end, you’ll have a working automation setup that’s both efficient and scalable.
Why Use MCP With Playwright and MySQL?
The Model Context Protocol (MCP), developed by Anthropic, standardizes how large language models (LLMs) interact with external tools like browsers and databases. Playwright MCP acts as a bridge between LLMs and Playwright’s browser automation capabilities, allowing you to control web interactions using natural language or structured commands. MySQL MCP, on the other hand, enables read-only access to MySQL databases, letting you query data dynamically.
Together, these tools allow you to:
- Fetch real-time data from a database
- Automate web interactions like form filling
- Create end-to-end testing workflows with minimal coding
- Leverage AI-driven automation for dynamic, data-driven scenarios
In the example we are going to discuss, we’ll fetch Checkout data from a MySQL database and use it to populate the checkout form on saucedemo.com, a demo e-commerce site.
Prerequisites
Before we start, ensure you have the following:
- Node.js (LTS version, 18 or newer) installed
- MySQL server with a database named “demo”
- Playwright MCP and MySQL MCP servers installed
- Cursor IDE or Claude Desktop for running MCP commands
- A basic understanding of JavaScript/TypeScript and SQL
Step 1: Setting Up the MySQL Database
First, let’s create a demo database and a table to store customer data for the checkout form. The checkout form on saucedemo.com requires a first name, last name, and postal code. We’ll create a table called Checkout to save this data.
SQL Setup
Connect to your MySQL server (via MySQL Workbench or the command line) and run the following SQL commands:
CREATE DATABASE demo;
USE demo;

CREATE TABLE Checkout (
    id INT AUTO_INCREMENT PRIMARY KEY,
    first_name VARCHAR(50) NOT NULL,
    last_name VARCHAR(50) NOT NULL,
    postal_code VARCHAR(10) NOT NULL
);

INSERT INTO Checkout (first_name, last_name, postal_code) VALUES
('John', 'Doe', '12345'),
('Jane', 'Smith', '67890'),
('Alex', 'Johnson', '54321');
This creates a demo database with a Checkout table containing sample data.
Verify the data by running:
SELECT * FROM Checkout;Step 2: Installing and Configuring MySQL MCP Server
The MySQL MCP server allows LLMs to execute read-only queries on your MySQL database. Let’s set it up.
Installation
Install the MySQL MCP server using npm.
npx -y @smithery/cli install mysql-mcp-server --client claudeMySQL Configuration
Create a dedicated MySQL user with minimal permissions for security (avoid using root credentials). Configure the server by adding the following to your MCP configuration file (e.g., ~/.cursor/mcp.json for Cursor.
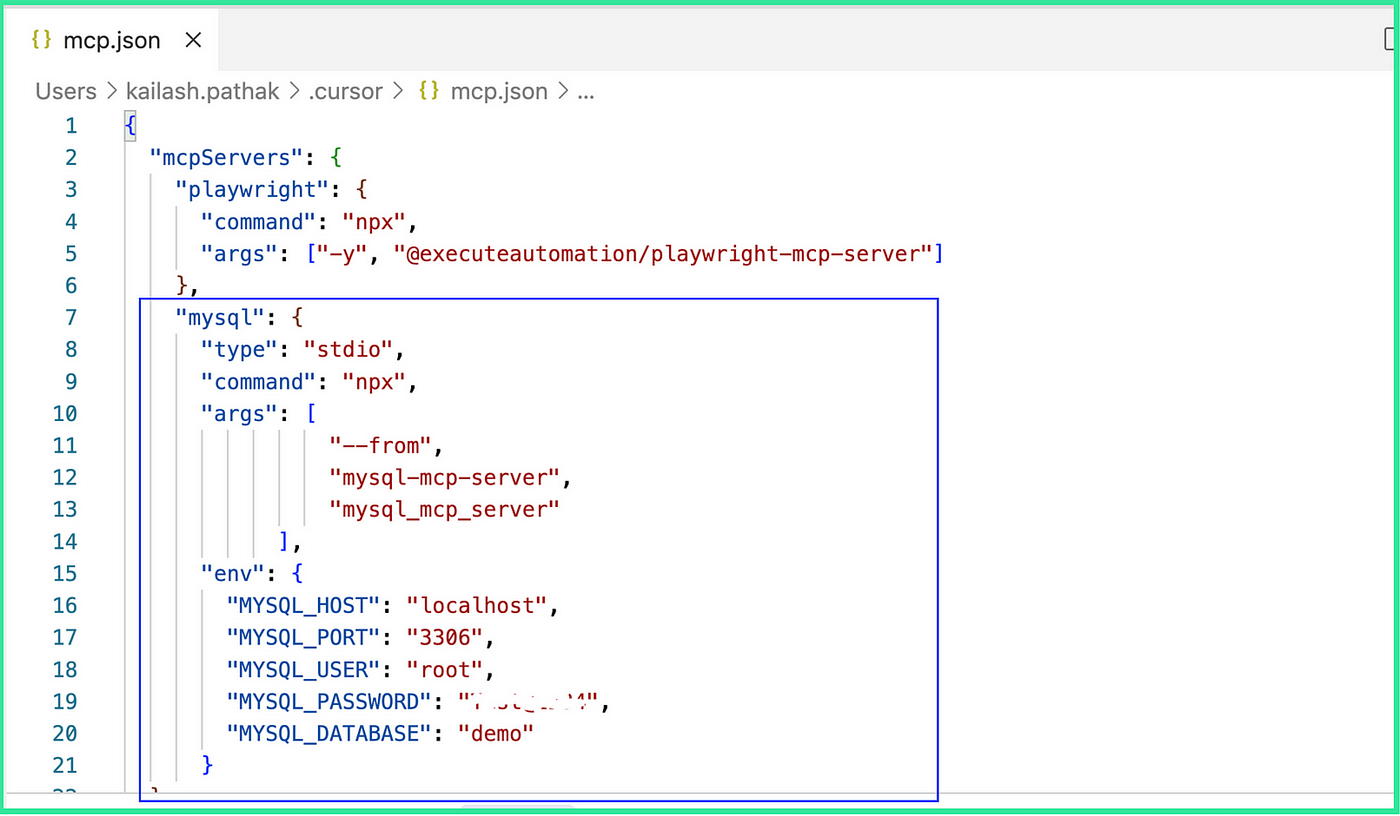
"mysql": {
      "type": "stdio",
      "command": "npx",
      "args": [
                "--from",
                "mysql-mcp-server",
                "mysql_mcp_server"
            ],
      "env": {
        "MYSQL_HOST": "localhost",
        "MYSQL_PORT": "3306",
        "MYSQL_USER": "root",
        "MYSQL_PASSWORD": "xxxxx",
        "MYSQL_DATABASE": "demo"
      }
  }
Step 3: Installing and Configuring Playwright MCP
The Playwright MCP from executeautomation/mcp-playwright enables browser automation. Follow these steps.
Clone the repository and install dependencies:
git clone https://github.com/executeautomation/mcp-playwright.git
cd mcp-playwright
npm install
Or, install the package globally (if available via npm):
Playwright MCP Configuration
Add the Playwright MCP server to your MCP configuration file:
  "mcpServers": {
    "playwright": {
      "command": "npx",
      "args": ["-y", "@executeautomation/playwright-mcp-server"]
    },
}
Step 4: Automating the Checkout Form
For demo purposes, we are taking the example of the saucedemo “Checkout: Your Information” page. We will fill in the data in the three fields below using MySQL MCP along with Playwright MCP:
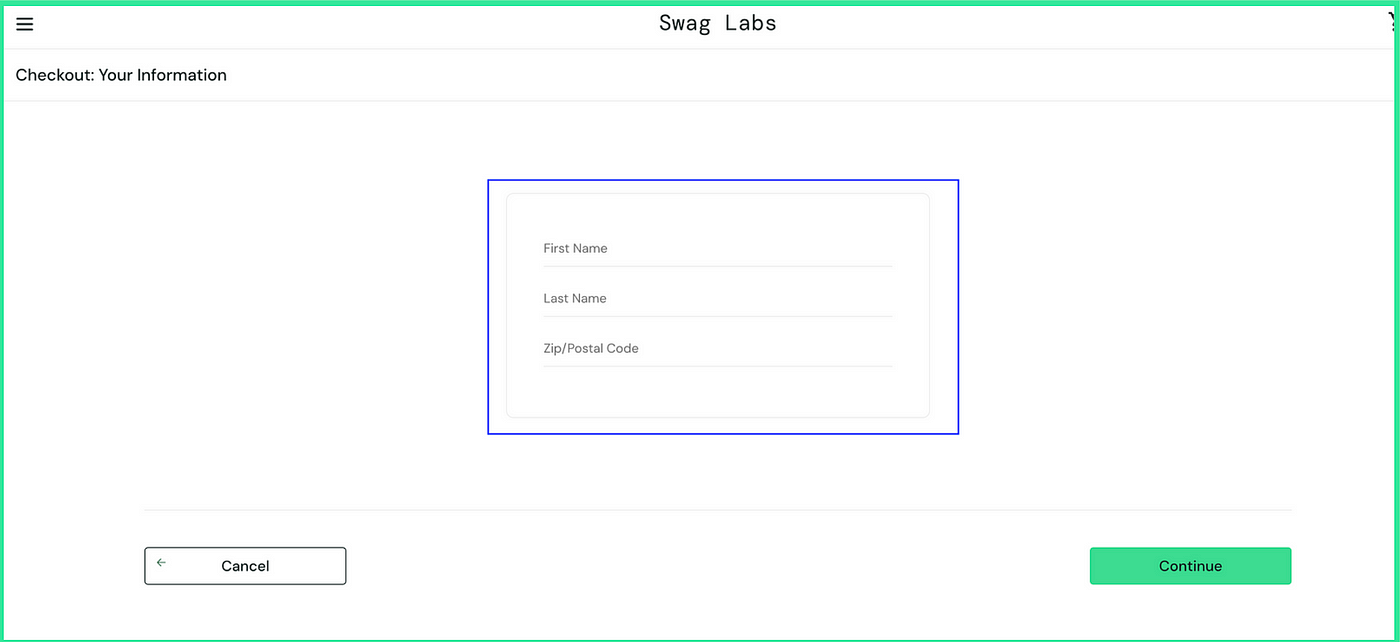
Now let's take the scenario that we want to automate using Playwright MCP and MySQL MCP.
Use Case
Let's take the below use case where we’ll fetch a third customer record from the demo database and use the data to fill the saucedemo.com checkout form. In Cursor IDE or Claude Desktop, connect to both MCP servers and use this prompt. In this blog, we are using the Cursor IDE.
Prompt: We will use a cursor to execute the use case below.
1.Open https://www.saucedemo.com/
2.Login with username and password
3.Add product “Sauce Labs Backpack” into the cart
4.Open the cart
5.Click on Checkout button
6.Pull data of third record from Checkout Table of demo database  and fill data in First Name,Last Name and Zip/Postal Code
7.Click on continue button
8.Click on Finish button
9.Verify message Thank you for your order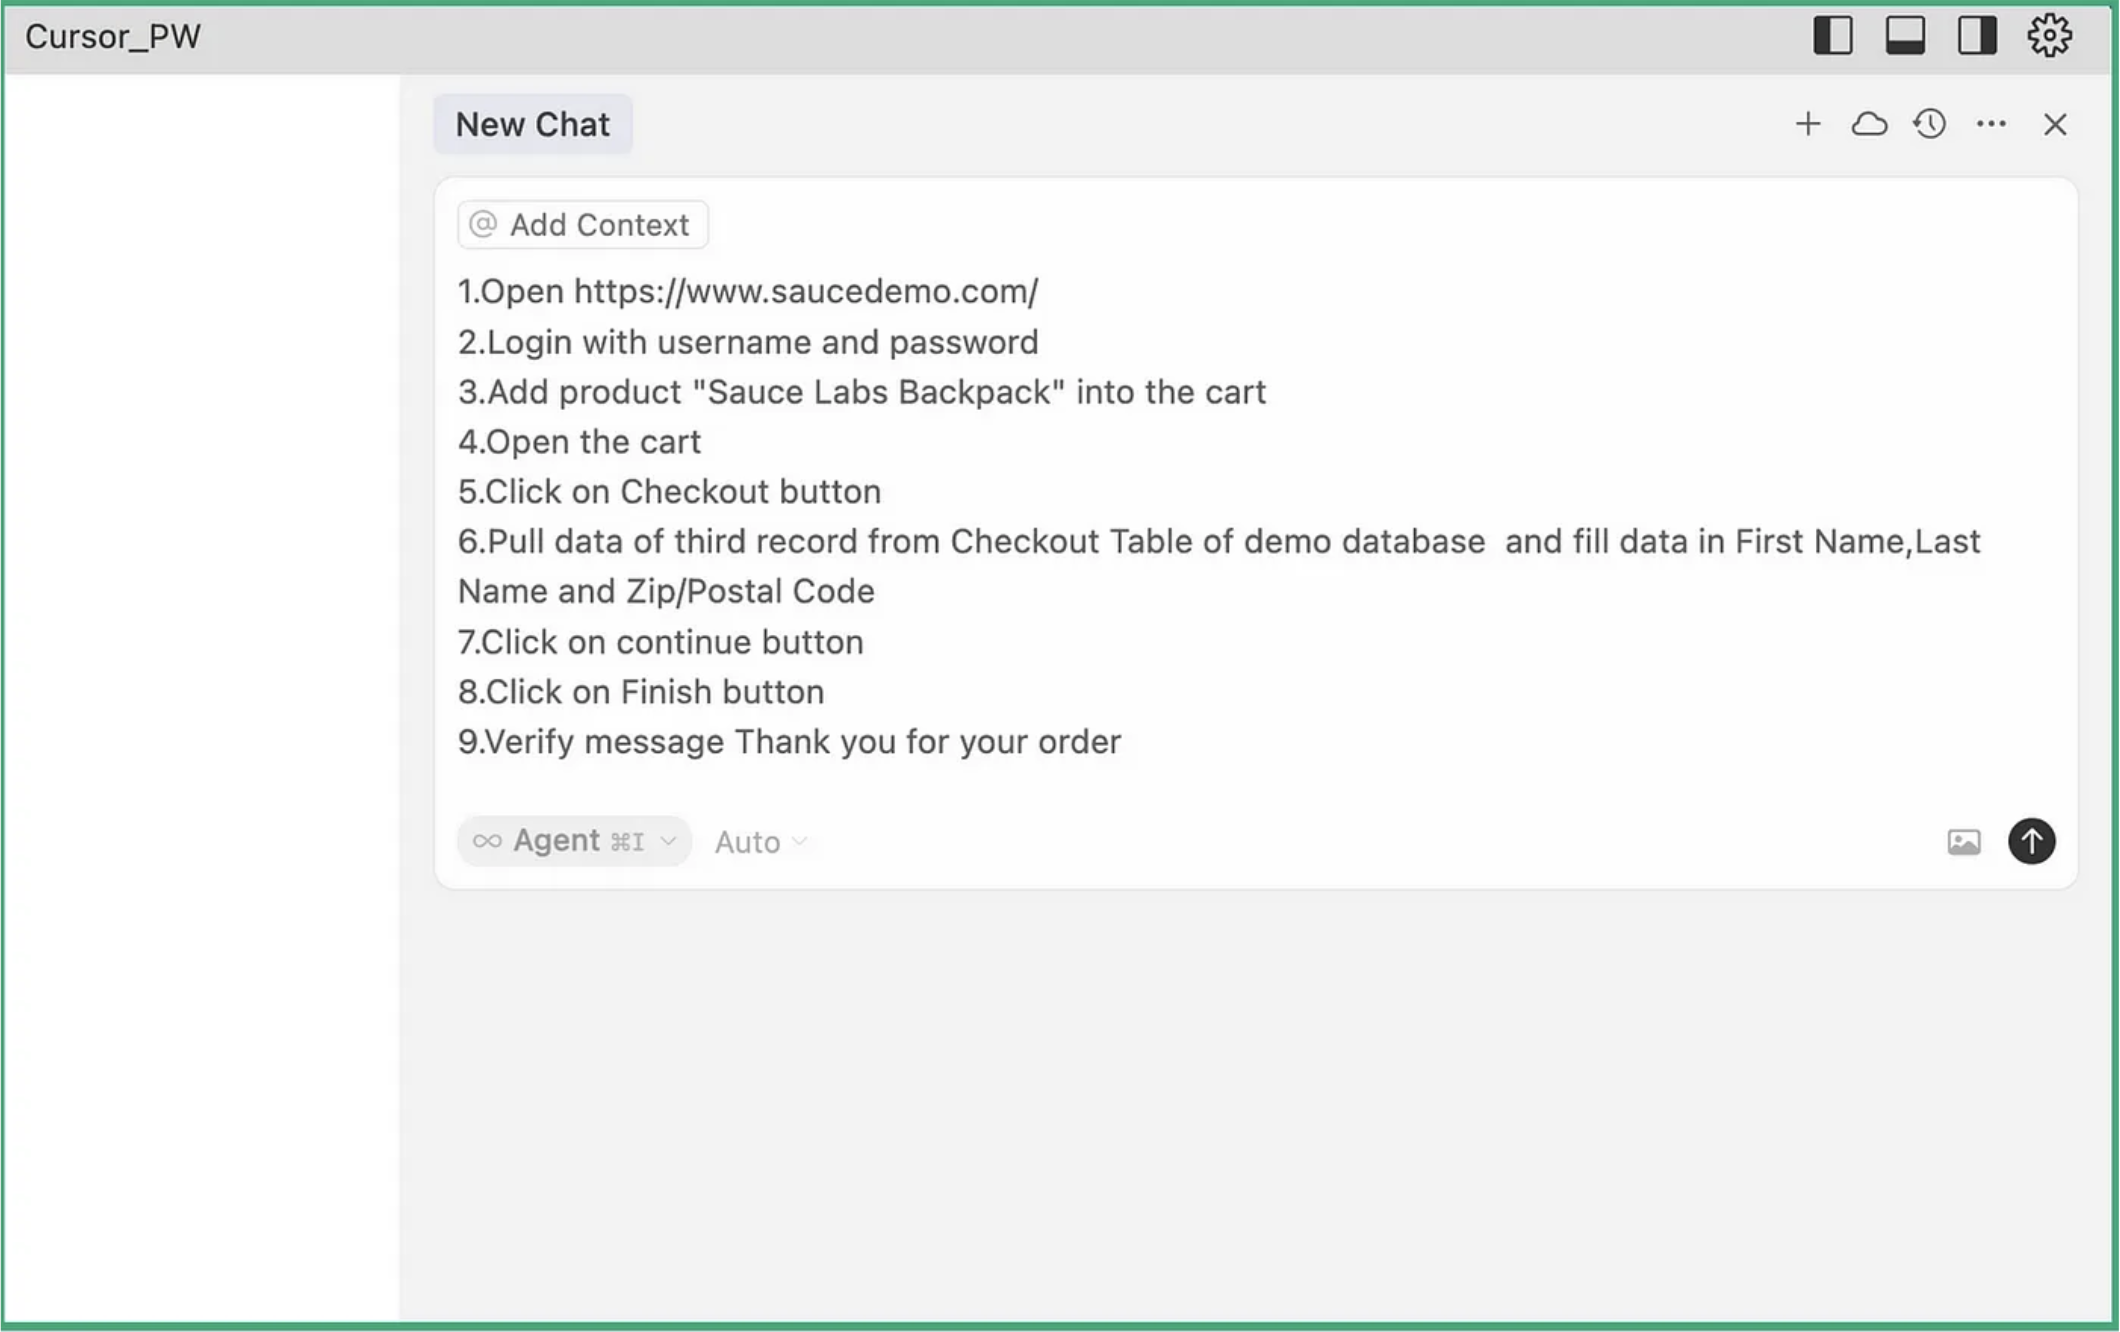
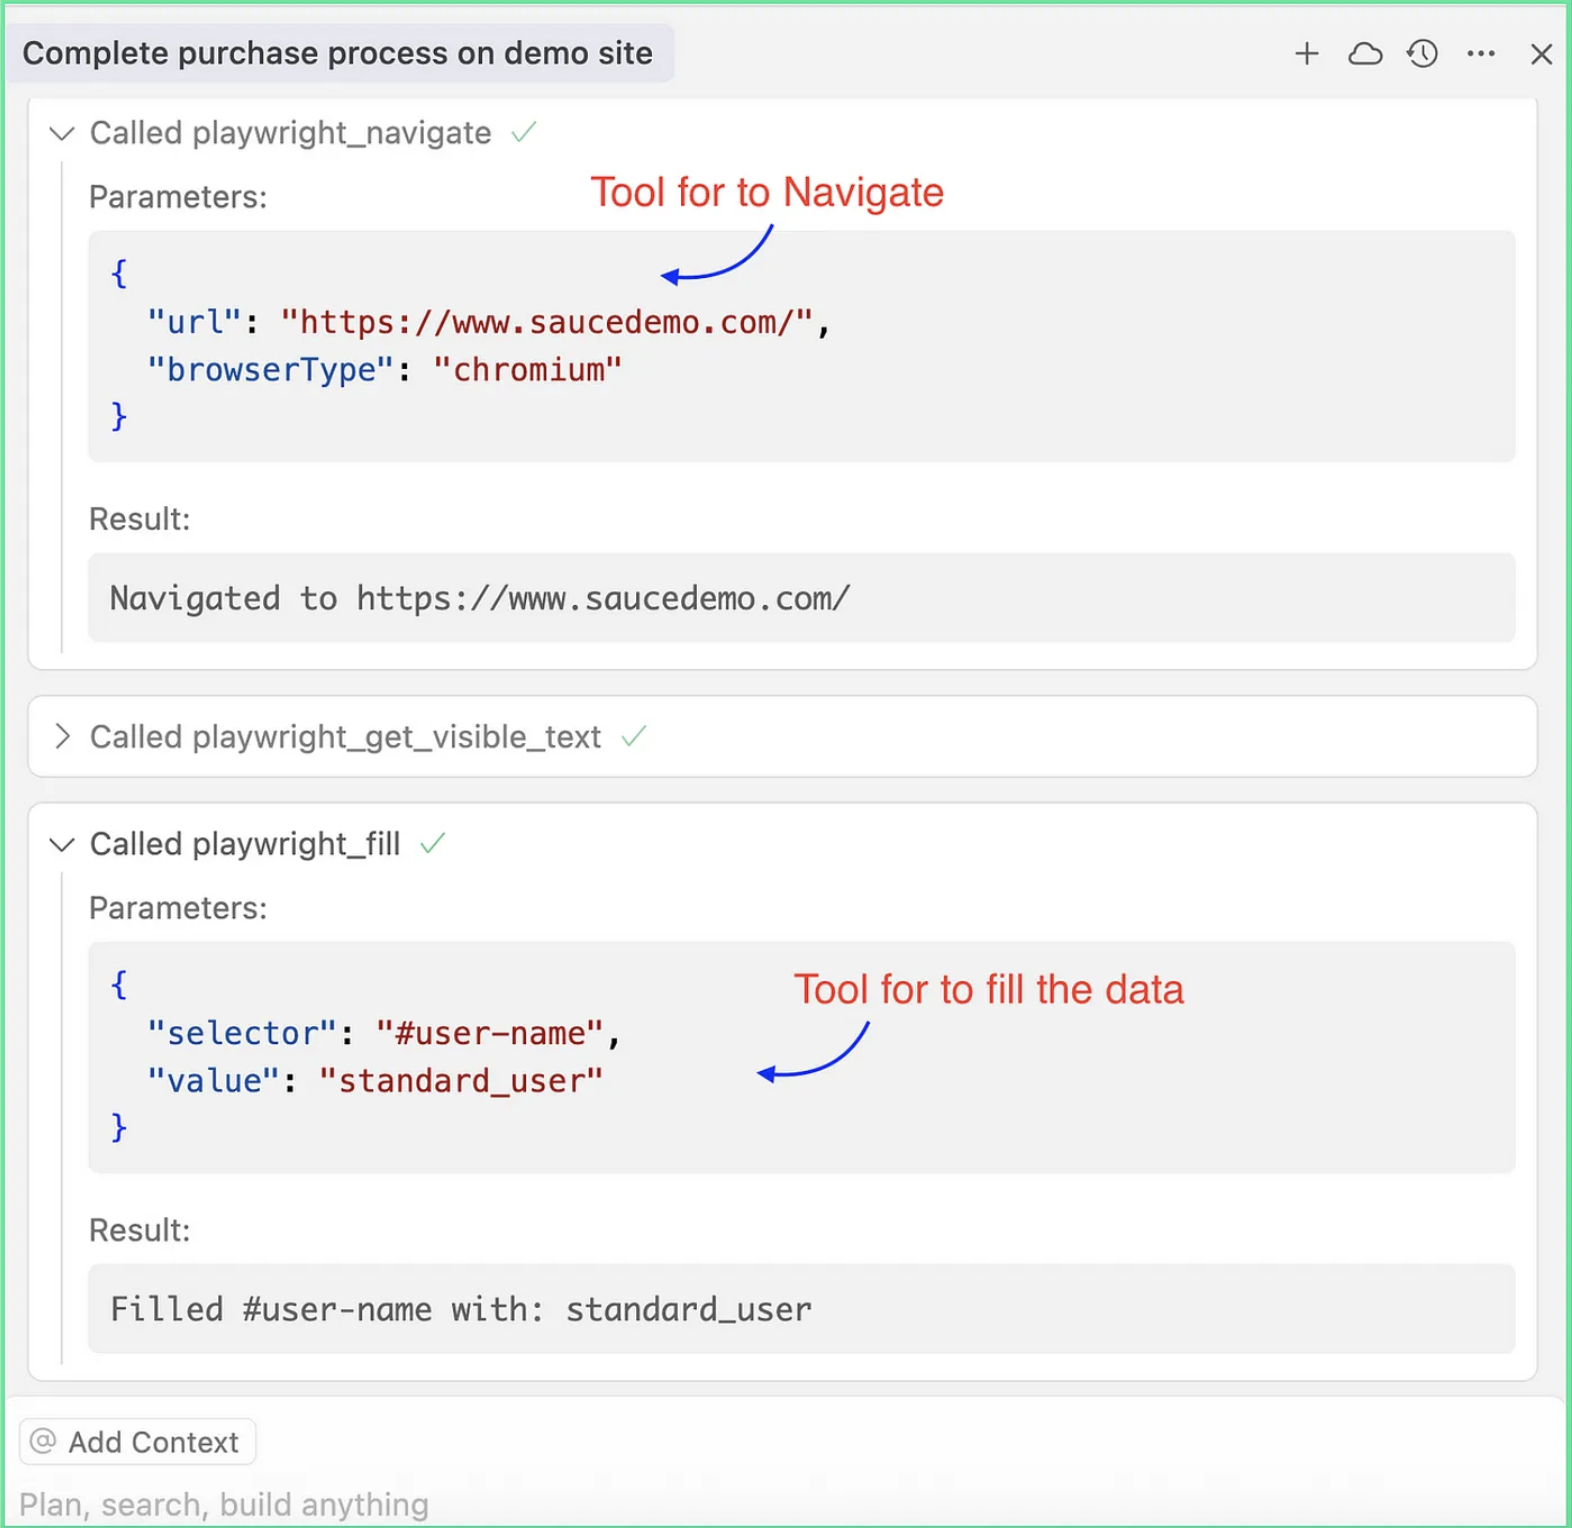
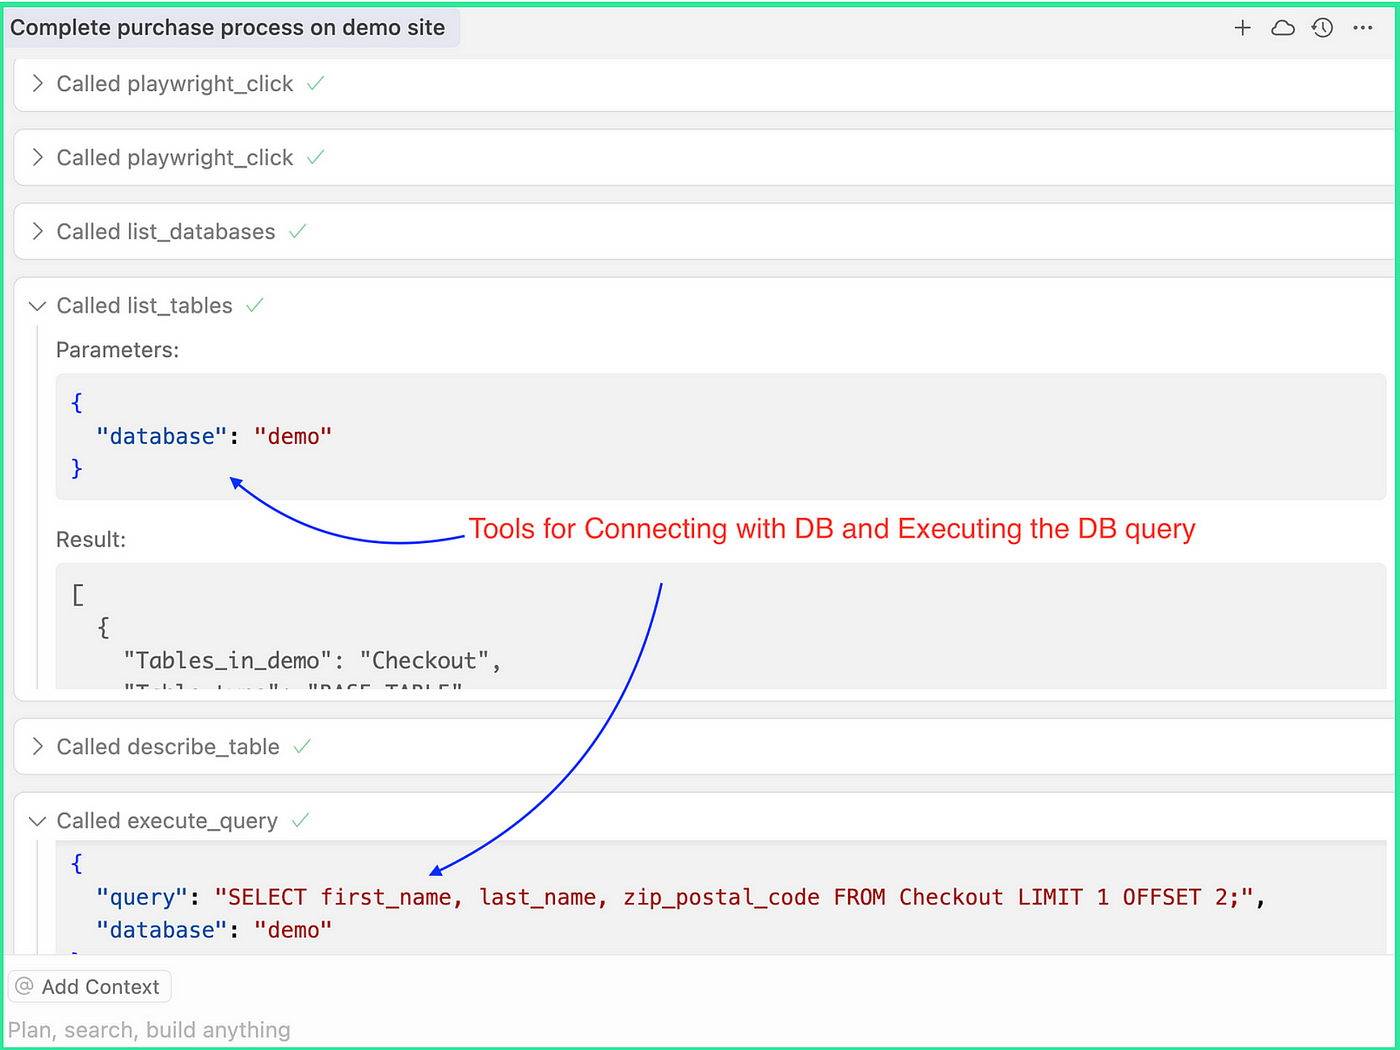
When we trigger the above prompt in the cursor, the first tool call is to start a new browser session, and other tools to fill data into fields, connect with the DB, and execute the query. Finally, fill in the data from the DB in the checkout form.
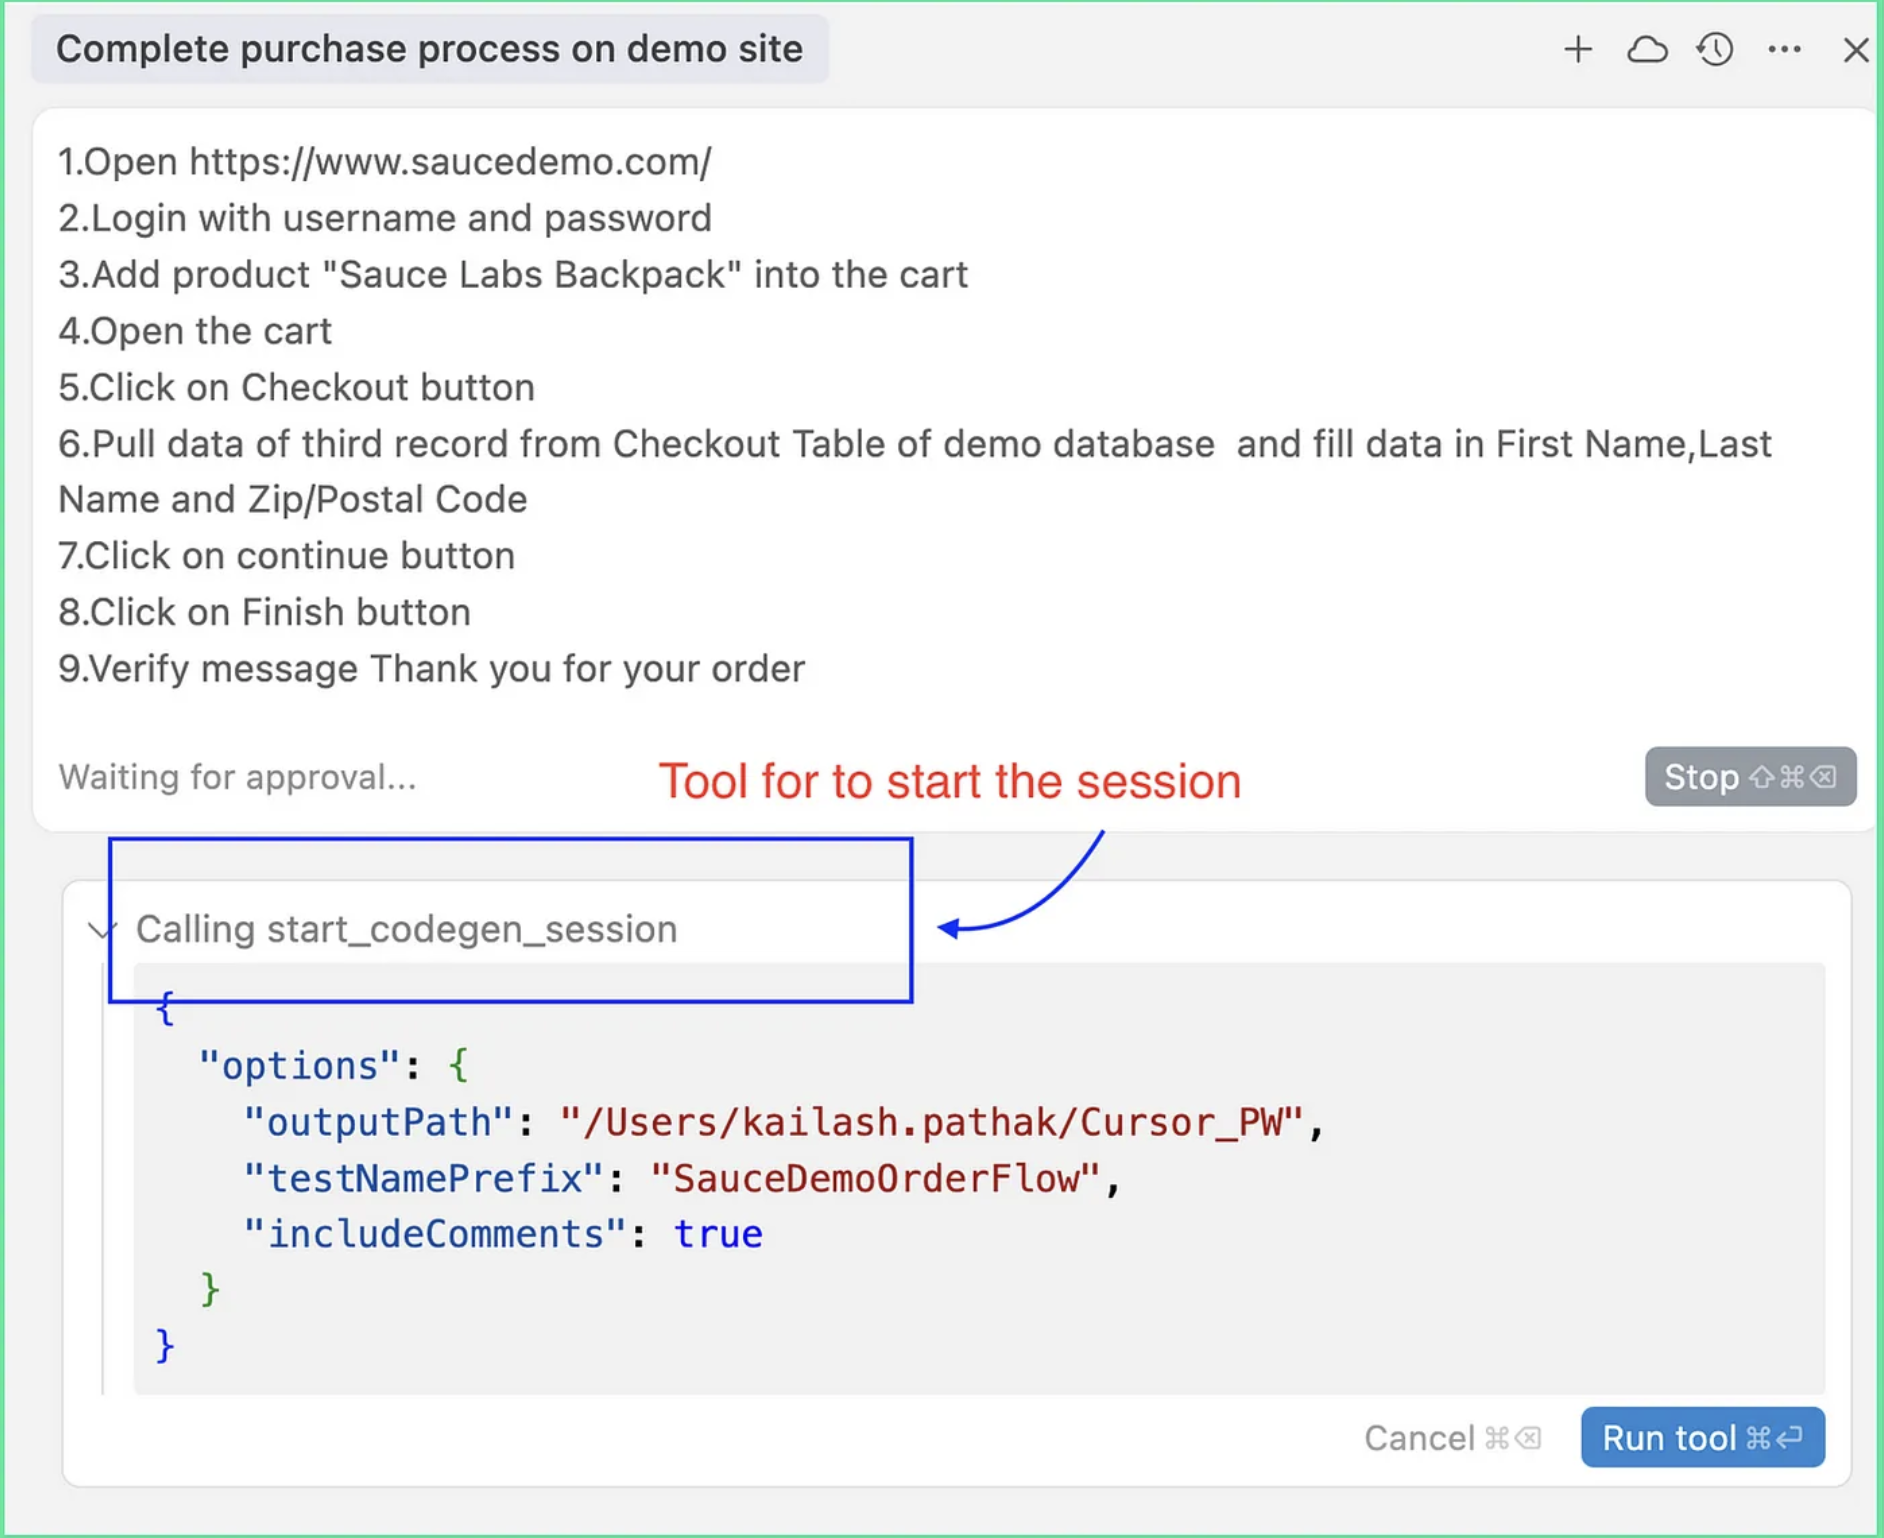
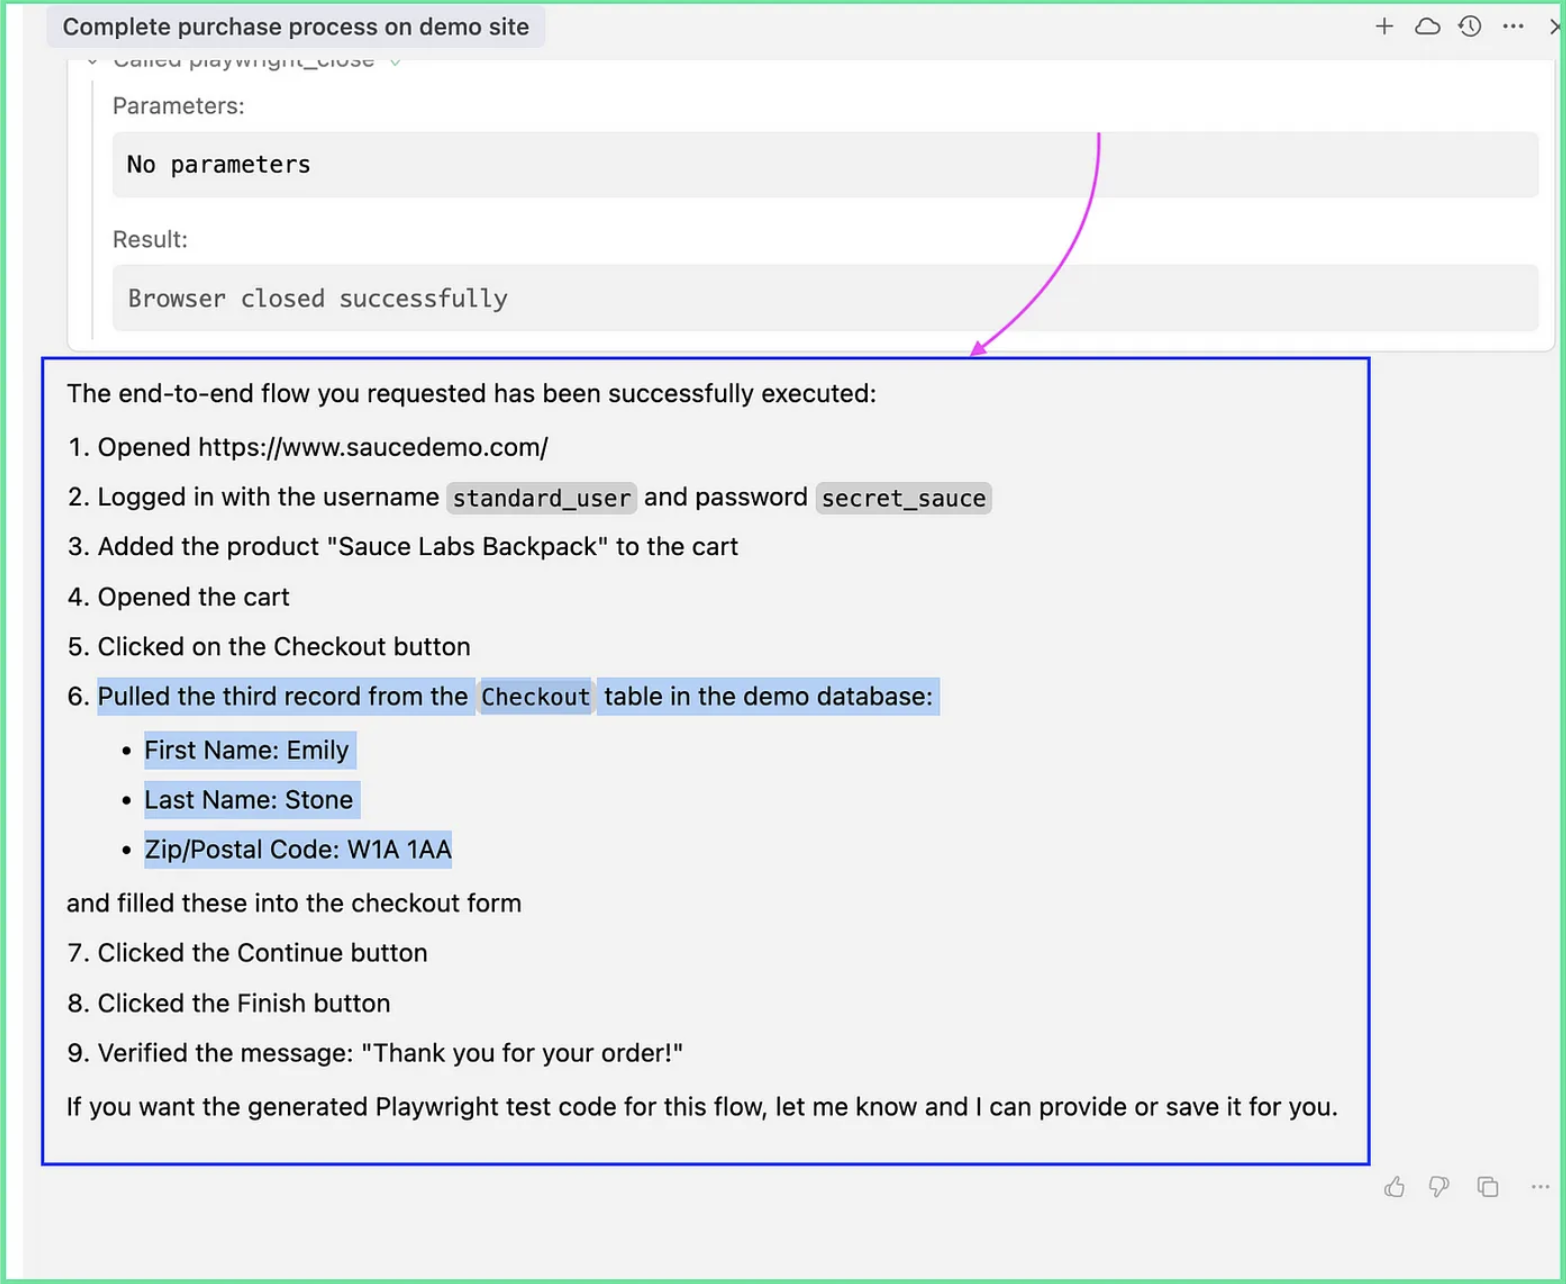
Finally, you will see that all steps of the use cases are executed successfully.
See the video below for more details.
Video
Each step is covered in the video below:
Conclusion
Integrating Playwright MCP from executeautomation/mcp-playwright with MySQL MCP Server from designcomputer/mysql_mcp_server enables powerful, data-driven automation. This blog showed how to fetch customer data from a demo database and automate the saucedemo.com checkout form using natural language commands. It’s a game-changer for testers and developers looking to streamline workflows.
Opinions expressed by DZone contributors are their own.
Comments