

Automated Deployment Using a CI/CD Pipeline (Mule 4 | CloudHub 2.0)
This tutorial demonstrates automated deployment using a CI/CD pipeline with Mule 4. It shows how code pushed to a Git repository triggers deployment automatically.
Join the DZone community and get the full member experience.
Join For FreeThe purpose of this article is to depict and demonstrate how to automate the build and deployment process using a CI/CD pipeline with CloudHub 2.0 (Mule 4).
Prerequisites
- Anypoint CloudHub account (CloudHub 2.0)
app.runtime– 4.9.0mule.maven.plugin.version– 4.3.0- Anypoint Studio – Version 7.21.0
- OpenJDK – 11.0
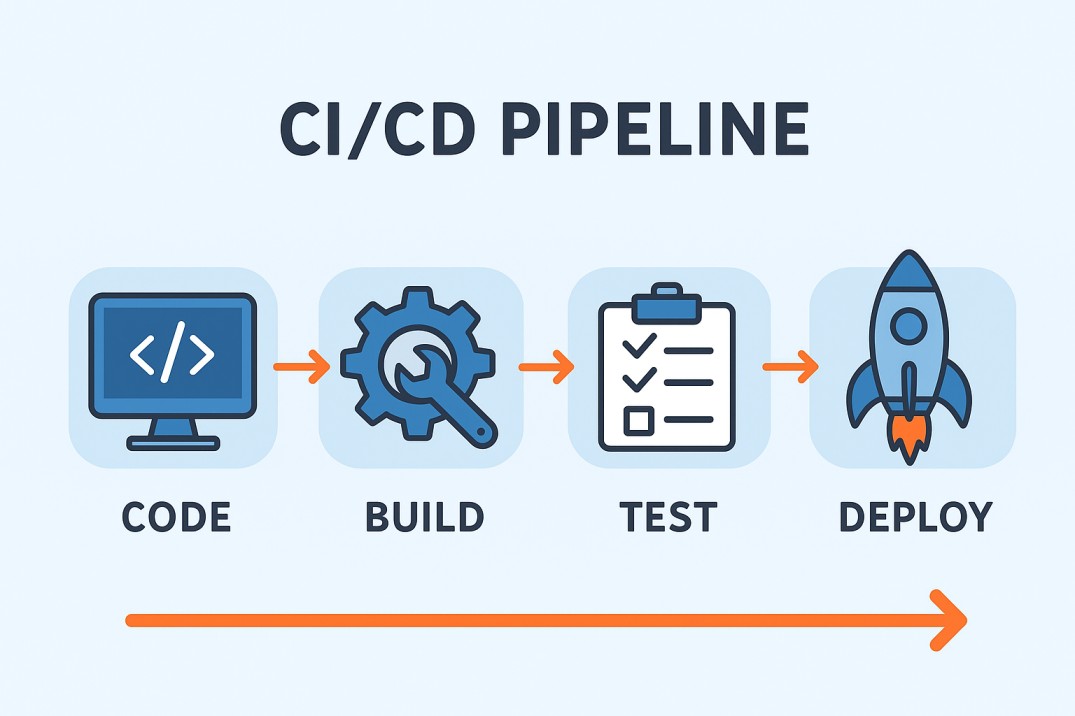
CI/CD Pipeline
Now, follow the steps below.
Create a project from a RAML file in Anypoint Studio. The detailed steps are mentioned in my earlier blog. Please go through the link below if you have not already done so:
https://dzone.com/articles/jwt-policy-enforcement-raml-anypoint-platform
How to Do Automated Deployment?
First, let’s see how to deploy manually using a Maven command from the command prompt.
There are two steps: build and deployment.
- Deploy to Exchange
- Deploy to Runtime Manager
Please find the pom.xml below. For security reasons, I have changed the group ID.
<?xml version="1.0" encoding="UTF-8"?>
<project xmlns="http://maven.apache.org/POM/4.0.0" xmlns:xsi="http://www.w3.org/2001/XMLSchema-instance" xsi:schemaLocation="http://maven.apache.org/POM/4.0.0 https://maven.apache.org/xsd/maven-4.0.0.xsd">
	<modelVersion>4.0.0</modelVersion>

	<groupId>XXXXXXX-a7c8-XXX-ae67-dXXXXXXXXXXX</groupId>
	<artifactId>order-api-sapi</artifactId>
	<version>1.0.20</version>
	<packaging>mule-application</packaging>
	<name>order-api-sapi</name>

	<properties>
		<mule.maven.plugin.version>4.3.0</mule.maven.plugin.version>
		<app.runtime>4.9.0</app.runtime>
	</properties>

	<build>
		<plugins>
			<plugin>
				<groupId>org.mule.tools.maven</groupId>
				<artifactId>mule-maven-plugin</artifactId>
				<version>${mule.maven.plugin.version}</version>
				<extensions>true</extensions>
				<configuration>
					<classifier>mule-application</classifier>
					<cloudhub2Deployment>
						<uri>https://anypoint.mulesoft.com</uri>
						<provider>MC</provider>
						<environment>${env}</environment>
						<server>anypoint-exchange-v3</server>
						<target>${target}</target>
						<applicationName>${app.name}</applicationName>
						<replicas>${replicas}</replicas>
						<muleVersion>${app.runtime}</muleVersion>
						<vCores>${vCores}</vCores>
						<deploymentSettings>
							<generateDefaultPublicUrl>true</generateDefaultPublicUrl>
						</deploymentSettings>
						<connectedAppGrantType>client_credentials</connectedAppGrantType>
						<properties>
							<anypoint.platform.client_id>${anypoint.client.id}</anypoint.platform.client_id>
							<anypoint.platform.client_secret>${anypoint.client.secret}</anypoint.platform.client_secret>
							<remote.api.clientId>8081</remote.api.clientId>
							<env>${env}</env>
						</properties>
						<secureProperties>
							<remote.api.clientSecret>8082</remote.api.clientSecret>
						</secureProperties>
					</cloudhub2Deployment>
				</configuration>
			</plugin>
		</plugins>
	</build>

	<dependencies>
		<dependency>
			<groupId>org.mule.connectors</groupId>
			<artifactId>mule-http-connector</artifactId>
			<version>1.10.3</version>
			<classifier>mule-plugin</classifier>
		</dependency>
		<dependency>
			<groupId>org.mule.connectors</groupId>
			<artifactId>mule-sockets-connector</artifactId>
			<version>1.2.5</version>
			<classifier>mule-plugin</classifier>
		</dependency>
		<dependency>
			<groupId>org.mule.modules</groupId>
			<artifactId>mule-apikit-module</artifactId>
			<version>1.11.3</version>
			<classifier>mule-plugin</classifier>
		</dependency>
	</dependencies>

	<distributionManagement>
		<repository>
			<id>anypoint-exchange-v3</id>
			<name>anypoint-exchange-v3</name>
			<url>https://maven.anypoint.mulesoft.com/api/v3/organizations/${groupId}/maven</url>
			<layout>default</layout>
		</repository>
	</distributionManagement>
	<repositories>
		<repository>
			<id>anypoint-exchange-v3</id>
			<name>Anypoint Exchange</name>
			<url>https://maven.anypoint.mulesoft.com/api/v3/maven</url>
			<layout>default</layout>
		</repository>
		<repository>
			<id>mulesoft-releases</id>
			<name>MuleSoft Releases Repository</name>
			<url>https://repository.mulesoft.org/releases/</url>
			<layout>default</layout>
		</repository>
	</repositories>

	<pluginRepositories>
		<pluginRepository>
			<id>mulesoft-releases</id>
			<name>MuleSoft Releases Repository</name>
			<layout>default</layout>
			<url>https://repository.mulesoft.org/releases/</url>
			<snapshots>
				<enabled>false</enabled>
			</snapshots>
		</pluginRepository>
	</pluginRepositories>

</project>
I already explained <cloudhub2Deployment> in my earlier blog. Please refer to it if required.
Mandatory Configuration
We need to explicitly mention the following snippet under distributionManagement. This is mandatory, as it defines the repository location of the generated build JAR.
	<distributionManagement>
		<repository>
			<id>anypoint-exchange-v3</id>
			<name>anypoint-exchange-v3</name>
			<url>https://maven.anypoint.mulesoft.com/api/v3/organizations/${groupId}/maven</url>
			<layout>default</layout>
		</repository>
	</distributionManagement>
You also need to add the repository inside the <repositories> tag:
<repository>
			<id>anypoint-exchange-v3</id>
			<name>Anypoint Exchange</name>
			<url>https://maven.anypoint.mulesoft.com/api/v3/maven</url>
			<layout>default</layout>
		</repository>
Project Setup in VS Code
Now, open the project using Visual Studio Code. Once opened, you will see the project structure.
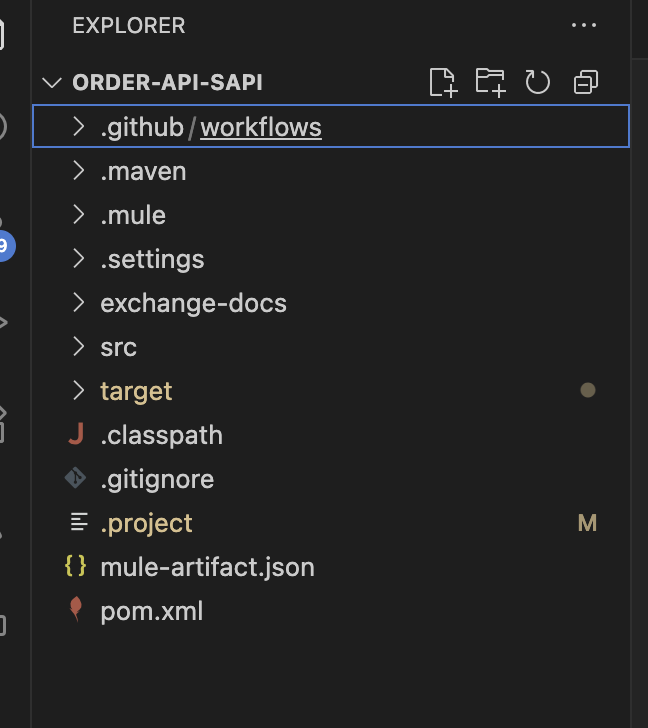
We need to do three things:
- Create a
.mavenfolder inside the project and create asettings.xmlfile inside it. - Create a
.github/workflowsfolder inside the project and create abuild.yamlfile inside it. - Add the GitHub Actions extension in VS Code. This will connect VS Code with your GitHub account after providing credentials.
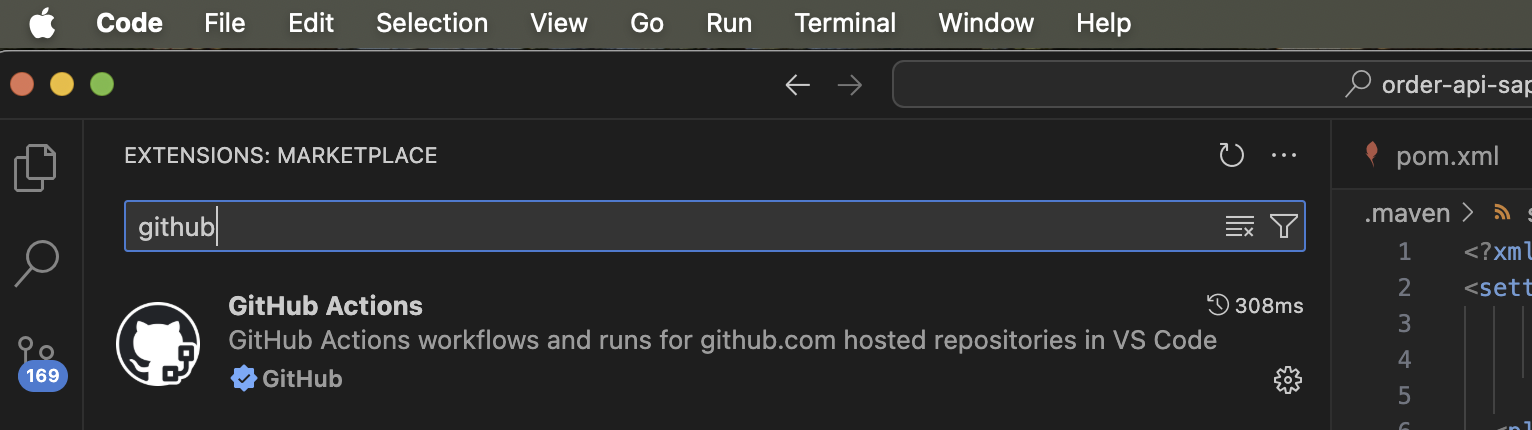
settings.xml
You need to add the profiles and servers sections as shown below.
- Profile section contains environment-specific details.
- Server section contains connected app credentials (client ID and client secret).
<?xml version="1.0" encoding="UTF-8"?>
<settings xmlns="http://maven.apache.org/SETTINGS/1.2.0"
          xmlns:xsi="http://www.w3.org/2001/XMLSchema-instance"
          xsi:schemaLocation="http://maven.apache.org/SETTINGS/1.2.0 https://maven.apache.org/xsd/settings-1.2.0.xsd">

  <pluginGroups>
    <pluginGroup>org.mule.tools</pluginGroup>
  </pluginGroups>

  <profiles>
     	<profile>
			<id>Sandbox</id>
			<properties>
				<target>Cloudhub-US-East-2</target>
				<replicas>1</replicas>
				<region>us-east-1</region>
				<env>Sandbox</env>
				<app.name>sand-order-api-sapi</app.name>
				<vCores>0.1</vCores>
				<worker.type>MICRO</worker.type>
				<anypoint.client.id>xxxxxx</anypoint.client.id>
				<anypoint.client.secret>xxxxx</anypoint.client.secret>
			</properties>
		</profile>
  </profiles>

  <servers>
    <server>
      <id>anypoint-exchange-v3</id>
      <username>~~~Client~~~</username>
      <password>f059d98e8d974517bxxxxxxx~?~c1efdD4cFxxxxxxxxx</password>
    </server>
  </servers>
</settings>
Please ensure that all three IDs match exactly:
- Server ID
- Repository ID
- Distribution repository ID
Example: anypoint-exchange-v3
build.yaml File
Add the following content to the build.yaml file:
name: Publish to Exchange & Deploy to CH2.0

on:
  push:
    branches: [ main ]

jobs:
  build:
    runs-on: ubuntu-latest
    steps:
      - name: Checkout this repo
        uses: actions/checkout@v4

      - name: Cache dependencies
        uses: actions/cache@v4
        with:
          path: ~/.m2/repository
          key: ${{ runner.os }}-maven-${{ hashFiles('**/pom.xml') }}
          restore-keys: ${{ runner.os }}-maven-

      - name: Set up JDK 1.8
        uses: actions/setup-java@v4
        with:
          distribution: "zulu"
          java-version: 8

      - name: Publish to Exchange
        run: |
          mvn deploy --settings .maven/settings.xml -DskipMunitTests \
          -Dclient.id="${{ secrets.CONNECTED_APP_CLIENT_ID }}" \
          -Dclient.secret="${{ secrets.CONNECTED_APP_CLIENT_SECRET }}"
      - name: Deploy to CloudHub 2.0
        run: |
          mvn deploy --settings .maven/settings.xml -PSandbox -DskipMunitTests -DmuleDeploy \
          -Dclient.id="${{ secrets.CONNECTED_APP_CLIENT_ID }}" \
          -Dclient.secret="${{ secrets.CONNECTED_APP_CLIENT_SECRET }}"
Add Client ID and Client Secret
Below is where you can add the client ID and client secret in VS Code. Please ensure that the names match exactly in both places:
build.yamlfile- Repository Secrets
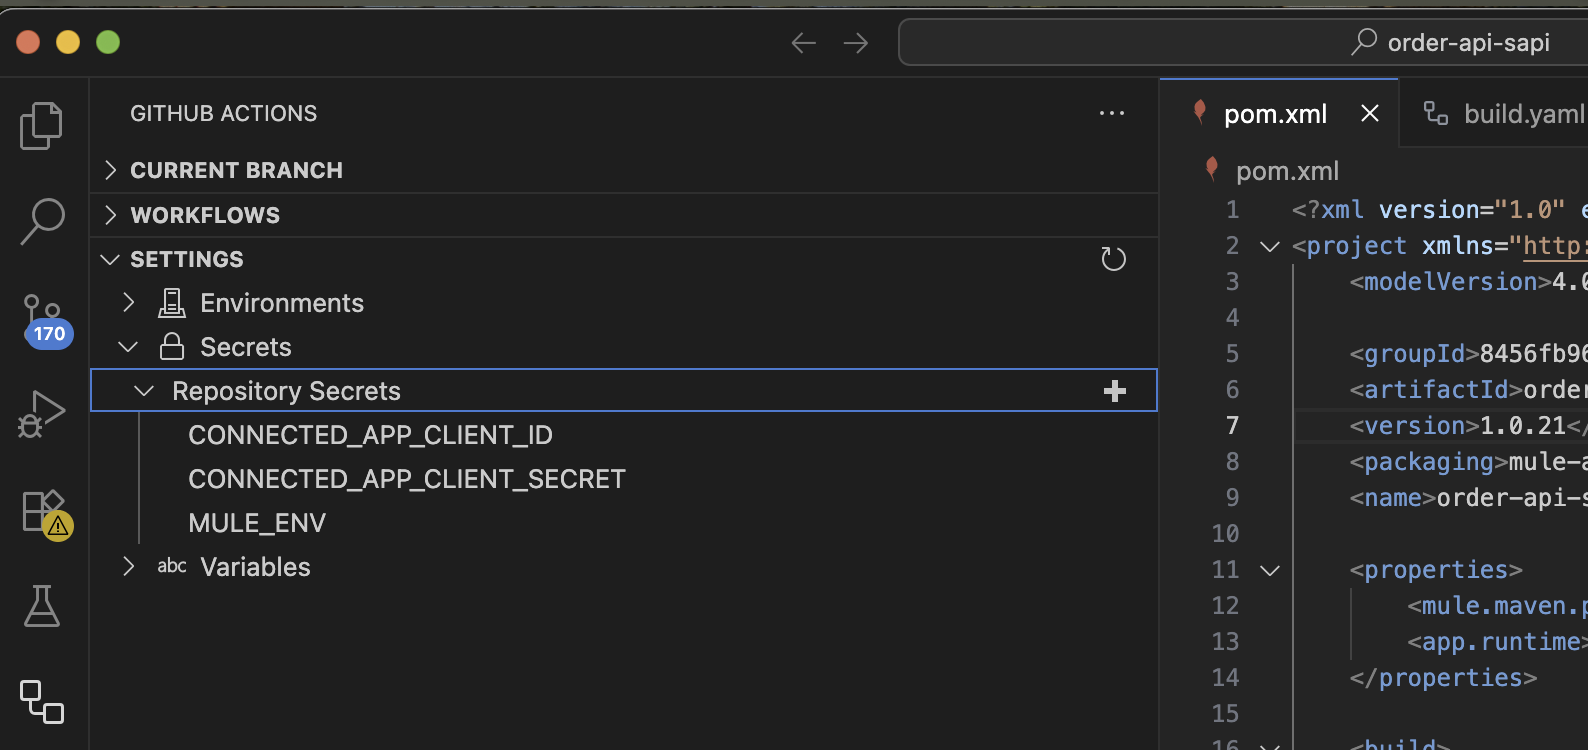
Once added in VS Code, they will automatically appear in the GitHub repository settings.
To view this in GitHub, navigate to:
Your Repository → Settings → Actions
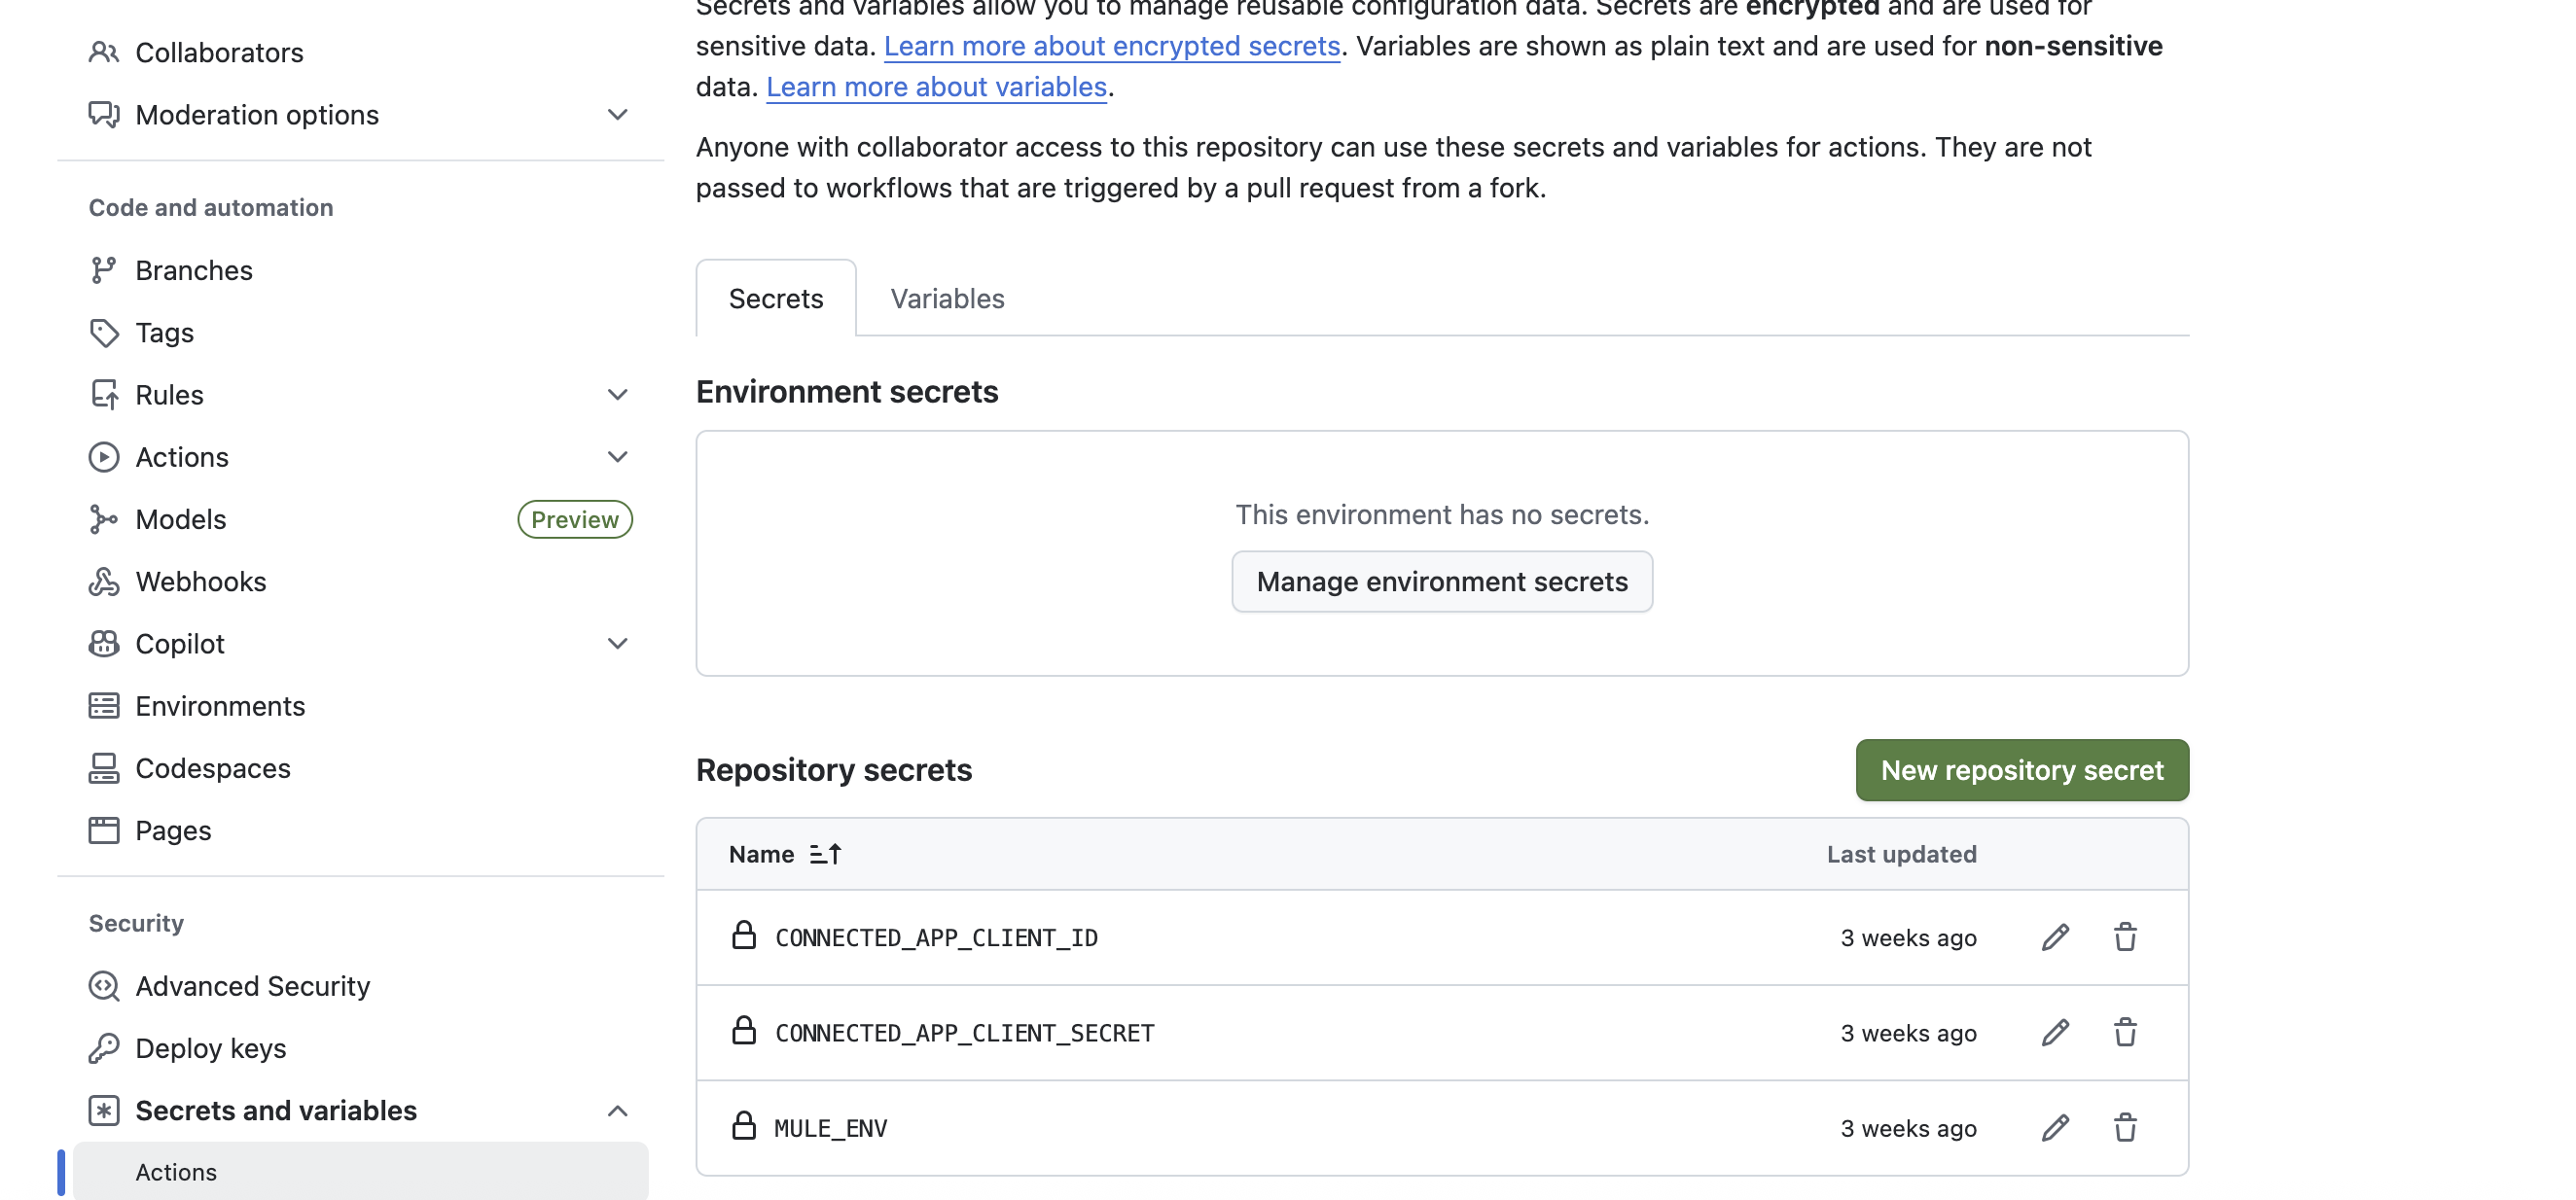
You can also set these directly in GitHub. The client ID and client secret are the credentials of the Connected App.
Build Execution
Once everything is set, the build will start automatically when you check in the code.
Important:
Every time you run a fresh build, ensure that the Group ID, Artifact ID, and Version (GAV) combination is unique. Otherwise, you may encounter the common GAV error.
To demonstrate this, I first ran the build without changing the version. As expected, publishing to Exchange failed because the same GAV already existed.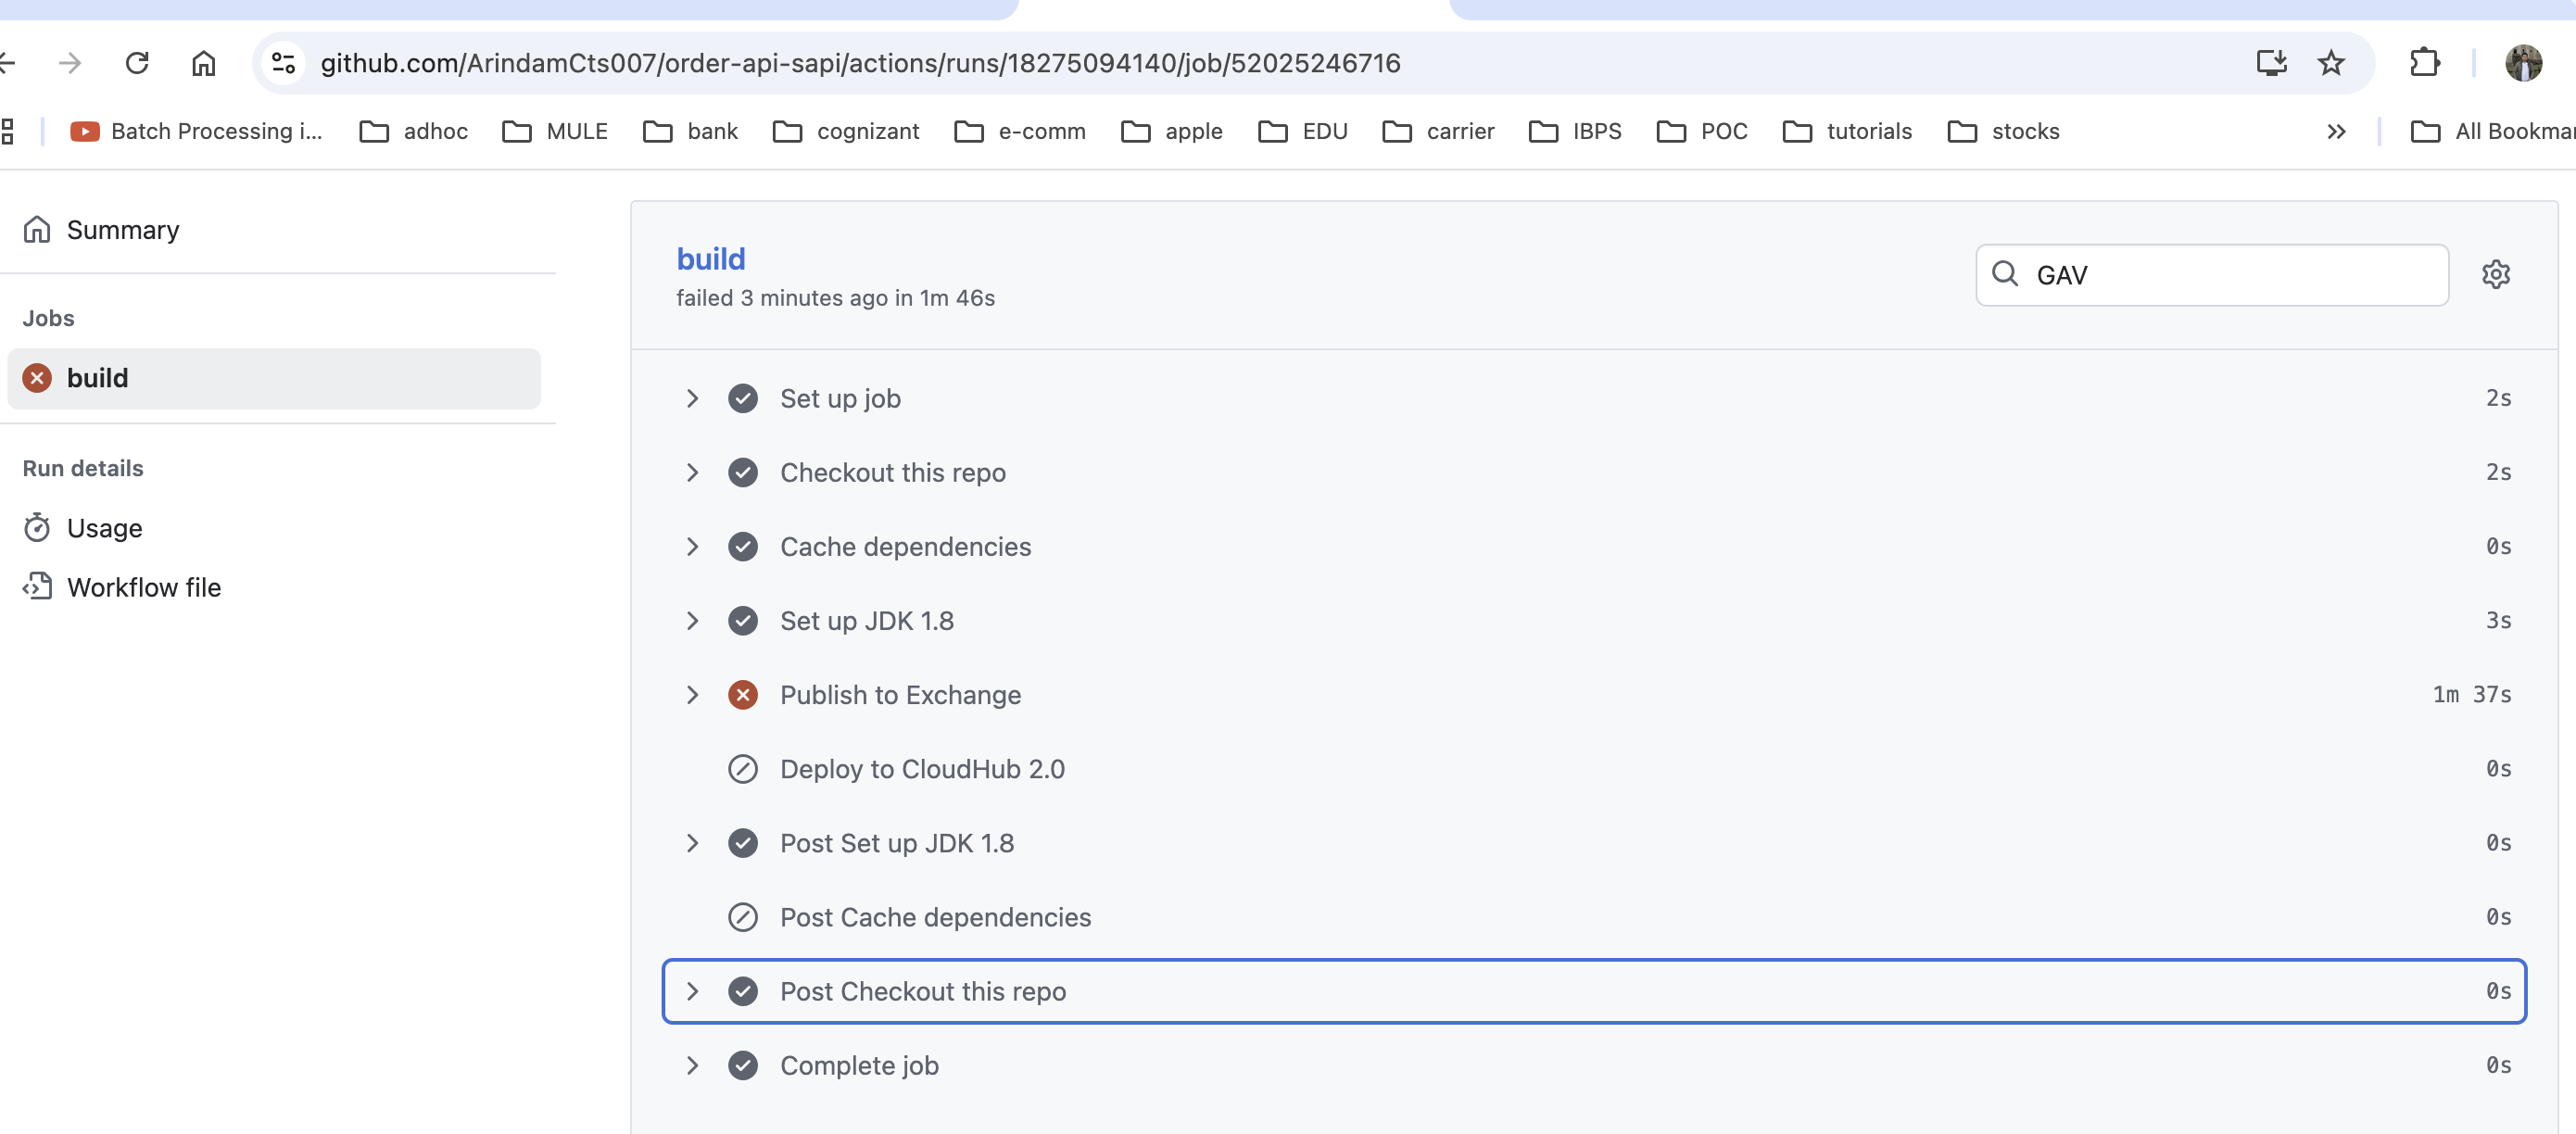
After changing the version, the build succeeded.
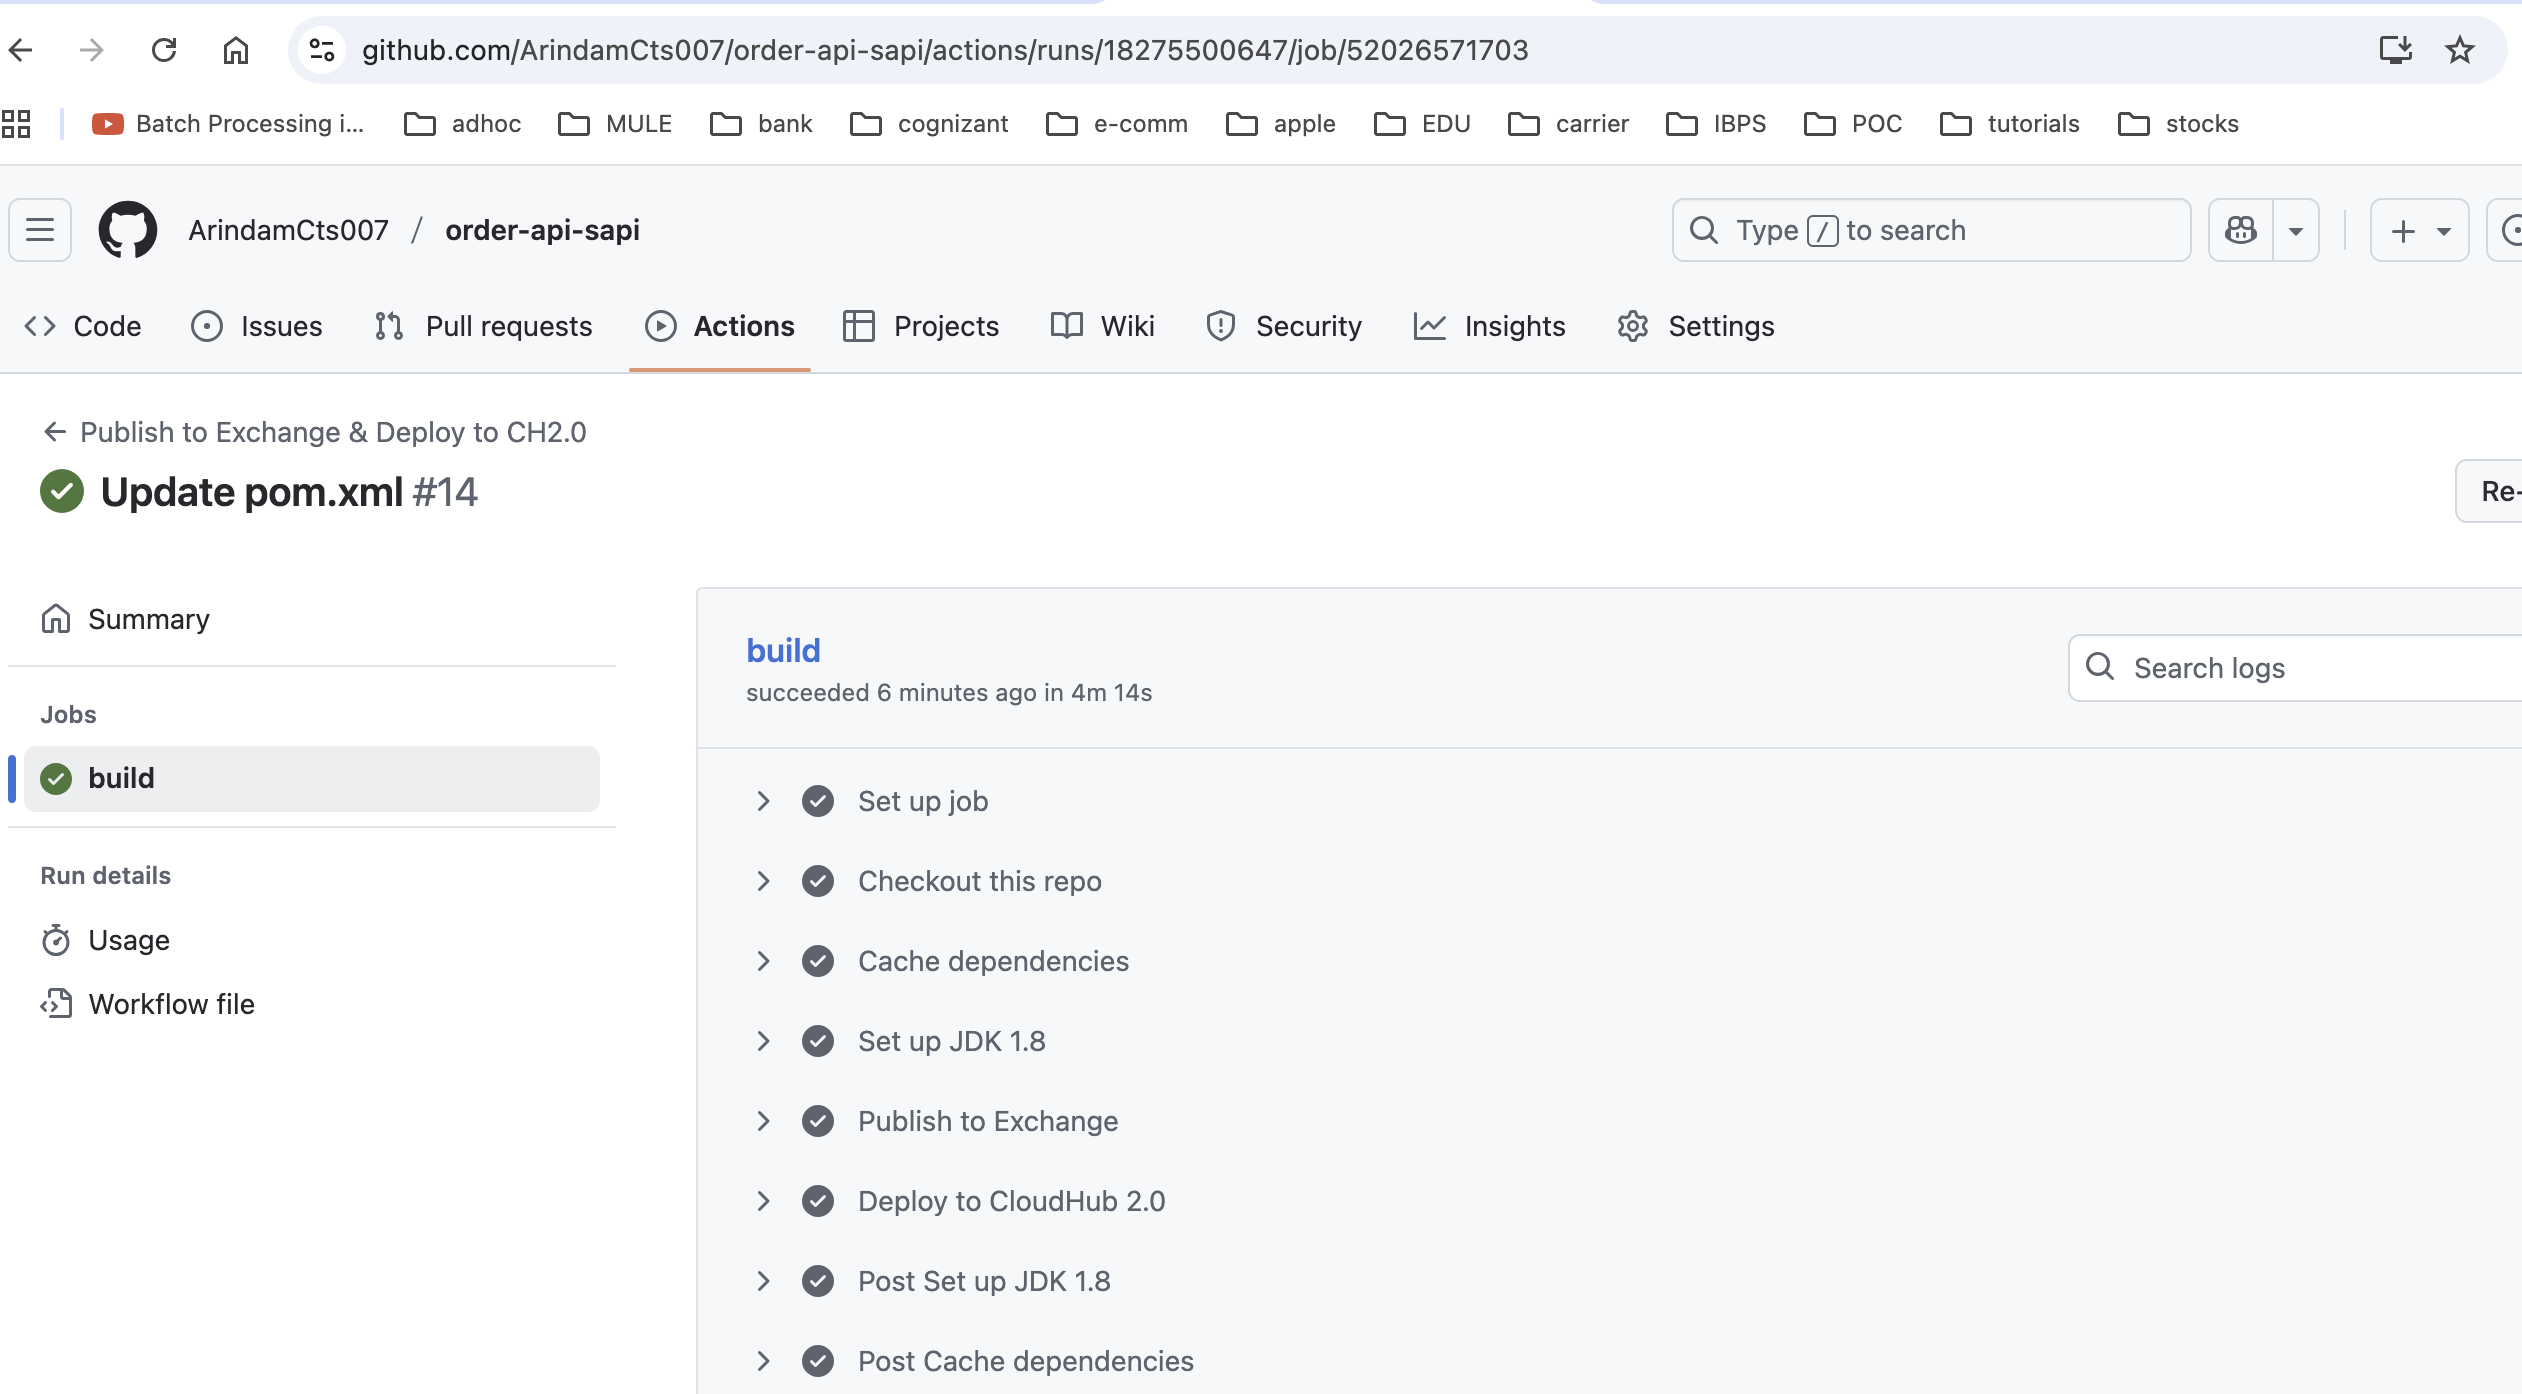
How to Verify the CI/CD Pipeline
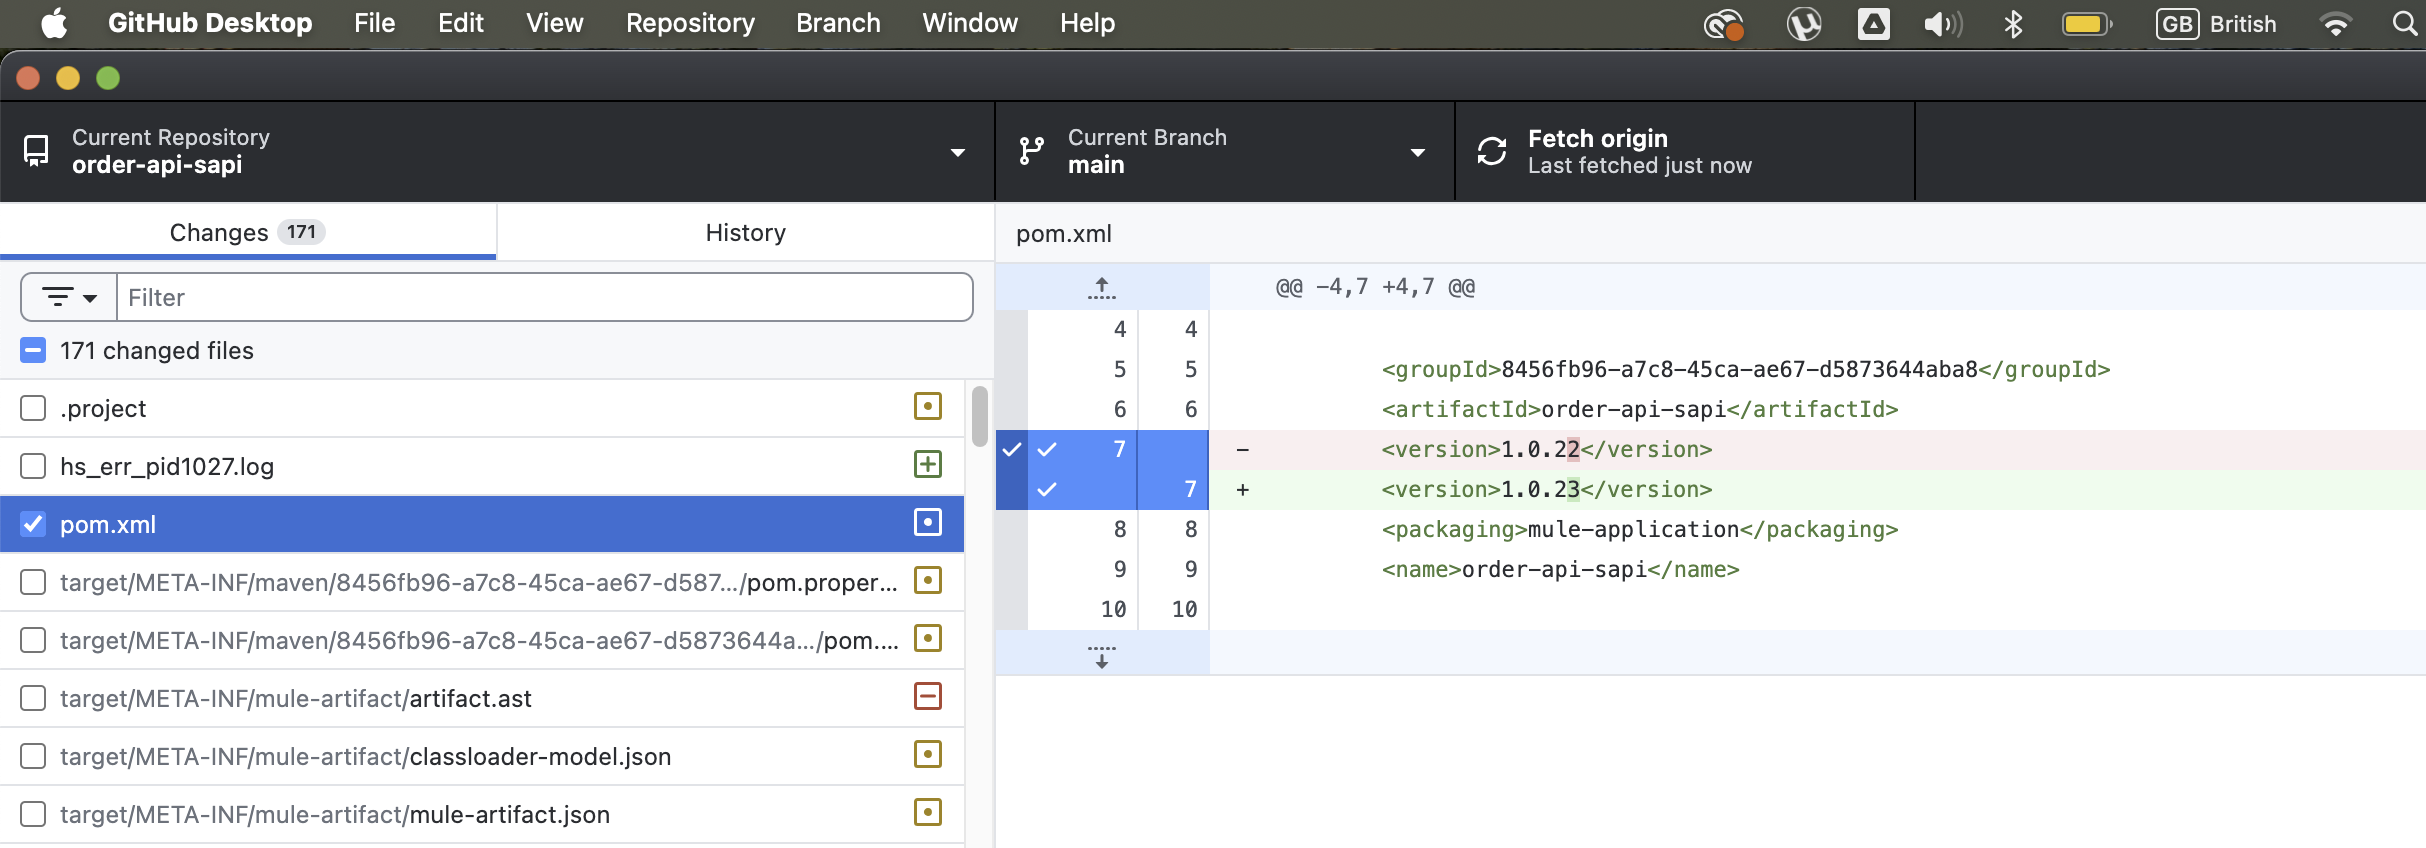
1. Make changes to the code locally, then commit and push them to the Git repository (as shown in the figure below).
2. Once the changes are pushed, the build starts automatically.
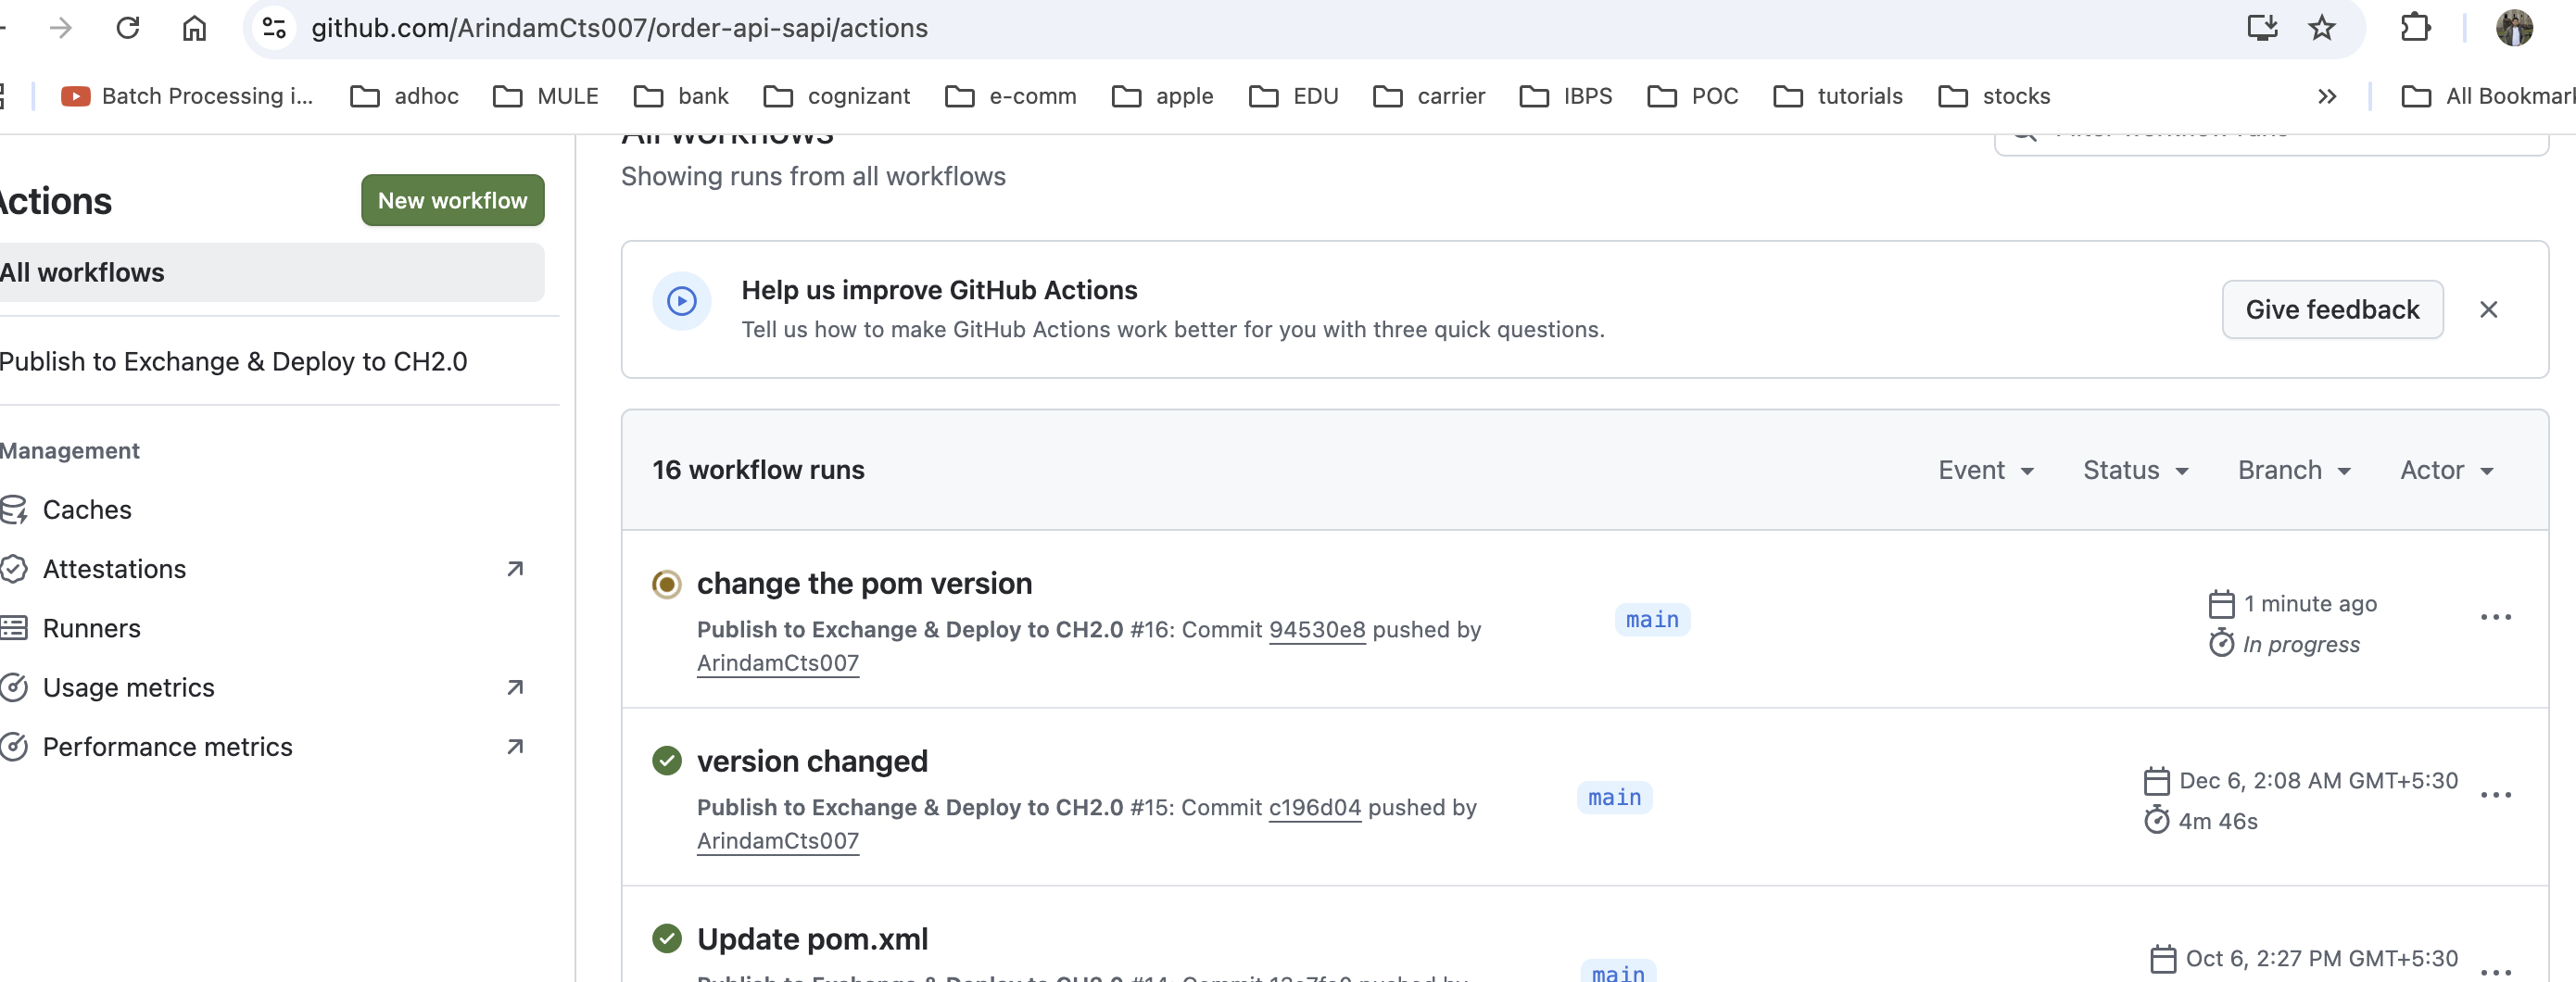
Note: There are two steps in the build:
- Publish to Exchange
- Deploy to Runtime Manager
3. The build completes successfully.
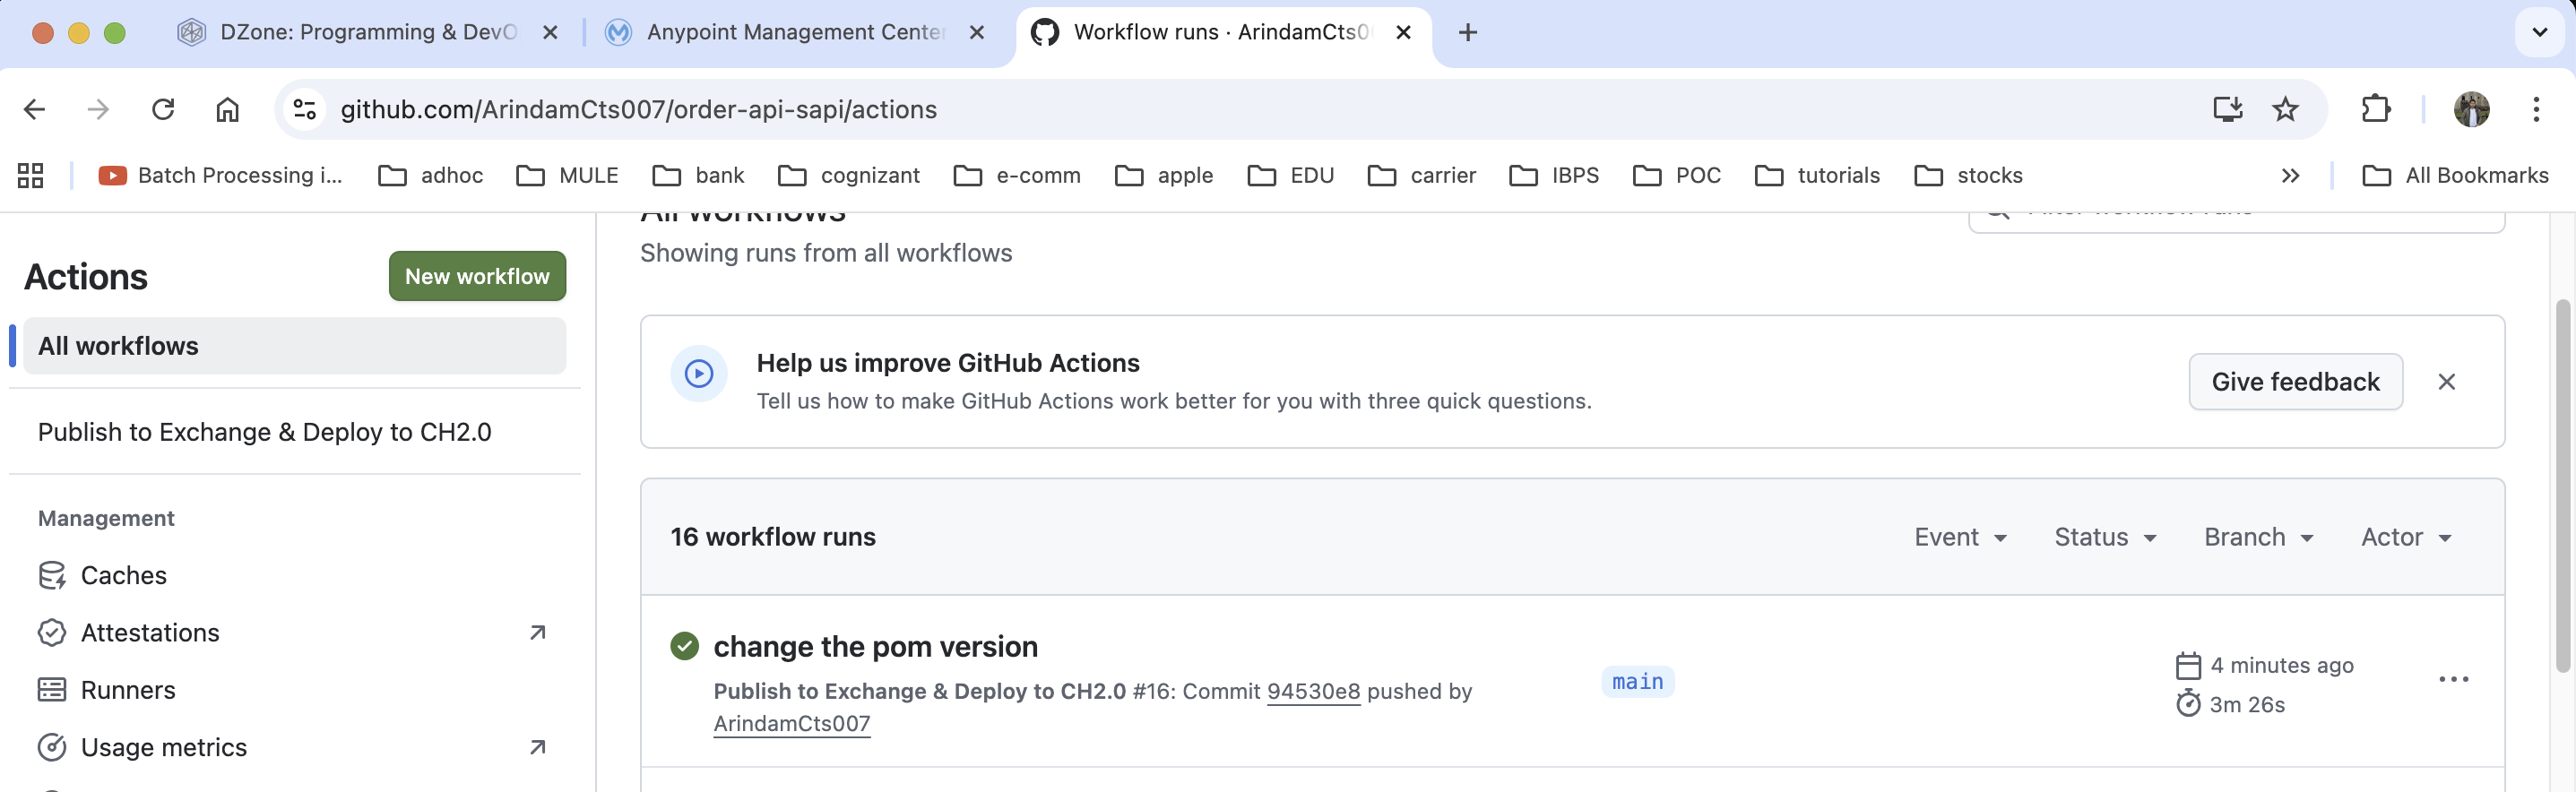
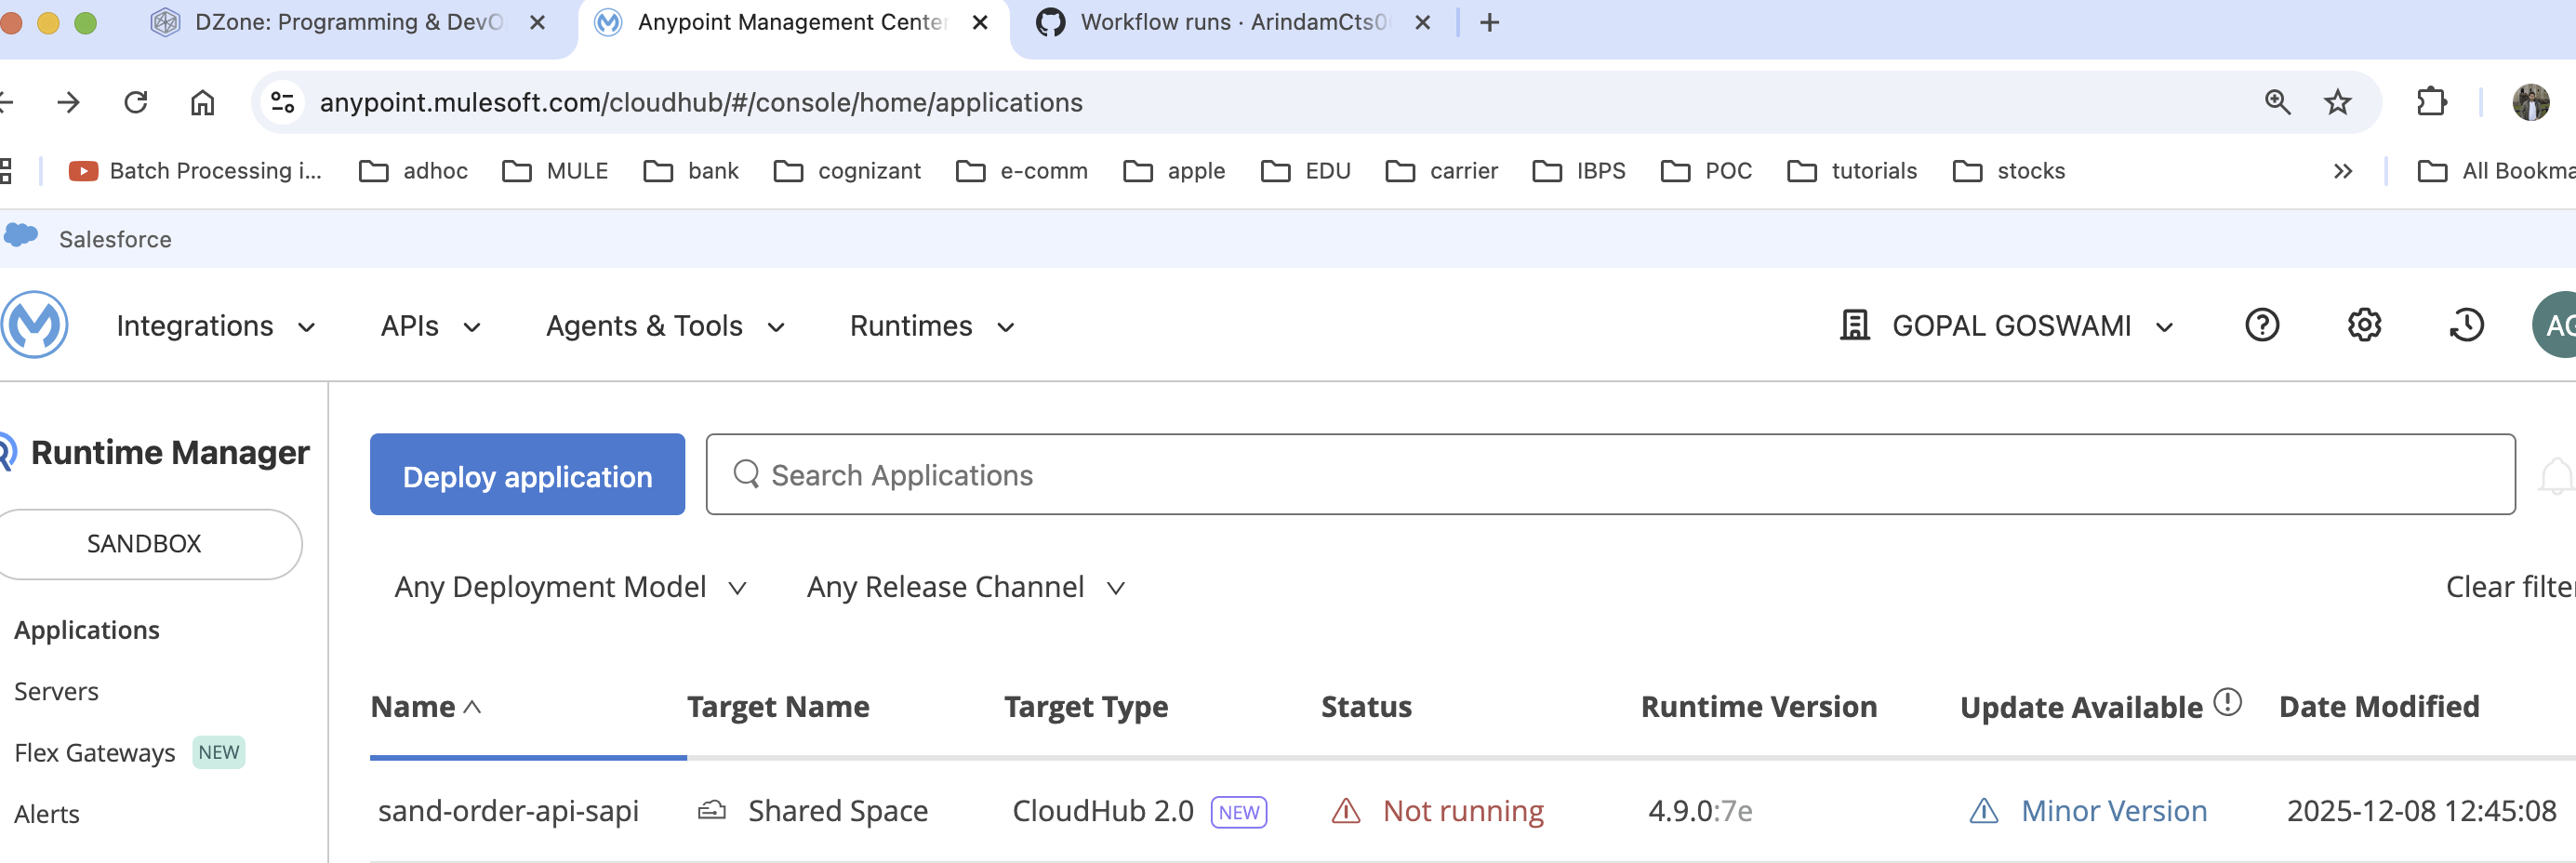
4. The same changes are reflected in the Anypoint Platform. Please verify the timestamp.
I hope you enjoyed this article. Please leave a comment if you have any suggestions or improvements.
Published at DZone with permission of ARINDAM GOSWAMI. See the original article here.
Opinions expressed by DZone contributors are their own.
Comments