Azure Function Build Release Pipeline in Azure DevOps CI/CD
Learn how to take your simple Azure Functions application and automate build and release processes.
Join the DZone community and get the full member experience.
Join For FreePlaying with Azure Functions is always a nice feeling, and it is very important to configure both build and release pipelines for all of your applications. Azure Functions are no different. In this article, we will see how we can create both build and release pipelines in Azure DevOps for our Azure Function application.
What Are Azure Functions?
Azure Functions are a serverless compute service provided by Microsoft Azure, offering the ability to run event-triggered functions without the need to manage infrastructure explicitly. These functions support multiple programming languages, such as C#, Java, Python, and JavaScript, and can be executed in response to various events, including HTTP requests, timer triggers, or messages in Azure Queue Storage.
They seamlessly integrate into (CI/CD) pipelines, automating code building, testing, and deployment in response to source code repository changes. This integration often leverages Azure DevOps Pipelines to execute tasks at various pipeline stages.
By incorporating Azure Functions into DevOps practices, organizations achieve a more streamlined and automated release process. This not only reduces manual intervention but also enhances overall efficiency in development and deployment workflows.
Related Tutorial: How to Run Ansible Playbook From Azure DevOps
Prerequisites
You should have an Azure Function application to configure the build and release pipeline. You can either create a new one in the Azure portal, or you can use any existing Azure functions available on the internet. For an example, you can see one here.
How to Setup Build Pipelines for Azure Functions
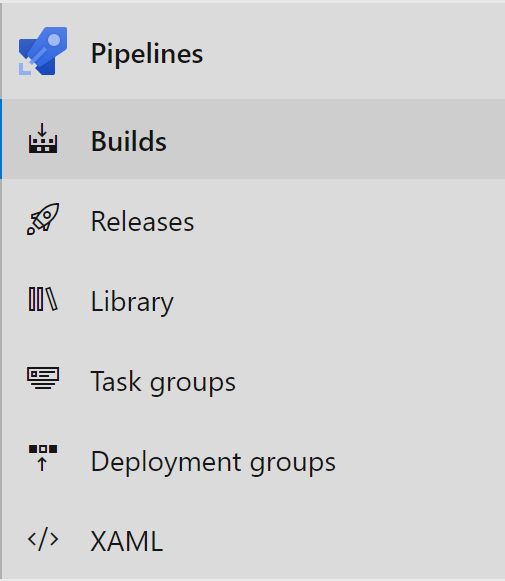
- Go to your Azure DevOps and click on Builds.
![Builds: dropdown menu]()
-
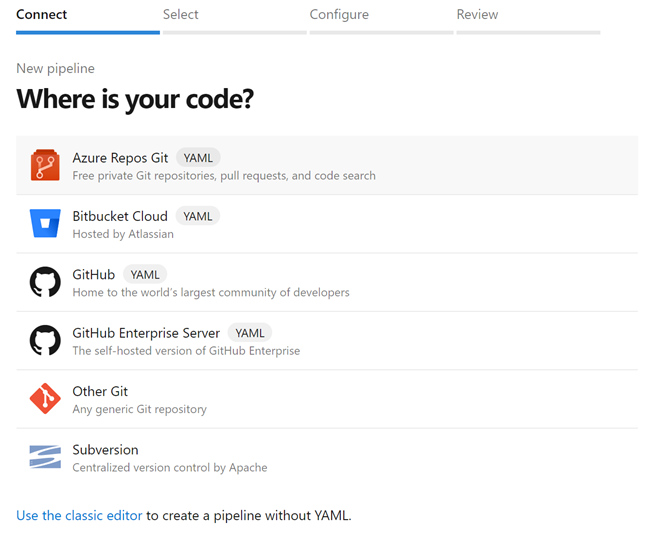
Now you should see an option to select where your code is available. You can choose accordingly.
![Where is your code?]()
As my project is in the Azure repository, I will select that. Please note that I will be using the classic editor to create the pipeline now so that I can show the steps with the screenshots. You should be able to see the final YAML file at the end of the configuration.
- Now you can select the template of your project. I will select ASP.NET Core as the template as my Azure Function is in .NET Core.
![Select ASP.NET Core as a template]()
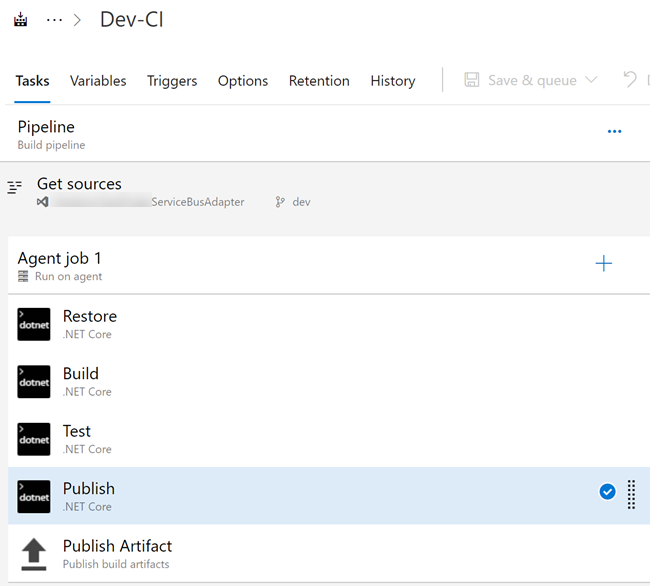
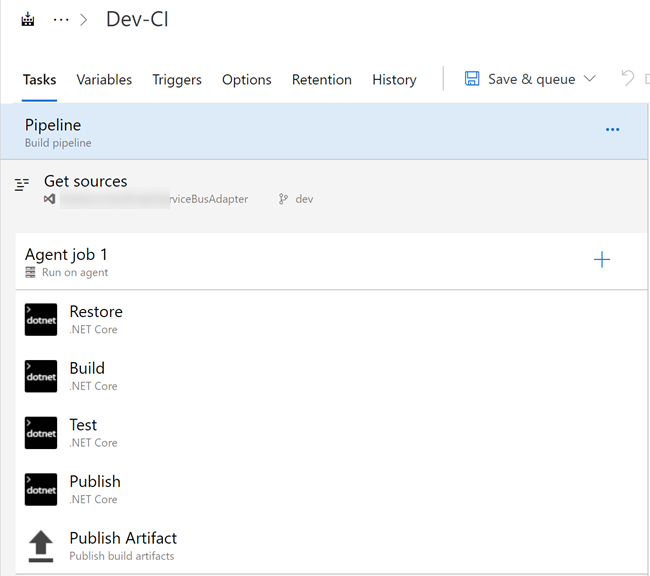
You can see that our pipeline is created with some default tasks and settings as follows:
![Pipeline default tasks and settings]()
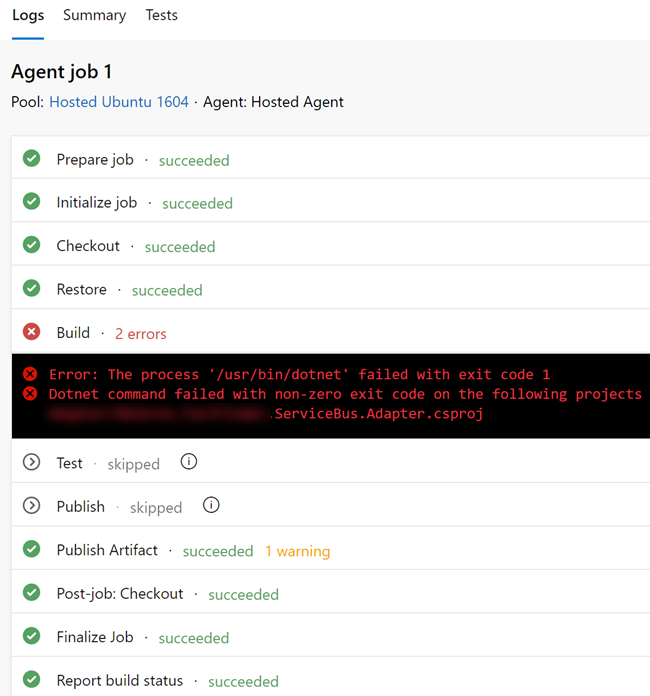
- As everything is already created for us, let us save and queue the build. Please make sure that your source code branch is valid and that you have verified the build. I forgot to do this, and I was getting the error below, as there was some issue with my code (there was an additional dot(.) in my code that I added by mistake).
![Error message]()
So I edited my code and build, and then initiated a manual build again. But even after that, I was getting an error that read:
No web project was found in the repository. Web projects are identified by presence of either a web.config file or wwwroot folder in the directory.![Error message returned]()
The reason for this is that by default, the "Publish Web Projects" is enabled in the Publish task. As ours is not a web project, and if this option is enabled, the Publish task will look for a web project in the repository and run the
publishcommand. If we have a web.config file or a wwwroot folder in the directory, it is being treated as a web project. - We have to disable this option as it is not applicable to our project, as it is not a web project. To do so, please go to your Publish task.
![Publish task]()
- Now you should deselect the "Publish Web Projects" option.
![Publish Web Projects]()
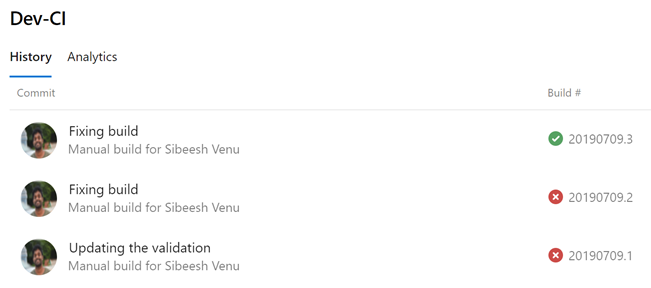
- Save your build configuration and queue a new build. If everything goes well, you should see that your build is successful.
![Dev-CI history screen]()
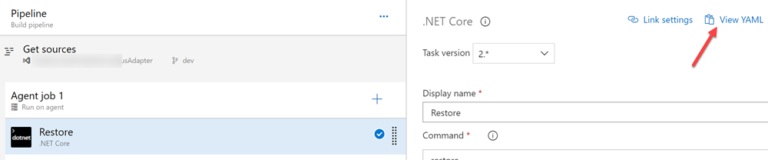
- If you wish to see the YAML code of a task, you should be able to see it if you click on "View YAML" link.
![Click on view YAML link]()
- Please do not forget to enable it if you need to trigger the build automatically when there is a check-in that happens in the repository.
![Click Enable continuous integration]()


How to Setup Release Pipelines for Azure Functions
Now that we have got our build successful, let us go ahead and create a release pipeline for our Azure Function. But before we do that, we need to create a service connection in our Azure DevOps project. To create one:
- Go to your Azure DevOps Project Settings -> Pipelines -> Service Connections.
Once it is created, you should see it under your service connections slab.![Project Settings -> Pipelines -> Service Connections]()
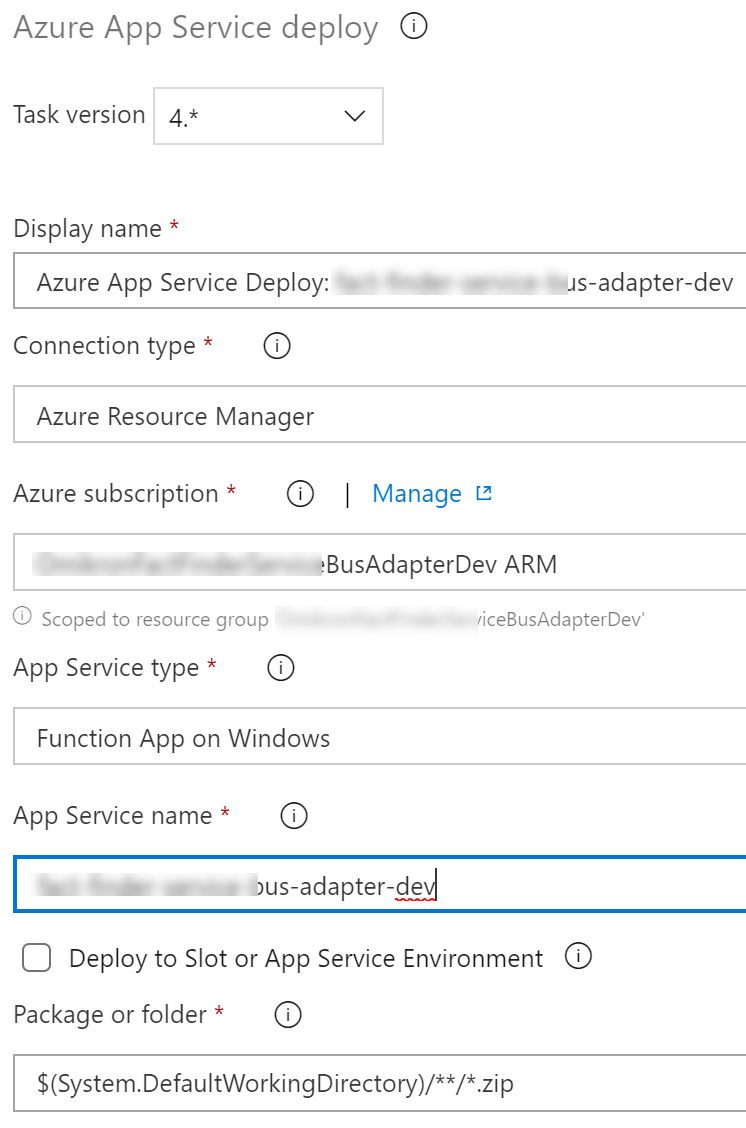
- Now go to the Pipelines section of your Azure DevOps project. Click on Releases, and then click on New Pipeline. Select Azure App Service deploymentas the template.
![Azure App Service deployment]()
You should see this task in the Task section of your pipeline. If you are unable to see the service connection that you had created on the right panel, just remove the task, add the same again, and then check. Your task definition should look like this.
![Task definition]()
- Once you are done, save your pipeline.
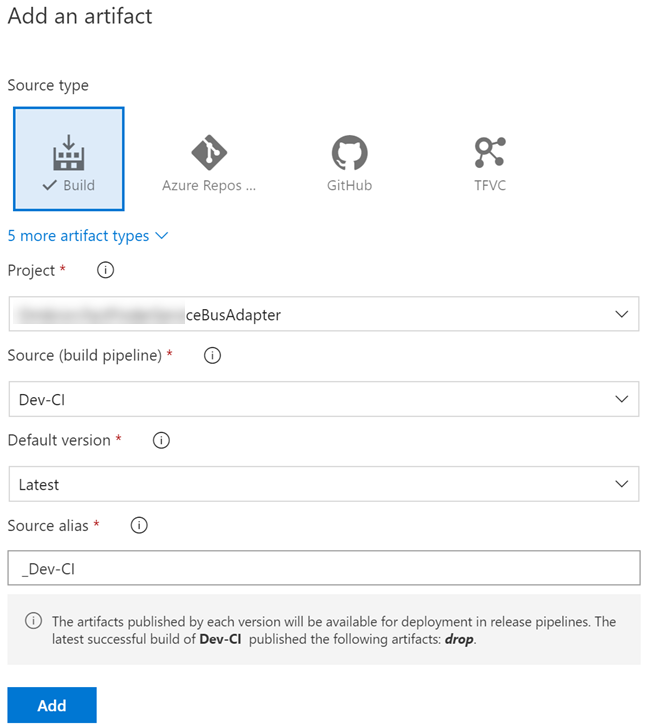
- Before you create a release, make sure that you have assigned the right build artifacts. Click on Add an artifact.
Now you should set the artifact properties.![Click on Add an artifact]()
![Set the artifact properties]()
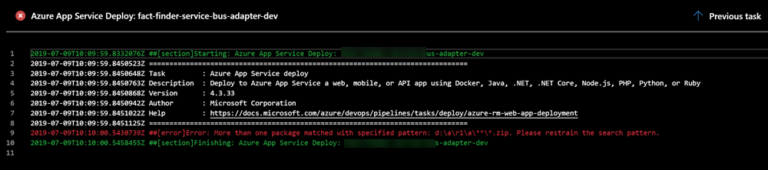
- Click on Add and Save your pipeline and then queue a release by clicking on the button Create release. You may get the following error:
Error: More than one package matched with specified pattern: d:\a\r1\a\**\*.zip. Please restrain the search pattern.![Error message following create release]()
The reason behind this is that your solution has many projects in it and each project will have its own zip folder in the artifacts. To fix this, we should specify our Azure Function Project in the Package section of our pipeline task.
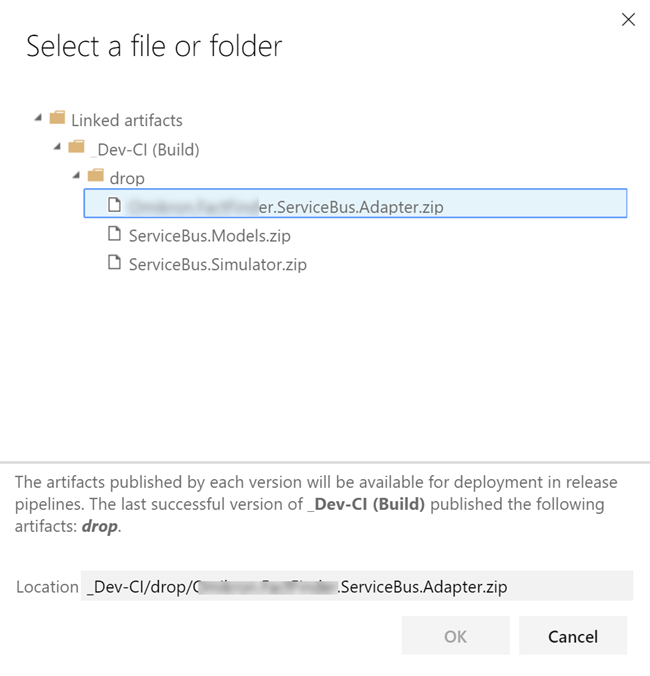
- Click on the Azure App Service deploy task, go to the Package or Folder section, and then click on the three dots.
![Package or folder section]()
Now you should have an option to select the right zip file.
![Option to select the right zip file]()
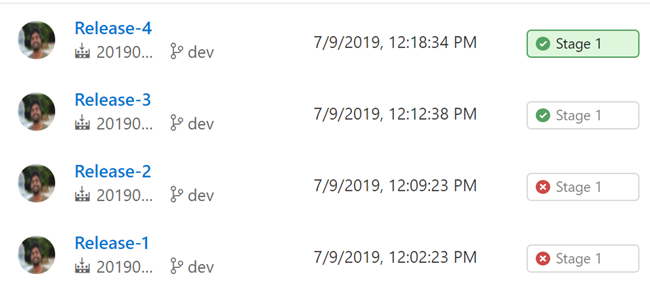
- Create the release again and you should see that the release is successful. You can also see my StackOverflow answer here.
![Release successful]()


Enabling Continuous Deployment
If you wish, you can always enable continuous delivery or deployment. This will trigger whenever there is a build. To set up this, please go to your Release pipeline and click on the trigger.

Now you should see an option to enable the Continuous Deployment.

Now all you have to do is change something in the code, and not worry about the build and releases. How cool is that?
Conclusion
In this article, we have learned:
- How to configure build pipeline configuration for Azure Function in Azure DevOps
- How to configure release pipeline configuration for Azure Function in Azure DevOps
- About fixing errors in pipeline configurations in Azure DevOps
- How to enable Continuous Delivery/Deployment in Azure DevOps
- How to enable Continuous Integration in Azure DevOps
Please let me know what else you learned from this article.
Your Turn: What Do You Think?
Thanks a lot for reading. Did I miss anything that you may think is needed in this article? Did you find this post useful? Kindly share your feedback.
Opinions expressed by DZone contributors are their own.
Comments