Deploying MuleSoft Using Azure DevOps
This article introduces Azure DevOps and provides a step-by-step guide on how to deploy MuleSoft with Azure DevOps.
Join the DZone community and get the full member experience.
Join For FreeContinuous Integration and Continuous Delivery (CI/CD) have become common practices in developing high-quality applications because they promote scaling and shorten the time between coding and deployment.
Mulesoft is a popular integration platform that streamlines data integration across disparate systems. The predefined APIs have support for all types of applications where data can be unlocked between legacy systems, applications, and cloud devices. This highly networked MuleSoft Anypoint platform enables smarter and faster decision-making abilities in an organization. Azure DevOps, on the other hand, provides version control, reporting, requirements management, project management, automated builds, lab management, testing, and release management capabilities. In short, it covers the entire software development lifecycle and enables organizations to automate the software delivery process. The variety of services leverages the collaboration and development of any project.
By combining Azure DevOps with Mulesoft, organizations can leverage the CI/CD pipeline by streamlining the process of development and delivery. This not only increases the efficiency of the process but also considerably reduces risk due to error.
How to Deploy MuleSoft With Azure DevOps
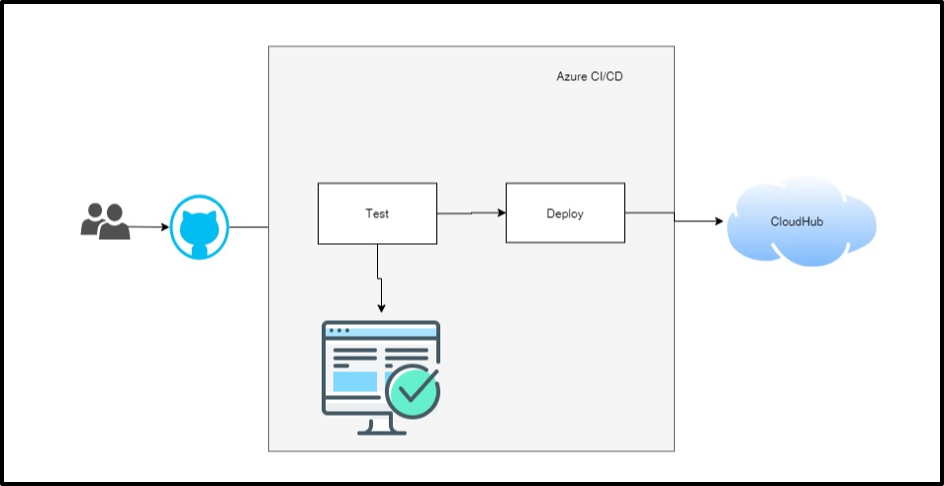
Here we are going to see how to implement CI/CD pipeline for MuleSoft application using Azure DevOps.
Step 1: Mule-Maven Plugin Configuration
Make sure you have added the Mule-Maven plugin in your pom.xml.
<plugin>
<groupId>org.mule.tools.maven</groupId>
<artifactId>mule-maven-plugin</artifactId>
<version>3.3.1</version>
<extensions>true</extensions>
<configuration>
<cloudHubDeployment>
<uri>https://anypoint.mulesoft.com</uri>
<muleVersion>${app.runtime}</muleVersion>
<username>${anypoint.username}</username>
<password>${anypoint.password}</password>
<businessGroup>${businessGroup}</businessGroup>
<workers>${workers}</workers>
<workerType>${workerType}</workerType>
<region>us-west-1</region>
<environment>${environment}</environment>
<applicationName>${applicationName}</applicationName>
<properties>
<mule.env>${mule.env}</mule.env>
<encrypt.key>${encrypt.key}</encrypt.key> <anypoint.platform.client_id>${anypoint.platform.client_id} </anypoint.platform.client_id> <anypoint.platform.client_secret>${anypoint.platform.client_secret}</anypoint.platform.client_secret>
<api.id>${ilg.api.version}</api.id>
<anypoint.platform.config.analytics.agent.enabled>true</anypoint.platform.config.analytics.agent.enabled>
</properties>
</cloudHubDeployment>
<executions>
<execution>
<id>deploy</id>
<goals>
<goal>deploy</goal>
</goals>
<configuration>
<classifier>mule-application</classifier>
</configuration>
</execution>
</executions>
<classifier>mule-application</classifier>
</configuration>
</plugin>
The <cloudHubDeployment> tag of the Mule Maven plugin defines the attributes of your deployable. So, let's see what each of these properties tells us about the deployment onto CloudHub.
- uri: Mulesoft Anypoint platform URL
- muleVersion: Mulesoft version to be used for deployment(e.g. 4.2.3).
- username: Username for Anypoint platform
- password: Password for Anypoint platform
- businessGroup: Business group of the Anypoint platform under which you want to deploy your application
- workers: The number of workers to be assigned to the application. This is used for horizontal scaling
- workerType: The number of vCores to be assigned to the application. This is used for vertical scaling
- region: Region to be used while deploying the application
- environment: Environment onto which application needs to be deployed
- applicationName: Application name to be deployed
- properties: Provide here all the properties which are required by application at deployment time i.e. encryption key
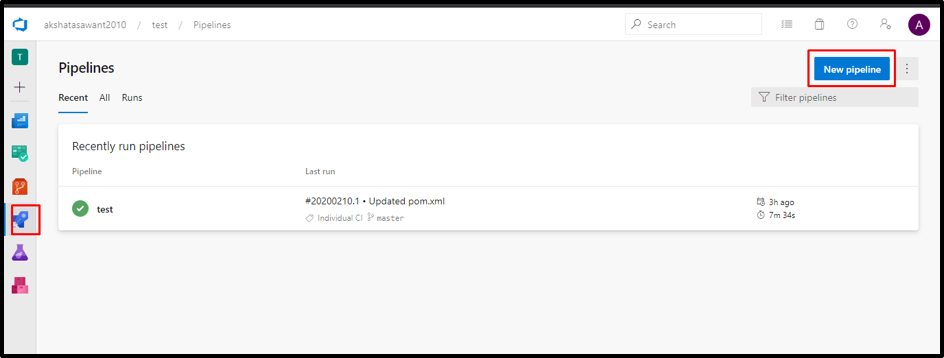
Step 2: Create a New Pipeline
Log in to your Azure DevOps account. There are two ways to create a pipeline. First, you can go to the Pipelines tab and click a new pipeline.
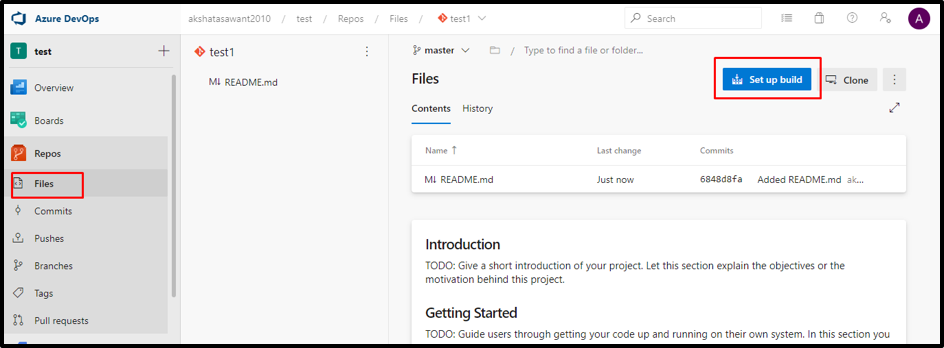
Or, you can go to your repositories where you have your files and select the Build Pipeline option.
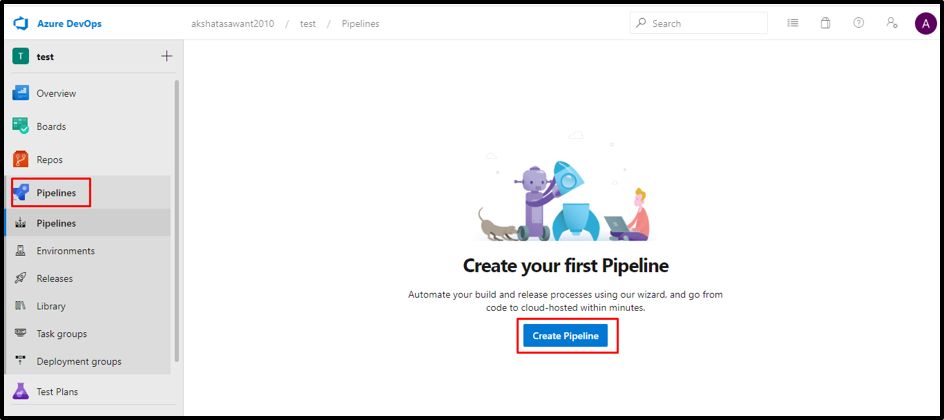
So, let's create it using the Create pipeline option. Go to Pipeline and Create Pipeline.
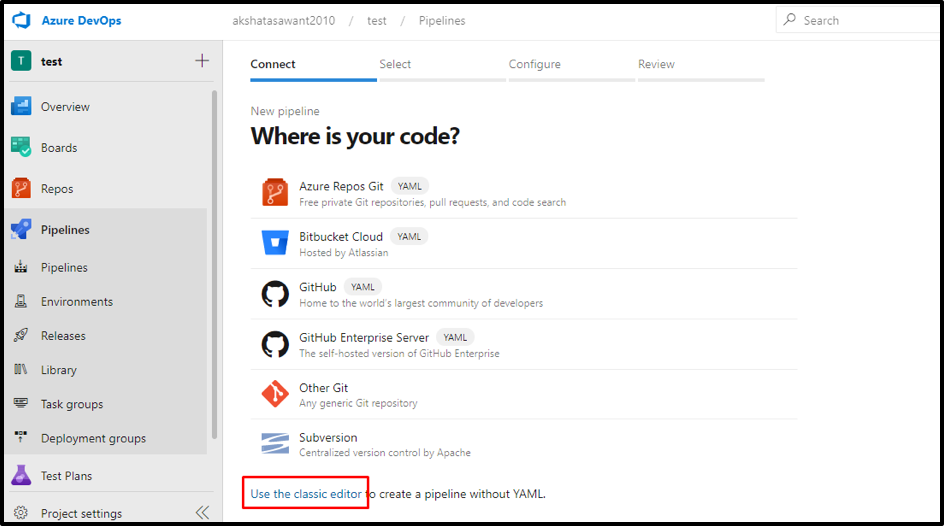
Step 3: Select Classic Editor
Now, select Classic Editor as it gives better customization.
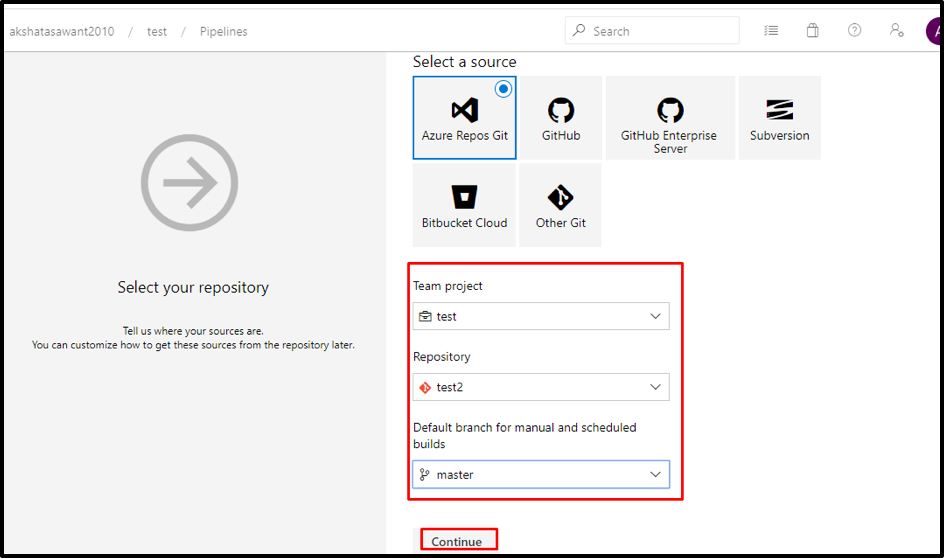
Step 4: Select Source
You can select your source where your code is stored. In my case, it’s in Azure Repos. Further, select your Team Project, Repository and branch. Then, click continue.
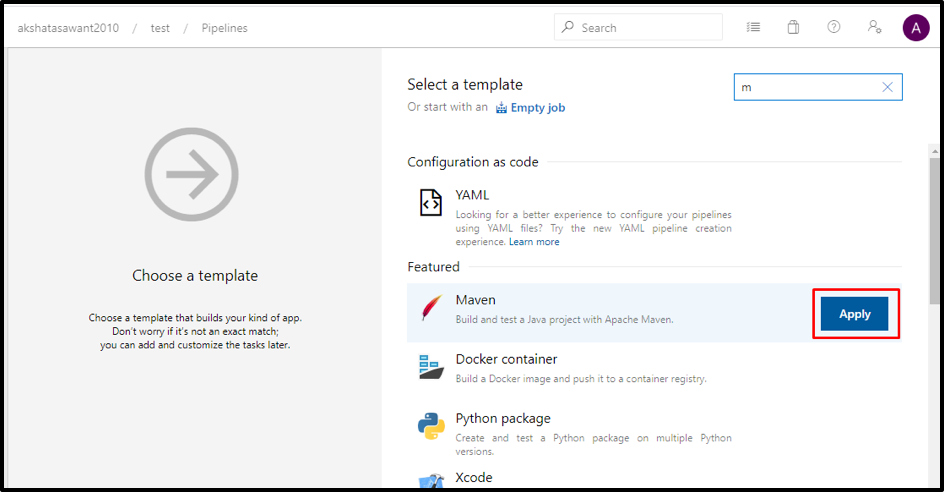
Step 5: Select Maven Template
Now, Select the Maven template.
This is the default screen you’ll see.
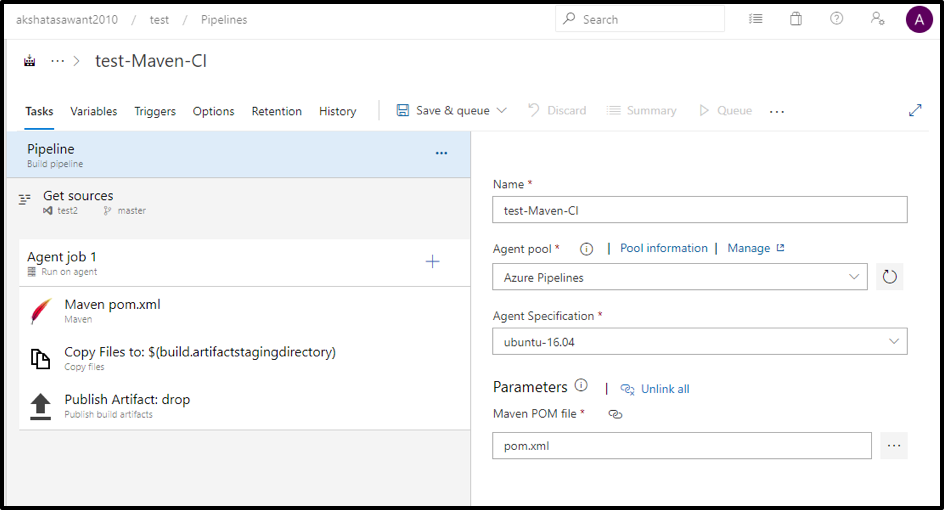
I’ll be removing all the three steps created under the Agent job and customize it according to my requirements.

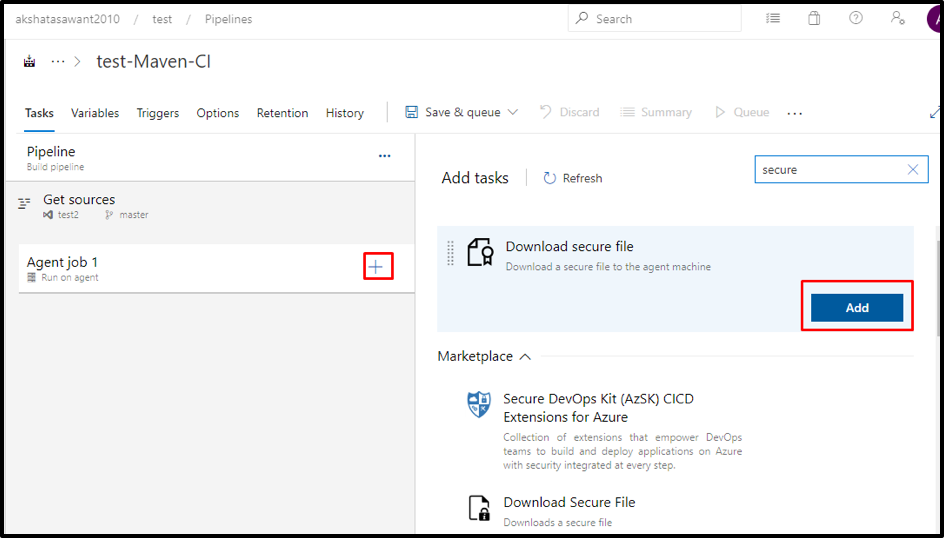
Step 6: Download Secure File
Firstly, I am adding “Download secure file.” I’ll be using it to download settings.xml.
But to download and use secure file in our pipeline, we need to store our file somewhere. In order to add settings.xml, go to Pipelines → Library → Secure files and add (+) Secure files. Then navigate to settings.xml:

Make sure your settings.xml has the below server and profile added under the respective tags.
xxxxxxxxxx
<server>
<id>Exchange2</id>
<username>guest-mule</username>
<password>Mulesoft1</password>
</server>
<profile>
<id>Mule</id>
<activation>
<activeByDefault>true</activeByDefault>
</activation>
<repositories>
<repository>
<id>Exchange2</id>
<name>Exchange2</name>
<url>https://repository.mulesoft.org/nexus-ee/content/repositories/releases-ee/</url>
<layout>default</layout>
<releases>
<enabled>true</enabled>
</releases>
<snapshots>
<enabled>true</enabled>
</snapshots>
</repository>
</repositories>
</profile>
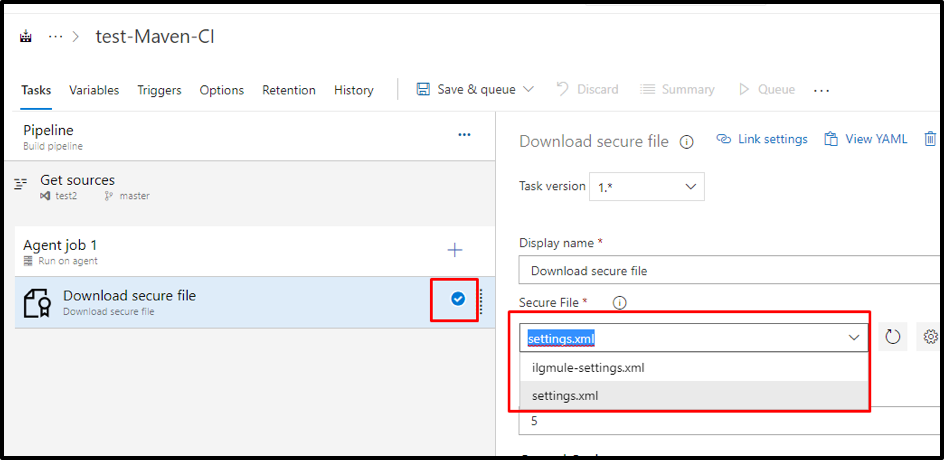
Now the settings that we created need to be selected, as shown below.
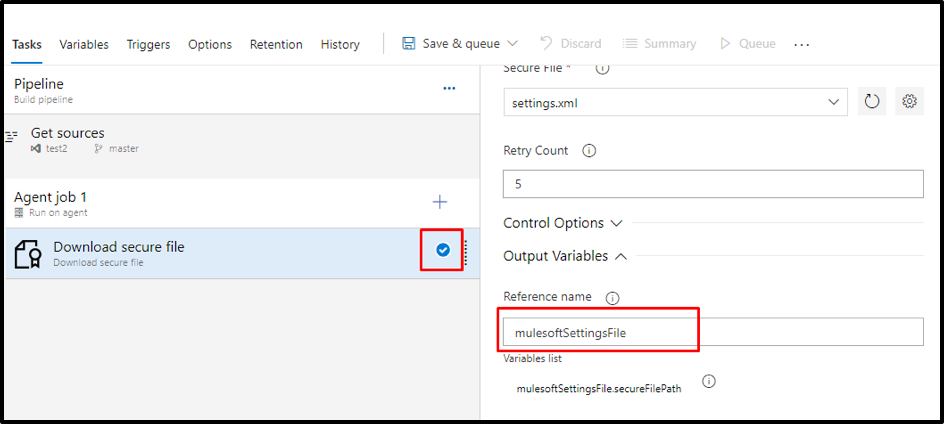
Step 7: Create Reference Name
Now let’s create a reference name “mulesoftSettingsFile” for this settings file, which we will use later in maven goals.
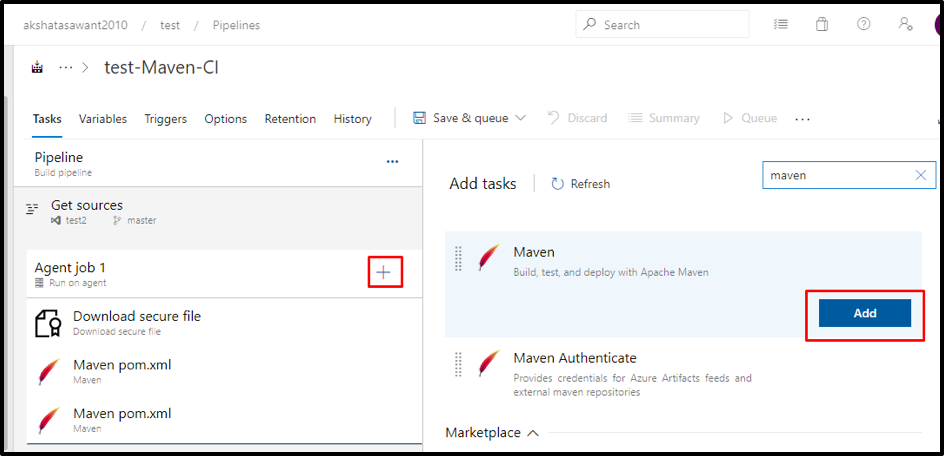
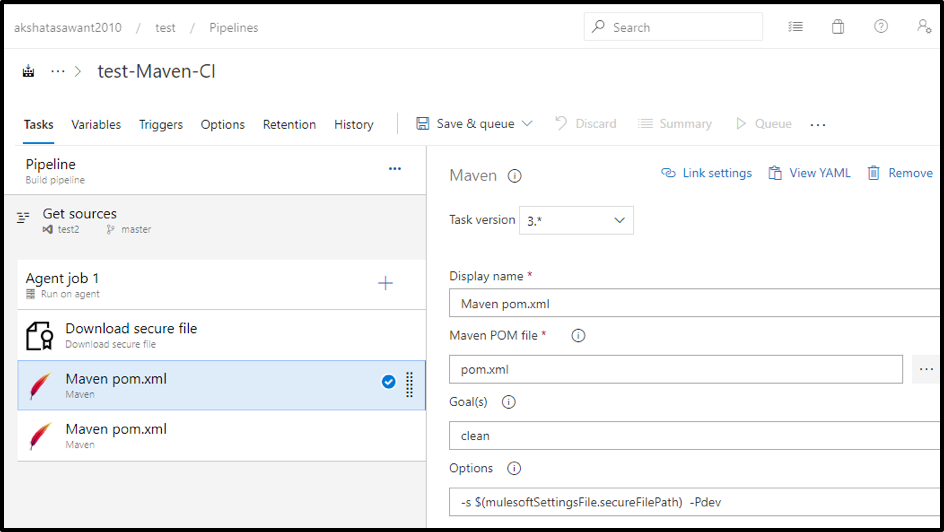
Step 8: Add Maven
Let’s add the next step in the Agent job, which will be Maven.
In Options, we have given the secure settings file a reference name, which we created in the previous step.
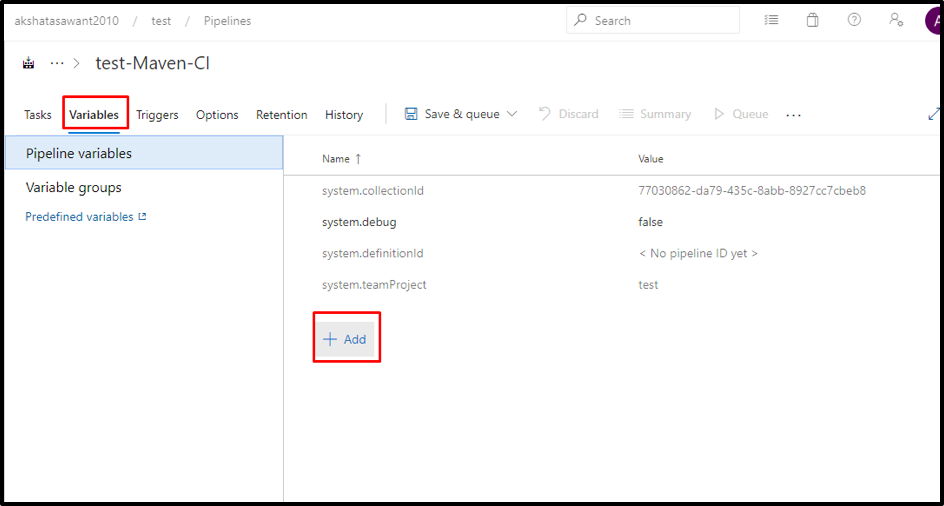
Step 9: Add Variables
We require "username" and "password" for the Anypoint platform to be provided at build time, so lets create two variables for them and pass it into the Maven setup for deployment.
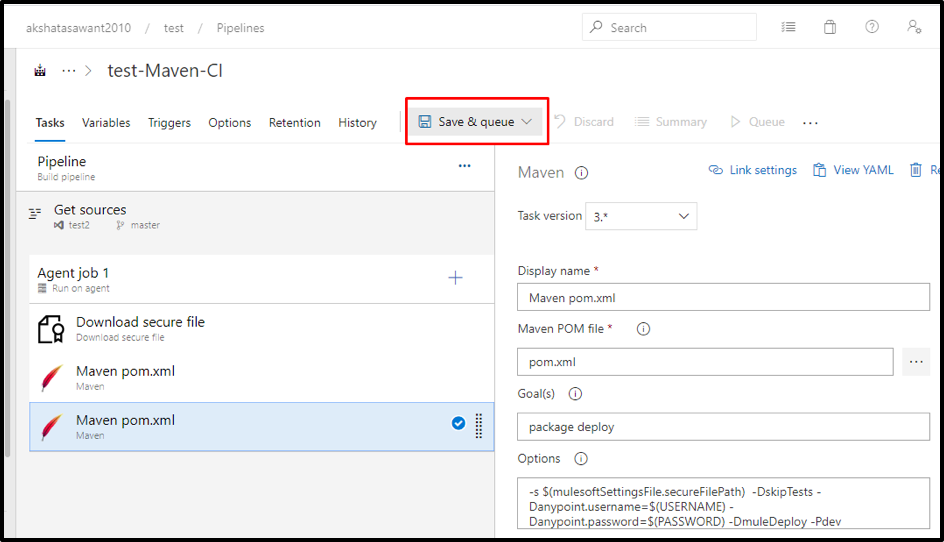
Step 10: Save and Deploy
Now let’s add the final Step, which will be performed by our Agent.

Now let's run the pipeline. We can either save the pipeline using "Save" or save it and run using the "Save and run" option.
Once the pipeline is executed, you will see the below screen.
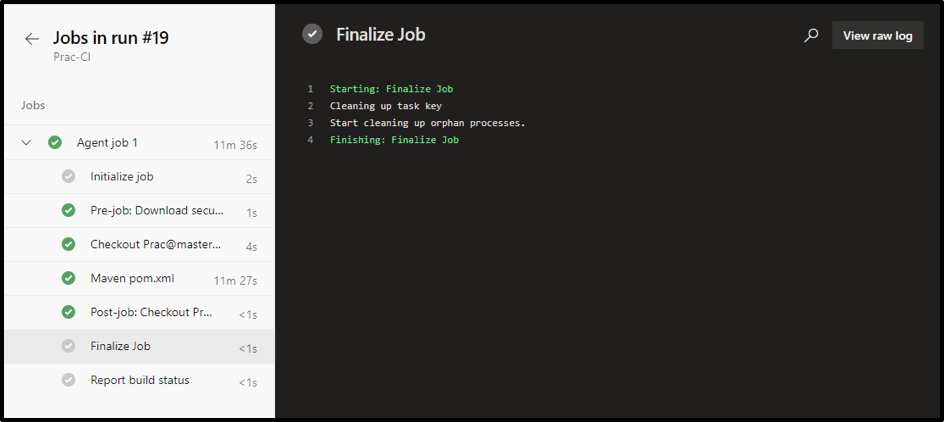
And you will be able to see the application deployed onto CloudHub. We can add more steps into the CI/CD pipeline like code analysis, testing, and report generation. Thus, we have successfully created a CI/CD pipeline using Azure DevOps and deployed an application to CloudHub.
Opinions expressed by DZone contributors are their own.
Comments