Build Pipeline Triggers Using Azure DevOps (CI)
This article demonstrates how to trigger a build pipeline for scheduled continuous integration and pull requests using the Azure DevOps build pipeline trigger.
Join the DZone community and get the full member experience.
Join For FreeAzure DevOps is a Microsoft-provided "one-stop shop" for software development. It allows for developers, functional users, and any other stakeholders to collaborate efficiently and effectively so that any and all requirements for a software project can be satisfied. One of Azure DevOps' most popular components is its version control functionality, which allows developers to work on large-scale software projects without conflicting with one another. This functionality also works seamlessly with the Git version control solution. Azure DevOps, in spite of being part of the Microsoft ecosystem, supports any language or coding environment.
But another feature that Azure DevOps provides is Pipelines. Azure Pipelines has proven to be an invaluable software testing tool, and while manually running an individual pipeline after a pull request or a commit helps to move testing along, you might find it more useful to automatically run a pipeline, based on the events you choose. Azure DevOps allows you to create and deploy pipeline triggers to achieve this end.
A pipeline trigger, as the name suggests, is a mechanism provided by Azure DevOps that allows for an Azure Pipeline to run based on certain events happening. They function similarly to database triggers, in that the database will take a specific pre-defined action based on data being inserted or modified. Pipeline triggers are the building blocks of continuous integration (CI), which is "the process of automatically building and testing code every time a team member commits code changes to version control."
This article demonstrates how to trigger a build pipeline for scheduled CI and pull requests using the Azure DevOps build pipeline trigger.
Enable CI in Your Azure DevOps Project
Step 1
Click on "Pipelines" in the left-hand menu: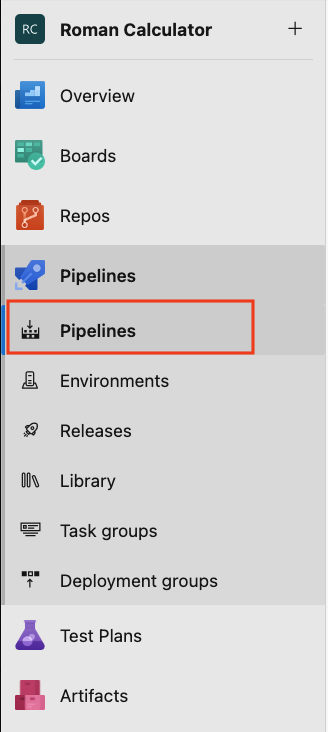
Step 2
On the "Pipelines" screen, click on the "More Options" button on the right of your specific pipeline, then click "Edit":
Step 3
On the next screen, the one which shows your YAML code, click on the "More Actions" button near the upper right-hand corner of the screen, then click "Triggers":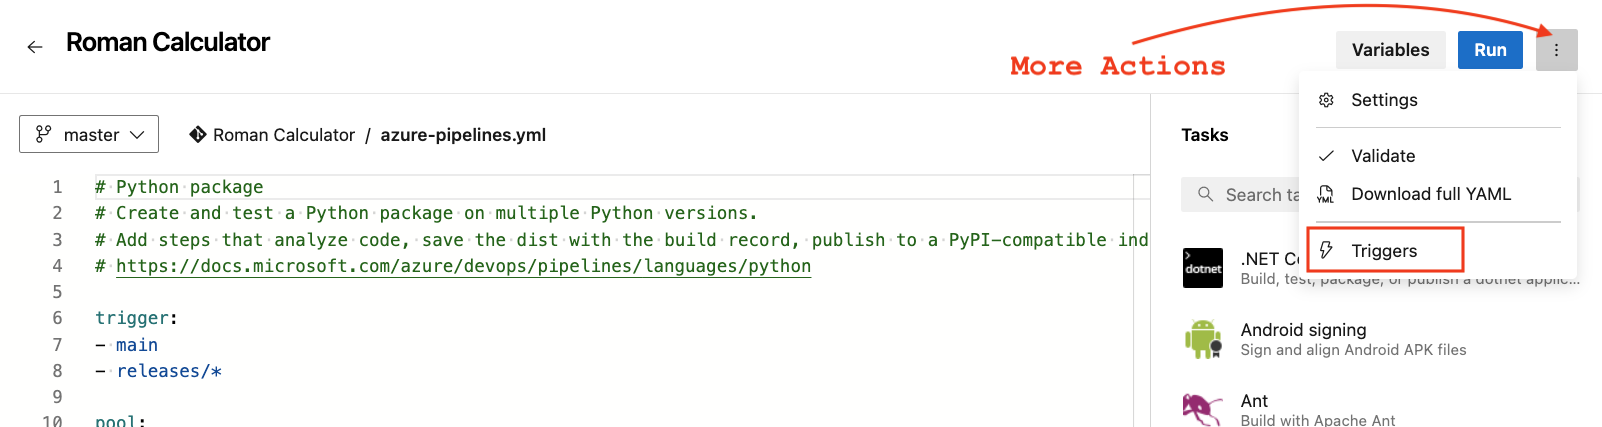
Step 4
The build pipeline triggers tab specifies the events that trigger builds and specifies the same build pipeline for CI and scheduled builds.
Builds are configured by default with a CI trigger on all branches. Control which branch gets triggered with sample syntax.
Step 5
Include the branches you want to trigger and then exclude the branches you don't want to trigger.
trigger:
branches:
   include:
   - master
   exclude:
   - develop/*
Step 6
In addition to the "define certain branches" in the branches lists, configure triggers based on tags.
trigger:
  branches:
    include:
     refs/tags/{test}
Step 7
Disable the CI Builds entirely by specifying trigger: none.
By using the Scheduled trigger, the pipeline is triggered every day or on random days.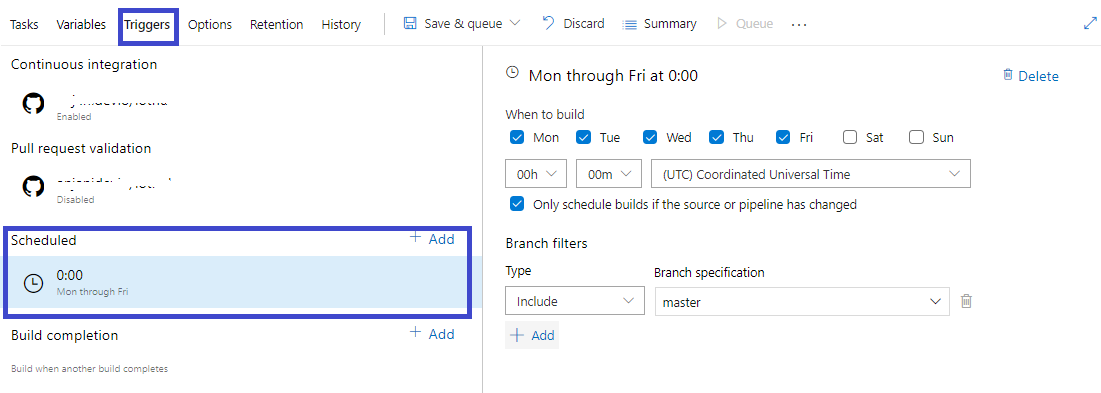
Further Reading: Implement CI/CD For Multibranch Pipelines.
Build Completion Triggers
When a vast number of products have a component that depends on another, these components are often independently built.
When an upstream service changes (e.g., packages), the downstream service has to be rebuilt and revalidated. Usually, people manage these dependencies manually.
With Azure DevOps, the CI build triggers a build upon the successful completion of another build. Artifacts built by an upstream can be downloaded and used in the later build, and the build will generate variables such as Build.TriggeredBy.BuildId and Build.TriggeredBy.DefinitionId.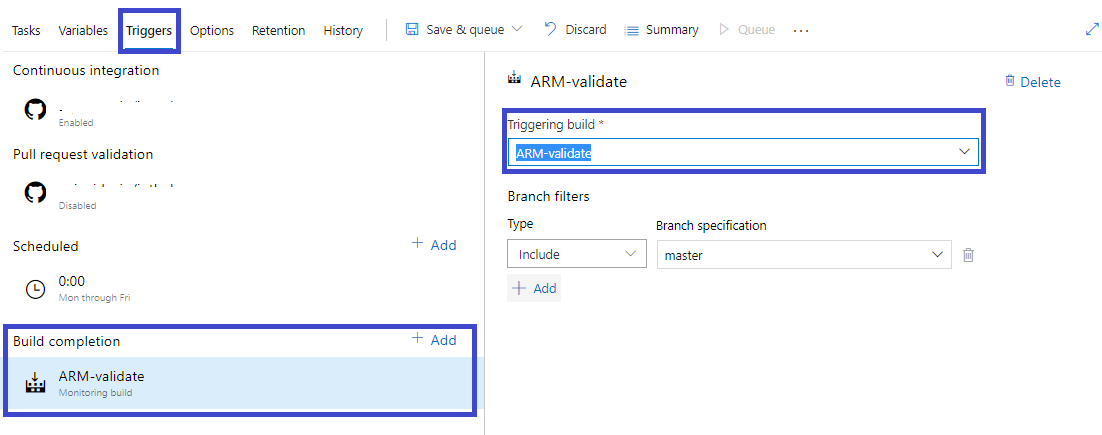
Creating a Pull Request
Pull requests are used to review and merge code changes in a Git project. A pull request is when teams review code and give feedback on changes before they merge it into the master branch. Reviewers can go through the proposed code changes and comments and approve or reject the code.
Step 1
Enable pull request validation under triggers, and specify the branch to merge the code.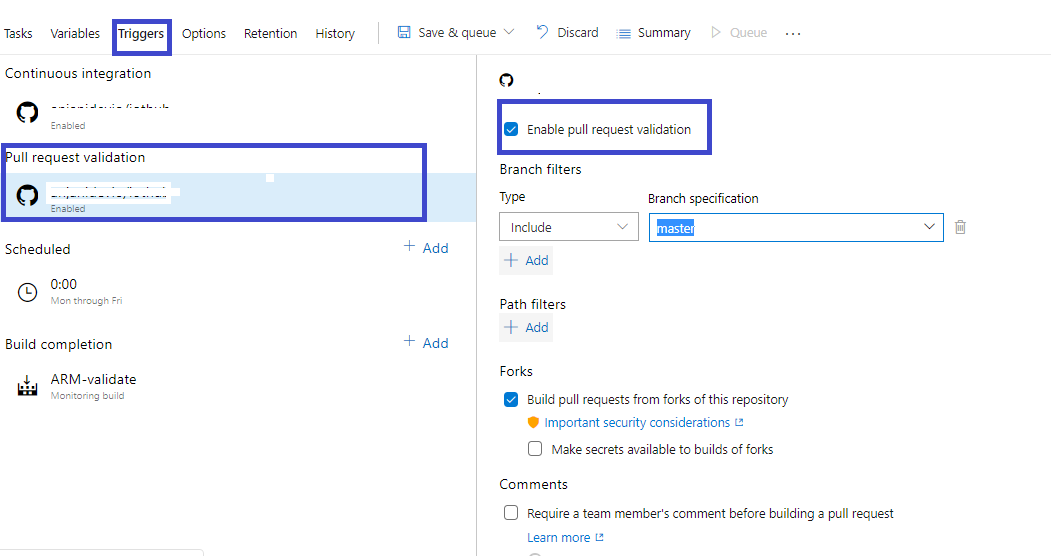
Step 2
Commit to a file at the root repository on a topic branch (developing).
Step 3
After committing code into the topic branch, create a pull request.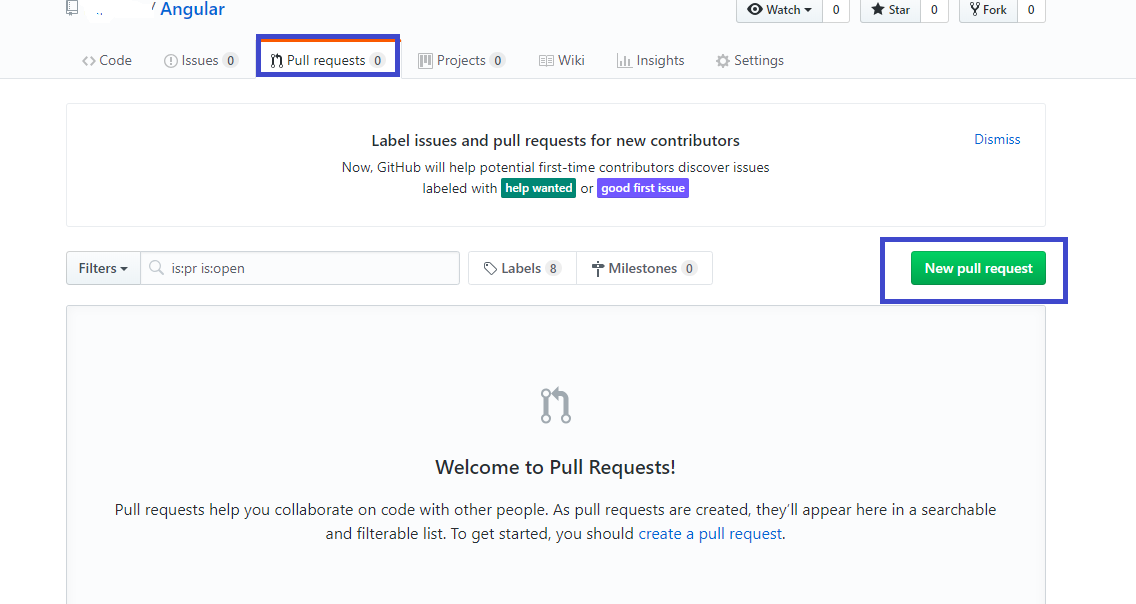
Step 4
Create a pull request, choose "Master" branch as the base, and compare it as a topic branch. This will compare to the master branch.
Step 5
Mention the title and comments about the pull request, then create a pull request.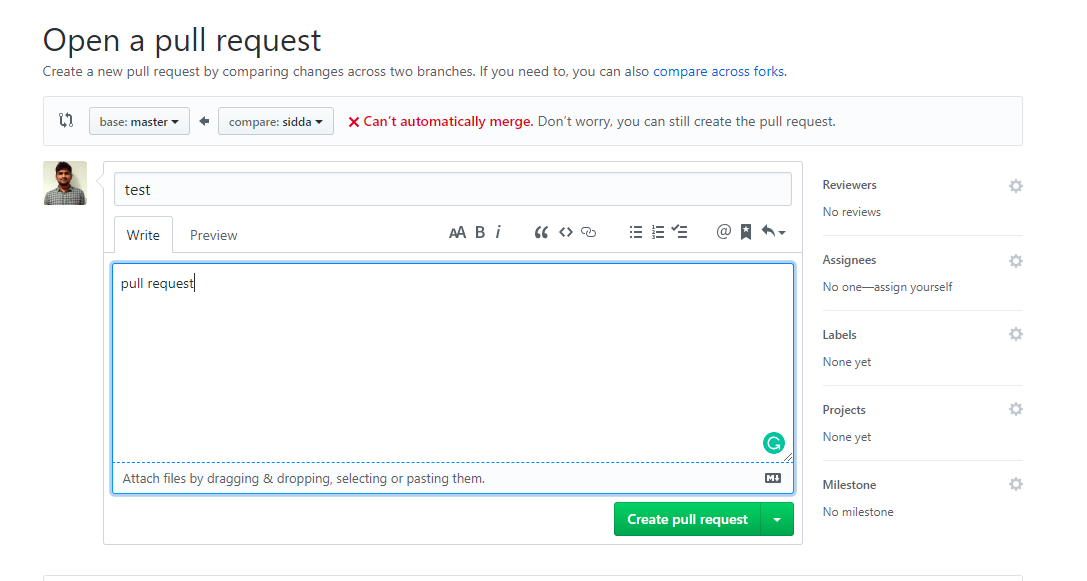
Once the pull request is created, the CI build will automatically start.
Step 6
Go through the details, and it will navigate to the Azure DevOps portal. The build will start and run automatically.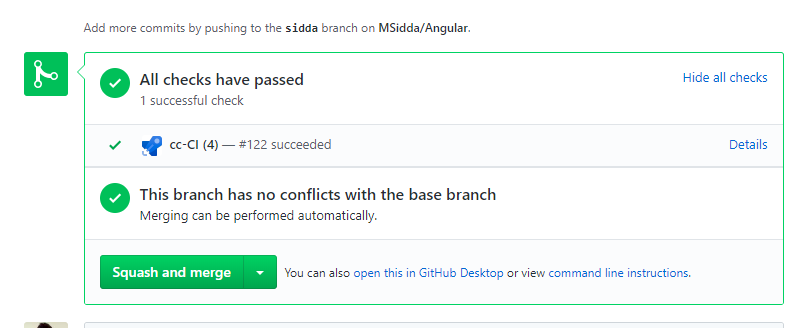
You can view the build with the build ID and show a Pull Request build.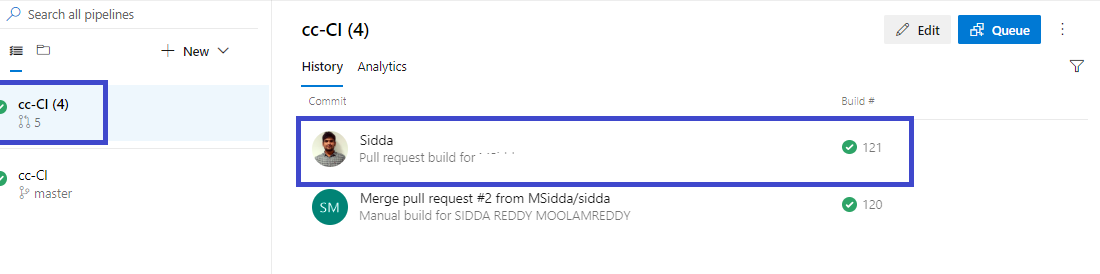
Step 7
Squash merging keeps the default branch histories clean. When a pull request is completed, merge the topic branch into the default branch (usually Master). This merge adds the commits of the topic branch to the main branch and creates a merge commit to make any conflicts between the default and develop branches.
Step 8
When squash merging is done, it is a better practice to delete the source branch.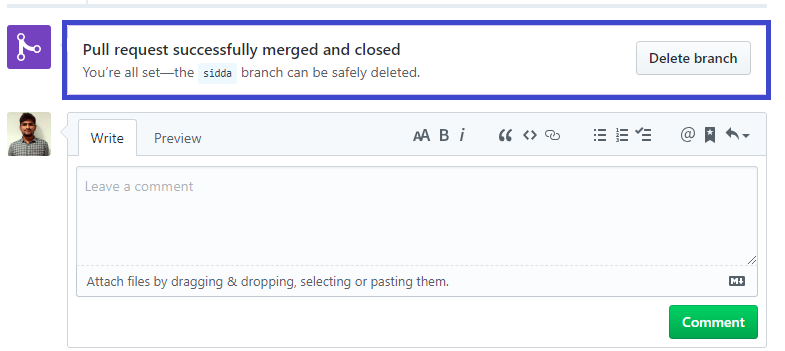
The build is triggered through Continuous Integration (CI). DZone’s previously covered release pipelines using Azure DevOps.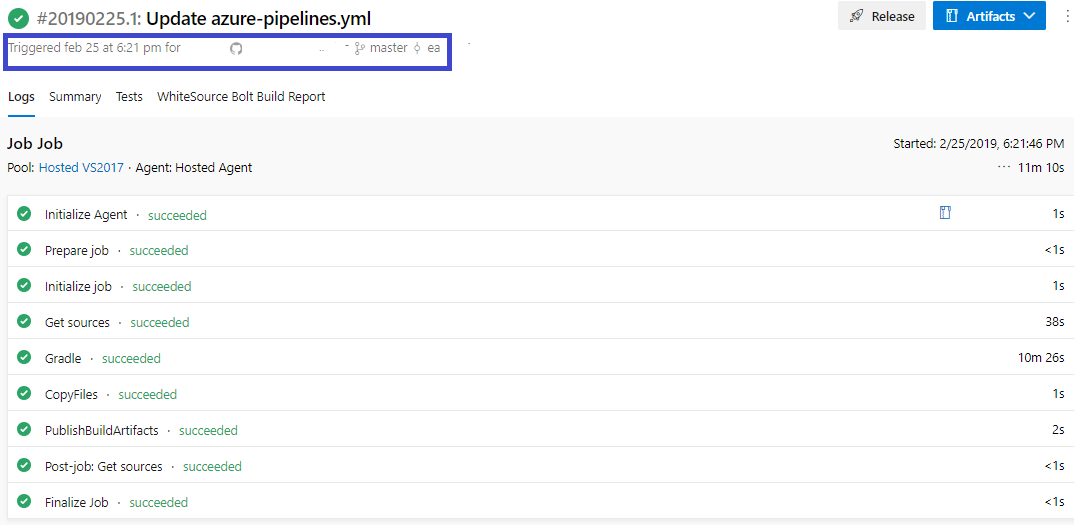
The azure-pipelines.yaml file is shown below:
trigger:
branches:
   include:
   - master
   exclude:
   - develop/*
trigger:
  branches:
    include:
     refs/tags/{test}
     exclude:
      refs/tags/{testapp}
## if dont specify any triggers in the build, mention default one as like below.
trigger:
  branches:
    include:
    - '*'  # must quote since "*" is a YAML reserved character; we want a string
## Batch Building
# specific branch build with batching
trigger:
  batch: true
  branches:
    include:
    - master
# specific path build
trigger:
  branches:
    include:
    - master
    - releases/*
  paths:
    include:
    - docs/*
    exclude:
    - docs/README.md

# A pipeline with no CI trigger
trigger: noneOpinions expressed by DZone contributors are their own.
Comments