Building a Web UI for PostgreSQL DBs in Plain Java
This guide walks you through the process of connecting to PostgreSQL databases from Java web applications using MyBatis and Spring Framework. The UI part will be built using Vaadin Framework which allows you to build modern single-page web apps with only Java.
Join the DZone community and get the full member experience.
Join For FreeThis guide walks you through the process of connecting to PostgreSQL databases from Java web applications using MyBatis and Spring Framework. The UI part will be built using Vaadin Framework which allows you to build modern single-page web apps with only Java.
When connecting to databases from Java applications, there are two main alternatives: using low-level JDBC or a convenient ORM framework. JPA is the de-facto ORM for Java, but it poses rather strict requirements for the DB and it is often hard to adapt it on an existing database. MyBatis is something between raw JDBC and a fully-featured ORM library. It does mapping as well, but only from the SQL result sets.
The approach shown in this guide suits cases in which you have an existing and probably old database with many tables and stored procedures.
Prerequisites
This guide assumes you have previously installed a PostgreSQL server, your favorite IDE, and Maven. No previous experience with MyBatis or Spring Framework is required to follow this guide.
- Tip: Mac users can use the Postgres.app to easily install, run, and stop a PosgreSQL server during development. Alternatively, you can use the graphical installer available for many platforms and select the components to be installed (for example pgAdmin could be useful).
Create a Spring-Based Project
The easiest way to create a new Spring-based application is by using Spring Boot and Spring Initializr. Spring Boot simplifies the process of developing Spring applications. Spring Initializr is a web-based tool that allows you to create project skeletons for Spring applications.
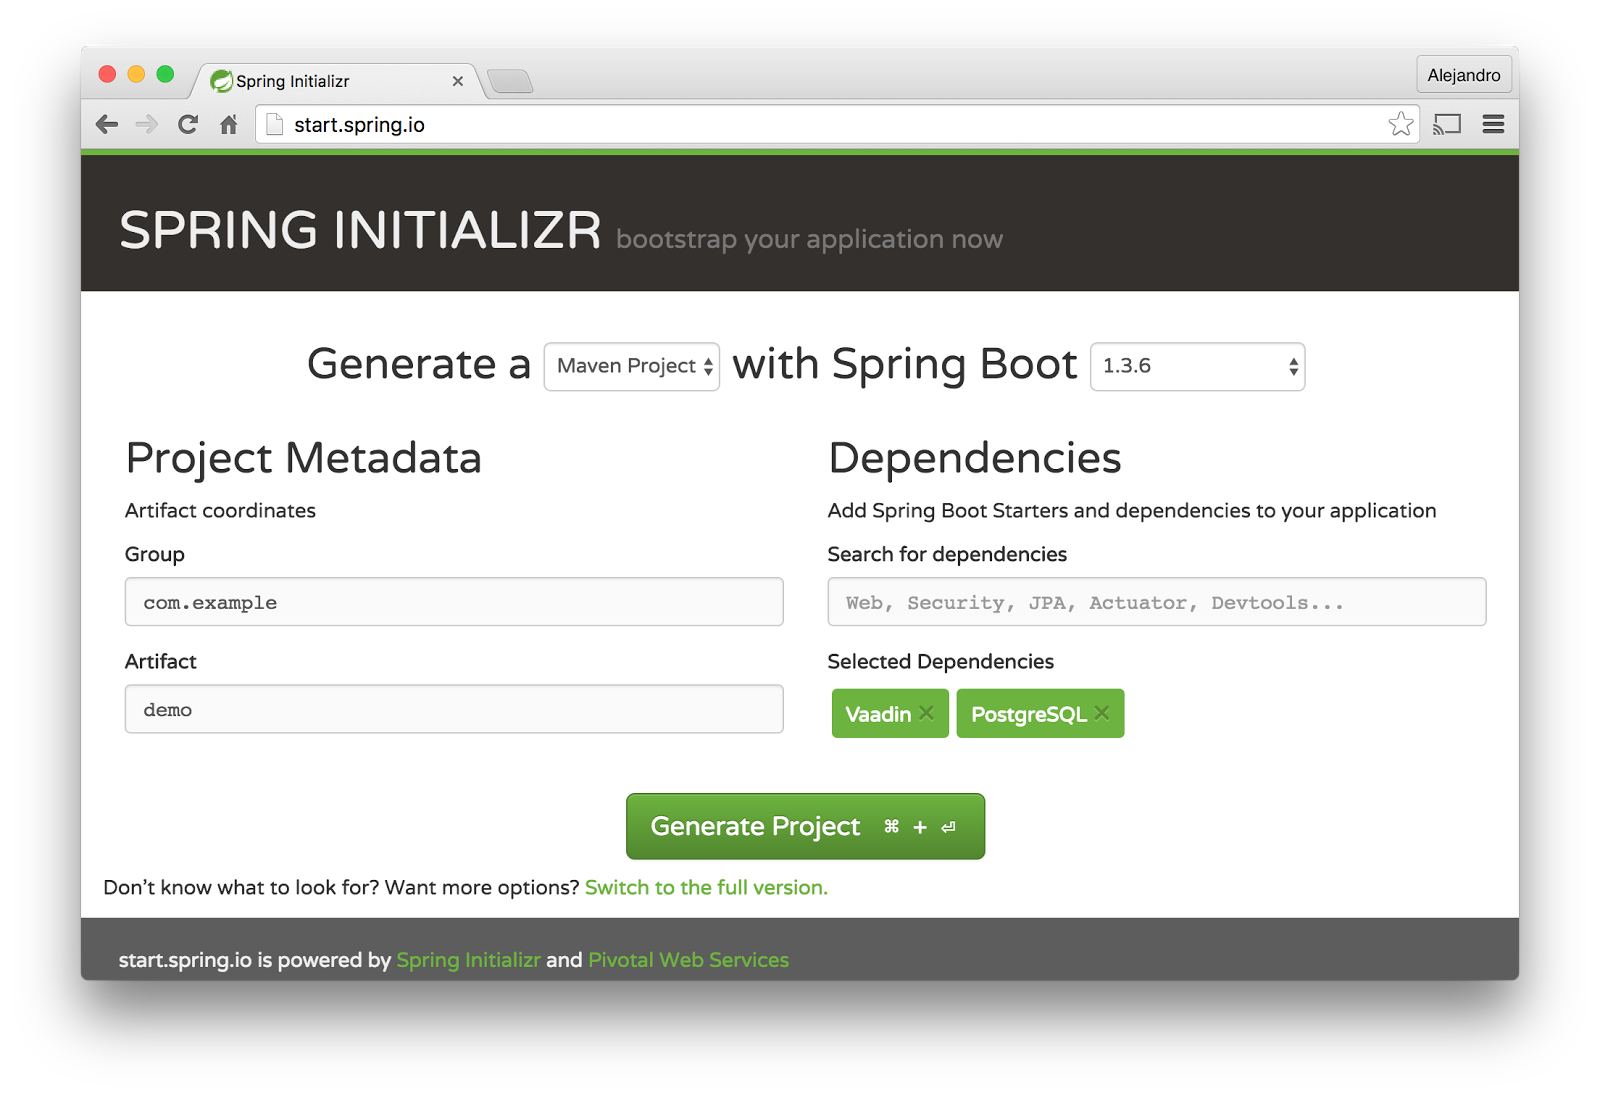
To create a new application, go to http://start.spring.io and add the Vaadin and PostgreSQL dependencies as shown in the following figure:
 Click the Generate Project button and extract the generated zip file. You should get a Maven project you can import into your favorite IDE.
Create a PostgreSQL Database
Connect to the PostgreSQL instance and create a new database:
CREATE DATABASE demo;Create the following table:
CREATE TABLE company(
  id SERIAL,
  name VARCHAR(255) NOT NULL,
  website VARCHAR(255)
);
Add some test data, such as the following:
INSERT INTO company(name, website) VALUES ('Vaadin', 'vaadin.com');
INSERT INTO company(name, website) VALUES ('Red Hat', 'redhat.com');
INSERT INTO company(name, website) VALUES ('Canonical', 'canonical.com');
INSERT INTO company(name, website) VALUES ('Sonatype', 'sonatype.com');
INSERT INTO company(name, website) VALUES ('Alfresco', 'alfresco.com');
Create a Company class
Create the following Company class to encapsulate the data from the company table:
package com.example;

public class Company {

    private Long id;
    private String name;
    private String website;

    ... getters and setters ...
}
Create a Backend Service Class
Start by configuring the database connection in the application.properties file inside the src/main/resources directory:
spring.datasource.url=jdbc:postgresql://localhost:5432/demo
spring.datasource.username=postgres
spring.datasource.password=password
spring.datasource.driver-class-name=org.postgresql.Driver
You may need to change the username and password used to connect to your database.
We will encapsulate the queries and update statements in a service interface. This interface will use the MyBatis-Spring-Boot-Starter module to connect to the database and to query and update rows in the company table.
Add the MyBatis-Spring-Boot-Starter module in the dependencies section of the pom.xml file:
<dependency>
  <groupId>org.mybatis.spring.boot</groupId>
  <artifactId>mybatis-spring-boot-starter</artifactId>
  <version>1.1.1</version>
</dependency>
Create the following CompanyService interface:
package com.example;

import org.apache.ibatis.annotations.Mapper;
import org.apache.ibatis.annotations.Select;
import org.apache.ibatis.annotations.Update;

import java.util.List;

@Mapper
public interface CompanyService {

    @Select("SELECT * FROM company ORDER BY id")
    List findAll();

    @Update(
      "UPDATE company SET name=#{name}, website=#{website} WHERE id=#{id}")
    void update(Company company);
}
Notice how the CompanyService interface is annotated with @Mapper. Spring Framework will automatically create an instance of this type. In Spring terminology, this kind of managed object is called bean. We can inject beans in other beans. Later, we will inject the CompanyService instance into the class implementing the UI.
We don’t need to provide an implementation of this interface. MyBatis will create the implementation for us and map the results of the queries to Company instances.
Implement the UI
Create a Vaadin UI by implementing the following VaadinUI class:
package com.example;

import com.vaadin.annotations.Theme;
import com.vaadin.data.fieldgroup.BeanFieldGroup;
import com.vaadin.data.util.BeanItemContainer;
import com.vaadin.server.VaadinRequest;
import com.vaadin.spring.annotation.SpringUI;
import com.vaadin.ui.*;
import org.springframework.beans.factory.annotation.Autowired;

import java.util.List;

@SpringUI
@Theme("valo")
public class VaadinUI extends UI {

    @Autowired
    private CompanyService service;
    private Company company;

    private Grid grid = new Grid();
    private TextField name = new TextField("Name");
    private TextField website = new TextField("Website");
    private Button save = new Button("Save", e -> saveCompany());

    @Override
    protected void init(VaadinRequest request) {
        updateGrid();
        grid.addSelectionListener(e -> updateForm());

        VerticalLayout layout = new VerticalLayout(
            grid, name, website, save);
        layout.setMargin(true);
        layout.setSpacing(true);
        setContent(layout);
    }

    private void updateGrid() {
        List companies = service.findAll();
        grid.setContainerDataSource(
            new BeanItemContainer<>(Company.class, companies));
        setFormVisible(false);
    }

    private void updateForm() {
        setFormVisible(!grid.getSelectedRows().isEmpty());
        if (!grid.getSelectedRows().isEmpty()) {
            company = (Company) grid.getSelectedRow();
            BeanFieldGroup.bindFieldsUnbuffered(company, this);
        }
    }

    private void setFormVisible(boolean visible) {
        name.setVisible(visible);
        website.setVisible(visible);
        save.setVisible(visible);
    }

    private void saveCompany() {
        service.update(company);
        updateGrid();
    }
}
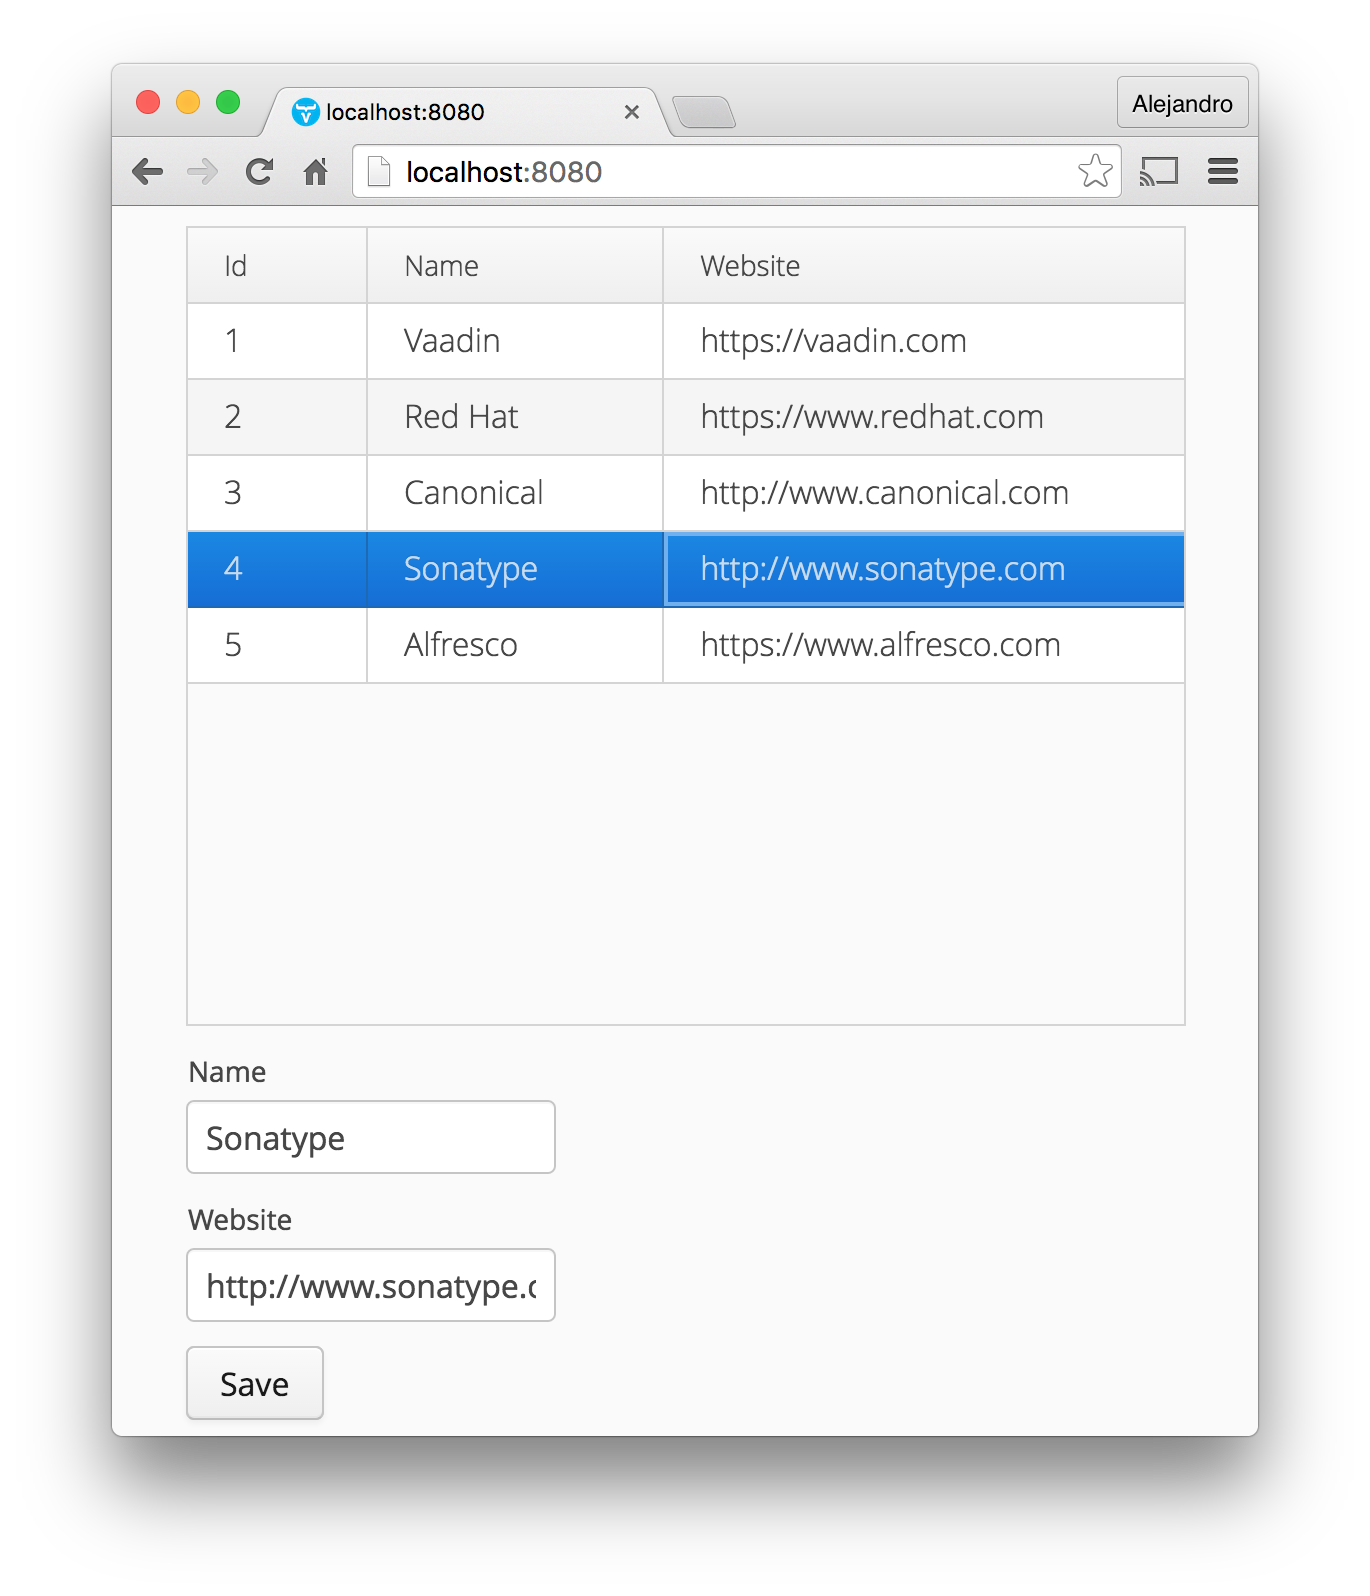
This class creates a UI containing a Grid component to show all the companies in the database and a form to edit companies’ names and websites. Notice how the VaadinUI class is annotated with @SpringUI. This makes it a Spring-managed bean and we can inject the CompanyService bean in this class and use it to read and update companies.
The most interesting part of this class is how data binding is managed inside the updateForm method. The BeanFieldGroup.bindFieldsUnbuffered method binds the values in the given Company instance with the Vaadin Fields (name and website) in the VaadinUI instance (this). When the save button is clicked, the updated company instance is passed to the service layer and MyBatis will execute the update query.
Running the application
Spring Initializr created the Application class with a standard main method defining the entry point of the Java application. When you run the application using this method, Spring Boot configures and runs a Jetty server on port 8080 (all this can be configured).
Before running the application you have to build it. You can use the following command line to build and run the application:
mvn install

cd target
java -jar demo-0.0.1-SNAPSHOT.jar
The following is a screenshot of the application:

Published at DZone with permission of Alejandro Duarte. See the original article here.
Opinions expressed by DZone contributors are their own.

Comments